
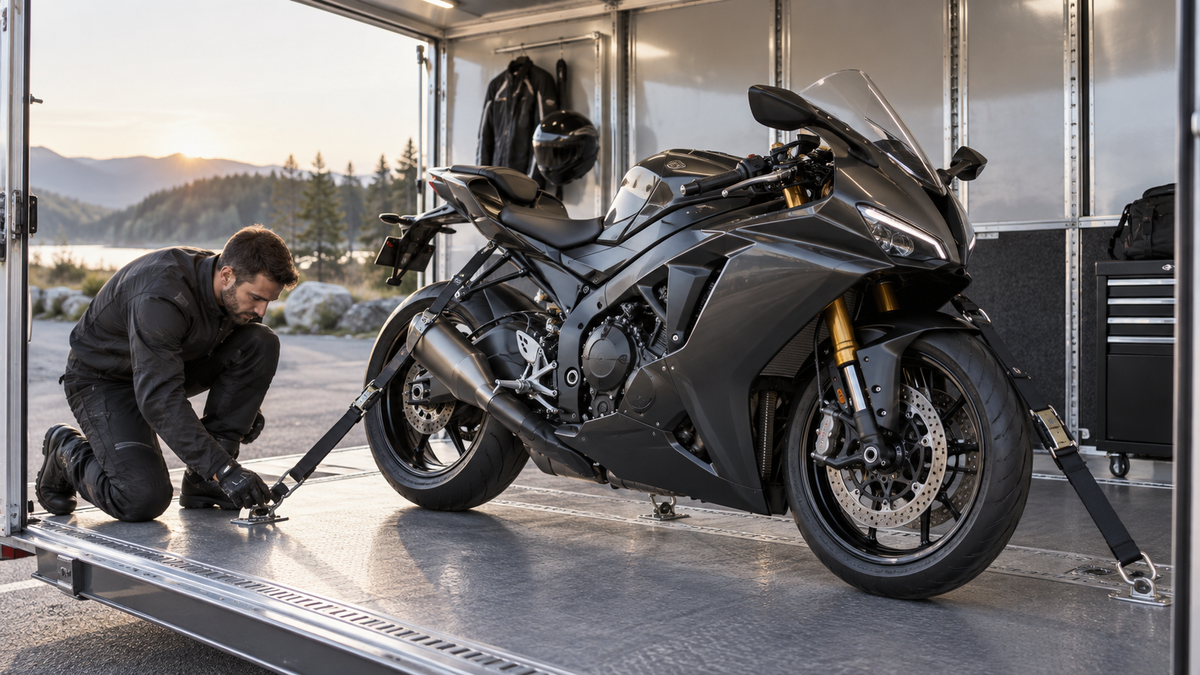
A fully faired sportbike can be damaged in a trailer without ever falling over. A strap can polish through clear coat, a metal hook can chip a panel edge, a loose cover can beat against the paint, and a compressed accessory can load the windscreen or tail for hours. The safe plan begins before loading: use the motorcycle, trailer and restraint manufacturers’ instructions to identify approved structural restraint points, then keep every strap, buckle and loose item away from painted bodywork.
There is no universal tie-down point, strap angle or suspension-compression target for every sportbike and trailer. This guide focuses on protecting fairings and documenting the load. If the approved points or equipment limits are unclear, use a qualified motorcycle transporter.
Quick answer
- Never route a strap over a fairing, windscreen, seat cowl or control cable.
- Use rated, undamaged transport equipment and the approved instructions for the exact motorcycle and restraint system.
- A soft sleeve can reduce incidental abrasion, but it cannot make a bad strap path safe.
- Photograph the motorcycle and completed load, then inspect it again at safe planned stops and before riding after unloading.

Why transport damage often appears after unloading
Road vibration repeats small movements thousands of times. A strap that merely touches a painted edge in the driveway can leave a dull patch by arrival. A buckle hanging near a side panel can become a small hammer. Dust trapped beneath a loose cover can act as abrasive grit. None of these failures requires the motorcycle to shift dramatically.
Fairing tabs face a different risk. If a strap loads an outer panel, mirror base or tail shell, the force is transferred into mounting points designed to locate bodywork rather than restrain the motorcycle. The panel may look stable while loaded, yet emerge with a hairline crack or elongated hole.
Plan around three separate jobs: hold the motorcycle with an approved restraint system, prevent restraint hardware from touching cosmetic surfaces, and keep detached accessories from moving inside the vehicle.
Document the motorcycle before loading
Photograph the left side, right side, front, rear and upper surfaces in even light. Add close views of the windscreen, mirror bases, leading fairing edges and any existing marks. This record helps you inspect efficiently at the destination and distinguish new transport damage from an older chip.
Also photograph accessories that could change loading clearance: frame protection, luggage racks, aftermarket exhausts, winglets, tall windscreens and extended plate brackets. If bodywork was recently installed, complete the normal fastener and clearance inspection first. Transport restraints should never be used to stabilize a panel that is already loose.
Inspect the trailer and restraint equipment
Use equipment designed and rated for the task. Follow the published limits and instructions for the trailer, anchors, wheel restraint, soft loops and straps. Replace webbing that is cut, chemically damaged, badly abraded or otherwise outside the manufacturer’s service criteria. Make sure latches and hooks cannot release when the system cycles over bumps.
Clean the trailer floor and remove loose hardware. Check that anchors are secure and positioned so the required strap paths do not cross bodywork. A wheel chock or other wheel restraint must be compatible with the motorcycle and used as its manufacturer directs. Do not improvise a wheel stop from objects that can shift.
| Inspection area | Acceptable condition | Stop and correct |
|---|---|---|
| Webbing and soft loops | Clean, rated and within manufacturer service limits | Cuts, heat damage, chemical contamination or unknown rating |
| Hooks, buckles and ratchets | Operate correctly and remain clear of the motorcycle | Deformation, corrosion, sharp edges or contact with paint |
| Floor anchors | Approved for the system and securely installed | Movement, damage or uncertain capacity |
| Wheel restraint | Correctly installed and compatible with the tire and bike | Interference with brakes, bodywork or an unsupported setup |
| Trailer interior | Clean, dry and free of loose objects | Tools, grit or cargo that can strike the motorcycle |
Choose restraint points from approved information
A generic article cannot identify the correct attachment point on every motorcycle. Frame geometry, fork design, steering components and bodywork clearance vary. Consult the motorcycle owner or service information and the restraint-system instructions. Where those sources do not define a safe solution, ask an experienced professional who can see the exact bike and trailer.
Once the approved points are known, map the complete strap path under load. Check both sides of the webbing, the hardware and the movement that occurs as tension is applied. The path must remain clear of painted panels, windscreen edges, brake lines, wiring, control cables, radiator components and hot exhaust parts.
Why “just add a towel” is not a solution
A protective sleeve can help where approved webbing passes close to a noncritical surface, but padding should not carry the strap load through bodywork. Towels compress, migrate and hold grit. If a buckle, hook or loaded strap rests on a fairing, change the anchor geometry or restraint method instead of hiding the contact.
Keep controls free
Turn the handlebar through the applicable range before final loading, following the restraint instructions. Watch for straps that press switches, pull a brake line, touch a reservoir or load a lever. Do not trap a cable against the windscreen or upper fairing. After tensioning, check again because the motorcycle’s position can change.
Load without using the bodywork as a handle
Plan the ramp, lighting and assistance before moving the motorcycle. Push from stable, appropriate contact areas; do not lift or steer the bike by mirrors, the windscreen, winglets, tail plastics or side fairings. Keep helpers’ buckles, tools and zippers away from paint.
Once the motorcycle is positioned, install the wheel restraint and tie-downs in the sequence specified by their manufacturers. Build tension evenly and confirm that the bike is centered in its intended position. Do not chase stability by adding excessive load to one strap or by compressing bodywork between the motorcycle and trailer wall.
Exact suspension compression depends on the motorcycle and restraint system. More tension is not automatically safer. Excessive or uneven loading can damage components, while insufficient restraint can allow movement. Use the relevant instructions rather than a generic number.
Remove or secure accessories deliberately
Some transport setups require mirrors, a tall windscreen, camera mounts or luggage to be removed for clearance. Follow the correct procedure and store each part in a padded, closed container. Label model-specific hardware and keep it out of the trailer footwell. Do not place a removed mirror or seat cowl loose beside the bike.
If a part remains installed, confirm that airflow and vibration cannot move it into another surface. Check quick-release luggage, phone mounts, tank bags and temporary number plates. The objective is a motorcycle with no loose item that can rub, flap or detach during the journey.
Think carefully before covering the motorcycle
A cover can protect against dust or road debris, but a loose cover can abrade paint continuously. In an open trailer, airflow can turn fabric and seams into high-frequency contact points. Use only a cover and fastening method intended for the transport situation, following its instructions, and start with clean paint and clean fabric.
In an enclosed trailer, it may be safer to leave the fairings uncovered when the interior is clean and the motorcycle is separated from other cargo. If protection is needed, prevent movement rather than wrapping loose blankets around the bike. Never allow fabric to contact a hot exhaust.
Check the load during the trip
After the initial loading, record clear photos showing the motorcycle’s position, each strap path and the distance between hardware and bodywork. At safe, planned stops, park securely and inspect according to the transport-equipment instructions. Never enter or adjust cargo in an unsafe roadside position or while the vehicle is moving.
Look for changed strap tension, displaced sleeves, hooks that have rotated, new contact marks and cargo that has migrated toward the motorcycle. If anything changed, correct the cause before continuing. Adding a second layer of padding without fixing the strap path only conceals the problem.
Unload and inspect before riding
At the destination, photograph the load before releasing it if conditions are safe. Unload using the planned ramp and assistance. Once the motorcycle is stable, inspect every area near a strap, buckle, wheel restraint or neighboring cargo. Use broad light across glossy paint to reveal scuffing, then inspect panel seams, tabs, mirror bases and the windscreen.
Complete a normal bodywork check before riding. Confirm that fasteners are present, panels are stable, steering moves freely and no wiring, hose or cable was displaced. Check brake and control operation according to the motorcycle manufacturer’s procedure. If a panel is loose, a restraint contacted a control system, or any safety-critical condition is uncertain, do not ride until the motorcycle has been inspected.
For a structured record of panel locations and hardware, use the motorcycle fairing photo-label workflow. If the bike was transported after track use, the track-day fairing inspection checklist adds a bodywork-focused post-session review.
Transport checklist for fully faired sportbikes
- Record all sides of the motorcycle and existing paint marks before loading.
- Verify the trailer, anchors, wheel restraint and tie-down equipment are rated and serviceable.
- Use only approved structural restraint points for the exact motorcycle and system.
- Keep loaded webbing, hooks, buckles and ratchets clear of fairings, windscreen, controls, cables, hoses and exhaust.
- Secure or remove accessories according to their instructions; store removed parts in padded containers.
- Keep the trailer clean and separate the bike from tools and other cargo.
- Photograph the completed load and recheck it at safe planned stops.
- Inspect bodywork, steering, controls and all restraint-adjacent areas after unloading.
The practical rule
Restrain the motorcycle through an approved system and protect the fairings through clearance. Painted plastic should never become part of the load path. A few minutes spent mapping the straps, removing loose accessories and recording the bike can prevent hours of paint correction or a cracked mounting tab at the destination.
If the trailer layout cannot create a clear, approved strap path, change the transport setup or hire a specialist. Fairing protection is easiest when the motorcycle is restrained correctly from the start.
AI-generated editorial illustration of sportbike transport planning; follow the motorcycle and restraint-system instructions.


