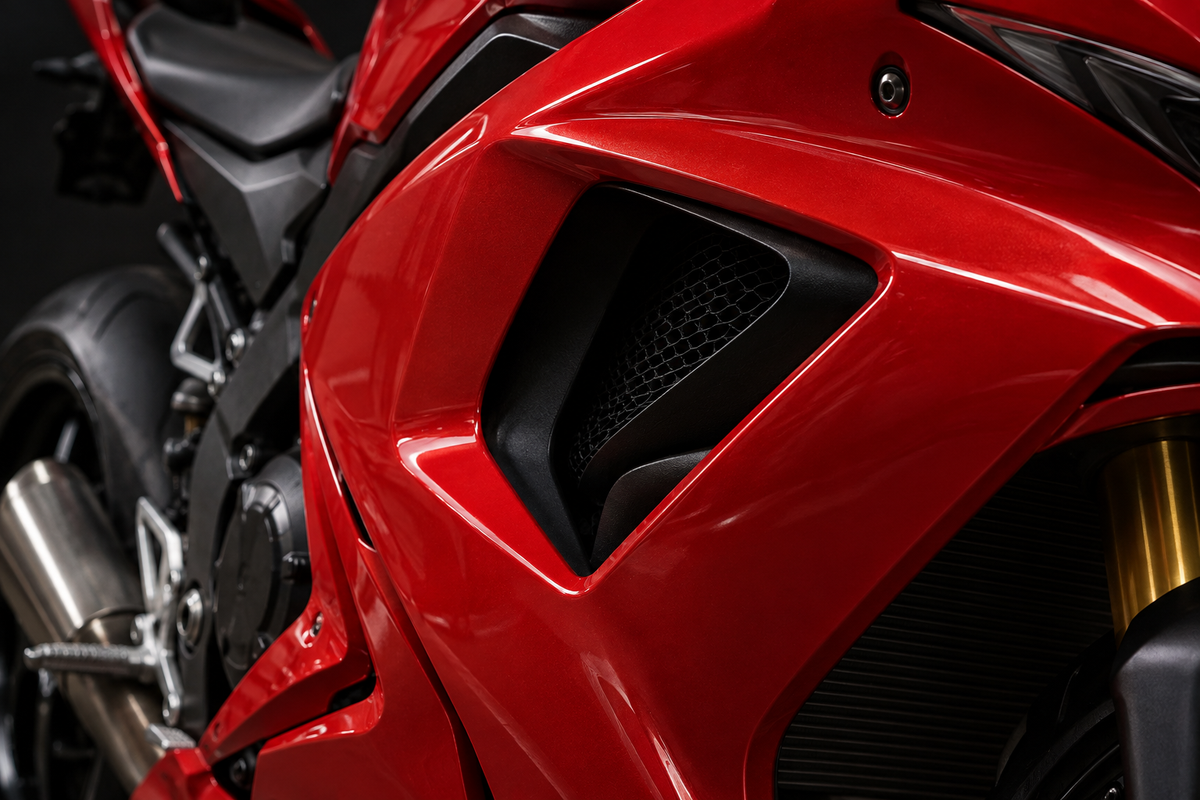
A mesh insert and an inner duct are different components, but appearance alone does not establish either part’s function. Mesh can have a functional role, and an airflow guide need not resemble a sealed tube. Before ordering replacement fairing pieces, identify the exact component, its application and any surrounding parts through appropriate manufacturer information and supplier clarification. This is an ordering guide, not a cooling-performance test or a modification procedure.
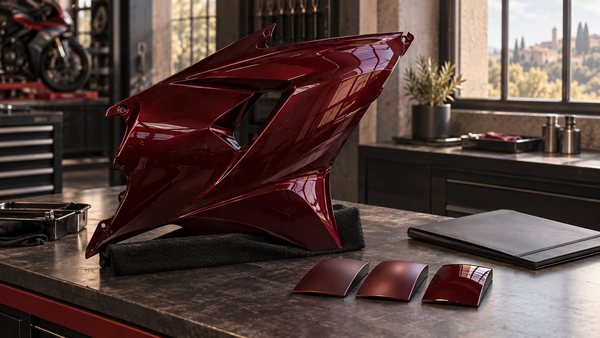
Images are AI-generated editorial illustrations, not photographs of the supplied product or evidence of model-year fitment, dimensions or safe installation. Use actual product documentation and motorcycle records for technical decisions.
Key Takeaways
Do not assume a mesh insert is decorative merely because it is simple or visible.
Ducts and air guides have model-specific arrangements and roles; confirm the actual component.
Check your bike's factory diagram to identify each part right.
Back-side photographs provide context, but an open back, glue mark or absent hose does not prove function.
Do not improvise a mesh-over-duct replacement or change the specified attachment method.
Aftermarket kits might not have important seals or gaskets; check what is inside before you install.
Retain required thermal protection and have damaged material assessed against the correct specification.
Use photographs as supporting records, not as a substitute for service instructions.
Fairing Vent Mesh vs Inner Ducts: Decorative or Functional?
The useful distinction is the identity and role of the actual components, not a rule that visible mesh is decorative while hidden plastic is functional. Review the exact assembly and intended replacement product. If documentation is unclear, ask a knowledgeable supplier or technician before choosing a part or modifying the opening.
What Is a Fairing Vent Mesh?
A fairing vent mesh is a screen or grid associated with a bodywork opening. Its exact role depends on the design. Do not assume it is decorative or quantify protection from its pattern alone; use component-specific information.
Materials – perforated metal, plastic inserts, honeycomb grills.
A mesh or grille may be made from different materials and patterns. Its construction, attachment and specified application matter more than a generic claim about strength or appearance. Material alone does not establish whether the item protects an opening, influences the assembly’s behavior or primarily changes its appearance.
Common locations – side fairings, front cowls, around headlights.
Record the location of the insert relative to neighboring panels and equipment. A position near a radiator, lamp or lower panel helps describe the enquiry, but does not by itself prove the insert’s role. Compare the actual component with a suitable parts reference instead of inferring function from location alone.
What Is an Inner Duct?
An inner duct or air guide forms part of a model-specific arrangement intended to direct air. Designs can be open, partly enclosed or combined with surrounding panels. Not every air guide is a sealed tube or leads to the same type of component. Identify the actual assembly before explaining what a replacement needs to preserve.
Purpose – directs air to radiators, oil coolers, or engine intakes.
The duct's job is to control where air goes. A radiator duct feeds the cooling fins. An oil cooler duct sends air to the oil cooler core. An intake duct routes air toward the airbox. Each purpose needs a different shape and mounting position. The factory designs these paths for a specific model. You should not change them without engineering guidance.
Typical construction – rigid plastic or rubber tubes with mounting tabs.
Construction and attachment vary by assembly. A duct or guide can work with neighboring panels, supports, seals or other parts, but no universal combination applies. Identify the required pieces in the appropriate documentation and check their condition through suitable service access. Absence of a seal on a generic photograph does not prove a missing part.
Why the Distinction Matters
A mesh and a duct may be separate items or part of a combined assembly. Replacing one with the other without a documented application can leave the intended assembly incomplete. Confirm the named supplied component and the required surrounding pieces rather than treating similar-looking openings as interchangeable.
Identify the specified assembly rather than classifying function from appearance.
Back-side photographs can help show shape, interfaces and attachment details. They do not provide a universal functional test. An open air guide may still perform a role, and a mesh may serve a purpose without a hose behind it. Ask what the manufacturer documentation establishes and what remains uncertain.
Misidentification can lead to incorrect replacement and airflow disruption.
Part names and diagrams are useful starting points, but terms such as duct, grille, insert and cover are not a universal function code. Read the relevant assembly context and ask for clarification when necessary. Do not use a generic label or outside photograph to decide that a part can be omitted.
Always check the part number against your model's official fiche. Do not assume that a similar-looking part from another year will fit or work the same way. The factory setup exists for a reason. Preserve it.

Identifying Parts From Factory Diagrams
Use a suitable manufacturer or dealer reference for the exact motorcycle and assembly. A diagram helps identify named pieces and their relationship, but it may not explain performance, service procedure or every inclusion in an aftermarket kit. Keep those questions separate and resolve uncertainty with the relevant supplier.
Locating OEM Parts Fiche
Searching by year, make, and model on official or reputable parts sites.
Search using the exact model, year, variant and market where available. Manufacturer and dealer catalog access varies. Diagram callouts are not always orderable part numbers; consult the accompanying list and any application notes. A displayed price or reference may also need current dealer confirmation before ordering.
A dealer may use the VIN to help identify the correct motorcycle application. It does not remove every question about superseded components or modifications by a previous owner. Keep the actual configuration in the enquiry and share sensitive identification privately with the appropriate party.
Read Part Descriptions in the Context of the Actual Assembly
A catalog description identifies the named item, but does not necessarily explain its complete role. Terminology varies between manufacturers and translations. Read the surrounding assembly information and relevant instructions instead of deciding that a “cover” is nonfunctional or that every “duct” has the same construction.
Record the full description and orderable reference separately from the diagram callout. Check application notes and supersessions with a dealer where needed. An apparent number match alone does not establish condition or compatibility with unrelated aftermarket surrounding parts.
Not every diagram labels the part clearly in the picture. Some diagrams show only reference numbers. You must look up each number in the parts list that comes with it. The list shows the description next to the number. Read every word in that description. A "mesh, front fairing" does a different job than a "duct, air intake." Take your time with this step.
Matching Aftermarket Kit Descriptions
Distinguishing between “mesh insert kit” and “duct replacement kit.”
Ask exactly what the aftermarket package supplies: a visible insert, a guide, a larger panel, attachment pieces or a combined assembly. Marketing titles may not match OEM terminology word for word. The supplier should clarify the physical item and its intended configuration, including retained parts.
Use listing keywords to find candidates, not to certify function. Mesh, screen, grille, scoop and cover can be used loosely. Obtain an itemized description and appropriate views or documentation before concluding that an item is decorative, functional or a replacement for an entire assembly.
Verifying compatibility with your fairing and model year.
Verify the actual product application. A changed genuine reference may reflect a supersession or another distinction, not necessarily incompatibility; unchanged styling does not establish shared hidden parts. Ask a dealer or supplier to interpret the relevant references rather than making a rule from model-year boundaries.
Check the kit's compatibility list. Sellers often list the exact models that fit. Some kits fit many years because the fairing shape stayed the same. Other kits fit only one model year. You confirm this before you buy. The return process costs time and shipping fees. Avoid the hassle by checking first.
Physical Verification
Have hidden parts identified using appropriate service access by a qualified technician.
Have hidden interfaces reviewed through the service access appropriate to the motorcycle. A qualified technician can compare the actual arrangement with the documentation and record uncertainties. An inspection supports identification, but a quick visual look alone does not quantify airflow or establish a performance claim.
Ask the technician to document the relevant connected components and any condition concerns. Do not assume a particular route behind the radiator or airbox applies to every design. Limit the enquiry to the actual assembly being replaced and the access needed for competent assessment.
Do not remove panels merely to follow a generic identification article if you lack the relevant knowledge or instructions. Appropriate professional assessment can help avoid an incorrect order, although no universal cost saving is guaranteed. The goal is a documented component enquiry, not unnecessary exploratory disassembly.

Gray Area: Functional Meshes vs Decorative Ducts
Neither the visible pattern nor a scoop-like shape establishes a function. Use the intended assembly and available manufacturer information. Some features may be decorative, some functional, and some combine roles. Record uncertainty instead of presenting an unverified visual guess as fact.
Functional Meshes: Check the Actual Application
A mesh can serve a role in an opening without a conspicuous hose or enclosed passage behind it. This guide has not measured the effect of any particular insert. Do not dismiss it as decoration, or claim a cooling benefit, without relevant information for that component.
Performance claims need model-specific evidence, not a track-inspired appearance.
Claims about pressure, braking temperatures or high-speed behavior require evidence for the actual design and configuration. A generic photograph or racing label does not supply that evidence. If the replacement is advertised for a specific function, ask the supplier for the application and substantiation rather than borrowing claims from another motorcycle.
Factory combined mesh-and-duct assemblies (one part, two functions).
Some products combine an insert and another bodywork or airflow component. Confirm whether the pieces are supplied together, separately replaceable or part of a larger assembly. A single diagram view does not establish that the components cannot be separated, and a visible screen is not automatically the whole replacement scope.
Decorative Ducts – Common Aftermarket Traps
An aftermarket accessory may primarily change appearance, but a scoop-like shape does not establish that it is either functional or nonfunctional. Ask the supplier what the product is intended to do and what configuration it requires. Keep styling preferences separate from documented performance claims.
A closed back or attachment appearance is not a universal function test.
Photographs can reveal useful construction details, but absence of a fully enclosed rear channel does not automatically make an item decorative. Nor does an adhesive attachment establish that it has no role. Identify the actual product and its intended use before interpreting those observations.
A performance label or visible shape does not establish a documented function.
A label such as “race” or “high flow” is not evidence of a result. Ask for relevant documentation and the exact installation conditions. Shape, seals and visible channels can help describe the component, but do not independently verify performance or the suitability of a substitute.
How to Spot the Difference
Treat visible details as questions to resolve against the actual application.
Record attachment interfaces and neighboring parts without inferring function from one clue.
A useful photograph shows the component’s boundaries and its relationship to neighboring pieces. Tabs, rubber, adhesive or open space do not form a universal decorative-versus-functional checklist. Ask the technician or supplier to explain which details matter for the documented application and which cannot be concluded from the image.
Use a flashlight to look behind the fairing. A qualified technician can help you access hidden areas. Write down what you see. Compare your notes to the OEM fiche.

Inventorying Aftermarket Replacement Kits
When you order a replacement kit, you should know what is inside the box. The parts you get may fit your fairing perfectly. They may not. Checking the contents before you start work stops delays and extra shipping costs.
Typical Kit Contents
Fairing panel with mesh pre‑molded, separate duct, or both.
A kit may supply a panel with an insert, a separate insert, a duct or some combination. Ask the supplier to identify the exact contents and any required original pieces. For a NiceFairings order, use the actual listing and written clarification rather than assuming every model page contains a complete assembly inventory.
Record hardware, seals and other attachments as included, retained, separately required or unresolved. Do not infer suitability because adhesive pads or generic bolts happen to be in the box. The documented application and instructions determine which components belong in the assembly.
Hardware (screws, clips, grommets), adhesive pads, and sometimes seals.
Different fasteners, rubber pieces and seals serve different roles. New-looking hardware is not automatically suitable, and a supplied assortment does not authorize substitution for a specified component. Have condition and compatibility assessed where needed. Obtain the correct item rather than choosing by apparent size alone.
What's Often Missing
Rubber seals that bridge duct to radiator, foam gaskets, mesh retaining rings.
Identify any required surrounding seals, trim or retainers from the actual assembly. These are examples of questions to ask, not a claim that every duct uses them or every kit omits them. A component shown separately in an OEM diagram may or may not be part of the aftermarket package. Check the agreed inventory.
Check kit description carefully before ordering.
The kit description is your best source of information. Read every line. Look for words like "includes seals" or "gaskets not included." If the description is not clear, contact the seller. A good seller answers your question before you buy. You avoid delays by confirming these details.
Documenting Missing Trim
Compare delivered contents with the agreed kit inventory; OEM diagrams identify separate parts.
Compare the delivered items with the agreed inventory before installation. Record discrepancies promptly and retain the packaging according to the supplier’s process. Separately confirm any required original components; a delivered kit can match its contents list while still relying on retained motorcycle parts.
Use appropriate component references to identify separately required pieces, with dealer help if application or supersession is unclear. A diagram is not a statement of what an aftermarket seller promised to include. Keep a delivery discrepancy separate from an item that was correctly excluded from the quote.
If the delivered kit does not match the inventory list, document it with photos. Contact the seller right away. Many sellers replace missing items quickly when you have proof. Photograph the box, the packing slip, and the scattered parts.
Use our general kit-contents and photo guides as enquiry aids, not as model-specific assembly manuals. They do not show every required part for every motorcycle. Installation and hidden-component identification still require the actual product and motorcycle documentation.
Inspecting and Replacing Damaged Components
You need to check your fairing parts before you order new ones. Damage can hide behind panels. A cracked tab or a missing seal may not show from the outside. Take your time with this step. A careful inspection saves you from ordering the wrong part.
Pre-Installation Inspection
Check for cracks, broken tabs, missing mesh, blocked ducts from debris.
Look at every visible part of your fairing assembly. Check for cracks in the plastic panels. Broken mounting tabs are common after a tip-over or vibration. A missing fairing vent mesh insert leaves an open hole. Debris like leaves or road grit can block a duct opening. Use a flashlight to see into tight spaces. Write down every problem you find.
Determine if the part is cosmetic or functional – casual inspection may mislead.
A casual inspection may not establish the part’s role. Compare the actual item and surrounding assembly with relevant documentation, and ask for clarification where needed. Do not decide that a mesh or insert is optional from its label, or that a visible channel proves a particular cooling function.
Sourcing Replacements
OEM vs aftermarket – fit, material quality, and availability differences.
Compare genuine and aftermarket options by documented application, supplied scope, condition, material specification and actual availability. Do not assume one category always ships faster or another always has weaker tabs. An OEM label also does not resolve damage elsewhere on the motorcycle. Obtain relevant product details for the particular order.
Using salvaged parts from compatible models – verify part numbers.
For a used genuine component, confirm its identity, applicable references and any supersession with a reliable catalog or dealer. Also assess condition and modification history. A number match does not prove an undamaged part, while a different number does not automatically exclude an approved replacement. Aftermarket surrounding pieces may introduce separate questions.
Installation Sequence
Follow the exact manufacturer installation sequence; there is no universal order.
Every bike model has its own installation steps. The factory service manual shows the correct order. Some panels must come off before others. A duct may need to go in before a fairing panel covers it. Do not assume one order works for all bikes. Follow the manual for your specific model.
Use factory torque specs; avoid overtightening that deforms plastic.
Use the exact service or product instructions for the relevant fasteners and assembly. Do not substitute a generic “snug” rule or a torque value from a different component. If the correct procedure is unavailable or alignment is uncertain, stop and ask a qualified installer rather than tightening until the panel looks right.
Installation Pitfalls: Key Warnings
You can avoid the most common mistakes by leaving the factory setup alone. The manufacturer designed your fairing's airflow path for a reason. Changing that path without engineering guidance can create problems you cannot easily fix.
Do Not Modify Factory Openings
Do not alter openings without model-specific engineering approval.
Do not cut or enlarge openings based on appearance or an assumed cooling gain. Modification changes a defined component and may affect more than its visible outline. This guide supplies no engineering assessment for such work. Resolve the correct replacement application and obtain appropriately qualified advice instead of improvising.
No removing internal louvers or vanes that direct airflow.
Some fairings have louvers or vanes inside the duct. These parts guide air toward the radiator or cooler. You should not remove them. They may look like extra plastic. They serve a purpose in the airflow path. Removing them can send air in the wrong direction. Keep every internal piece in its original position.
Do Not Glue Mesh Over Ducts
Adhesive can block the duct opening and reduce air volume.
Do not cover a missing or damaged duct with improvised mesh and adhesive. That is not a verified substitute for the specified assembly. It may change access or the arrangement around an opening. Follow the documented replacement method and ask the supplier or installer about uncertain components.
Unspecified bonding can complicate service access or damage finishes.
Adhesive behavior and removability vary, so it is inaccurate to call every bond permanent. Nevertheless, unapproved bonding can complicate later access or harm a surface. Use the attachment method specified for the actual product, whether that involves a particular adhesive, fastener or other component; do not substitute a generic rule.
Do Not Remove Heat Shielding
Heat shields, foam, or reflective tape serve crucial thermal management.
Thermal materials, seals and isolation pieces have application-specific roles and are not interchangeable. Worn appearance does not establish whether they remain serviceable. Have required components and their condition assessed against the actual specification. This guide does not approve household material or an improvised thermal substitute.
Never discard them even if they seem ugly – engine and paint protection depend on them.
You may want a cleaner look under the fairing. Do not throw away heat shielding to get it. The factory installed these materials for protection. Engine components and paint depend on them. If a shield is damaged, replace it with an equivalent part. Do not substitute household foil or random materials. Order the correct replacement from your dealer or a reputable parts supplier.

Photo Documentation Checklist
Keep photographs as a supporting record of the current configuration and the enquiry. Obtain hidden views only during appropriate service access. Existing installation may itself be incorrect or modified, so photographs do not replace the correct instructions or guarantee that copying the old arrangement is safe.
Exterior Close-Ups
Start with the outside of your fairing. You need clear photos of every vent and mesh opening. These images show how the parts line up before you disturb them. Write down the date and which side of the bike you are photographing.
Mesh orientation, any branding or part numbers, overall fairing layout.
Show the visible insert and any marks clearly. A molded mark may identify a mold, material or batch rather than an orderable part number. Label it as an observed mark until a reliable reference interprets it. Do not infer airflow direction from a mesh pattern alone.
Take a wider shot of the whole fairing section. Show how each mesh sits relative to nearby panels and fasteners. This overview helps you see the layout. You will know where each insert belongs when you put everything back. Do not rely on memory alone. Memory fades between the day you take the fairing off and the day you install the new parts.
Interior Photos
Ask the technician for useful hidden views when the assembly is already accessible through the correct procedure. Do not remove parts or probe hidden areas solely for this article. A picture of the rear face helps explain the enquiry but cannot establish the whole function or serviceability of the assembly.
Duct routing, rubber seals, foam gaskets, attachment points.
Record the relevant interfaces and surrounding pieces identified during proper service access. Ask which seals or attachments are required for that exact arrangement and whether any condition concern needs attention. Do not assume a universal duct path or gasket role from a generic illustration.
Photograph every attachment point. Look for mounting tabs, screw holes, and clip locations. These points tell you how the duct stays in place. You can compare them to the new part you order. A missing tab or clip location means the part may not fit. Show these details in your photos.
Using Photos for Reassembly
Use photographs alongside, not instead of, appropriate installation documentation.
Compare with factory manual or aftermarket instructions.
Lay your photos next to the service manual. Line up each part with the diagram. Check that your pictures match the factory layout. If something looks different, stop and inspect. You may have a missing seal or a damaged tab. The manual shows you the correct arrangement. Your photos show you what you actually have.
A photograph records what was present; it does not prove that the original arrangement was correct.
Match each photo to a step in the instructions. Mark the photo with the step number if that helps. You will avoid fitting a part backward or upside down.
Use photos when ordering replacement parts to match exactly.
Send relevant photographs privately to the supplier with the exact product and motorcycle information. They can support clarification of the intended item, but cannot independently confirm a functional match. Keep any model-specific application decision grounded in reliable references and the supplier’s documented conditions.
Keep the photos on your phone or computer. Label each file with a simple name like "left fairing duct back" or "front mesh part number." You will find them quickly when you need to order or reinstall.
Identify the actual mesh, guide or combined assembly before replacing it. Avoid simple rules based on an open back, a hose, a seal or glue marks. Confirm the application and package contents, preserve required surrounding components, and use photographs as supporting records. Unverified performance claims and improvised modifications are outside this buying guide.
FAQ
How do I check if my vent mesh has a function?
Consult information for the actual component and assembly, with supplier or technician clarification where needed. Appearance alone cannot establish the role. A functional mesh need not have a hose or a sealed channel behind it.
What should I do if my inner duct is damaged?
Have the affected assembly and required replacement identified, then obtain a suitable documented component. Do not improvise with a screen or assume all damage can be addressed by the visible piece alone.
Can a mesh insert replace a missing duct?
Do not substitute a screen for a required duct or guide without a documented application. They are different component categories, although some assemblies combine them. Identify and obtain the actual replacement scope instead of improvising.
What parts are often missing in aftermarket kits?
There is no universal missing-parts list. Confirm required seals, trim, retainers and hardware for the actual assembly, then distinguish included items from original parts to retain or separately order.
Can I use a salvaged duct from a different model?
Only after its application and condition are appropriately verified. References and supersessions may need dealer interpretation; a matching number alone does not establish condition or suitability with modified surrounding parts.
Why should I not glue mesh over a duct opening?
An improvised mesh-and-adhesive arrangement is not a verified replacement for the specified assembly. Follow the actual product’s attachment instructions and preserve appropriate service access rather than substituting a generic fix.
Is it safe to remove heat shielding under the fairing?
No. Heat shields protect wiring, plastic, and paint from high temperatures. Removing them can cause damage over time. Replace damaged shielding with the original-equivalent part. Do not substitute household materials.