
A used sportbike arrives with a circular opening in each side fairing. The previous owner calls them “frame-slider holes,” but the pucks are missing, one side looks different, and nobody has the fitting sheet. The tempting move is to trace those openings onto a new painted panel. That is precisely the point to stop. A hole records where one installation met one panel; it does not identify the hardware behind it or establish where another slider should sit.
This guide is for riders inheriting already-drilled bodywork. It is a way to document the old setup, decide whether the panel or mounting system needs attention, and give a fairing supplier and installer useful information. It is not a drilling template or a judgment about which crash protector performs best. Any work involving an engine or frame mount belongs with the instructions for the exact motorcycle and protector kit, and a qualified installer when the specification is uncertain.
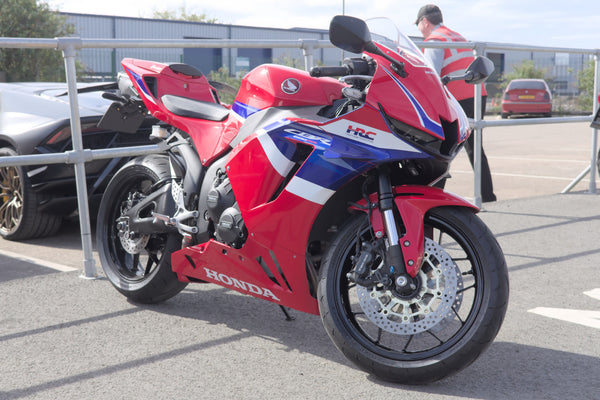
The cover is a real Yamaha YZF-R6 riding photograph used to show the kind of fully faired motorcycle discussed here. It does not show a verified slider opening or document this motorcycle's repair history. Photo: Brian Snelson, CC BY 3.0; image unmodified.
A hole, a slider and a mount are three different things
The painted fairing contains an opening. The protector may contain a puck, sleeve, bracket, fastener, washers and side-specific spacers. Behind both is a motorcycle mounting point. The visible opening tells you almost nothing about the hidden bolt specification, spacer length, bracket position or health of that mount. A puck that appears centered in a hole can still touch the plastic under load, or pull a panel away from its natural position.
Start with the motorcycle's exact make, model, year and market. Record the left and right sides separately; symmetry is not a safe assumption. Note modifications to the fairing stay, engine covers, exhaust, radiator area and wiring. Then look at how the panel sits with its normal bodywork fasteners, before treating the slider as a locating device. If a panel only lines up when the protector bolt drags it into place, the apparent “fit” is not a reason to drill another panel.
For comparison, R&G lists a GSX-R600/750 drill-kit application for a defined 2011–2024 range. That listing is evidence that the particular kit has a stated fairing-modification scope. It says nothing about an unidentified slider on another bike, and its dimensions must not be copied to a different fairing or product revision.
Photograph the old installation before loosening anything
Make four sets of pictures: a whole-bike left view, a whole-bike right view, a close-up of each hole and puck, and an oblique view that shows the panel gap. If safe access is already available, add the inside face of the panel and any visible bracket or sleeve. Place a ruler next to a second close-up for scale; a phone photograph is useful evidence but is not a precision hole-location drawing. Capture the fastener head and any manufacturer mark. Photograph parts in place before a shop disassembles them.
Write observations rather than diagnoses: round or irregular edge; equal clearance around the puck or contact at one side; paint flaking, radiating crack or intact finish; clean or damaged fastener head; panel gap consistent with the other side or visibly pulled inward. Record what cannot be seen. A shiny puck does not prove that the hidden fastener is correct or that the frame mount is undamaged.
If the protector must come off, have the installer keep left and right components separate and document the removal order. Do not substitute a longer bolt or stack washers to “make it fit.” If an engine-mount bolt has already been removed and its specification is unknown, the next step is the motorcycle service information and the protector maker's current fitting instructions, not a guessed torque value from a forum post.
Classify the problem before ordering panels
An old, clean-edged opening in a panel that otherwise mounts naturally is different from a cracked tab, an ovalized cutout or a bent bracket. The first may be primarily a bodywork and finish decision. The others call for mechanical inspection before fresh paint hides them. A dark ring around a puck can be a surface mark; a line running from the opening toward a mounting tab deserves a closer look. Neither conclusion can be made from a distant listing photograph.
Ask a repairer to separate three questions: What is the panel's condition? What is the protector assembly's condition? What is the motorcycle-side mount's condition? Inspect the fairing stay, rubber receivers and nearby hoses or wiring as well as the opening. A new panel can sit under stress if a support underneath is bent. If the bike has been dropped, or the slider or mounting bolt is deformed, a qualified technician should assess the mounting area. A replacement fairing is not a crash inspection.

Choose a path, then define what has to be proved
| Intended outcome | What must be confirmed first | What not to assume |
|---|---|---|
| Retain the same protector | Exact maker, part number, fitting-sheet revision, complete side-specific hardware and serviceable mount | The old hole can be traced onto a new panel |
| Change protector system | New kit's exact motorcycle application, hardware, mounting method and current instructions | The new puck will appear in the old opening |
| Remove protectors | Correct original mount hardware and restoration procedure | Removing the visible puck leaves a safe original fastener arrangement |
The first path may allow a new panel to be planned around the identified hardware, but the current installed geometry and exact instructions govern any irreversible cut. A supplier may offer a panel undrilled or a supported opening option; confirm the scope in writing for the actual listing. The second path is a fresh fitment project, even if the new puck looks similar. The third can restore an uncluttered side fairing, but it may require replacing a long accessory bolt, spacer or bracket with the motorcycle's correct original arrangement. None of these choices promises a particular result in a future fall.
If you are still weighing cut and no-cut designs before any installation, read our separate cut versus no-cut frame-slider guide. This article starts later, when a previous owner's hole already exists.
Send the supplier a decision packet, not one close-up
A fairing supplier can confirm bodywork scope and the options offered for a specific product. They cannot certify an unseen engine mount from a phone photo. A good message to NiceFairings contains the exact bike and year; both full side views; close-ups of each opening and the inside face if available; the slider maker, part number and instruction revision if known; any altered stay or mount; and the fairing listing you are considering. Mark unknown items as unknown. Ask which painted pieces are included and whether the relevant panel is supplied undrilled or has a documented slider-opening option.
For a concrete example of why the listing matters, this 2008–2016 Yamaha R6 fairing kit is pictured below as a replacement bodywork set. The photograph is not a packing-list verification, a drilling guide or a promise that it fits another generation. Confirm the exact SKU, year and supplied parts on the live product page before ordering.

Give a qualified installer a separate question list: does the existing mount match the identified protector hardware, is the panel's natural position correct, and what steps does the current fitting sheet require? Our modified-sportbike pre-order checklist helps record the other nonstandard parts that can affect a fairing order. If only one side needs replacement, photograph it beside the retained tank, opposite panel and tail under the same light; even a mechanically suitable new painted panel may differ from aged surrounding paint. A coordinated redesign is a different conversation, and our custom-fairings page is where to start it.
Pre-fit before the irreversible step
When the new bodywork arrives, compare actual pieces with the written order. Support the bike securely, protect the paint, and place the new side panel on its normal locating points using appropriate bodywork hardware. Check adjacent seams, stay condition and clearance around hoses and controls. Do not use the slider fastener to pull the panel into shape. Photograph this natural fit before considering any alteration.
Only then should the installer compare the actual motorcycle, exact protector kit and current instructions. A ruler measurement taken from the old panel can help explain its history; it is not the decision point for the new one. If the first alignment check fails, stop. Enlarging a hole, slotting a panel or improvising a spacer to compensate for a bent bracket can turn one inherited problem into two. Keep the product reference, fitting sheet, photographs and supplier's written answer with the motorcycle's maintenance record.
The useful question is not “Can I make the old hole disappear?” It is “Do I know what created it, what lies behind it, and which documented configuration I want next?” Once those answers are separated, a replacement fairing order becomes much easier to specify—and much harder to regret.