You hear motorcycle fairing rattles coming from your bike and think a bolt is missing. That guess often makes you buy new fasteners before you know the real cause. The result? You waste money and the problem is still not fixed.
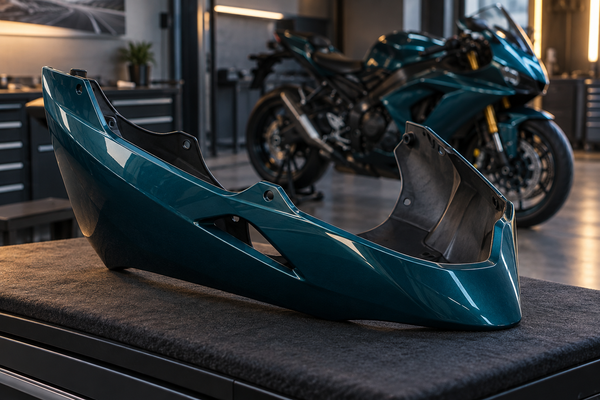
Images are AI-generated editorial illustrations, not photographs of the supplied product or evidence of model-year fitment, dimensions or safe installation. Use actual product documentation and motorcycle records for technical decisions.
This guide focuses on safe, parked, visual inspection and careful notes. You will not find advice on riding to make noises happen or on quick fixes. A noise cannot be reliably diagnosed from an article alone. Your job is to gather observations and, if needed, give them to a qualified technician.
What follows is a logical, step-by-step way to inspect before you purchase motorcycle fairing fasteners.
Key Takeaways
Write down the rattle details: when it happens, what it sounds like, and where it comes from.
Check your parked motorcycle for gaps, missing fasteners, cracks, and worn rubber.
Look for panels touching each other, old rubber grommets, and loose trim that could cause rattles.
Check any recent maintenance or repairs that may have moved fairing panels or fasteners.
Write down what you notice so you can share it with a trained mechanic.
To save money and fix the real issue, don't buy fasteners until you know what's wrong.
Buy new fasteners only after you check for a missing, broken, or worn part.
Use the applicable component references and service instructions; correct hardware alone does not guarantee that a noise will not recur.
Record the Motorcycle Fairing Rattles You Hear
Before you check any part or buy any fasteners, write down what you already know. A rattle that only happens in certain situations gives you clues. Write those clues down while you remember them clearly. This step needs no tools, no ride, and no taking things apart. Park your motorcycle safely. Turn off the engine. Then start your notes.
Describe the Rattle in Detail
Good records begin with clear descriptions. Answer three easy questions about the noise you hear. Your answers will help you when you talk to a mechanic later.
When Does It Happen?
Think back to the first time you heard the noise. Was it during a ride after you hit a bump? Did it start after a wash or repair? Write down everything you remember about that first time. Do not guess. Just write what you recall. Even fuzzy notes are helpful.
What Does It Sound Like?
Use ordinary descriptive words such as buzzing, ticking, scraping or rattling. These communicate an impression, not a diagnosis. Different sources can sound similar, and an apparent location may be misleading. The example worksheet below leaves the actual observations to you rather than matching a sound to a specific cause.
Descriptor |
Perceived Location |
Additional Attributes |
|---|---|---|
Describe the sound already heard |
Apparent area, if known |
Conditions remembered; do not reproduce the noise |
Duration or repetition |
Mark uncertainty |
Continuous, intermittent or another observed pattern |
Change over time |
Do not infer the source |
Record only what was already observed |
Recent work or event |
Relevant area if known |
Timing is context, not proof of causation |
For example, a descriptive note might say:
“I remember an intermittent light clicking sound near the front, but I could not identify the source.” This is an illustrative note, not a customer account or diagnosis.
This level of detail helps you or a technician later.
Where Does It Seem to Come From?
Point to the general area of the sound. Do not say you found the cause. Just note the location. Is it from the front or back? Does it come from the dashboard or the headlight area? Write that location in your log.
Note the Conditions
Remembered conditions help a technician plan an appropriate assessment. Do not take a ride, run the engine or manipulate panels to reproduce the sound for this worksheet.
Speed and Road Surface
Record only the speed and surface conditions you already remember. Do not return to a particular road or speed to collect a missing entry. A bump-related noise can have more than one cause; leave unknown details marked unknown.
Engine RPM and Gear
Write the RPM range and the gear you were in. Some rattles change with engine speed. Others happen only when idling. Write down the exact numbers if you remember them.
Temperature and Weather
Note if the motorcycle was cold or fully warmed up. Record the outside temperature if it matters. Plastic panels expand or shrink with heat. That changes how parts fit together.
Create a Simple Written Log
A written log turns random memories into useful information. You can use your phone or a notebook.
Use Your Phone or a Notepad
Use your phone or a notebook after stopping safely. Choose a format that makes it easy to distinguish observations from uncertain memories. Do not make recordings or notes while riding.
Record Date, Time, and Observations
Record existing observations once safely parked with the engine off. Do not continue using a motorcycle with an uncertain safety-related noise simply to complete the log. A blank entry is better than collecting information through an unnecessary test.
Date |
Mileage |
Observation |
Notes |
|---|---|---|---|
Date observed |
Mileage if known |
Description already remembered |
Arrange assessment; do not infer urgency from this example |
Add columns for weather or road conditions if you want more detail. Being consistent matters. Writing down observations stops you from guessing later. You can use the same format for future problems. Your written record helps you avoid wasting money on the wrong fasteners. It also helps you see patterns of damage over time. Writing down each observation protects your investment.

Parked Visual Inspection: What It Can and Cannot Show
A parked visual inspection gives you useful clues about motorcycle fairing rattles. It does not give you proof. Work only on a cool, parked motorcycle. Secure the bike per the manual before you touch anything. Perform visual checks only if you feel competent to do so. Never press panels while riding. Never run the engine near your hands. Never tighten hardware until the noise stops. Those actions hide problems and create new risks.
What You Can See With the Bike Off
Your eyes can catch several issues on a parked motorcycle. Each finding is a clue, not a confirmed cause. Document what you see and move on.
Visible Issue |
How It Is Identified During Parked Visual Inspection |
|---|---|
Gaps |
Record visible spacing without loosening or reassembling parts for this article. |
Misalignment |
Compare pre-drilled holes against the correct side-specific reference; apparent misalignment of holes or panels needs investigation. |
Missing fasteners |
Verify all correctly identified hardware and the complete mounting stack are present; do not omit required collars or grommets. |
Cracks |
Record visible cracks or suspicious marks; appearance alone cannot establish depth or cause. |
Scuffs, scratches, chips |
Record visible surface marks in suitable light without assuming they identify the noise source. |
Broken tabs |
Record accessible visible tab concerns without pressing, flexing or disassembling the panel. |
Stress marks |
Whitening or surface marks need interpretation; record what is visible without diagnosing stress from color alone. |
Warping, bends |
View panel contours from several angles against the correct product reference; do not press the panel flat. |
Obvious Gaps and Misalignment
A gap between the fairing and the tank may point to a bent bracket or a worn rubber support. It may also mean nothing at all. Compare both sides of the motorcycle. Note whether one side sits higher or whether a gap is tighter near one fastener and wider near another.
Missing or Backed-Out Fasteners
An empty mounting hole does not automatically mean missing hardware. Some holes exist for alignment pins or clips. Check your parts diagram before you assume a bolt fell out. Look for backed-out fasteners too. A screw that sits proud of its seat deserves a note in your log.
Cracks, Scuffs, and Broken Tabs
Record visible cracks, scuffs or damaged tabs in accessible areas. Such marks can have different histories and do not prove the source of the present sound. Do not flex a suspicious tab or remove a panel merely to obtain a closer photograph.
What You Cannot Confirm Without Disassembly
Some problems stay hidden until a qualified technician removes the fairing. Do not take panels apart to hunt for noises yourself. Instead, record these possibilities for later review:
Hairline cracks and stress marks often appear on the inner surface of fairings, especially around corners, bolt areas, and mounting tabs.
Secondary cracking on the back side may be present even if the front looks lightly damaged.
Old repairs such as glue residue, plastic weld lines, reinforcement mesh, or patched mounting tabs can indicate pre-existing weakening.
Hidden fastener wear and loose components behind the panel are not visible until disassembly.
Impact forces can transfer to inner brackets, headlight supports, windscreen mounts, or mirror bases, causing misalignment of replacement parts.
Aging mounting tabs, brittle clips, and slight alignment issues may remain hidden until a minor incident exposes them.
Internal Stress Cracks
Some cracks or prior repairs may not be visible from the outside. Leave hidden-condition assessment to appropriate service access rather than assuming an intact-looking face proves an intact part.
Hidden Fastener Wear
Threads, grommets, and spacers wear in ways you cannot see. Bolt tightness alone does not prove the mounting stack is correct. The exact manual rules apply here.
Loose Components Behind the Panel
A hidden component may contribute to a sound that seems to come from the fairing. A technician should decide the appropriate assessment and access; do not assume disassembly is always necessary or sufficient.
The Limits of a Static Inspection
A parked inspection narrows the field of suspects. It does not close the case.
No Confirmation of Noise Source
Every finding — a gap, a missing fastener, a crack — remains a possibility. None of them is a proven cause of your motorcycle fairing rattles.
No Substitute for a Professional Diagnosis
A qualified technician has tools, manuals, and experience you may lack. Hand your notes over and let them confirm the source.

Panel Contact, Rubber Supports, and Loose Trim
You have recorded your noise and completed a parked visual inspection. Now you can look at three common suspects behind fairing rattles. Each one is a possibility, not a diagnosis. Your goal is to document what you see and hand those notes to a qualified technician.
Check for Panel-to-Panel Contact
Plastic panels move as you ride. Vibration, heat, and road bumps all shift them slightly. Two panels that touch can create a buzzing or ticking sound. This contact does not prove the source of your noise. It simply gives you another clue to record.
Look for Rub Marks and Scratches
Record visible marks near panel boundaries using suitable light. A scratch does not by itself establish recent contact or its cause. Note the location and any known history without pressing panels together or trying to make a sound.
Identify Areas Where Plastic Meets Plastic
Check the seams between the side fairing and the tank. Look at the nose panel where it meets the headlight housing. Examine the tail section where it joins the seat cowl. Any spot where two plastic parts sit close together deserves a close look. Write down each area where you see contact or wear.
Inspect Rubber Grommets and Isolators
Rubber components may provide isolation, retention or another specified role. Their suitability and condition depend on the actual assembly. A visible concern is worth recording, but age or appearance alone does not establish the source of a noise.
Look for Hardened, Cracked, or Missing Rubber
Inspect each rubber grommet and isolator you can see. Look for these signs of wear:
Condition |
What You See |
|---|---|
Hardened rubber |
Hardness cannot be verified from a photograph; record visible deterioration for assessment |
Cracked rubber |
Small splits or tears in the surface |
Missing rubber |
Confirm whether a rubber component is specified there; an empty opening alone is insufficient |
Displaced rubber |
Grommet pushed out of its seat |
A missing or damaged grommet changes how a fastener sits. The bolt may feel tight, but the mounting stack is no longer correct. The exact manual rules apply here. Do not assume a tight bolt means a proper installation.
Check for Compression or Displacement
Keep this check visual. Record visibly displaced, torn or unusually compressed material without pressing it as a universal elasticity test. The appropriate condition criteria depend on the actual component and instructions. A qualified technician can assess uncertainty.
Examine Loose Trim and Accessories
Small parts can make big noises. Reflectors, turn signals, and decorative pieces all mount to the fairing. Aftermarket add-ons add more mounting points. Each one can loosen over time.
Reflectors, Turn Signals, and Decorative Pieces
Record visibly displaced trim or an accessory concern without wiggling components to provoke a noise. Mirror, lamp and reflector supports may need their own assessment. Do not assume visible movement or a particular sound establishes a cause.
Aftermarket Add-Ons and Their Mounting Points
Record aftermarket accessories and any known installation changes. Visible corrosion or unusual attachments warrant assessment but do not quantify joint strength by themselves. Ask the installer to compare the actual arrangement with the appropriate product requirements.
Do not use foam, tape, or glue as universal repairs. These quick fixes hide problems and can make diagnosis harder. They may also damage the paint or plastic surface underneath. A proper repair uses the correct part for the confirmed issue.
Rubber wear, panel contact, and loose trim are all possibilities. None of them is a proven cause of your fairing rattle. Document what you find. Then move to the next step: reviewing recent work and missing-part records.
Recent Work and Missing-Part Records
The notes you took earlier give you a starting point. Now you need to see if the noise is linked to any recent work on the bike. A fairing rattle often shows up after maintenance, a repair, or installing a new part. This step helps you find that link.
Review Recent Maintenance or Repairs
Think about the last time someone worked on your motorcycle. Even a simple oil change may require removing a plastic panel. Changing a tire might move the front fender. Write down every service event from the past few months.
Was the Fairing Removed Recently?
Note whether panels or surrounding components were disturbed during any recent work. Do not assume a particular service always requires fairing removal or that recent work was necessarily performed incorrectly. The sequence of events is useful context for the technician.
Were Any Fasteners Lost or Left Over?
If there are leftover components or labeled bags from prior work, record them without guessing where they belong. Keep the service invoice, photographs and part references together. Do not replace a component merely because it appears similar to a visible opening. Have uncertain fasteners and mounting arrangements identified and assessed using the relevant instructions.
If a fastener shows signs of wear, or the manual says replace it, do not take a chance. Fairings face strong wind forces at speed. A loose panel can cause a crash.
Check Your Parts Diagrams and Notes
Use the relevant manufacturer or dealer component reference and appropriate service information. General NiceFairings blog illustrations are not model-specific exploded diagrams. A catalog can help identify parts but may not show the entire installation procedure or every hidden condition.
Compare Your Bike to an Exploded View Diagram
Print the diagram or look at it on your phone. Walk around your motorcycle and match each visible fastener to the diagram. Note any spot where your bike has a bolt but the diagram shows a rubber grommet. Note any spot where the diagram lists a spacer but your bike has none.
Look for Empty Mounting Holes
An empty mounting hole does not always mean missing hardware. Some holes are for alignment pins, clips, or tools used in production. Check the diagram before you think a bolt fell out. If the diagram shows a fastener there, write it down as a suspect area.
The Value of a Simple History
A short written history turns scattered facts into a clear timeline. This timeline helps you and your technician.
When the Rattle Started Relative to the Work
Record the dates of the first remembered sound and relevant work or events. A close timing relationship is worth mentioning, but it does not prove that the work caused the noise. A delay also does not rule out a connection. Keep facts and interpretations separate.
What Was Changed or Disturbed
List every part that was removed, replaced, or adjusted. Include aftermarket add-ons and their mounting points. Note any fastener that was reused or replaced. This record helps a technician focus on the right area.
Fairing Location |
Reuse OEM |
Included in Kit |
Separately Needed |
|---|---|---|---|
Left upper panel |
Record quantity |
Record quantity |
Record quantity |
Right upper panel |
Record quantity |
Record quantity |
Record quantity |
Front nose section |
Record quantity |
Record quantity |
Record quantity |
Left lower cowling |
Record quantity |
Record quantity |
Record quantity |
Right lower cowling |
Record quantity |
Record quantity |
Record quantity |
Tail section |
Record quantity |
Record quantity |
Record quantity |

Technician Handover Worksheet
Your notes are valuable now. A clear written summary turns scattered observations into a focused diagnostic tool. This worksheet helps a technician find the source of your fairing noise faster.
What to Include in Your Written Summary
A good summary has three parts. Each part gives the technician a different piece of the puzzle.
Your Sound Log and Conditions
Start with your sound log. Include when you first heard the noise and the conditions under which it appeared. List speed, road surface, engine RPM, gear, temperature, and weather. Describe the sound itself. Use words like metallic, plastic, buzzing, ticking, or scraping. Note where the noise seemed to come from. Do not claim you found the cause. Just report what you observed.
Your Visual Findings and Suspect Areas
Add your parked inspection notes. List any gaps, missing fasteners, cracks, or broken tabs you saw. Note worn rubber grommets, rub marks, or loose trim. Include photos if you took them. Mark each finding as a suspect area, not a confirmed source. A missing bolt or a cracked tab is a clue. It is not proof.
Your Recent Work History
Write down any recent maintenance or repairs. Note if the fairing was removed. List any fasteners that were lost, replaced, or reused. Include aftermarket add-ons and their mounting points. This history helps the technician link the noise to specific work.
How to Present the Information
Keep your worksheet simple and direct. The technician needs facts, not theories.
Keep It Clear and Factual
Use clear observations and state any concern you want addressed. It is reasonable to explain how the problem affects you, while separating that from an unverified mechanical explanation. A useful record does not require technical vocabulary.
Avoid Guessing at the Cause
Do not write "I think the bolt is loose" or "It must be the rubber." State only what you observed. If you are unsure about something, say so plainly. It is better to admit uncertainty than to provide confident information that may be wrong. A technician can work with honest gaps. They cannot work with false leads.
Why This Saves Time and Money
A good handover worksheet pays for itself in several ways.
Helps the Technician Plan an Appropriate Assessment
Your remembered conditions and history help the technician decide how to assess the motorcycle. They determine whether and how any controlled testing is appropriate. The worksheet does not instruct you to reproduce a potentially unsafe noise, and it cannot guarantee a shorter diagnosis.
Prevents Unnecessary Parts Replacement
Clear observations can support a targeted assessment and a better-informed parts decision. They do not guarantee a diagnosis or eliminate every unnecessary expense. Ask the technician to explain the identified issue and the parts or work required before authorizing replacements.
Stop use and seek qualified assessment for any uncertain or safety-related noise. This includes structural, steering, wheel, heat contact, or loose equipment concerns.

Buy Motorcycle Fairing Fasteners Only After Diagnosis
You have completed your inspection and gathered your notes. The final step is deciding whether to purchase new parts. Buying before you confirm the problem wastes money and leaves the real issue unresolved. This section helps you make that decision wisely.
The Risk of Buying Fasteners First
Buying fasteners before diagnosis carries several risks. Each one wastes your time and money.
Wasted Money on Unneeded Parts
Do not enlarge or reshape a fairing hole to fit an unknown fastener. Misalignment may involve hardware, panel choice, brackets, damage, or assembly order. Modifying the hole risks voiding your warranty and wastes money while the real cause remains hidden.
Do not assume stainless steel is always better. Material and property class are only part of the specification. Choosing by appearance alone leads to purchasing unsuitable fasteners, wasting money without fixing the underlying issue.
A universal bolt kit covers only common sizes, not every mounting point. Ordering without checking specific needs risks wasted money on mismatched parts while the actual fastener issue remains unaddressed.
Seek professional help if you are unsure about mounting strength or lack proper measuring tools. A visual check cannot assess hidden damage, and guessing leads to unneeded parts and unresolved problems.
The Real Cause Remains Unfixed
Replacing an unverified bolt may leave the actual concern unresolved. The sound could involve bodywork or something unrelated to it. Do not assume the cause is limited to a grommet, panel or tab. Seek appropriate assessment, particularly if the source or safety implications are uncertain.
When a Purchase Is Justified
Not every rattle calls for new parts. You should only buy motorcycle fairing fasteners after you confirm the problem.
A Confirmed Missing or Broken Fastener
A fastener that is missing or broken needs replacement. Inspect each fastener for damage before deciding to reuse or replace it. Check the threads for corrosion and wear. Damaged threads mean the bolt will not hold correctly. Consult your service manual for parts marked nonreusable. Apply the replacement requirements from your manual. The reuse or replace decision must follow manufacturer instructions. Reuse only correctly identified, serviceable hardware where instructions permit.
Condition Observed |
Justification for Purchasing Replacement |
|---|---|
Fastener confirmed missing or broken |
Replace any fastener with visible damage; a candidate for reuse or replace must be undamaged and permitted by service instructions. |
Rubber component worn (cracked, hardened, brittle) |
Have the actual rubber component assessed and replace it when its condition or instructions require. |
Deformed or collapsed flange |
An apparently deformed flange needs assessment against the actual component requirements. |
Manufacturer designates part as nonreusable |
The manufacturer requires replacement for that application; appearance does not override this instruction. |
Corrosion, stripped threads, or deformed clips |
Do not reuse questionable components without appropriate assessment; follow the applicable replacement requirements. |
A Diagnosed Worn Rubber Component
Use the specified replacement when a rubber component is found unsuitable or the instructions require renewal. The diagnosis should identify the actual item and application rather than substituting generic material based on appearance.
Making an Informed Decision
Your notes guide the final purchase. Use them to buy exactly what you need.
Use Your Inspection Notes and Technician Advice
Your sound log and visual findings point to the problem area. Review your notes before ordering parts. If you consulted a technician, follow their advice. They may identify a condition you missed. Ask a qualified technician about uncertain findings before purchasing.
Buy the Correct Part for the Confirmed Issue
Use the exact component references and service or product instructions for the confirmed repair. General NiceFairings diagrams or illustrations are not a source of universal fastener specifications. Required length, thread, material and other details must be identified for the actual application.
Have the completed work checked using the applicable instructions and the diagnosed issue. Correct hardware is one part of a suitable assembly, not a promise of silence. Record any unresolved condition and ask the installer to explain what has been verified before returning the motorcycle to use.
A noise disappearing by itself does not establish that the motorcycle is safe or the repair complete. Appropriate post-work assessment should address the identified fault and relevant assembly requirements. Keep the work record and report any unresolved concern instead of treating silence as the only acceptance test.
Make the parts decision from the identified issue and appropriate instructions, not from guesswork.
The purpose of this process is a clear record for assessment: the sound already heard, accessible visual observations, relevant history and unresolved questions. Do not ride or run the engine to reproduce the noise, press panels while moving, or tighten hardware until a sound stops. A parked check cannot certify hidden condition or safety. Obtain qualified assessment for uncertain or safety-related noises, then buy the correct parts for the identified work.
FAQ
Can I diagnose a fairing rattle without riding my motorcycle?
A parked visual check can provide observations, but this article cannot diagnose your noise or determine which tests are needed. Record what you already remember and let a qualified technician choose an appropriate assessment. Do not ride or run the engine merely to collect more information.
What should I write down when I first notice a rattle?
Record only details you already remember once safely stopped: date, apparent location, sound description and relevant conditions. Mark unknown information as unknown. Do not ride again or reproduce the noise to fill missing entries.
Does an empty mounting hole always mean a missing fastener?
No. Some holes are for alignment pins or clips. Look at your parts diagram before you think a bolt is missing. Compare your bike to a diagram that shows all parts. A missing bolt is a clue, not a sure cause.
Can I reuse fasteners after removing a fairing panel?
Only reuse parts that your service manual allows. Check the threads for rust, damage, or wear. Replace any fastener that looks worn. Follow the maker's rules for each spot where you put a bolt.
Should I buy a universal bolt kit to fix a rattle?
No. A universal kit fits common sizes, but not every exact spot. Buying parts before you know the problem wastes money. The real cause could be a worn rubber piece or a cracked plastic tab. Find the problem first.
When is replacement of fairing hardware justified?
Buy new parts only after you know you have a missing or broken fastener. A worn rubber part that a mechanic finds also needs replacing. Use your notes and advice from a technician. Buy the right part for the problem you found.
What should I include in a handover to my technician?
Provide remembered sound details, accessible visual observations and relevant work history. Mark uncertainty clearly. The technician decides what assessment is appropriate; do not attempt your own reproduction test to complete the handover.
When should I stop riding and seek professional help?
Stop riding if you hear any uncertain or safety-related noise. This includes noise from the frame, steering, wheels, heat contact, or loose parts. A trained mechanic must check these problems before you ride again. Do not take a test ride to find the source.