
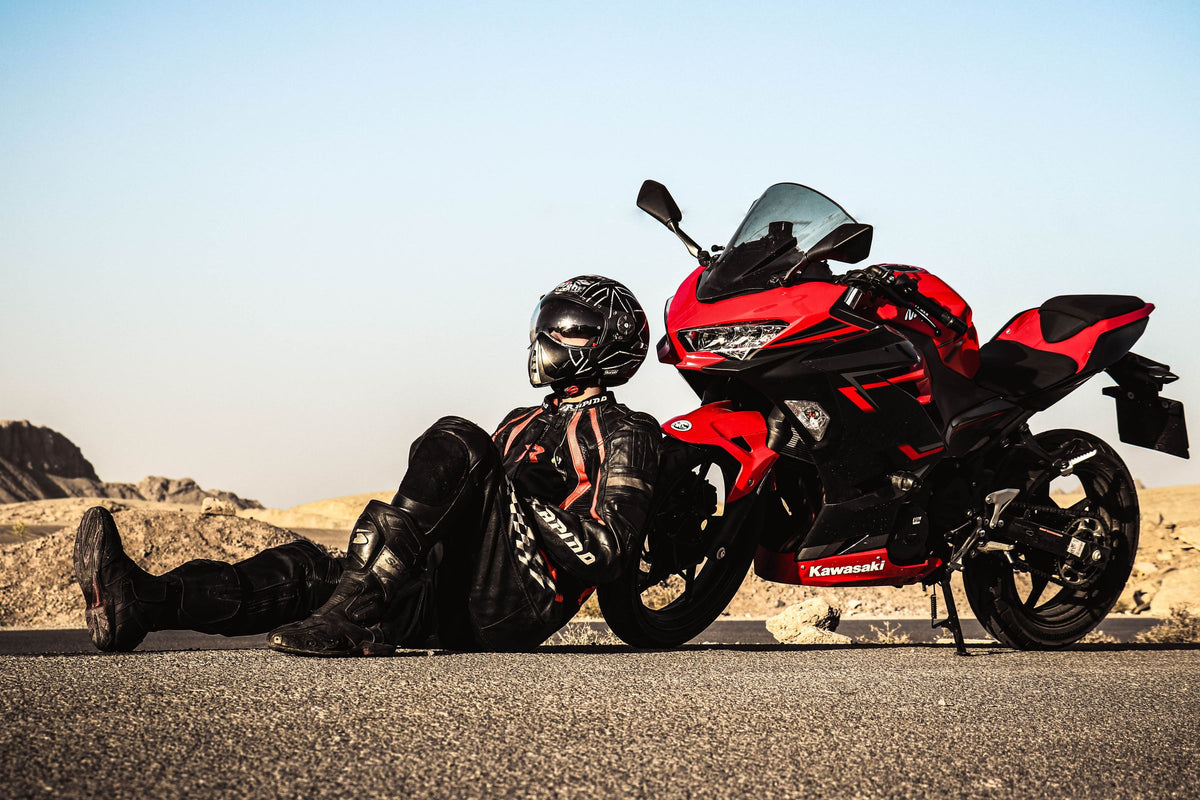
You want to refresh your sportbike without committing to every painted panel at once. The useful question is not simply which piece costs least to change first. It is whether the motorcycle will look deliberate when that stage ends, even if the next stage waits until another season. Plan a finished appearance for each stopping point before commissioning the first part.
Cover photo: payam yazdani via Pexels. The complete motorcycle and helmeted rider provide a real-world reference for judging an interim whole-bike look; this is not a NiceFairings staged refurbishment or fitment record.
One safety rule applies throughout: never ride with missing or unverified panels. Every riding stage must be fully assembled and checked per applicable instructions.
Planning a Sportbike Fairing Refresh in Stages
Finish Boundaries vs Physical Compatibility
A finish boundary is a visual stopping point: the place where a color or graphic ends intentionally. Physical compatibility concerns whether the correct components assemble together. Shared access or overlapping panels can also affect workshop effort. None of these automatically requires adjoining panels to be painted together, but all three influence a sensible project plan.
Imagine a stripe that ends cleanly inside one side panel rather than continuing onto the tail. The tail can remain unchanged without leaving half a graphic. Use photographs of your actual panel layout to mark the intended endpoints. Avoid adopting a universal distance from a vent or seam: a painter needs the relevant shape, assembled gap and agreed artwork, not an arbitrary measurement copied from another motorcycle.
Confirm the exact application and resolve fitment concerns before custom finishing or altering a part. If trial assembly is appropriate, follow the supplier and motorcycle instructions and clarify any return conditions first. Do not force, drill or heat the plastic to conceal a mismatch. A technician can investigate whether the concern comes from the panel, supports, hardware or assembly sequence.
Include retained parts in the plan. The tank, lights, screen, trim and inner pieces may stay through every phase, so they influence both the look and the assembly. Record them as retained rather than silently assuming a fairing kit replaces them. Required pads, heat protection and support pieces also need to remain part of the correct installation. Styling choices do not override their function.
Linked Graphics vs Independent Panels
A linked graphic crosses multiple panels. A racing stripe that runs from the nose to the tail is a linked graphic. So is a number plate that spans the upper and side fairings. These designs create a visual connection across the bike. They also create a staging problem. If you paint one panel in phase one and another in phase two, the graphic may not line up. The color may not match. The clear coat may age differently.
Independent panels carry a complete design within their own boundaries. A solid-color fender or a side panel with a contained motif may be easier to stage visually. There is still a color relationship to the rest of the bike, and a future replacement may differ in shade. Independence reduces reliance on stripe alignment; it does not remove every matching issue.
The staging decision matrix below helps you compare panel groups. Use it to find the best order for your project.
| Proposed stage | Visual question | Workshop question |
|---|---|---|
| Fender or tail accent | Does it repeat a color already present without waiting for another graphic? | What access and correct hardware does this model require? |
| Upper and side design group | Does a stripe cross the boundary into retained panels? | Which adjoining pieces need temporary removal or trial assembly? |
| Lower panel group | Will the finish contrast look deliberate from both sides? | Which supports, insulation and clearances belong with these parts? |
| Tank-adjacent bodywork | Is the retained tank a color reference or an intentional contrast? | Is the named part a cover or another component, and what remains original? |
| Full continuous livery | Would an incomplete stripe make an interim stage look unfinished? | Would one coordinated production and installation scope reduce repeated work? |
A linked graphic creates a future matching dependency. If phase two changes shape, color or timing, the first piece may also need revision. An independent design gives you more freedom because it does not need to complete a line on another part. Decide whether that flexibility matters more than the continuous livery you originally imagined.
Review left, right and front views of the interim design. An intentionally asymmetric scheme can work, but changing one side simply because it is first on the list may look accidental. The test is whether the stopping point satisfies you as a complete design. Do not approve it only because a future purchase is supposed to make it make sense.
Shared removal work affects cost and effort rather than dictating paint boundaries. Ask the workshop what must be disturbed for each phase and what should be checked during reassembly. It may be sensible to group work while access is available. Equally, a small independent finish change may be practical on its own. Get that answer for your motorcycle instead of assuming all sportbikes share an installation sequence.

NiceFairings production reference showing number graphics prepared as a separate design element. It illustrates why graphics need a defined phase and placement plan; it is not a personal race-number order or model-specific fitment example.
Temporary Final Appearance Between Phases
Staging a Sportbike Fairing Refresh by Panel Group
Start with a photograph of the complete motorcycle. Mark unchanged panels, the first design group and any later group in different annotations. Keep the underlying photograph intact so the actual component boundaries remain visible. A color concept can explore appearance, but it cannot establish fitment or show the final paint. Label those concepts clearly when sending them to a supplier.
Create a visual panel map with unique panel identifiers. This gives you a shared language and stops you from describing graphics that cannot exist on your specific panel layout. Define anchor points and exclusion zones for each panel. Anchor points give the painter a clear starting point. Exclusion zones keep graphics clear of seams, cutouts, and vents. Build a panel-by-panel specification sheet that combines color, graphic, and placement data for every panel. For graphics that flow across seams, verify the stripe continues correctly across adjacent panels.
Review the concept before production, then review the actual assembled relationship through the appropriate workshop process. Do not reposition a correctly installed panel simply to make a painted stripe line up. Installation has to satisfy the applicable fit and clearance requirements first. If the design is wrong on correctly fitted parts, the artwork or finish may need correction instead.
Hypothetical R6 plan: retain an existing blue body and introduce a complete, restrained accent on the front fender. A later tail accent repeats that idea but is not needed to complete a stripe. The phase-one decision is whether blue plus the small accent already looks finished. Use the Yamaha R6 collection only after confirming your exact model year and the availability of the required part or kit.
Hypothetical CBR600RR plan: keep the tank and upper panels, then commission side-panel graphics that end within their own outlines. Later tail work remains a separate design choice. Before ordering, establish whether a partial supply is available and whether the selected side panels work with the retained components. This is a design example, not a compatibility statement for every CBR600RR generation.
Hypothetical S1000RR plan: retain the existing main color and group a proposed nose accent with a fender treatment only if the actual shapes and overall design support that choice. Check the unchanged left and right views as well as the front. If the desired livery crosses onto several retained pieces, defer it for one coordinated group instead of leaving interrupted graphics. These examples describe planning choices, not completed customer installations.
When One Batch Is Better Than Many
Consider one coordinated production group when your design relies on continuous graphics or closely matched adjacent colors. That does not mean every part must literally be sprayed in one uninterrupted session. It means the supplier can plan and compare the relevant parts together under the agreed process. Separate sessions may be possible, but discuss their matching implications before committing.
Ask for a comparison of the proposed scopes: one coordinated set versus the stages you outlined. Include repeated removal, preparation, shipping and any minimum order requirements in that discussion. Staging spreads decisions over time; it does not inherently make the total project cheaper. If the first stage only works by guaranteeing a future exact match, it may be the wrong stopping point.

NiceFairings production reference showing several visible preparation and finishing stages. It illustrates why each phase needs its own approved scope; it is not a completed staged customer project or a universal process specification.
Design Revision Control and Shade Availability
Locking the Design Before Phase One
Keep one approved design file with a version number and date. Include both sides, named panels, retained parts and the finish reference. After a conversation, write down any agreed change and ask the supplier to confirm it before production. You do not need a complicated approval system for a small project. You do need to know which version controls the order when several pictures have been exchanged.
Planning for Future Shade Matching
Ask whether the same product and finish are expected to remain available, but treat future availability as uncertain unless there is a specific agreement. Save any material or paint-system details the supplier can provide. A color code helps identify intent; application, later ageing and product changes can still affect appearance. Do not order extra paint on the assumption it will remain usable indefinitely.
A retained spray sample or other agreed physical reference can help a painter compare later work. Ask the shop what reference is useful and how it should be stored. A sample records a target appearance rather than guaranteeing an invisible match years later. If close matching is essential, ask whether completing the visually linked group now is more realistic than separating it across seasons.
Phase Handover Notes and Troubleshooting
Writing Handover Notes Between Stages
Record Field |
What to Include |
Why It Matters |
|---|---|---|
Panel group |
Front fender, upper fairing, side fairings, etc. |
Identifies which panels are finished |
Finish boundary |
The clean visual stop point used |
Tells the painter where phase two begins |
Paint batch code |
Brand, batch number, mix code |
Supports later comparison; does not guarantee a match |
Cure time |
Date painted, recommended cure duration |
Records the shop's handling and readiness instructions |
Next step |
The first action for phase two |
Eliminates guesswork when you resume |
Keep the approved photographs, finish reference and handover notes together. If the shop provides a sample, label it with the design version and date. Leave storage of paint or other workshop chemicals to the relevant product instructions and the professional; the useful owner record is the specification and reference, not an unlabeled container.
Fixing Common Issues Between Phases
If a later panel differs visibly, compare the parts under the same light and ask the painter to assess the difference. The solution might involve a revised sample, a deliberate contrast or reworking a larger visual group. A color-reading instrument can inform the process, but it does not guarantee an invisible result. Decide what scope you accept before more work begins.
If the next phase is delayed, revisit these three decisions before reopening the project:
Does the completed stage still meet your needs, or has the desired final design changed?
Are the relevant parts and finishes still available under the same specification?
Do the retained components and earlier finish still match the condition recorded in your handover?
If a graphic fails to align on correctly fitted panels, ask for an artwork review rather than changing fitment to suit the stripe. If readiness for handling or installation is unclear, obtain the painter's product-specific instructions. Avoid universal spray corrections or fixed drying times copied from another job. The next phase should begin with the actual condition of the earlier work, not an assumed unchanged starting point.
Before starting, send the completed stage map through the custom fairing enquiry. Ask whether the requested supply and finish are feasible. Use the contact page for remaining application questions. An approved first phase should stand on its own visually, with the motorcycle fully assembled and checked before use.
FAQ
Can I paint linked graphics across two separate phases?
It may be possible, but it creates dependencies in color, position and finish. Discuss those with the painter. A coordinated group is often easier to compare, while independent graphics leave more flexibility if the next stage changes.
What should I record before pausing a project?
Save the approved design version, completed panel list, retained parts, finish reference, available paint details and the first unresolved decision for the next stage. Record handling guidance supplied by the shop rather than inventing a universal cure time.
How do I fix a slight shade difference between phases?
Have the painter compare the actual parts and propose an appropriate remedy. Another coat or a fixed spray overlap is not a universal correction. Decide whether a revised match, deliberate contrast or broader refinish best serves the project.
Is it safe to ride between phases?
Never ride with missing or unverified panels. Every riding stage must be fully assembled and checked per applicable instructions.
A finished appearance does not establish mechanical readiness. Complete the required assembly and checks before riding, with qualified help where needed.


