
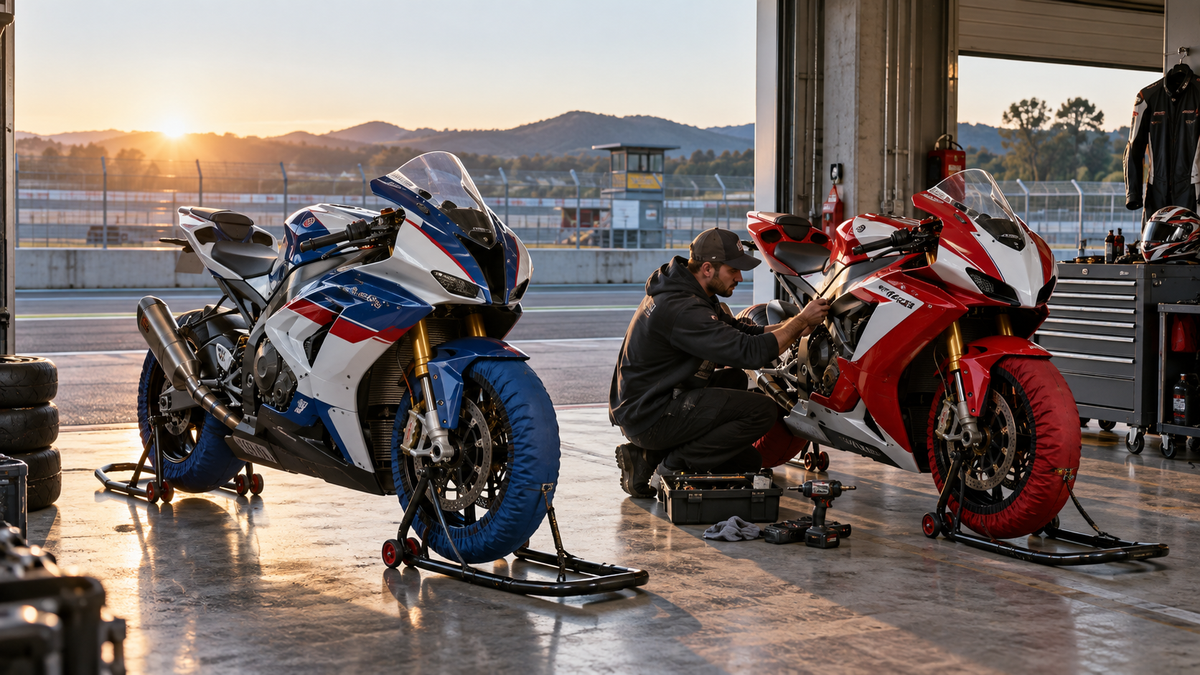
Comparing a BMW S1000RR with a Honda CBR1000RR-R Fireblade usually turns into a debate about power, electronics and lap times. That is entertaining, but it does not answer the question that arrives when either bike is parked in a paddock: which bodywork are you willing to risk, and what must be verified before you replace it?
Both motorcycles use tightly packaged, model-specific outer panels around expensive lighting, intake, cooling and aerodynamic parts. A low-speed tip-over can mark several connected pieces even when the motorcycle remains mechanically rideable. The practical comparison is therefore less about declaring a winner and more about building a bodywork plan for the exact generation, market and equipment on the bike.
This guide treats the two machines as separate projects. It does not assume that panels, winglets, ducts or brackets interchange between years, trims or markets. Use the bike's VIN, model designation, current hardware and clear photographs when asking a supplier to identify a kit.
The first decision: preserve, repair or replace
Before ordering anything, decide what the bodywork needs to do.
- Preserve the original set when the factory finish is clean and you want to protect it from track wear. Photograph every panel before removal, label the hardware and store the pieces without stacking painted faces together.
- Repair selected panels when damage is cosmetic and the mounting points remain sound. A paint shop should inspect cracks that reach a hole, edge or bonded feature.
- Replace a complete visual set when several panels are damaged, colors no longer match or the project calls for a different livery. A full set can produce a more coherent finish, but it still needs a patient dry fit.
Do not let a cosmetic plan hide mechanical damage. A bent fairing stay, shifted light bracket, distorted radiator mount or damaged fastener can make a correct panel appear wrong. Check the supporting structure first.
Where the two projects differ
The S1000RR and CBR1000RR-R do not share a universal “liter-bike fairing” architecture. Each model year packages its nose, side panels, lower cowl and aero details differently. Even within one nameplate, a redesign can change the outline and the hidden interfaces.
| Planning question | BMW S1000RR project | Honda CBR1000RR-R project |
|---|---|---|
| Identity evidence | VIN, model year, market, trim and clear left/right photos | VIN, model year, market, trim and clear left/right photos |
| High-risk visual area | Nose, side openings, trim transitions and any model-specific aero pieces | Nose, side cowl interfaces, lower edges and any model-specific winglet pieces |
| What to retain during teardown | OEM dampers, clips, inner pieces and documented bracket locations | OEM collars, grommets, clips, inner pieces and documented bracket locations |
| What can mislead the installer | Prior crash damage or a bracket that was already adjusted | Prior crash damage, shifted stays or mixed hardware from an earlier repair |
| Best approval method | Full kit list plus photos of every visible face and mounting edge | Full kit list plus photos of every visible face and mounting edge |
The lesson is simple: compare the projects at the planning level, then verify each motorcycle independently.
Build a track-day bodywork inventory
Lay out the proposed set before touching the bike. A complete-looking photograph can still omit inner trim, a small bridge piece or a model-specific cover. Ask the supplier for an itemized list rather than relying only on a piece count.
Create four groups:
- Large painted panels: nose, side cowls, lowers, front fender, tail pieces and tank-cover-shaped panels where applicable.
- Small painted or black trim: infills, duct surrounds, seat-side pieces and other model-specific finish panels.
- Transferred components: lights, screens, rubber dampers, heat barriers, clips and retainers that the kit does not include.
- Supporting hardware: stays, brackets, well-nuts, collars and fasteners that belong to the motorcycle rather than the decorative shell.
If a part is not shown or named, treat it as unknown until the seller confirms it. This avoids discovering halfway through installation that the old broken inner panel was meant to be reused.

*User-provided production photograph showing a threaded insert in a plastic mounting feature. It illustrates the kind of detail to inspect; it is not evidence for either motorcycle or a specific kit.*
Dry fit before track preparation
Fresh paint is not a reason to skip the test fit. Assemble the bodywork loosely and let the interfaces find their natural position.
Start with the central reference pieces specified for the motorcycle, then add the neighboring panels. Insert fasteners only far enough to hold the parts. Keep a hand on the panel while engaging tabs; do not use the bolt threads to pull a gap closed. If a hole is offset, stop and identify the cause.
Common causes include:
- a rubber grommet not seated in its bracket;
- a collar missing from the original assembly;
- a stay bent during the incident that damaged the old bodywork;
- an inner trim piece trapped behind the wrong edge;
- mixed hardware with different shoulder lengths;
- a panel intended for another generation or market configuration.
Only tighten after the nose, side panels, lower cowl and tail sit without visible preload. Follow the motorcycle service information for fastener type and torque. A bodywork screw is not a structural bolt; overtightening can crush a collar or stress an ABS mounting feature.
Cooling, steering and exhaust clearances
A track-day inspection must cover more than panel gaps. With the motorcycle stationary and cool, check:
- full steering movement in both directions, including lever, hose, cable and screen clearance;
- clearance around fans, radiator edges and cooling ducts;
- lower-cowl distance from the exhaust along the complete route, not just at one easy-to-see point;
- brake-line and wiring retention after the nose and side panels are installed;
- front-wheel and fender clearance through the suspension's available movement;
- secure attachment of any model-specific aero trim.
Do not invent a universal minimum distance for exhaust clearance. Pipe diameter, routing, shielding, operating conditions and the panel's geometry all matter. If an aftermarket exhaust changes the route, compare it with the exhaust maker's instructions and inspect the panel after a short controlled heat cycle.
Paint and livery choices that survive real use
The BMW and Honda visual languages offer very different starting points, but a durable design brief uses the same discipline.
For an S1000RR-inspired scheme, decide whether the goal is a restrained three-color rhythm, a darker technical look or a custom layout that simply complements the motorcycle's shapes. For a Fireblade-inspired scheme, decide how much red, white or blue should carry across panel seams. Avoid asking a designer to “copy the race bike” without supplying panel-year references and confirming rights to third-party marks.
Ask for a proof that shows both sides, the front and the tail. Check:
- whether a stripe breaks awkwardly at a removable panel;
- whether a large graphic disappears under a rider's leg or a frame slider;
- whether light and dark sections make the bodywork openings easy to read;
- whether the finish changes around replacement panels or retained OEM parts;
- whether logos or numbers are authorized and supplied at usable resolution.
An under-clear graphic can reduce exposed decal edges, but the supplier should describe the actual process for the specific order. Do not assume every kit uses the same paint stack.
Cost comparison without invented numbers
Dealer prices, paint labor, freight and kit contents change by model, country and date. A useful comparison records current quotes instead of repeating a single internet number.
| Cost line | Retain/repair OEM | Individual replacement panels | Complete painted set |
|---|---|---|---|
| Parts | Damaged pieces and consumables | Each confirmed panel and required trim | Confirmed kit contents plus transfer items |
| Finish | Blend or repaint labor may be needed | Color match may differ from aged adjacent paint | More consistent set-wide finish, subject to proof approval |
| Labor | Removal, repair and refit | Identification, transfer and alignment | Full teardown, inventory, dry fit and final installation |
| Risk to record | Hidden cracks and color blending | Wrong generation or incomplete trim | Missing transfer pieces or rushed fitment |
Request written quotes for the exact VIN/model-year project. A high headline price or a low kit price means little until the contents, finish and required transfer parts are on the same worksheet.
Storage matters if the OEM set is the investment
If the goal is to preserve original bodywork, storage must be part of the plan. Wash and dry the panels, remove trapped insects and road film, photograph their condition, and wrap each piece separately with a non-abrasive layer. Support large panels so their weight does not rest on a tab. Keep labeled hardware bags with a diagram, but do not tape bags directly to paint.
Choose a dry area away from direct sun, fuel vapor and repeated temperature extremes. A perfect removal followed by careless stacking can create the scratches the project was meant to prevent.
Pre-session bodywork checklist
Complete this check after installation and again after the first short ride:
- Every panel matches the verified model, year range and market configuration.
- No fastener is being used to drag an offset hole into place.
- Rubber dampers, collars and well-nuts are seated and not visibly split.
- Steering reaches both stops without touching bodywork, wiring or hoses.
- Cooling openings and fans are unobstructed.
- The lower cowl does not touch the exhaust and its heat barrier is secure.
- Lights, mirrors and road equipment required for the ride are secure and functional.
- No loose edge, rattle or fresh rub mark appears after the controlled test ride.
Which motorcycle wins this comparison?
For bodywork planning, neither wins by brand reputation. The better project is the one with the clearer identity record, a complete parts map, sound supporting brackets and an installer willing to dry-fit patiently.
Use the BMW S1000RR fairing collection and Honda CBR1000RR-R fairing collection as starting points, then confirm the exact year, trim, market and included pieces before ordering. That approach protects the original set, reduces rework and lets track-day preparation stay focused on the motorcycle in front of you.



