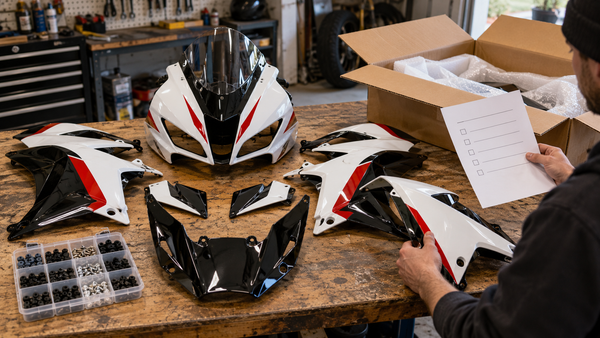

The painted panels have arrived, but you would rather have a professional install them. You call a motorcycle shop and ask, “What does it cost to fit a fairing kit?” The answer is difficult because fit can mean anything from replacing one undamaged side panel on a stock bike to rebuilding the front of a previously crashed machine. A quote based only on a photograph of the new kit leaves both you and the installer guessing.
The useful document is a short, specific work order. It names the bike and the parts, separates cosmetic assembly from mechanical diagnosis, tells the shop when to stop, and defines what you will inspect at collection. That is especially important when you buy the bodywork from one business and pay another to install it. Neither party can reliably diagnose a hidden bracket or missing spacer from a glossy finished-bike photograph.
This guide is for customer-supplied street fairings. It is not a model-specific installation manual, a labor-price promise, or advice to ride a damaged motorcycle. If the steering, brakes, lighting, frame or supports may be compromised, have a qualified technician assess those issues before treating the job as a cosmetic swap.
First decide what job you are actually buying
There are at least four different jobs commonly described as “install my fairings.” One is a like-for-like replacement of painted outer panels on a complete, stock motorcycle. A second includes transferring screens, lamps, inner covers, rubber pieces and fasteners. A third involves diagnosing a bent stay, broken mounting boss, damaged wiring or collision damage. A fourth is a custom conversion around nonstandard exhausts, sliders, lights or bodywork. A shop can reasonably quote these differently.
Before booking, photograph the entire motorcycle from front, both sides and rear. Add close-ups of the damaged or altered areas, but keep each close-up connected to a wide view. Identify the documented model year and market, the exact kit listing, and any changes from stock. A registration year is not always a model year; an earlier repair may also have changed the mounted parts. Our photo-and-label workflow explains how to keep that record usable.
Write the requested scope in ordinary words: “Remove and retain the present outer panels; inspect the visible mounts; transfer reusable original parts as agreed; loosely trial-fit the supplied kit; complete the installation only after the fit checkpoint; test the lighting and controls; return all removed parts.” The shop can amend this after seeing the motorcycle. A vague instruction to “make it fit” should not silently authorize drilling, cutting, changing wiring or discarding original pieces.
Give the installer a parts packet, not just a tracking number
Send the exact NiceFairings listing you ordered and a copy of the written order confirmation. The listing and order are the place to check what is promised for that kit. Do not assume a visible screen, lamp, bracket, fastener set or heat shield is included because it appears in a lifestyle image. If the box has not arrived yet, ask the shop whether it prefers to inspect the kit before reserving a full installation slot.
At receipt, record the carton condition and lay the parts out on a protected surface. Count against the actual packing or order information, photograph both sides of relevant panels, and group supplied hardware separately from reusable motorcycle hardware. A technician needs to know whether a missing item is expected to come from the kit, the bike or a separate parts order. The fastener reuse and replacement guide helps make that distinction without claiming every kit contains the same bolts.

Photo context: The real photograph used as this article's cover shows a Suzuki superbike being worked on in a racing paddock at Magny-Cours in 2009. It illustrates an actual workshop setting; it does not show a NiceFairings kit, this customer-supplied-parts process or an installation result. Photo: Cjp24, Wikimedia Commons, CC BY-SA 4.0.
Put five decisions in the written estimate
1. What is included? Ask whether the estimate covers removal of old panels, inspection, transfer of retained pieces, initial trial fit, final assembly and a post-install check. State whether the shop is being asked to clean the bike, handle broken tabs or repair underlying damage. A shop that has not seen an opened bike may reasonably give an inspection estimate first and a revised installation estimate later.
2. Who supplies missing pieces? Name the contact who will approve an additional original part, spacer, rubber mount, bracket or fastener. “Hardware included” is too broad if no one knows whether it refers to painted-panel fasteners, mounting collars or motorcycle-specific retainers. Ask the shop to identify the part and location before ordering or substituting it.
3. What happens at the first conflict? Require a pause and photographs when a panel cannot sit in place with the expected supports and neighboring parts. The first-conflict panel-gap guide explains why a final uneven seam alone may hide the real cause. Do not authorize force, unexplained hole enlargement or trimming in advance.
4. What needs separate approval? Put a clear threshold in the work order: call before extra labor, drilling, cutting, adhesive work, wiring changes, throwing away old bodywork or installing a part with damage. Ask for the shop's actual terms in writing; this article cannot define its labor policy, your local consumer rights or the supplier's warranty.
5. What is the finish line? Agree on the inspection steps at pickup, which removed parts you get back, and what remains unresolved. A finished photograph is useful, but it cannot prove hidden hardware or mechanical safety. A written note of what the shop checked is more informative.
| Question | Put it on the work order | Why it matters |
|---|---|---|
| Motorcycle identity | Model, documented year, market, visible modifications | A familiar model name alone may hide a different bodywork application |
| Supplied kit | Exact product URL, order reference, received-piece count | Prevents an image from becoming an assumed parts list |
| Labor scope | Removal, transfers, trial fit, final installation, checks | Makes estimates and change requests comparable |
| Stop point | Photograph the first unexplained mismatch before alteration | Preserves evidence for the shop and supplier |
| Extra work | Who approves it and how it is priced | Keeps diagnosis distinct from open-ended fitting labor |
| Return of parts | Old panels, reusable hardware, packaging if needed | Protects resale value and helps resolve a discrepancy |
Make the trial fit a decision point
Ask the installer to first compare the motorcycle's supports, lamp, screen, inner pieces and neighboring panels with the delivered components. The aim is to identify the first mismatch while the parts can still be assessed cleanly. A bent original stay, absent collar or changed headlight can produce a gap that looks like a bad outer panel. Conversely, a correctly identified motorcycle does not guarantee that every supplied component is perfect; the shop should describe the observed issue rather than guess its cause.
For a one-panel repair, the important question may be whether the replacement follows the original panel's edges and attachment points without disturbing the rest of the assembly. For a full kit, the installer should consider how the front, sides, lower cowl and tail meet as a system. In both cases, record which original parts were transferred. Avoid using a last bolt to pull a reluctant panel into place: the apparent success can load a tab or hide a missing support.
If a slider or other accessory passes through a fairing, identify that before the estimate. A pre-existing hole does not prove that a new panel should be cut in the same place. Our frame-slider-hole assessment treats that as a separate design and clearance decision. The shop and supplier should agree on the exact application before irreversible work.
Separate the three kinds of problem
A delayed installation does not automatically mean the kit is defective or the mechanic is wrong. Sort the evidence into three buckets.
Motorcycle condition: a cracked support, altered lamp, damaged mount or previous repair changes the surface to which the panel attaches. This belongs to the bike's inspection and repair decision. Supplied-part condition: the expected piece is absent, damaged on arrival or inconsistent with the confirmed order. Preserve the packing, photographs and order details and contact the supplier. Installation decision: the parts and bike may be compatible, but the proposed way to assemble them has not been agreed, perhaps because a retained spacer or an accessory changes the route. Ask the installer to explain the next step before approving it.
The same photo set can help all three conversations, provided it includes orientation and a description of the first contact or missing interface. Do not send only a tight photo of a gap with no view of the motorcycle. When contacting NiceFairings, include the relevant kit page, the bike's documented year/variant, photos of the delivered piece and the mating area, and the installer's written observation. State what was attempted and what has not been altered. Avoid publicly posting full VIN or personal address details.
At collection, inspect a motorcycle rather than a paint job
Agree that the technician will perform the checks required by the correct service information and explain any item not completed. You can then walk around the stationary bike together. Look at both side seams, the nose and screen, front fender, lower edges and tail. Ask whether each lamp, indicator, mirror, latch and any transferred accessory works as intended. Request confirmation of steering clearance through its full range and of clearance from the wheel, fork, exhaust and other moving or hot components. The steering-clearance guide discusses that specific post-install check.
Check that there are no unexplained loose fasteners or fresh stress marks. A small visual difference in seams does not by itself identify an unsafe bike or a defective kit; a panel contacting a control, wheel or hot part is a reason to stop and have the cause resolved. Ask for photographs of any concealed concern before it was closed. If the shop found damage beneath the fairing, have it described separately from the cosmetic result. Take your removed parts and the final invoice, including any approved changes.
Do not replace the professional's mechanical judgment with a short ride around the block. Follow the motorcycle's own pre-ride and service guidance and the shop's advice about any follow-up inspection. If the installer cannot account for a safety-relevant issue, keep the bike off the road until it is assessed.
A short message you can actually send to a shop
I have a [documented year, make, model and variant] with [stock/modified] bodywork. I bought [exact kit link and order reference] and would like an estimate for removing the existing outer panels, inspecting the visible supports, transferring agreed reusable pieces, trial-fitting the kit, and completing installation if the first fit check is sound. The bike has [known damage or modifications]. Please tell me what inspection is included, what you would charge if hidden damage or missing hardware is found, which changes need my written approval, and whether you can return all original parts. I can send wide and close-up photos before booking.
Fill the brackets with verified information. If you cannot answer one, write “unknown” and ask the shop what it needs to check. This message is more useful than asking for a universal “fairing install price,” and it respects the shop's ability to inspect the actual bike before promising an outcome.
NiceFairings can help you narrow the bodywork order: browse the fairing collections, check the exact year and design on the selected listing, or start a custom paint discussion for a planned color change. A purchase page does not replace a workshop inspection, and a professional installation does not turn an incorrect year or hidden collision damage into a fitment guarantee. The best handoff is one in which the owner, supplier and installer can each say precisely what they know—and what they still need to verify.