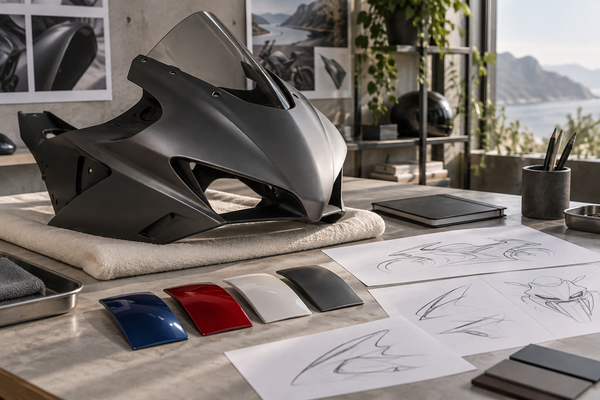
Graphics that cross fairing seams look like one piece only when you plan stripe width, angle, and color block placement around the actual panel curve and seam location. That planning is what fairing graphic alignment is really about. Then you check the result from the rider's view and from an observer's view. Flat panels, angled close-up photos, and side views of the mounted fairing each show a different version of the same graphic. Some breaks are part of the design. Others happen because parts do not line up. To tell them apart, you need agreed reference views. NiceFairings makes custom-painted ABS outer fairings. Confirming your exact model, year, design, and parts before production helps fairing graphic alignment match your intent.
Key Takeaways
Plan stripe width and angle across the whole side of the bike, not just one panel.
Use agreed reference views, like side and rider views, to check alignment.
Ask your supplier which seam breaks are intentional and which are mistakes.
Test the graphics from the rider's seat and from an observer's side angle.
Review both sides of the bike separately because they may not match.
Seams, Curves, and Viewing Angles
Why Curved Panels Bend a Straight Line
A detached fairing panel keeps its molded curves, but it may sit at a very different angle on a table than on the motorcycle. A stripe that looks level in a tabletop photo can appear to rise or narrow when viewed in the mounted position. The panel does not have to change shape for its appearance to change. Surface curvature, orientation and the camera position all affect the projected line. Compare equivalent views before deciding whether the layout is wrong.

Think about a stripe that runs from the nose to the side panel. The nose curves sharply. The side panel curves more gently. A stripe that looks even on both flat pieces may look wider on one side once mounted. The angle of your view changes how the line reads. You cannot judge the final look from flat pieces alone.
How Seams and Gaps Change What You See
Real seams separate fairing panels. These gaps are not flaws. They are part of how the bike goes together. A stripe that crosses a seam must account for that gap. From the rider's view, you look down and forward. From the side, an observer sees the full profile. A close oblique photo shows yet another angle. Each view reveals different alignment behavior.
A rendering is not fitment or exact-color proof. It shows a design idea, not the final mounted result. Finishing and application processes differ by supplier. Some suppliers clear coat over decals. Others use different methods. You should ask what process applies to your order. Confirm your exact model, year, design, and included pieces before production. This step helps you avoid surprises when the fairing graphic alignment matters most.
Designing Stripes and Color Blocks for Fairing Graphic Alignment
Planning Stripe Width and Angle
A stripe does not belong to one panel. It belongs to the whole side of the bike. When you plan width and angle, you plan them across the full run of panels. Start with the largest panel and work outward. That panel gives you the most visible reference for how wide the stripe should read. Then carry that width forward to the nose and back to the tail. If you design each panel alone, the stripe may look right on the table and wrong on the bike.

Left-to-right balance matters just as much. A stripe that sits high on the left side and low on the right side will look uneven from behind the bike. Confirm whether the design is intended to be symmetrical or deliberately different on each side. Angle is the other half of this. A stripe that runs parallel to a body line on one panel may cross that line at a different point on the next panel. That change is normal. The question is whether the change looks deliberate.
Think about how the stripe meets each seam. At the seam, the stripe should either continue with a consistent visual weight or stop in a way that looks planned. A stripe that narrows sharply right at a gap draws the eye to the gap. A stripe that holds its width across the gap reads as one continuous band. Neither choice is wrong. You just need to decide which one you want before production starts.
Placing Color Blocks and Logos With Intent
Color blocks behave like stripes, but they cover more area. A block that spans two panels must account for the curve of both. A block that looks square on a flat layout may look stretched once mounted. Place blocks so their edges follow the natural flow of the bodywork. That approach keeps the design readable from the side and from the rider's seat.
Logos need extra care at seams. Check the orientation of every logo on every panel. A logo that faces forward on one panel and tilts back on the next will look off. Spelling is easy to overlook too. A word split across two panels can lose a letter at the gap if nobody checks it. Read the full word on the mounted bike, not just on the flat pieces.
Motorcycle generation and color direction both shape how a graphic reads. A newer model with sharper body lines may make a stripe look faster. A darker color direction can make a thin stripe disappear in low light. These are design choices, not errors. Confirm your exact model, year, design, and included pieces before production. Ask whether finished photos are available when your order is complete. That step gives you a real look at fairing graphic alignment before the fairing ships.
Reviewing the Supplier’s Proposed Layout
Matching Reference Views
You need a consistent visual target when you review graphics across panels. A flat layout photo or a single angled shot will not give you the full picture. You need an agreed reference view. This view shows the bike from one specific angle. You and your supplier both look at this same view. It becomes your standard for fairing graphic alignment.

Agree on a side-on reference view and a separate oblique or stationary rider-position view where useful. Compare a proposed design with the corresponding angle, rather than comparing a flat layout directly with a perspective photo. Keep the camera height and direction reasonably consistent. A stripe may appear continuous in one view and interrupted in another. Ask the supplier which view the design prioritizes and what differences to expect. Do not assume a finished-panel photograph shows the panels mounted on your motorcycle.
Questions About Intended Breaks
Ask your supplier one question before you approve the graphics: “Which breaks are intentional?” Some designs use visible gaps at seams as a style choice. Other designs aim for a continuous line across panels. You need to know which approach you ordered.
Ask about logo placement at seams too. A logo that splits across two panels should split at a natural point along the seam. If the split looks awkward in the reference view, request a revised placement before production begins. You can also request finished photos of your specific order. Ask whether the available photos show detached panels or a mounted arrangement; neither should be mistaken for the other.
For a painted fairing order, review the supplier’s proposed layout rather than attempting to reposition finished graphics yourself. Identify the seam on a copy of the reference photo and describe the issue: line width, endpoint, direction or intended break. Ask for clarification before approving the design. Do not force, trim or drill a panel to make a graphic appear continuous.
Ask how the requested graphics and finish will be produced, and what is included in the quote. Do not infer the finishing process or durability from a rendering. The answer should describe the specific order, including any limits on reproducing the reference design.
Adjusting for Viewing Angles
Rider View and Observer View
Your perspective changes what you see. The rider's view comes from the seat. You look forward and slightly down. A stripe that looks continuous from the side may appear to jump at each seam from this angle. The nose curve and your gaze angle create that effect. A color block spanning two panels may shift in your view as you lean forward. These changes come from viewing geometry.

The observer's view comes from beside the bike. This shows the full profile. A three-quarter angle adds another set of visual shifts. A stripe reads differently from each angle. Both views matter for your final judgment.
Use agreed reference views to test both perspectives. Take a photo from the rider's eye level. Take another from the side at bike center height. Take a third from a three-quarter angle. Compare all three to the design rendering. Check stripe widths at each seam. Check color block edges. Check logo placement at each gap. If something looks off in one view but fine in another, you have a decision. Some breaks are intentional design choices. Others may need clarification or a layout revision before production.
When reviewing a proposal, mark the same stripe endpoints on copies of the side and oblique views. Note whether the apparent difference remains after comparing similar angles. Ask the supplier to respond to those marked areas. A revision should be checked in the same views as the earlier proposal. This creates a clear comparison without asking the buyer to apply or adjust the graphics.
Reviewing Both Actual Sides
Never trust a mirrored image alone. Design renderings often show one side and mirror it. This hides real differences.
Your left and right sides may not match. Mounting points and cable paths differ side to side. A stripe that fits the left panel may shift on the right. A logo centered on one side may sit off-center on the other.
Review both actual sides separately. Take individual photos in the same lighting. Place them side by side. Compare stripe widths at each seam. Compare stripe angles. A small curvature difference from left to right can shift a stripe visibly.
When you contact your supplier, use agreed reference views for both sides. Send photos of the left and right sides. Ask whether the design is meant to read the same on both. Some designs use asymmetry on purpose. Others aim for symmetry. Your supplier needs both sides to answer accurately.
Confirm your exact model and year before production. Request finished photos of your specific order when available at the NiceFairings custom fairings page. Ask for separate views of both actual sides where available, and clarify what the photographs can establish before shipping. If you have questions about a specific design, use the NiceFairings contact page to discuss your reference views. This helps record the intended appearance and the remaining limits of the available views.
Common Fairing Graphic Alignment Mistakes
Misalignment and Mismatched Reference Views
You check the design on a flat layout. Everything looks right. Then you mount the panels and the stripe jumps at the seam. This is a common fairing graphic alignment problem. The flat view hides how the curve of each panel changes the line. A stripe that looks even on paper may appear wider on one side of the gap. Distortion works the same way. A color block that looks square on a flat piece may stretch once it wraps around a curved surface.
Mismatched reference views can make a comparison misleading. A side-on photograph and an oblique rendering show different projections of the same panels. Agree which views to compare and record the intended appearance in each. If a stripe looks different, ask whether the cause is perspective, an intentional layout choice, panel position or an issue that needs closer review. Photographs alone may not settle that question.
Intentional Breaks vs. Accidental Gaps
Some designs intentionally stop a stripe before a seam; others aim for continuity across it. Repeated spacing may suggest a design choice, but a pattern does not prove intent. An isolated break may also be deliberate. Ask the supplier to identify the intended breaks on the agreed reference view and explain any difference you have marked. Use that answer and the actual order reference, rather than guessing from repetition.
Road rash repair and restoration can shift graphic alignment across seams. A repaired panel may sit slightly different from the original. The stripe that crossed that seam may no longer line up the same way. Review repairs with the same reference views you used for the original design. Take fresh photos of both actual sides. Compare them to the agreed view. If the repair changed the panel shape or position, the graphic may need adjustment. Confirm your exact model, year, design, and included pieces before production. Request finished photos when available. These steps help you catch alignment issues before the fairing ships.
Review cross-panel graphics as a complete design, then examine the seams from agreed side and oblique views. Check both actual sides rather than relying on a mirrored rendering. Record intentional breaks and request clarification of uncertain areas before production. Confirm the exact model, year, design and included pieces with NiceFairings, and ask what finished photographs can be provided when available.
FAQ
How do I tell if a seam break is intentional or a mistake?
Ask the supplier to identify intentional breaks on the agreed design reference. Repetition alone does not establish intent, and a single break is not proof of an error. Compare matching views and have uncertain areas clarified before approval.
Why does a stripe look different on the bike than on a flat layout?
Curved panels viewed at different orientations produce different apparent line widths and angles. A detached-panel photo and a mounted side view are not equivalent evidence. Compare the design using the intended mounted orientation where that reference is available.
What is the best reference view for checking alignment?
Use a side-on photo taken at the bike's center height to see the full profile. Then take a rider-view photo from the seat. Compare both to your design rendering. This method shows how the graphic looks from each angle.
Should both sides of the bike match?
Not always. Some designs use asymmetry on purpose. Look at both actual sides one at a time with photos taken in the same lighting. Ask your supplier if the design is meant to be symmetrical or different on purpose.