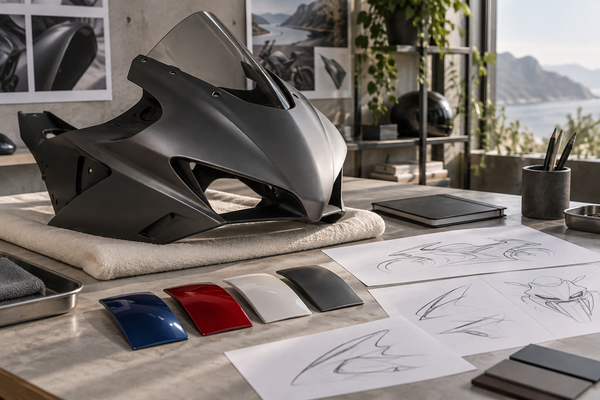
Before sending detached fairings to a painter, agree that the recipient accepts the shipment and confirm the exact parts, address and packaging requirements. Packing should protect the finish while supporting each shell without concentrating weight on its tabs. These checks reduce avoidable risks but cannot guarantee damage-free delivery.
This guide covers recording the condition of already detached panels, choosing suitable contact materials, separating the contents and keeping shipment records. The painter decides what preparation and repair work is needed after inspection. Agree those expectations before packing, particularly for fresh paint, repaired tabs or large, irregular pieces.
Key Takeaways
Check each fairing panel in good light for cracks or chips before you pack it.
Separate each panel and use a finish-compatible contact layer confirmed with the painter.
Choose a suitably rated box and cushioning for the actual panel shapes and shipment.
Take a picture of each panel before and after you wrap it, and put a packing list inside the box.
Keep the tracking number, drop-off receipt, contents list and packing photographs.
Packing Motorcycle Fairings: Inspection and Cleaning
Cleaning and Inspecting Each Panel
Contact the intended painter first. Confirm which parts they expect, their condition, the shipment address and the name or reference to put on the box. Ask which protective material may touch the existing finish. A contact layer is packaging material, not a coating that should bond to the paint. Fresh, repaired or unfamiliar finishes may need different handling; ask the painter before wrapping and do not assume a fixed curing time.

Inspect each panel under good light and photograph visible cracks, chips, repaired areas and mounting tabs. Ask the painter whether any cleaning is wanted before shipment and which method is suitable for the current surface. Let any agreed cleaning process dry fully before packing. Do not sand, apply solvents or add a coating merely to prepare a shipment unless that work has been specifically agreed.
Give the painter the motorcycle model, year, panel positions and the agreed scope of work. Label left and right from the rider’s seated perspective. If a part was repaired or came from another motorcycle, explain that history. A package described as a kit does not automatically include every panel or hardware item. Use an itemized list. Packaging records describe what is being sent; they do not prove fit or determine the paint preparation process.
Separate already detached loose pieces. Only include hardware the recipient has requested. Bag and label it, then secure it away from painted shells so it cannot move into them. Do not remove bonded components or unfamiliar fittings simply for packing; ask the painter how they want them handled. Keep adhesive tape on the packaging rather than on the painted surface.
Protecting Protruding Tabs and Edges
Protruding tabs need clearance from the box walls and neighboring parts. Support the broad body of the shell so its weight is not carried by one tab or a narrow edge. Use suitable cushioning around projections without tightening it into a pressure point. A padded tab can still be damaged if it bears the load of another panel. Check the support arrangement before placing anything above or beside the shell.
Edges also need your attention. The edges of each panel can chip easily. Use extra bubble wrap along all edges. Place corner protectors if you have them available. Check that the extra protection does not press against a fragile edge.
When packing motorcycle fairings, use thick cushioning all around. Do not let tabs make contact with the box wall. Leave at least a few inches of space between panels and box sides. Your prep pays off when the box arrives in good shape. The aim is to reduce movement and contact without distorting the panels.
Before wrapping, make sure your contents list and condition photos agree. If a crack, repaired tab or unsupported projection makes the arrangement uncertain, ask the recipient or a packing professional to review it. Do not conceal unresolved damage inside the wrapping.
Choosing Materials and Wrapping for the Painter
Essential Packing Supplies
Gather your supplies before you touch a single panel. You need several rolls of bubble wrap, packing paper, foam sheets, and sturdy tape. Grab a marker and some labels too. A good box comes later, but the wrap matters first. Think about your painter and what they expect. Ask if they want a finish-compatible contact layer on the surface. That packaging layer will touch the existing surface during transit, so its compatibility matters.

Bubble wrap may be part of the cushioning plan if suitable for the surface and arrangement. Buy more than you think you need. Hardware needs its own bag. Keep bolts and brackets away from the fairings. A loose bolt can scratch a panel during shipping. Label every bag so the shop knows what is inside. Good prep work here saves confusion later.
Wrapping Each Panel Individually
Wrap each panel on its own. Use the agreed contact layer before adding the selected cushioning. Start at one corner and work your way across. Overlap the layers so no bare spot remains. Pay extra attention to tabs and edges. Those spots take the hardest hits.
Never let a panel touch the box directly. Put packing paper or foam between the surface and the cardboard. This intermediate layer absorbs shock. Add cushioning on all sides. Several inches of material gives you a safer buffer. No universal thickness rule guarantees safety, so use your judgment for each shape.
Wrap hardware separately from the panels. Bag it, then wrap the bag. This keeps metal away from painted surfaces. Your painter will thank you for the organization.
Check the wrapped shape, not just the bare panel dimensions. A shell may need a separate compartment or box to keep its edges and projections clear. Do not nest parts simply because they fit together on the motorcycle: transit loads act differently, and concealed contact can mark the surfaces. The recipient should be able to unpack one piece without dragging another across it.
Boxing and Labeling to Prevent Movement
Selecting the Right Box and Cushioning
Choose the outer box after measuring the wrapped parts and the support arrangement. It must have room for appropriate cushioning without compressing tabs or bending the shell to close the lid. Confirm the box rating, closure and any need for double boxing with the carrier or packing provider. A particular wall count or fixed padding thickness is not a universal solution for every panel shape.

Select cushioning that will continue to support the broad panel surfaces during handling. Ask the packing provider about material suited to the size, shape and mass of the contents. Loose fill can shift; tightly compressed material can transmit pressure to a projection. Before closing, inspect the arrangement for unsupported sections, hard contact points and possible movement. Do not shake a package containing fragile or damaged tabs to test it.
FedEx's general breakables guide recommends a sturdy outer box with cushioning room, individual wrapping, limiting movement, and double boxing fragile items. You can read the full guide at https://www.fedex.com/en-us/shipping/packing/how-to-pack/breakables.html.
Large or complex shapes deserve professional packing help. A shop that ships fragile parts every day knows how to brace odd angles. They can also confirm carrier limits for size and weight before you seal anything. Check those limits on your carrier's website. An oversized box may cost more or get refused at drop-off.
Sealing and Labeling the Box
Seal every open edge with packing tape. Use the wide tape made for shipping boxes. Run one strip along the center seam. Add two more strips along the edges. Do not use masking tape or duct tape. Use tape and a closure method suitable for the box and carrier requirements. A box that opens in transit defeats all your prep.
Label the box on the top and one side. Write the painter's address clearly. Add your return address too. Mark the box "Fragile" and "This Side Up" if the panels have a preferred orientation. Write "Do Not Stack" if the contents cannot bear weight. These labels guide handlers, though they cannot guarantee special treatment.
Slip a packing list inside the box before you seal it. Tape a second copy to the outside in a clear pouch. The list should note each panel, the hardware bag, and any special handling notes. Your painter can check the contents at a glance. This simple step protects your paint job from confusion later.
Record the completed arrangement before closing the box. Photographs should show separation between panels, support beneath the broad shell areas and clearance around projections. If the lid only closes by pushing on a panel, revise the box or support arrangement. A shipping package should accommodate the existing shape rather than flatten it.
Shipment Records and Tracking
Taking Photos and Creating a Packing List
Photograph your panels before you wrap anything. Capture the front and back of each piece from multiple angles. Zoom in on tabs and edges to show their condition. This record protects you if a problem arises later. The photos record what was visible before packing; they do not independently prove hidden condition or what happened in transit.

Take another set of photos after you wrap each piece. Show the cushioning layers and how you placed everything inside the box. Good photos document the finish condition of your panels. A painter may ask about your packing method. These images answer those questions clearly.
Create a detailed packing list on paper. Write down every item in the box. List each panel separately. Note any hardware bags and contents. Include a condition note for each piece, such as "no cracks" or "minor scuff." Slip one copy inside before sealing. Tape a second copy to the outside in a clear pouch. The painter can check the contents against your list.
The itemized list helps the recipient match the package to the agreed job. Include your order or inquiry reference and a way to contact you about discrepancies. Describe visible condition without presenting a photograph as proof of hidden condition. Retain a copy so both parties can discuss the same named pieces.
Using Tracking Numbers and Retaining Receipts
Get a tracking number from your carrier when you ship. Write it down and keep it handy. This number lets you watch the box move toward the painter. You can spot delays early and handle them.
Keep the carrier booking confirmation, drop-off receipt and any tracking reference with the contents list and photos. For a delay or reported problem, check the carrier’s current process and contact the recipient. These records can help explain the shipment; they do not guarantee a particular review outcome.
Confirm your carrier's size and weight limits before you pay. An oversized box may cost extra or get refused. Check those numbers at the counter. This prevents surprises at drop-off.
Your records tie everything together. They show what you packed, how you packed it, and where it went. The painter receives your parts with clarity. You have records of the shipment and visible condition to support a clear discussion if questions arise.
Agree the shipment with the painter first, document the detached panels and select finish-compatible materials. Support the shells without loading tabs, separate the contents and confirm the box and carrier requirements. Keep the photos, packing list and tracking details. If you are instead exploring replacement bodywork, NiceFairings offers made-to-order painted ABS fairings; confirm availability, exact model, year, design and included pieces before production. Sending your own panels to any business, including NiceFairings, requires a separate prior arrangement.
FAQ
Should I ship the hardware with the fairings?
Send hardware only if the painter has requested it. Label each bag and secure it separately so metal cannot contact the shells. Agree which brackets, clips or fasteners are needed rather than assuming every painter wants them.
What if a panel already has a crack or a broken tab?
Note the damage on your packing list and photograph it before wrapping. Tell your painter ahead of time and confirm whether they will accept and assess the damaged part. Wrap the damaged area with extra foam. A crack can spread under pressure, so cushion it well.
Does the painter care how I pack the panels?
Often, yes. Some shops specify protective material that can safely contact the existing finish. Others want panels separated in a certain way. Ask about their preferences before you buy supplies. A quick message now saves rework later.
Do I really need photos of every panel?
Photos give you a record of each panel's condition before shipping. They also show how you wrapped and packed everything. If a question comes up later, you have clear evidence. Take a few extra shots of tabs and edges.
Can I reuse a box from a previous shipment?
Sometimes, but check its condition first. A crushed or water-stained box loses strength. Pick a sturdy box that fits your wrapped panels with room for cushioning. If you need replacement fairings for a future project, NiceFairings offers made-to-order ABS panels at NiceFairings custom fairings, and you can reach them at contact NiceFairings.