
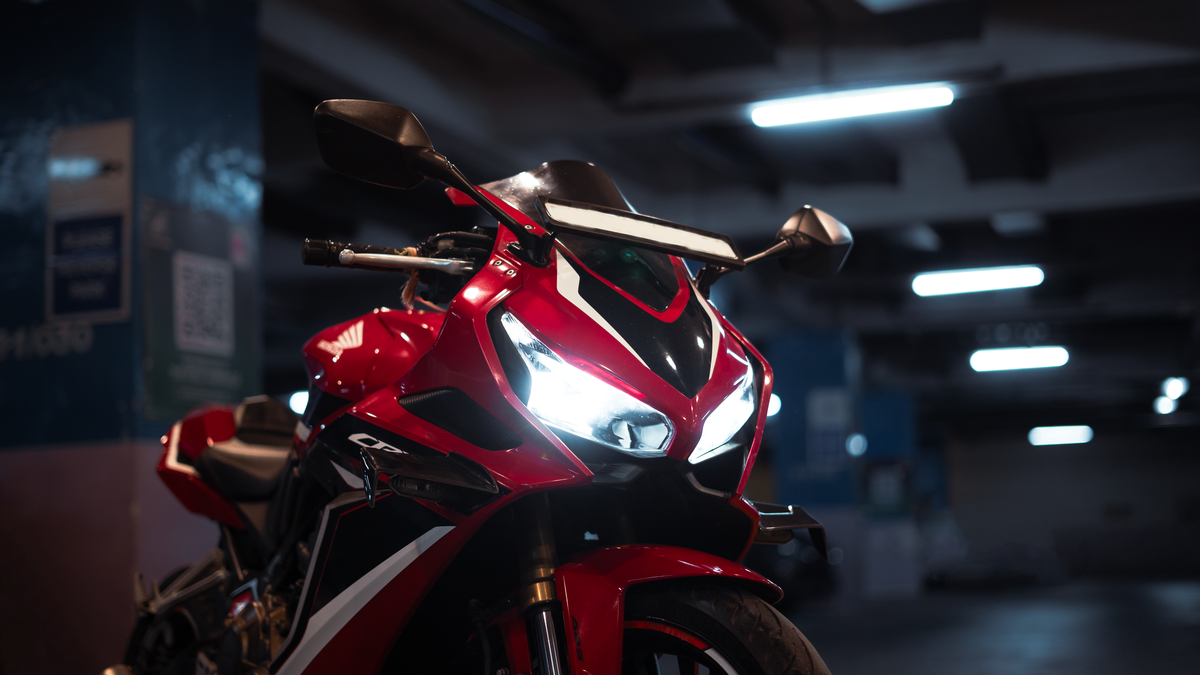
A gloss nose beside satin sides can look deliberate, or it can look like two unrelated orders. The difference often starts in the brief. Specify the finish panel by panel, identify the retained parts, and agree on where every transition ends before production. A photograph can introduce the mood, but a finish map and a shared reference give the painter something concrete to discuss.
Cover photo: Deepak KP via Pexels. The real garage photograph uses controlled light to show glossy red fairings beside darker low-reflection panels; it is a visual finish reference, not a coating specification or NiceFairings installation.
Finish Fundamentals for Mixed Designs
Color, Sheen, and Metallic Effect
Color, sheen and effect describe different decisions. Color names the intended hue. Sheen describes the character of the reflection, such as matte, satin or gloss. A metallic or pearl effect adds another aspect of appearance. Keep these fields separate in your brief. Matte black is not enough information to identify a particular coating system or reproduce a supplier's exact finish.
Avoid assigning universal gloss-unit bands to these marketing names. If an instrument reading is part of the specification, the method and agreed conditions matter. For most custom enquiries, a named supplier finish and an approved physical reference are more useful than an unsupported number. Ask how the chosen effect and clear finish will look together; do not assume every base color can use every proposed coating combination.
Visual Impact of Sheen
Gloss surfaces produce more distinct reflections, which can make curves and creases easy to read in a photograph. A lower-gloss finish scatters reflections differently. Neither is automatically more premium, and both still change with lighting and viewing angle. The design question is how they work together on your actual panel shapes.

NiceFairings production comparison: the lower pair is labeled matte and gloss. Compare reflection character, not exact color or a standardized gloss value.
Planning Matte Gloss Fairings Layout
Choosing a Dominant Finish
Choose a dominant finish as a starting design exercise, then use a contrasting zone deliberately. This is an editorial suggestion, not a rule that equal proportions are wrong. The useful test is whether each change has a reason: emphasizing the nose, visually separating a lower section, or relating a new panel to retained trim. If every small piece has a different treatment, the important shapes can become difficult to read.
Try two versions of the same layout before changing the colors. In one version, keep most painted panels gloss and use a restrained low-gloss accent. In the other, make the main body lower-gloss and use a smaller reflective area. Compare them against photographs of the actual retained tank. The better version is the one that meets your intended appearance, not the one described as more current or fashionable.
Practical expectations matter as well. Do not select matte on the assumption it will be easier to touch up or polish. Ask how the selected coating should be cared for and what a future local repair might involve. A design that requires a pristine, precisely matched low-gloss area should be discussed with the painter before you assume a small mark can be blended away.
Mapping Zones and Transitions
Two common approaches are whole-panel boundaries and separately masked zones within one panel. Whole-panel changes use an existing gap as the finish boundary. Within-panel changes allow more intricate graphics, but require a clear masking plan and an agreed finish process. Neither method guarantees easier repair. Ask the painter what reproducing or replacing that particular design would involve.
Mark each transition on both a close view and a complete-bike view. A body crease or panel gap can be a useful reference, but it is not mandatory for every design. The important point is that the boundary is specified rather than left for someone else to interpret. Include what happens at adjoining edges, around graphics and where a zone meets a retained component.
Consider three hypothetical design briefs. First, a white and red gloss layout with satin lower sections. The gloss dominates the upper fairings and tank. Satin covers the belly pan and lower side panels. Second, gray satin sides with a gloss black nose. The satin creates a calm middle zone. The gloss nose adds aggression. Third, a blue and white restrained layout. Gloss covers most surfaces. Matte accents appear only on small trim pieces.
The following hypothetical finish schedule illustrates the information to capture. It is a discussion template, not a product specification or an instruction to refinish the fuel tank. Identify actual panel names and confirm which pieces are included in your project.
| Part or zone | Proposed treatment | Boundary or reference |
|---|---|---|
| Upper fairing | Gloss in agreed main color | Entire painted outer face; graphic finish confirmed separately |
| Retained fuel tank | No refinishing in this order | Actual tank used as visual reference |
| Left and right side panels | Satin in agreed color | End at identified panel seams; compare as a pair |
| Lower panel group | Same satin reference | Confirm whether the physical group contains several pieces |
| Front fender | Gloss, coordinated with nose | Separate component, with no crossing graphic |
| Existing dark trim | Retain unchanged | Do not assume its material texture equals the new satin finish |
Check the Brief from Three Viewing Positions
For the front view, identify what frames the headlight area and screen. If the nose is gloss and adjoining pieces are satin, mark the actual component boundaries on your photograph. A small low-gloss insert can appear much larger in a close-up than it does on the complete motorcycle. Review both distances before deciding that the contrast is strong enough.
For the side view, compare the tank, main side panel and lower group together. These are not always one continuous painted surface. A retained tank can separate two new finishes, while a graphic can connect parts that are physically separate. Make the decision with the complete arrangement visible. State whether the graphic should continue visually across the gap or end within its own panel.
For the rear three-quarter view, look at the tail and any retained seat cowl or trim. A finish schedule that only covers the nose and sides leaves this area open to interpretation. If the tail stays unchanged, say so. If it repeats a front accent, identify the finish reference rather than asking for something similar. These checks turn a mood image into a panel-specific discussion.
Resolve Ambiguous Approval Comments
Comments such as make it less shiny or keep the black subtle are useful reactions, but they are not final specifications. Translate them into a named zone and a revised reference. For example, change both side panels to the approved satin sample while keeping the nose gloss is clearer than reduce the gloss everywhere. Keep the previous version so the supplier can see exactly what changed.
When feedback concerns only a photograph, first establish whether the apparent difference comes from lighting. Asking for a paint change to correct one bright reflection can send the project in the wrong direction. Compare the same zone in another view and ask the supplier to identify the actual finish. Approve a change only after the intended physical result is clear.
Turn the Finish Map into a Workable Brief
Confirm the Process with the Painter
PPG's low-gloss refinishing guidance explains that application conditions and technique influence final gloss, and recommends test panels. That supports a practical request: ask the painter how they will compare the proposed finish before committing to the bodywork. It does not supply a universal recipe for every motorcycle plastic or paint system.
Leave sanding grades, primers, application intervals and cure requirements to the selected product system and the professional. A matte design brief is not a painting specification. Tell the shop whether the panels are new, previously painted or repaired, and allow it to assess the preparation. More detailed styling instructions should never be used to bypass a material or coating compatibility question.
The same PPG guidance warns that polishing raises the gloss of a low-gloss surface. If a matte zone is accidentally polished or develops an unwanted shiny patch, ask the refinisher to assess it. Do not try to restore the original appearance by applying an improvised abrasive or another unapproved product.
For a finish split within one panel, clarify the treatment of the graphic itself. A gloss decal on a matte field may be an intentional accent, or it may conflict with the intended result. Ask whether the artwork, surrounding zone and final clear finish are meant to read alike. The answer should appear in the approved brief, not only in a reference photograph.
Also confirm how the boundary will be represented in the approval material. A broad side photograph may show the layout but hide a narrow change in sheen. Ask for a closer view that identifies the transition, while recognizing that photographs alone cannot reproduce every reflection. If the effect is critical, discuss whether a physical sample is available and what it adds to the order.
Map retained parts explicitly. A glossy tank may remain the strongest reflection in the design even if the new sides are satin. A windscreen or textured black trim should not automatically be treated as a paint target. Record these as unchanged. The intended transition is between new bodywork and existing parts, not a promise that every dark surface on the motorcycle will share one sheen.

NiceFairings production reference showing a painted side panel with a visible orange-to-red transition. Use it to discuss zone boundaries and finish planning; it does not establish a model-specific fitment or a universal coating recipe.
Shared-View Sample Review
Where the supplier can provide representative test pieces, review the proposed finishes together before full application. Ask about availability, cost and timing rather than assuming samples are included. Use the same viewing conditions for both pieces and compare them with the retained parts that matter most. Record which sample was approved and whether it represents the intended effect, color, or both.
Check the reference in more than one ordinary lighting situation, such as open shade and your usual garage light. Change your viewing angle instead of relying on one flattering photograph. If review must be remote, request identified images under consistent lighting and acknowledge the remaining limits of a screen. Avoid approving one sheen from a studio image and the adjoining sheen from an unrelated outdoor photograph.
Future Replacement and Care Across Borders
Planning for Replacement Panels
If a panel needs replacement later, the finish map provides a starting reference. Save its color, finish name, graphics version and any available product details. Identify whether the replacement is meant to match aged surrounding panels or the original sample. Those can become different targets. Ask the painter what comparison and scope are realistic before assuming a single piece will disappear into the existing finish.
Keep any approved physical sample with its label and handling instructions. It can help future comparison, but it does not remove uncertainty: materials, application and the motorcycle's finish can change. Update the record when a panel is refinished. Otherwise, a future order might faithfully reproduce an old specification that no longer describes the bike.
Caring for Mixed Finishes
Ask for care guidance covering both finishes and any decals or film that are actually present. A cleaner described as pH-balanced or film-safe is not automatically approved for every painted surface. Use products and methods confirmed for the selected system. Keep polishing work on gloss areas from crossing into low-gloss zones, and explain the mixed finish to anyone detailing the motorcycle.
Keep these potential sources of unwanted sheen away from low-gloss zones unless the coating supplier explicitly approves them:
Waxes, glazes, and shine enhancers
Quick detail sprays advertising "high gloss" or "wet look"
Polishing compounds and abrasive pads
Solvents or aggressive cleaners not approved for the actual coating
The boundary deserves particular attention during detailing because a towel or applicator can cross it easily. Tell the detailer which zones are lower-gloss before work begins. If contamination or a mark does not respond to the approved care method, ask for advice rather than escalating to an abrasive. This short care record belongs with the finish map so the styling decision remains understandable after the order is complete.
Send the finish map and retained-part photographs through the NiceFairings custom design enquiry. Ask the team to confirm what is feasible and which reference controls the finish. The contact page is the place to resolve remaining product questions before production. Check the FAQ for general ordering information, while keeping your specific design agreement in writing.
FAQ
Where should the transition between matte and gloss stop?
Stop transitions at natural body lines, panel gaps, or edges. A line that cuts across a flat surface looks accidental. A line that follows a crease or seam looks intentional. Whole-panel boundaries are easier to replace later than masked lines inside a single panel.
Can I polish a matte panel to make it shine?
Do not polish a matte zone if you want to retain its existing sheen. Polishing can raise the gloss. Ask the coating supplier or refinisher how to address a defect, rather than treating polishing as a reversible experiment.
How do I match a replacement panel to my existing finish?
Supply the finish map, approved reference and current photographs of adjoining panels. Ask whether the target is the original sample or the bike as it appears now. Those records help comparison but do not guarantee an exact match.
When should I review samples with my painter?
Review samples before any full application begins. Ask your painter or kit supplier to create small test pieces for each sheen in your schedule. View them together under the same lighting where you ride or display the bike. Compare them against retained parts like your tank and trim.


