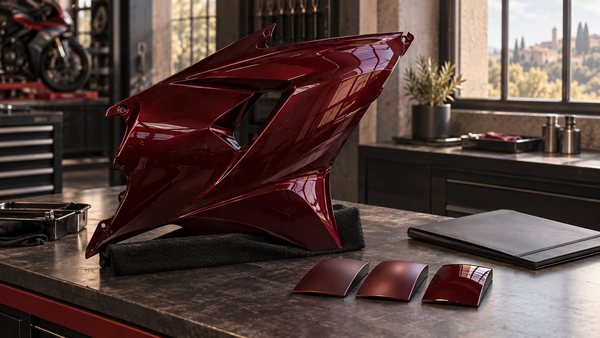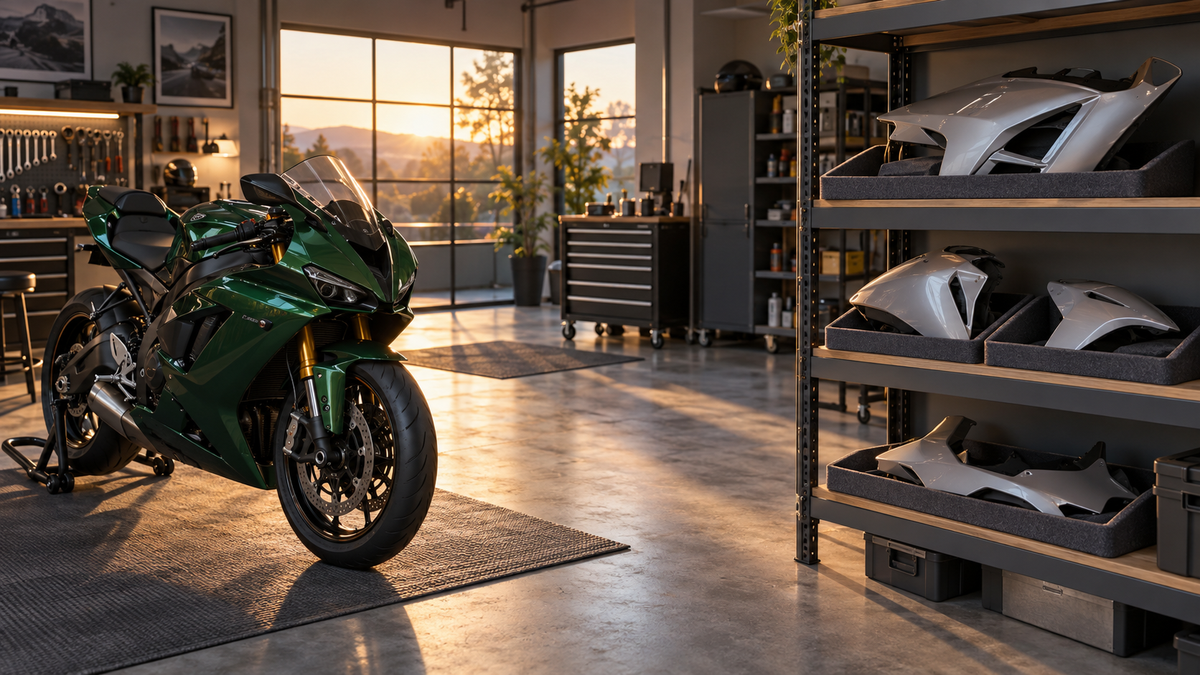
You finished your fairing swap. The new bodywork is on the bike, and the removed panels need a home. Start with four practical habits: document each piece, follow its finish-specific care instructions, support it individually, and choose a suitable indoor location. This guide concerns already-removed, intact motorcycle panels, not removal, structural repair or a certification of future fitment. Keeping the original set organized leaves options open for a later style change or resale without turning your garage into a pile of unidentified bodywork.
Document Panels Before Storage
Before you put your fairings away, record their identity and visible condition. When you want to sell them or put them back on, you will have a starting point instead of relying on memory. The record should distinguish what you know from what still needs verification. Make the labels, photographs and storage locations agree with each other.
Identify Bike and Panel Position
Record Make, Model, Year, and Market
Write down the exact make, model, model year and market of the motorcycle from which the panels were removed. Record the supplier and order details when available, especially if the parts were already replacements. Do not assume that matching graphics establish fitment, or that every market has different panels. Exact application information matters more than a broad model-family name.
Note Left, Right, Front, or Rear Position
Label each panel by its position, such as left upper, right lower or front fender. Use the motorcycle's riding orientation consistently and add a photograph when a name could be ambiguous. Attach labels to the packaging or storage compartment, not to the painted surface. Keep the position description consistent with your inventory and hardware containers.
Photograph Both Sides and Condition
Shoot the Finished Side in Even Light
Take clear photographs before wrapping anything. Use even light and a stable, padded support appropriate to the panel rather than placing its finish directly on a hard bench. Capture the whole finished side and closer views of existing marks. Several viewing angles can show a reflection that hides detail in a single photograph. Images record what was visible; they do not reveal every underlying issue.
Shoot the Inside Surface and Mounting Tabs
Photograph the inside surface and accessible attachment features without pulling or bending them. Record any readable part markings, but verify their meaning rather than treating a mold code as proof of origin or compatibility. Include existing concerns in your notes. Later differences can prompt investigation, although photographs alone cannot establish exactly when or why damage occurred.
Bag and Label Small Hardware
Match Bolts, Grommets, and Clips to Their Panel
Loose bolts, grommets, clips and washers are easy to misplace or mix with parts from another project. Their replacement cost and availability depend on the exact application, so avoid treating a generic kit as an automatic substitute. Use the fairing fastener review checklist to organize questions about reuse and replacement, then confirm the correct parts for each location.
Bag hardware that is already loose and label each bag with its recorded panel or mounting location. Write the actual contents rather than a remembered count. Keep bags in a separate compartment so they cannot rub against the finish or press into the panel. Do not tape a hardware bag to painted bodywork. Unidentified pieces belong in a clearly marked group until their location is confirmed.
Leave Captive or Bonded Fittings Untouched
Leave bonded inserts and captive fittings undisturbed. Do not pull out a component merely to make the storage photograph look tidy. Some fittings are removable service items and others are intended to remain attached; their appearance alone is not a reliable instruction. If the correct treatment is uncertain, consult the applicable parts or service information before doing anything to them.
Finish the recording step by checking that each panel, photograph and hardware label has the same identifier. Keep receipts and any original fitting information with the inventory. This preparation can reduce confusion later, but a complete bag is not proof that every fastener is still suitable for reuse. Condition and application still need checking before reinstallation.

Clean and Pack by Finish Type
Panels may have different finishes: factory paint, a refinish, a wrap or another surface treatment. Choose cleaning and packing methods for the actual finish rather than applying one routine to the entire set. Keep the supplier's care information with the inventory so a later owner or installer has the same guidance available.
Remove Dirt Without Scratching
Use a Cleaner Approved for the Specific Finish
Start with the coating rather than a universal cleaning recipe. A panel may have factory paint, a refinish, a wrap or another surface treatment, and the approved care can differ. Ask the finish supplier or refinisher which cleaner, cloth and method apply to your actual surface. Avoid experimenting with solvents, abrasive tools or a product chosen only because it worked on a different motorcycle.
Follow Finish-Specific Cleaning and Drying Instructions
Follow the specified cleaning and drying sequence for that finish, including whether rinsing is appropriate. Do not assume that rubbing, blotting or compressed air is suitable for every coating and assembly. Keep grit away from contact materials and allow the panel to reach the condition required before packing. If instructions are missing, obtain them before choosing a method rather than relying on a universal drying rule.
Ask the Finish Maker First
Request Compatible Cleaning and Drying Guidance
Contact the company that made or applied your finish. Ask for their approved cleaning and drying method. They know which chemicals will dull the coat or lift the paint. Follow their instructions exactly. This protects your investment whether you plan to keep the panels or sell them later.
Request Compatible Curing and Packing Guidance
Fresh paint needs time before you wrap it. Ask the finish maker when the coating is ready for packing. They will tell you which materials are safe to use against the surface. Do not guess at curing times or temperatures. The finish maker sets those limits.
Choose Finish-Compatible Packing Materials
Confirm the First Contact Layer
Choose the first contact layer only after confirming both finish readiness and material compatibility. A material described as soft, breathable or microfiber is not automatically appropriate: its condition, surface texture and compatibility still matter. Ask about the proposed storage duration as well as the coating. Use clean materials and replace anything contaminated instead of trapping grit against the panel.
Avoid Tight Cling Film and Bubble Wrap on Fresh Paint
Do not place cling film or bubble wrap directly against a finish unless the finish supplier approves that material and packing stage. Avoid tight wrapping that presses against the coating or loads delicate features. Breathability alone does not establish suitability, and a sealed container is not automatically wrong. The complete packing system must suit the surface, support arrangement and actual storage conditions.
Matte finishes illustrate why specific instructions matter. PPG's matte finish care guide cautions against polishing and waxing its matte finish system. Use that as an example of finish-specific guidance, not a cleaning recipe for every motorcycle panel. For another coating or wrap, obtain the corresponding manufacturer's instructions and keep them with your inventory.
Support Panels Individually for Motorcycle Fairing Storage
Give each panel a stable, individual place instead of leaning a loose set together. The support should suit its geometry and keep concentrated loads away from delicate tabs, lips and edges. There is no single orientation or packing material that is correct for every shape. Plan the support before putting the panel into storage, especially when a curved piece cannot rest securely on a simple shelf.
Choose Support for the Actual Panel Shape
Look at the panel's shape and the areas where the proposed support would make contact. Do not assume the painted face is always its strongest bearing surface or that a broad contact area makes any load acceptable. Ask the supplier about suitable support when uncertain. The aim is to avoid bending, localized pressure and contact between neighboring pieces, not to perform a strength test.
Use Suitable Supports for Curved Sections
A shaped, padded support can be useful when it accommodates the panel without forcing it into position. Confirm that all contact materials are compatible with the finish and suitable for the storage period. Foam types vary; their name alone does not establish coating compatibility. Use an appropriate existing support or seek packing advice instead of cutting a cradle from an unverified material and assuming it will work.
Keep Pressure Off Tabs and Thin Edges
Position the panel so its delicate features are clear of avoidable concentrated loads and neighboring objects. Observe whether it sits securely while handling it carefully; do not push on the face or flex tabs to test the arrangement. If it cannot be supported without rocking or pressure on a vulnerable area, change the support or choose a more suitable container. Stability is useful, but it is not a certification of safety.

Use Padded Bins With Individual Slots
Choose a container for its size, stability, cleanliness and internal arrangement, not just whether it is cardboard or plastic. A well-designed packing system may use different outer materials. Provide an independently supported place for each panel, with compatible padding where needed. A lid should close without pressing on bodywork, and hardware or tools should have separate storage rather than sharing the panel's space.
Avoid Stacking and Rubbing Between Panels
Avoid stacking panels directly against each other. Separation reduces opportunities for rubbing and concentrated loads, particularly when a container is handled. It does not remove every risk, so still check the support and available clearance. Keep hard objects and loose fasteners away from finished surfaces, and do not use one panel as the support for another.
Pad Between Panels If They Share a Bin
If panels share a container, each needs sufficient room and independent support with a suitable divider preventing contact. Do not squeeze another piece into an already crowded bin. Check the arrangement visually as you place the pieces, without tilting the loaded container or pressing the panels to test a gap. Choose a larger container or a different storage location if adequate separation is not possible.
Skip Hanging and Edge-Standing
Hanging a panel from a mounting feature or balancing it on a narrow edge can concentrate its weight in an unsuitable place. Avoid these improvised arrangements. This is a precaution about support, not a prediction that every panel will distort in a particular number of months. The suitable storage position depends on the actual shape, material, finish and support system.
Avoid Suspending Panels From Attachment Features
Do not suspend bodywork from tabs, mounting holes or a convenient nail without application-specific guidance for a suitable storage fixture. Those features are not a universal hanging system. An appropriately supported shelf or container is generally easier to organize without loading a single attachment point. If you want a wall display, obtain a fixture designed for the particular part rather than improvising around its holes.
Keep Thin Edges Free of Concentrated Loads
Avoid leaving a panel balanced on a thin edge where a bump or shift could concentrate load or topple it. Choose support that accommodates the actual contour and keeps the piece secure without pressure against adjacent objects. Do not predict cracking from a photograph or use a visible edge as a convenient bearing point simply because the panel appears to stand upright.
Review the arrangement visually before closing the container. Confirm that no lid, divider or stored object bears against the panel unexpectedly and that the label remains readable. Do not press or bend the bodywork as a test. Keep a photograph of the packing arrangement if helpful, so the next person opening the bin understands where the panel and its separate hardware belong.
Choose a Stable Indoor Storage Spot
Choose a clean indoor location with suitable, reasonably stable conditions for the finish and packaging. A cover does not make an exposed outdoor space equivalent to appropriate indoor storage. Consider sunlight, nearby heat, leaks, access and the chance of someone moving other items against the panels. The room's actual conditions matter more than what the room is called.
Pick a Clean, Dry, Stable Room
Prefer an Interior Closet or Spare Room
An interior closet or spare room may offer a practical location if it is dry, clean and has a suitable shelf or container space. A basement, garage or climate-controlled room is not automatically suitable simply because of its label. Look for signs of dampness, previous leaks and temperature exposure. Avoid locations beneath a known leak or where safe access requires moving heavy objects over the panels.
If using a garage, assess the actual storage area rather than choosing a corner by appearance alone. A stable raised shelf can keep the container off the floor and away from incidental contact, but it does not solve a damp room. If moisture problems are present, address their cause or relocate the panels before relying on more wrapping or an extra pallet.
Keep Panels Away From Sun, Heaters, Traffic, and Leaks
Keep the storage area clear of direct sun, heaters, likely leaks and busy traffic routes. These are avoidable exposures, not a universal timetable for finish failure. Think about how the space is used: a tidy corner beside frequently moved tools may still be a poor choice. Leave room to retrieve the container without scraping it against surrounding objects or lifting it over the motorcycle.
Use a stable shelf or cabinet suitable for the container's size and weight, at an accessible height. Do not automatically choose the highest shelf; safe handling matters too. Label the outside so nobody has to unpack several bins to find one piece. Keep heavy equipment elsewhere and make it clear that the fairing container is not a platform for additional storage.

Track Moisture Without Guessing Numbers
Use a Hygrometer to Watch Relative Humidity
A hygrometer can help you observe relative humidity near the storage location, but a reading does not certify that a coating is ready to pack or that the whole system is appropriate. Follow any conditions specified by the finish or packing supplier. Do not invent a universal humidity target for every kind of bodywork, and investigate visible dampness even if one instrument reading seems reassuring.
Record meaningful changes alongside your condition checks. Compare readings taken in the same location and note events such as a leak, extended heat or a change in building use. If conditions no longer suit the storage instructions, review the location or seek appropriate advice. An instrument is a source of information, not a substitute for responding to an actual moisture problem.
Investigate Moisture Sources and Review the Location
Find the source of unwanted moisture instead of treating every problem with an open window or a fan. Outdoor air can be more humid, and air movement alone does not establish appropriate storage conditions. Relocate the panels when necessary while a building or moisture problem is addressed. Seek suitable professional advice for persistent dampness rather than experimenting around valuable finished parts.
Desiccants and sealed containers are not universally good or bad. Their suitability depends on the complete packaging arrangement and its maintenance requirements. Use them only with appropriate guidance, and keep packets from direct contact with the finish. Do not assume adding a small packet makes a wet container suitable or that the packet eliminates the need to check the location and packaging.
Inspect Periodically on Your Own Schedule
Look for Dust, Moisture, and Pest Activity
Choose a check schedule based on actual conditions, the storage period and any supplier guidance. Record the last inspection and the next planned check in your inventory. There is no universal monthly or seasonal interval that guarantees protection. Plan an extra check after an event that could affect the area, such as a leak or significant change in room conditions.
Open the container carefully and visually check for dust, dampness, pests and disturbed packing. Avoid touching unknown contamination or rubbing the finish to investigate a mark. If you see a problem, document it and determine the appropriate response before repacking. Do not assume a quick wipe resolves the cause. Ask for suitable help when contamination, finish damage or the storage environment needs assessment.
Recheck Panels After Relevant Condition Changes
Recheck after meaningful changes in your local conditions rather than assuming the same seasons matter everywhere. Heavy rain, a heat event or changes to heating and ventilation can justify a closer look. Review the shelf, container and packaging as well as the room. Move the panels to a suitable alternative if necessary instead of leaving them in a location that no longer meets the intended conditions.
A useful inspection leaves a dated record of what you actually observed and any action taken. It cannot guarantee that repair will never be needed. Keep unresolved concerns visible in the inventory so they are not forgotten when the panels are eventually unpacked for reuse or sale. This connects the storage routine with the later condition review.
Keep Inventory, Photos, and Hardware Records
Build a Panel Inventory Table
Panel Name, Part Number, Finish Type, Condition Notes, Storage Location
A written record saves you from guessing later. Create a simple table with one row for each panel. Use the columns listed here to write down every detail. Print the table and put it in a clear sleeve inside the storage bin. This way the information stays with the panels.
Start with the panel name. Write "left upper" or "front fender" so you know which part each row is for. Add the part number if you have it. This number helps when you sell the panel or find a correct replacement. Note the finish type — factory paint, custom color, matte wrap, or fresh clear coat. Write condition notes that describe any existing scratches, chips, or cracks. Record the storage location so you can find the panel quickly without unpacking every bin.
Hardware Bag Label, Photo File Name, Date Stored, Last Inspected
Add columns for your hardware and photos. Write the label from each hardware bag, include the actual photo filenames, and record the date stored and the most recent condition check. Use the same identifiers in the digital folder and printed inventory so they refer to the same physical pieces.
Keep identification, condition and location together so you can find a panel without searching every box. A digital inventory can link to the relevant photo folder; a printed copy can stay with the container. Use actual filenames and dates, and update the information when a panel moves. Neither version needs to be elaborate to remain useful.
Use these fields to build your own inventory. The descriptions below are prompts, not sample part numbers or a claim about the contents of any particular motorcycle's panel set:
| Inventory Field | What to Record | Check Before Reuse or Sale |
|---|---|---|
| Panel identity | Position, known application and verified markings | Confirm the exact part; mark unknown details clearly |
| Finish and condition | Actual coating, visible marks and known prior work | Compare current observations without assuming a cause |
| Storage location | Room, shelf and container identifier | Update whenever the panel moves |
| Hardware record | Separate bag label and actual loose contents | Verify correct application and condition, not just quantity |
| Photos and dates | Image folder, date stored and last inspection | Keep originals and add current views and open questions |
Store Photos With the Inventory File
Shoot Each Panel Before Wrapping
Photograph each panel before wrapping and preserve the original image files with the inspection date. Photos help compare visible condition later, but they are not a complete history or proof of exactly when damage occurred. Lighting and viewing angle can hide a mark. Record uncertainty honestly rather than concluding that every newly noticed defect must have developed during storage.
Photograph Hardware Bags Next to Their Panels
Include the hardware bag in the same photo as its panel. This connects the bolts and clips to the correct surface. A single image shows both the panel and its hardware together. That photo becomes part of your record.
Keep available receipts and records of refinishing or repair alongside the photographs. They help explain which parts and work the documents refer to, but they do not establish current condition by themselves. Avoid treating documentation as a guarantee of value, compatibility or the outcome of any future dispute. Its practical purpose here is to keep the history you actually know organized.
When a buyer asks about the panels, share relevant condition photographs and explain any known work or gaps in the history. Keep personal details out of shared copies. If a piece later needs refinishing, the custom fairing design brief guide can help organize a new appearance request; it does not replace inspection of the existing panel.

Update Records After Later Modifications
Note Refinish Work, Repairs, or Replacement Panels
Your stored panels may change over time. You might repaint one panel to match a new color scheme. You might repair a crack that appeared during handling. You might buy a replacement panel to complete the set. Every change needs a new entry in the table. Update the condition notes and the date of modification. This keeps the record accurate for future use.
Keep the Inventory With the Bike's Paperwork
Store the inventory sheet in the same folder as your bike's registration, insurance policy, and maintenance records. When you need to reference it, you find everything together in one place. This habit protects your investment and makes future decisions easier. A well-maintained inventory gives you confidence whether you plan a future motorcycle fairing replacement or decide to sell the panels to another rider.
Recheck Panels Before Reuse or Sale
Before reinstalling or offering the panels for sale, review every piece against the inventory. Storage records are a useful starting point, not a current condition certificate. Separate a visual condition check from the fitment and attachment assessment needed for use. If you are considering replacements, first identify the exact application and scope using the fairing kit selection guide.
Unwrap and Inspect in Good Light
Look for Warping, Cracks, or Finish Lifting
Unpack carefully onto a suitable stable support in good light. Look for visible changes in shape, cracks or lifting finish without rubbing, pressing or bending the panel. Compare several views with the earlier photographs and record any concerns. A newly noticed mark may have been missed previously; do not assign its timing or cause from that comparison alone. Have uncertainty assessed before deciding on reuse.
Check Tabs, Grommets, and Mounting Points
Visually examine accessible tabs, grommets and mounting points for obvious changes or missing-looking pieces. Do not pull captive fittings or test a tab by flexing it. Compare observations with the appropriate parts information and ask a qualified professional about damage or insecure attachments. A tidy appearance alone does not establish that the panel and all its attachments are suitable for riding.
Verify the Current Motorcycle Configuration
Compare Against the Current Bodywork Setup
The motorcycle's configuration may have changed while the panels were stored. Compare the recorded application with the current bodywork, supports and relevant modifications before arranging reinstallation. Do not force a panel into place or assume that past fitment guarantees present compatibility. Ask an appropriate supplier or qualified installer to resolve discrepancies using the exact parts and vehicle information.
Confirm Hardware Still Matches the Panel
Match the labeled hardware to the correct application information, not merely to the color or apparent size of a mounting hole. The stored bag may contain worn, incomplete or previously substituted pieces. Resolve unidentified components and obtain an appropriate condition check before reuse. A bag labeled with the right panel name is an organizational aid, not an approval to fit everything inside it.
Prepare Panels for a Buyer or Reinstall
Clean If Needed Using the Finish Maker's Guidance
If cleaning is needed, use the method approved for the actual finish and its present condition. Do not automatically repeat a wash when the surface has developed a concern that needs assessment first. Keep the current care instructions with the panel, especially if it has been refinished since the first storage entry. The painted fairing care guide provides additional questions to consider alongside those specific instructions.
Disclose Prior Repairs and Storage History
Tell a buyer about known repairs, refinishing and significant storage events, and provide relevant records without presenting them as a guarantee. Before reuse, resolve condition and application questions with an appropriate professional. If you need help identifying a NiceFairings replacement, contact NiceFairings with the model details and panel photographs rather than selecting a part from color alone.
Write down each panel, clean and dry it the way the finish maker tells you, support it so no tabs or edges carry weight, and keep it indoors in a clean, dry, steady spot. These four habits are what smart motorcycle fairing storage means.
Keep the inventory, photographs and separate hardware labels up to date. Record where the panels are stored and what remains uncertain. This makes the next decision more specific: you can identify the part and its known history instead of reconstructing the entire project from memory.
Look at your stored panels on a regular schedule. Check them again before fairing installation or a sale.
Treat stored fairings like parts you plan to use again, not junk. A little care now protects your investment later and keeps your choices open.
FAQ
Can I store my fairings in a garage?
A garage may be suitable if its actual conditions meet the needs of the finish and packing system. Keep the container away from sun, heat, leaks and traffic, using stable support off the floor where appropriate. Raising a bin does not fix a damp building. Address moisture problems or choose another location.
Should I wrap panels in bubble wrap?
Only use a contact material approved for that finish and packing stage. Fresh paint can need particular preparation and waiting conditions, so do not infer readiness from appearance. Neither bubble wrap nor a breathable cloth is automatically suitable for every panel. Ask the finish supplier about the complete packing arrangement and intended storage period.
How often should I inspect stored panels?
Set a schedule that reflects the storage conditions and any applicable supplier guidance, and record each check. Add a check after relevant events such as a leak or major environmental change. There is no single interval that guarantees protection for every coating, container and location.
Can I hang fairings on a wall?
Avoid improvised hanging from tabs or mounting holes. If you want a wall display or hanging system, obtain a fixture suitable for the particular part and finish. Otherwise choose stable, individually supported storage that does not concentrate load on delicate features. Do not use the panel itself to test an uncertain fixture.
Do I need to remove bolts and clips before storage?
Leave bonded or captive fittings in place. Pulling them off can damage the panel. Bag loose bolts, grommets, and clips separately. Label each bag with its panel name.
What if I find new damage after storage?
Record what you see and compare it with the earlier notes and photographs without assuming when or why it occurred. Have concerns assessed before reuse or a repair decision, and disclose known issues if selling. A photograph alone cannot establish repairability or whether the panel is suitable for riding.