
Your custom-painted ABS sportbike fairings are a big investment. They face constant dangers: road grit scratches, stone chips, harsh UV rays, and chemical stains from fuel or bugs. This guide gives you a simple, step-by-step plan to protect painted fairings well.
You will learn how to prepare properly, pick the right protection—wax, sealant, ceramic coating, or paint protection film—and apply it correctly. A regular care routine keeps your finish shiny. A compatible coating can add a sacrificial layer against contamination and UV exposure, but it cannot stop all fading, chips, or scratches.
This advice works for US and European riders dealing with different weather and road conditions. Remember, paint systems differ. Always follow your manufacturer's instructions for your specific clear coat.
Key Takeaways
Make your fairings properly ready before applying protection.
Pick the right shield: wax, sealant, ceramic coating, or PPF.
Apply the protection carefully in a shaded, cool place.
Take care of your fairings by washing them regularly and reapplying protection.
No product makes paint scratch-proof; handle with care.
Preparing to Protect Painted Fairings
Getting the surface ready is the key first step for any protection product. You should never seal dirt or old grime under a fresh layer of wax or coating. Doing that traps debris against your clear coat and leads to tiny scratches over time. Before you apply anything, your fairings must be clean, dry, and free of surface contamination.
Safe Washing and Pre-Rinse Steps
Start with a cool surface. Hot plastic softens, and warm paint is more likely to get swirl marks. Park your bike in the shade and let it cool down fully before you start.
Begin with a gentle pre-rinse. Use a hose with low pressure to flood the surface. This removes loose dust and grit before you touch the paint. Stay away from pressure washers near panel edges, decals, or seams. High-pressure water can push under the clear coat and cause peeling.
Use a pH-neutral motorcycle or automotive shampoo. Mix it with cool water in a bucket, following the label instructions. Do not use dish soap. Dish soap strips existing wax or sealant and can dry out plastic fairings.
Wash one panel at a time using the two-bucket method. One bucket holds your soapy water. The other holds clean water for rinsing your mitt. This simple system keeps grit from getting back onto the paint. Use a clean microfiber wash mitt. Work from the top of the fairing downward. Rinse your mitt in the clean bucket after every pass.
Dry the fairings with a clean, soft microfiber towel. Pat the surface instead of rubbing. Rubbing can drag leftover particles across the paint. If you see water spots, use a spray detailer to lift them gently.
Fresh paint needs adequate cure time before it is sealed. The correct interval depends on the paint and clear-coat system, application conditions, and the painter's instructions; do not rely on one universal number.
Always follow your painter's curing instructions. Your clear coat may need more or less time depending on the product used.
Bug, Road Film, and Contaminant Removal
Bugs and road film need special attention. These contaminants bond to your clear coat and get harder to remove each day. Fresh splatter comes off easily. Dried-on residue needs a dedicated product.
Soak the affected area with a bug remover. Let it sit for the time listed on the label. Do not scrub hard. The product does the work, not your elbow. After soaking, rinse thoroughly and wash the panel normally.
Product |
Best For |
Strength |
Clear Coat Safe |
|---|---|---|---|
Quan BugX |
Fresh splatter (under 24h) |
Mild |
Yes (pH-balanced, water-based) |
CarPro BugOut |
Stubborn protein bonds (1-2 days) |
Medium |
Yes (enzyme blend, non-harsh) |
CarPro TarX |
Tar mixed with bug residue |
Strong (solvent-based) |
Yes (safe on paint when used as directed) |
CarPro TriX |
Old, baked-on splatter with iron + tar |
Strongest (2-in-1) |
Yes (coating-safe) |
A gentle, pH-neutral, enzyme-based product is what the pros use because it gets the job done without compromising the finish. Enzyme products break down the proteins in bug residue without attacking your clear coat.
For tar and stubborn road film, use a dedicated tar remover. Apply it to a microfiber cloth first, then wipe the affected area. Never spray directly onto the fairing. This method gives you control and prevents the product from running into seams.
Iron fallout removers require caution. These products dissolve embedded metal particles but carry risks on motorcycles:
Risk of discoloration: Iron removers are intended for automotive paint, not motorcycle hardware. Bikes have different metal components susceptible to discoloration.
Risk of residue marks: These products discolor certain surfaces even if they do not dry. Motorcycles have many nooks and crannies, and any missed product will leave a mark.
Cautious approach: If you use one, do not let it dry on the surface in the sun. Sponge it on rather than spraying, and test in an inconspicuous spot first.
Many riders choose to skip iron removers entirely. A thorough wash followed by a clay bar treatment removes bonded contaminants safely without chemical risk. Clay bars lift particles from the surface without dissolving anything.
After any chemical treatment, rinse thoroughly and dry completely. Your fairings are now ready for the next stage: choosing the right protection method to protect painted fairings long-term.
Choosing Your Protection Method
Your prep work is done. Now you need to pick the right protection. There are four main choices: wax, sealant, ceramic coating, and paint protection film (PPF). Each has different levels of how long it lasts, how much it costs, and how hard it is to put on. Your riding habits and budget will help you decide.
Wax, Sealant, or Ceramic Coating
Wax can add gloss and a temporary sacrificial layer. Its service life varies with the product, weather, washing method, mileage, and storage, so follow the product instructions and reapply only as directed.
Paint sealants can last longer than some waxes, but durability and chemical resistance vary widely. Confirm that the product is compatible with the clear coat, decals, matte sections, and any existing coating before use.
Ceramic coatings create a strong bond with your paint. They last one to five years, depending on the product grade. Putting them on requires careful surface prep and a controlled space. You must apply them in thin, even layers. Having a pro install them costs more but lowers the risk of uneven spots. Ceramic coatings give great UV protection and make water bead up and roll off, carrying dirt with it. They also make future washing easier.
Do |
Don't |
|---|---|
Use pH-neutral soap |
Use dish soap |
Use clean microfiber tools |
Use abrasive pads or brushes |
Apply UV protectants |
Use pressure washers at panel edges |
Test products in hidden areas |
Use abrasive polishes |
Follow manufacturer instructions |
Mix different product brands |
Paint Protection Film (PPF) as a Physical Barrier
PPF works differently. Instead of a chemical bond, you put a clear urethane film over your paint. This film absorbs hits and scratches that would damage your clear coat. PPF gives the strongest defense against stone chips and road debris.
Self-healing PPF adds another benefit. The film has polymer chains that move again when heated. This feature gives several practical benefits:
Shallow scratches and swirl marks fix themselves in sunlight or warm water
Regular washing marks go away without a pro, lowering upkeep costs
Small scratches keep getting removed, so the film stays clear and fresh
Contact scratches from branches or door handles heal within hours
PPF works really well on high-contact areas like the front fairing, fenders, and tank sides. The film is nearly invisible when put on correctly. Deep scratches that go through the film cannot fix themselves, so you must replace damaged sections.
Having a pro install PPF costs more than any coating option. But for riders who want the most protection from physical damage, it is worth the money. You can also put PPF on weak spots and then add a ceramic coating over the whole bike. This layered approach gives you both chemical and physical protection.
Whichever method you pick, always test it in a hidden spot first. Paint systems, decals, and clear coats differ. Follow the manufacturer's instructions for your specific products. For custom fairing options that fit your protection plan, visit custom fairings. Learn about careful handling during delivery at production and shipping. These steps help you protect painted fairings well from day one.
Applying Protection Step by Step
View this custom-painted Yamaha YZF-R6 fairing kit
You have chosen your protection method. Now you need to apply it correctly. The steps differ for each product type. Always work in a shaded area. Never apply any product in direct sunlight or on a hot surface. Heat causes products to dry too fast. This leads to uneven coverage and difficult removal.
How to Apply Wax or Sealant
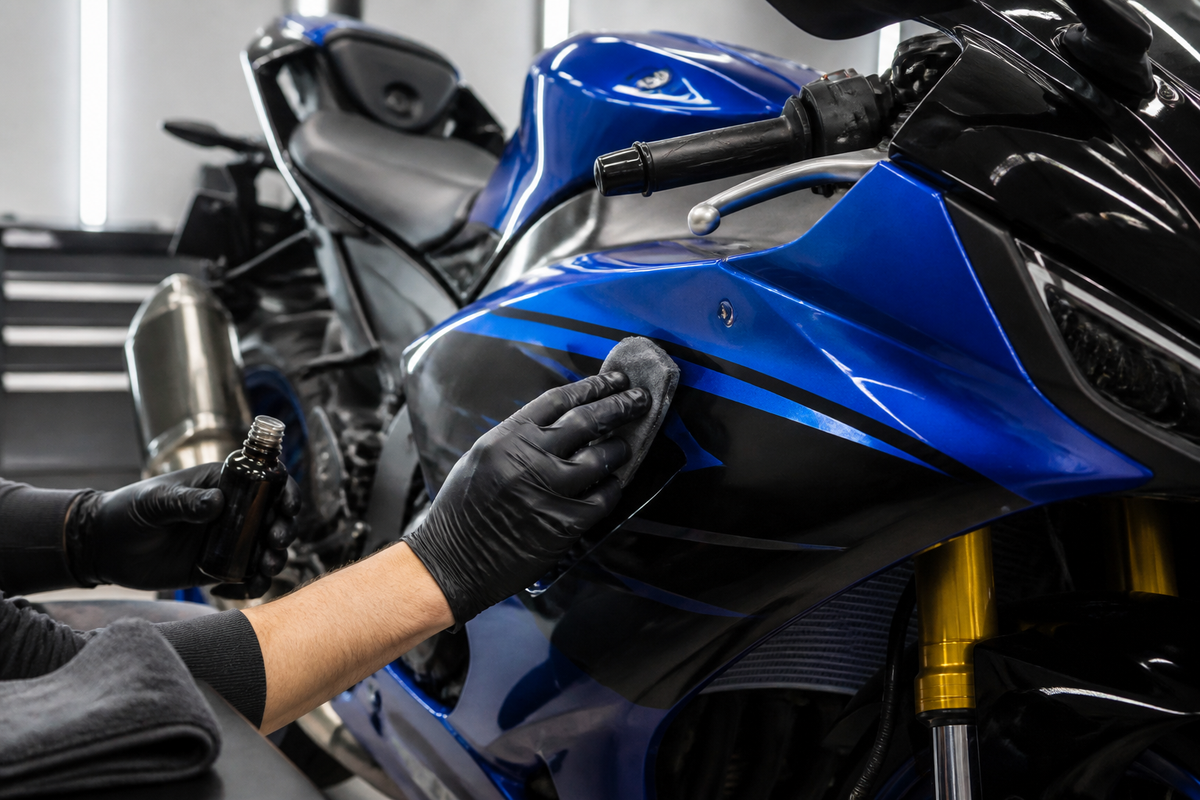
Start with a clean, dry, cool surface. Park your bike in the shade. Let it cool completely if you rode recently.
Apply a small amount of wax or sealant to a clean foam applicator pad. A pea-sized drop works for most panels. Too much product creates a thick layer that is hard to buff off.
Work one panel at a time. Spread the product in a thin, even layer using circular motions. Use light pressure.
Let the product haze over. Check the label for the exact time. Most waxes need 5 to 10 minutes. Sealants often need 10 to 20 minutes.
Buff off the residue with a clean, dry microfiber towel. Use a gentle back-and-forth motion. Flip the towel frequently to expose a fresh surface. A dirty towel can scratch your paint.
Inspect the panel under good light. Look for streaks or leftover residue. Wipe any missed spots with a fresh section of the towel.
Do not apply wax or sealant to rubber, plastic trim, or matte finishes. These products can stain non-painted surfaces. Tape off sensitive areas if needed.
No product makes paint scratch-proof. Wax and sealant provide a sacrificial layer. They take the brunt of minor abrasions. But they do not prevent damage from sharp objects or heavy contact. You still need careful handling every time you wash or touch the fairings.
How to Apply a Ceramic Coating
Ceramic coating requires more preparation and a controlled environment. You cannot rush this process. The coating bonds chemically with your clear coat. Any mistake shows as a permanent mark.
Start in a clean, dust-free space. The ideal humidity must be below 50 percent. High humidity causes the coating to cure too quickly. This leads to uneven bonding and visible streaks. Keep the area free of dust particles during the entire application and curing process.
Prepare the paint surface perfectly. Wash, clay bar, and polish the fairings. Remove all contaminants. The coating locks in whatever is underneath. You cannot fix imperfections after application.
Apply the coating to the applicator block. Use the recommended number of drops. Most products need 3 to 5 drops per panel.
Spread the coating in a crosshatch pattern. First pass left to right. Second pass top to bottom. This ensures full coverage.
Wait for the coating to flash. The surface will show a rainbow sheen. Then wipe off the excess with a clean microfiber towel. Use a second towel for a final buff.
Inspect the surface under proper lighting. Use a daylight-balanced light with a color temperature of 5000K to 6500K. This light reveals high spots and streaks. A handheld inspection light at a shallow 45-degree angle works best. Check every panel before the coating cures.
Let the coating cure according to the manufacturer instructions. Do not expose the bike to water or moisture during this time.
Ceramic coating is not a simple task. If you lack experience, hire a professional installer. The cost of redoing a bad application is higher than paying for installation. A professional has the controlled environment and proper tools.
No coating makes your paint scratch-proof. Ceramic coating adds hardness and chemical resistance. But it still requires careful washing and handling. You can still chip the paint if you hit something hard.
To protect painted fairings effectively, choose the product that matches your skill level and commitment. Follow each step with patience. The results reward your effort.
Maintaining Your Fairings Long-Term

Taking care of your paint on a regular basis keeps it looking new. A simple plan works best. Clean your fairings every two weeks with soap that has a neutral pH. Use a spray detailer each week to remove light dust. Put on wax or sealant again every one to three months. Check paint protection film once a month for lifting edges or scratches.
Safe Washing, Drying, and Spill Management
Fuel and chemicals are the biggest dangers to your finish. Gasoline, brake fluid, and coolant damage wax and clear coat fast. Wipe any spill right away with a damp microfiber cloth. Do not let these liquids stay on the paint. Even a few minutes of contact can leave stains that never come out.
How you dry matters just as much as how you wash. Rubbing a towel across wet paint moves tiny particles and causes swirl marks. Use this method instead:
Let a slow, steady stream of water flow over each panel. This removes most of the water.
Use a leaf blower to get rid of leftover water on flat surfaces, mirrors, lights, and tight spots.
Wipe remaining water with a waffle weave drying towel plus detail spray.
Keep physical contact with the paint as low as possible to reduce scratch risk.
This method keeps your hands off the paint. Less contact means fewer scratches.
Common Mistakes and Winter Storage
Many riders damage their finish while trying to help it. Using dish soap removes protection. Washing in direct sunlight causes water spots. Using rough pads scratches the clear coat. Pressure washing at panel edges pushes water under the paint. Stay away from all these habits.
Winter storage needs extra work. Clean your fairings well first. Remove all bugs, tar, and road film. Put on a fresh layer of wax or sealant. This barrier guards against dust and moisture while stored. Keep your bike in a cool, dry place away from direct UV light. Cover it with a breathable motorcycle cover. Do not use a plastic tarp. Trapped moisture causes mildew and paint damage.
Check your fairings monthly during storage. Look for any new marks or lifting edges on paint protection film. Fix small problems before they get bigger. This routine helps you protect painted fairings all year long.
Remember that paint, clear coat, and protection products differ. Always follow the manufacturer instructions for your specific products. Test any new product in a hidden area first. Regular, careful maintenance protects your investment for years.
Protecting your custom paint starts with proper preparation. You must clean and decontaminate the surface before applying any product. Then choose wax, sealant, ceramic coating, or PPF based on your riding habits and budget. Each option offers different durability and cost levels.
Remember that protection is an ongoing commitment. Use gentle washing as needed and reapply compatible protection only according to the product instructions and actual surface condition. No coating makes paint scratch-proof. You must always handle your fairings with care.
Your unique sportbike deserves this attention. Consistent maintenance preserves its beauty and value for years. Explore custom fairings to match your style, and check production and shipping for delivery details.
Fairing Care and Ownership Resources
FAQ
How often should I reapply wax or sealant?
You should reapply wax every four to eight weeks. Sealants last longer, about three to six months. Your riding frequency and weather exposure affect this timeline. Check your product label for specific guidance. Always clean and dry your fairings before applying a fresh layer.
Does ceramic coating make my paint scratch-proof?
No. Ceramic coating adds hardness and chemical resistance, but it does not make paint scratch-proof. Sharp objects and heavy impacts can still damage your clear coat. You must continue careful washing and handling. Think of ceramic coating as a strong shield, not an invisible armor.
Is paint protection film worth the cost?
PPF provides a physical sacrificial layer against some stone chips and road debris, especially on exposed leading edges. Some films can reduce the appearance of light surface swirls when warmed, but performance and compatibility vary by product and finish. If you ride often on highways or gravel roads, PPF may be worth considering for impact-prone areas when it is compatible with the finish and installed correctly.
What should I do if I spill gasoline on my fairings?
Wipe the spill immediately with a damp microfiber cloth. Do not let gasoline sit on the paint. Fuel may stain or soften some finishes, especially if it is allowed to remain on the surface. After wiping, wash the area with pH-neutral soap and water. Dry thoroughly. Never use gasoline as a cleaning agent.