
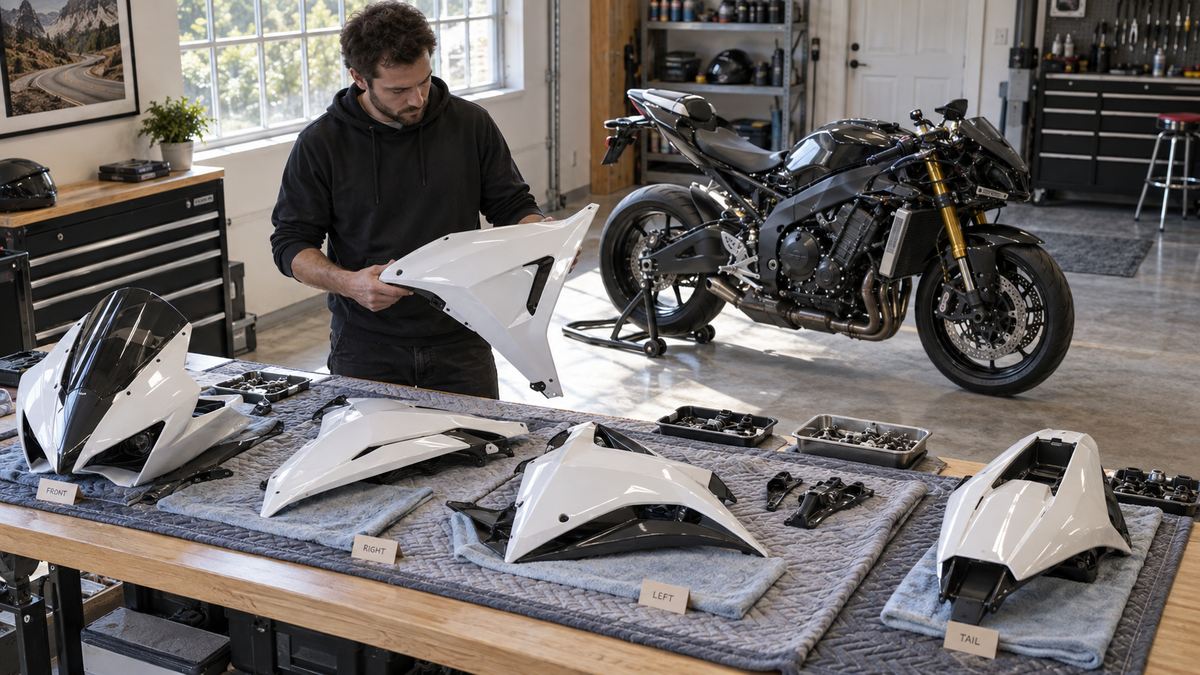
The box-and-store strategy has a second half that riders often underestimate. Removing clean factory bodywork when a motorcycle is new can protect those panels from everyday chips and scuffs, but putting them back years later is not a simple reversal of the original teardown. The motorcycle, the hardware and the stored plastics may all have changed while they were apart.
If you plan to reinstall OEM motorcycle fairings before a sale, treat the work as a fresh installation with a documented baseline. Do not call the motorcycle “mint,” “untouched” or “all original” merely because the original panels look clean. Its mileage, service history, accessories and any repaired damage still matter. The useful goal is a correctly assembled, honestly described motorcycle whose factory bodywork is secure and whose retained parts can be explained to the next owner.
This guide begins after the panels have been stored. For packing and storage methods, see our earlier guide to storing removed motorcycle fairings after a bodywork swap.
Decide Whether Return-to-Stock Is Actually the Right Plan
Original panels are valuable only when they are correct for the motorcycle and safe to reinstall. Before clearing the workbench, compare three realistic sale paths.
| Sale approach | Best when | Main work | What the buyer needs to know |
|---|---|---|---|
| Reinstall the stored OEM bodywork | The set is complete, correctly identified and structurally sound | Full inspection, hardware reconciliation and road-ready checks | What changed during ownership and what parts remain aftermarket |
| Sell with the installed replacement kit | The installed bodywork fits well and the OEM set needs repair or remains incomplete | Document the current installation and disclose retained parts | Whether the stored OEM pieces are included separately |
| Supply both sets without swapping | The buyer understands the project and transport is practical | Protect and inventory every loose panel and fastener | Exact condition, missing items and no assumption that loose parts are ready to install |
Do not reinstall a panel solely to improve listing photographs. A clean surface does not compensate for a cracked mounting boss, unknown repair or missing heat barrier. When the stored set is incomplete, describe it as incomplete rather than filling gaps with visually similar parts from another year.
Rebuild the Ownership Timeline Before Opening Every Package
List every change made while the OEM fairings were off the bike. This is where many return-to-stock jobs become more complicated than expected.
Record whether you changed:
- the exhaust, headers or oxygen-sensor routing;
- frame sliders, engine covers or crash protection;
- the windscreen, mirrors, turn signals or tail tidy;
- clip-ons, master cylinders, levers or control cables;
- radiator guards, ducts, fans or coolant hoses;
- headlights, wiring, accessory leads or USB power;
- subframe, fairing stay or brackets after a tip-over;
- heat shields, inner panels, grommets or fastener kits.
An OEM lower fairing designed around the original exhaust may not retain its former clearance after a system change. A nose panel may align differently if the fairing stay was repaired. Mirror hardware may have migrated into a block-off plate kit. None of those conditions is solved by tightening the original plastic against the new arrangement.
Use invoices, teardown photos and the motorcycle’s parts diagram to reconstruct the change list. If an alteration affects safety, emissions compliance or road equipment, use the applicable official information or a qualified technician rather than guessing what “stock” requires in your market.
Inventory the Panels Before Cleaning Them
Unwrap one piece at a time on a padded bench. Keep the labels and packing material with the panel until its identity is confirmed. Photograph each piece as it emerges, including its exterior, interior, mounting points and any label or molded identifier.
Build an inventory by location:
- nose or upper cowl;
- left and right upper side panels;
- left and right middle or lower panels;
- belly pan sections;
- inner trims and ducts;
- front fender;
- tail side panels, undertail pieces and seat cowl;
- tank cover or trim pieces;
- windscreen and model-specific small covers.
Compare the list with the applicable parts diagram and with the replacement kit currently on the motorcycle. Our guide to what a complete fairing kit replaces, reuses and leaves separate helps identify the retained components that may still be installed on the bike.
Do not rely on color alone. Adjacent years can share a paint scheme while using different vents, tabs, headlights or inner panels. If the identity of a piece is uncertain, pause until its application is established.
Inspect Stored Paint, Edges and Mounting Points
Storage prevents road wear, but it does not guarantee unchanged condition. Pressure from other objects, trapped moisture, temperature swings and degraded wrapping can leave marks even when a box remained closed.
Under diffuse daylight, inspect each exterior surface for:
- impressions or dull areas from packing material;
- color transfer from foam, printed paper or another painted panel;
- moisture marks, mold or adhesive residue;
- lifted surface decals or changes at graphic edges;
- chips or scratches that were present before storage;
- distortion along long edges and thin projections.
Then turn the panel over and inspect the structure. Look closely at bosses, interlocking tabs, threaded inserts and bonded pieces. Search for stress whitening, hairline cracks, previous adhesive repair and holes that have become oval. A tab can appear intact from the painted side while a crack begins at its base.
Do not polish first. Cleaning or correction can hide the evidence you need to decide whether a panel should be installed. Use the finish-specific care method and test any product on an inconspicuous area.

AI-generated editorial illustration of the inspection workflow; it is not a model-specific parts diagram or proof of product fitment.
Reconcile the Original Hardware by Function and Location
A bag marked “fairing bolts” is not enough after several years. Different locations may use screws that look similar but have different lengths, shoulders, collars or washers. Rubber isolators also age while stored.
Sort hardware into location groups and compare it with the parts diagram and teardown record. Check:
- screw length, head style and thread condition;
- metal collars and shouldered spacers;
- rubber well nuts and grommets;
- push rivets and their center pins;
- washers that isolate a screen or painted surface;
- model-specific brackets, clips and retaining plates;
- mirror and windscreen hardware;
- heat-shield fasteners or retainers.
Replace pieces that are split, hardened, deformed, corroded, cross-threaded or undocumented. A generic kit can be a useful source of common items, but it does not prove that every fastener matches the factory stack. Our photo-and-label hardware workflow provides a repeatable way to rebuild the location map.
Never choose a longer bolt simply because it catches the thread more easily. Hidden components can sit behind the mounting point, and an overlong fastener can create damage that is invisible from outside.
Record the Motorcycle Before Removing the Current Bodywork
Photograph the installed replacement bodywork and its seams before teardown. Capture any accessory brackets, routing changes and areas where the current kit uses retained factory parts. This record is useful if the OEM panels reveal an incompatibility and the motorcycle must be returned to its previous configuration.
Remove bodywork according to the exact model procedure. Support large panels, disconnect lighting carefully and keep current-kit hardware separate from original hardware. Do not create one mixed tray. If a fastener or grommet transfers from one set to the other, record the transfer explicitly.
Once the bodywork is off, inspect the fairing stay, subframe, brackets, ducts and wiring. A bracket bent during ownership may have been accommodated by the flexible current panels but may preload a stiffer or differently shaped OEM piece. Correct the underlying structure with appropriate information before installing valuable stored panels.
Clean the Hidden Areas Without Creating a New Problem
Years of riding can place grit, chain residue and road debris behind the installed kit. Clean the accessible structure using methods approved for the motorcycle and the nearby materials. Protect connectors and avoid driving water into bearings, electrical components or open intake paths.
While access is open, look for:
- rubbed wiring or a displaced retainer;
- heat marks near the exhaust and lower mounts;
- missing rubber cushions;
- loose brackets or evidence of movement;
- fluid residue that needs mechanical diagnosis;
- accessory wiring that would be trapped by the OEM panel;
- drain and vent paths that must remain clear.
Cleaning is not an excuse to disassemble unrelated systems. If you discover a safety or fluid issue, resolve it before the bodywork hides the area again.
Dry-Fit in Assemblies, Not One Fully Tightened Panel at a Time
Follow the model-specific installation order. In general, neighboring parts should be brought together with their locating features seated and fasteners initially loose enough for alignment. The exact sequence varies, so do not treat a universal center-out pattern as a service instruction.
At each assembly, confirm:
- the panel is supported and not hanging from one tab;
- grommets and collars are present in the documented locations;
- interlocking tabs enter their slots without bending;
- holes meet without using the screw as a pulling tool;
- wiring, hoses and cables are not trapped;
- the panel does not spring away when hand pressure is released.
If a hole misses its mount, loosen adjacent pieces and inspect the structure. Do not file, drill or heat an original panel merely to make it accept a changed bracket or unknown hardware. Preserve the evidence and solve the mismatch at its source.
Transfer Required Shields, Ducts and Retained Parts
Factory bodywork may rely on inner ducts, foam seals, heat barriers, mesh, lamp brackets or rubber cushions that were moved to the replacement kit. Identify those parts before final assembly.
Photograph orientation before transfer. Old adhesive may no longer be suitable for reuse, but replacement material must match the required application. Do not substitute generic foam near a hot zone or block a designed air passage. If an exhaust or cooling component differs from the factory configuration, verify the resulting clearance rather than assuming the old shield layout remains sufficient.
The same principle applies to lights and mirrors. Reconnect components using their intended clips and routes. Do not leave a connector loose behind a pristine cowl where it can strike the plastic.
Perform a Complete Road-Ready Check
Returning to stock appearance does not prove road readiness. Before the motorcycle moves, check:
- handlebars, levers, hoses and wiring through full steering lock;
- throttle return at every steering position;
- secure mirrors and an unobstructed rear view;
- headlight, signals, running lights, brake light and license-plate light;
- headlight aim if the nose, lamp or stay was disturbed;
- exhaust and engine clearance around lower panels;
- fan, radiator duct, vent and drain clearance;
- seat and cowl latches;
- tire and suspension clearance around the tail;
- all model-specified fasteners after final alignment.
Use the procedures in our headlight-aim guide when the lamp position has changed. Run the motorcycle only in a properly ventilated area, then complete a conservative shakedown and cooled reinspection before photographing it for sale.
Build an Honest Sale Record
Photograph the completed motorcycle from both sides, front, rear and rider’s view. Add close photographs of the panel seams, mounting areas that were previously repaired, and any remaining blemish. Keep the before-storage images, unwrapping images and final installation record together.
A useful description states facts:
- original bodywork was removed and stored during part of the ownership period;
- the date or mileage when it was reinstalled, if known;
- which mirrors, exhaust, windscreen, signals or other parts remain non-original;
- whether any OEM panel was repaired or refinished;
- whether the replacement fairing set and its hardware are included;
- any missing component or unresolved cosmetic condition.
Avoid financial promises. Clean OEM panels may support buyer confidence, but no fairing strategy guarantees a price, a condition grade or a return on the cost of the second set.
Return-to-Stock Checklist
- Every stored panel identified by exact motorcycle application
- Exterior finish inspected before polishing or correction
- Mounting tabs, bosses, inserts and holes inspected from inside
- Original hardware sorted by location and checked against the parts diagram
- Current accessories and ownership changes documented
- Fairing stay, brackets, wiring and hidden structure inspected
- Required ducts, heat shields, seals and retained parts transferred correctly
- Panels dry-fitted without using screws to force alignment
- Steering, throttle, brake hose and controls pass the full-lock check
- Lights, mirrors, latches, vents, drains and hot-zone clearance verified
- Short shakedown and cooled reinspection completed
- Sale description reflects actual history rather than appearance alone
The Value Is in the Record as Much as the Paint
Stored OEM fairings can return a sportbike to a familiar factory appearance, but the convincing result is more than a glossy set of panels. It is an installation that respects the hardware stack, accounts for every change made during ownership and survives a road-ready inspection without stored tension or hidden interference.
Take photographs, keep the two hardware sets separate, and describe the history accurately. That process protects the panels, gives the next owner useful evidence and prevents a last-minute cosmetic swap from becoming a mechanical problem.



