
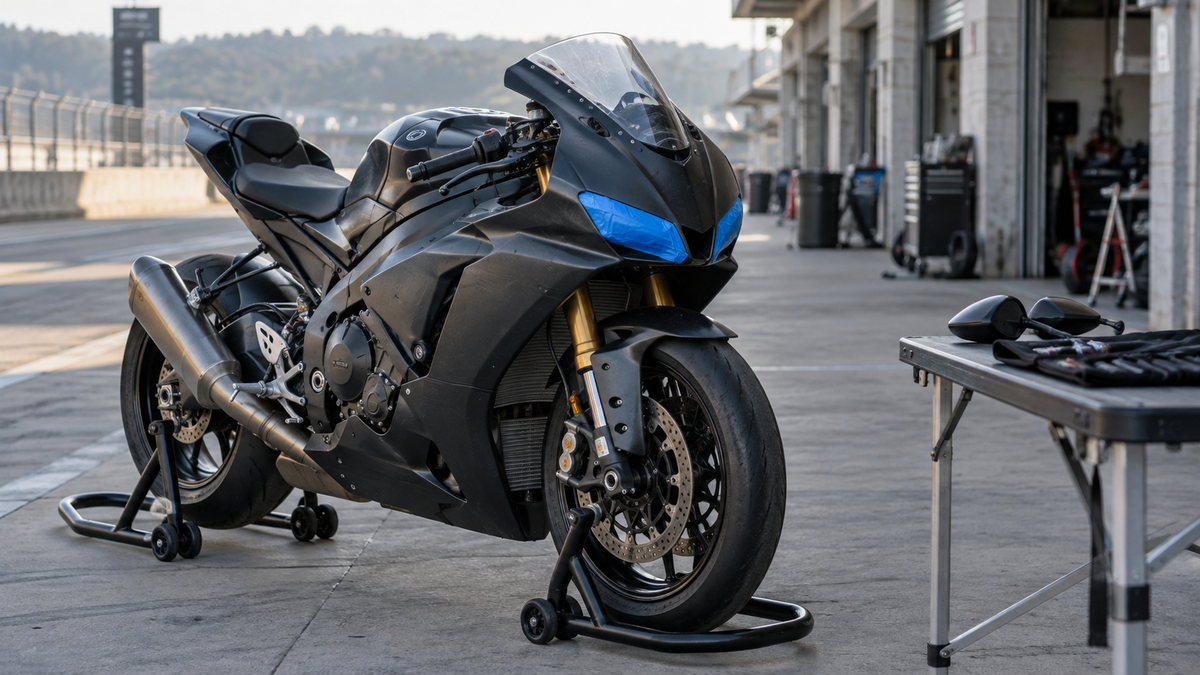
The same sportbike can commute on Friday and ride a closed course on Saturday, but the bodywork cannot be prepared from a universal internet checklist. Track-day organizations differ on lights, mirrors, license plates, coolant, fasteners and how a street motorcycle must be configured. Local road requirements also determine what must be restored before the ride home.
That makes the correct sequence simple: read the organizer’s current technical requirements first, prepare only what the event calls for, preserve every removed part, and reverse the changes through a documented road-readiness check. Blue tape on a headlight is visible; a missing mirror spacer, stretched wire or disabled brake light is easier to overlook.
This guide focuses on the fairing-related transition: headlight and taillight treatment, mirror removal, front-cowl hardware, temporary tape and restoration after the final session. It does not replace the event’s tech sheet, the motorcycle service manual or applicable road rules.
Start With the Event Sheet, Not a Paddock Photograph
Download or request the current requirements for the exact event, group and motorcycle. Do not assume that a preparation accepted at one circuit will pass at another. A novice street-bike group may use different procedures from an advanced group or race organization.
Create a two-column list:
| Event instruction | Your exact motorcycle action |
|---|---|
| Headlight treatment | Tape, disconnect or other stated procedure; identify access point |
| Taillight or brake light | Confirm whether illumination must be disabled, covered or retained |
| Mirrors | Fold, remove or secure as instructed; record spacers and wiring |
| Turn signals | Retain, tape, disconnect or remove only as required |
| License plate | Protect, remove or retain according to the organizer and transport plan |
| Bodywork and fasteners | Inspect required panels, belly pan and mounting security |
If an instruction is unclear, ask the organizer before modifying the bike. Do not state that a particular tape color, light treatment or block-off plate guarantees technical approval. The inspector and the event’s current rules decide.
Decide How the Motorcycle Will Reach and Leave the Track
A trailered motorcycle and a motorcycle ridden on public roads have different transition needs. If you ride to the venue, every road-required system must operate during the public-road portions of the trip. Removing or disabling it at home may create an unsafe or noncompliant journey before the track day begins.
Plan where each change will occur:
- At home: only work that preserves road readiness for the trip, unless the bike is transported.
- In the paddock before inspection: event-specific tape, mirror removal or light disconnection.
- After the final session: cooling, damage inspection, tape removal and restoration.
- Before entering a public road: complete functional and control check.
Pack a clean work mat, labeled bags, the correct tools, spare model-appropriate clips or isolators, clean microfiber cloths and the instructions for any removable part. Do not plan to improvise with a borrowed bolt after the final session.
Photograph the Street Configuration Before You Touch It
Take a straight-on view of the nose, both mirror bases, the inner cockpit and the relevant wiring route. Photograph the hardware stack as soon as a fastener comes out. This record is especially useful where a mirror base sandwiches the upper cowl against the fairing stay.
Use one label per side and location. Keep left and right defined from the rider’s perspective. A small bag marked `Left mirror—outer bolt, inner bolt, collar, washer` is more useful than a mixed tray labeled `track stuff`.
If the motorcycle already has a repaired upper cowl or non-original mirror, record that condition separately. A track-day conversion should not hide a pre-existing crack or alignment issue.
Prepare the Surface Before Applying Temporary Tape
Tape adheres poorly to dust, wax residue and insects. It can also drag grit across a headlight or painted edge when removed. Work on a cool motorcycle in shade. Clean the lens and any approved contact area using the care method specified for that surface, then dry it completely.
Before applying tape, verify:
- the product is intended to be removable from the surface involved;
- the lens or finish is fully cured and in sound condition;
- no lifted clear coat, cracked lens coating or loose decal edge lies underneath;
- tape will not cover a vent, sensor, intake or required identifier;
- the adhesive will not touch a hot component;
- the planned layout follows the event instruction.
Do not use strong duct tape simply because it survives heat. High adhesion and residue can turn a quick paddock task into a finish problem. If product compatibility is uncertain, test it on a suitable inconspicuous area before the event.
Apply Light Tape Without Loading the Fairing
The purpose of event-required light treatment is defined by the organizer; it is not to pull panels into alignment or reinforce a loose lamp. Lay strips onto the cleaned lens with light hand pressure. Avoid stretching tape across gaps in a way that draws the nose fairing inward.
Keep tape edges within the intended area. Do not bridge a painted panel seam that must move, cover a fastener needed for inspection, or wrap tape behind a hot lamp housing. If the event requires a light to be disconnected, follow the model-specific procedure rather than relying on tape to hide an illuminated lens.
Modern motorcycles may monitor lighting circuits or combine multiple functions in one assembly. Disconnecting a lamp can create a warning or affect another function. Never cut wiring for a temporary event change. Ask the organizer and consult the service information when the correct reversible method is unclear.
Remove Mirrors as a Supported Assembly
Mirrors can be heavy enough to twist the upper cowl when the final fastener is removed. Support the mirror with one hand and loosen the hardware in the documented sequence. Protect the painted surface and do not allow the mirror to hang from signal wiring.
As each side comes apart, identify:
- fastener position and length;
- metal spacers or collars;
- rubber seals and isolators;
- locating pins;
- signal connectors and their locks;
- the relationship between mirror base, cowl and fairing stay.
If model-specific block-off plates are required, verify that their hardware and mounting face suit the application. A plate should not be used to pull offset cowl holes toward a bent stay. If the holes align only under force, diagnose the structure before riding. Our guide to mirror and upper-cowl alignment after a tip-over explains the warning signs.
Store mirrors face-up in a padded container where they cannot be stepped on or scratched. Keep their hardware with them rather than on the motorcycle work mat.
Check the Cockpit After Every Front-End Change
Mirror removal and light access can disturb more than the visible parts. Turn the handlebars slowly to full left and full right with the engine off. Watch cables, brake hoses, connectors, accessory wiring and the inner cowl.
Confirm that:
- the throttle returns normally at every steering position;
- no wire is stretched or pinched;
- the brake hose remains clear of sharp edges;
- block-off hardware does not project into a moving area;
- the windscreen and upper cowl remain secure;
- removed signal wiring is insulated and retained by an approved method;
- no fastener or tool remains inside the nose.
Use the full steering-clearance inspection if any cockpit component was moved. A track surface does not make steering or brake interference acceptable.
Complete a Bodywork Walkaround Before Tech
Inspect the motorcycle from front to rear. The event may have requirements beyond the scope of this article, so use its checklist as the controlling document.
For bodywork, look for:
- secure nose, side panels, belly pan and tail pieces;
- seated tabs, clips and rubber isolators;
- no loose tape edge near an intake or wheel;
- no fastener being used to pull a misaligned hole;
- safe clearance around exhaust and moving components;
- a secure seat or seat cowl;
- no loose hardware, camera mount or accessory near the rider.
Our track-day fairing inspection checklist covers the bodywork after a session as well as before the ride home. Present the motorcycle for inspection early enough to correct a problem without rushing.
Keep a Reversion Kit Ready for the Final Session
Pack the street parts as carefully as you packed the riding gear. A useful kit includes:
- left and right mirrors in separate padded sleeves;
- labeled original fasteners, collars, washers and seals;
- the tools required by the service procedure;
- clean microfiber cloths;
- surface-compatible cleaner for any tape residue;
- photographs of the original assembly;
- replacement clips or isolators only where their application is confirmed;
- a small light for checking connectors and hidden routing.
Keep the kit out of direct sun and away from fuel containers. Do not leave mirrors where a tire warmer, stand or neighboring motorcycle can strike them.
Let the Motorcycle Cool Before Removing Tape
After the final session, park securely and let the lamps, fairings, engine and exhaust cool. Hot adhesive can behave differently, and reaching around a hot upper cowl creates needless risk.
Inspect the tape before peeling. If it has lifted, collected debris or crossed a damaged area, slow down. Pull a short section back at a low angle, close to the lens, rather than upward away from it. Support the surrounding bodywork without pressing on a thin edge.

AI-generated editorial illustration of the tape-removal and street-restoration process; it does not represent a specific event’s technical rules.
If adhesive remains, use a product approved for the lens or finish and follow its instructions. Do not reach immediately for brake cleaner, gasoline or another aggressive solvent. The controlled removal principles in our fairing sticker-removal guide also apply to residue and vulnerable finishes.
Restore Mirrors, Lights and Wiring From the Record
Reinstall each mirror with its original side-specific stack. Support it until the hardware is engaged. Seat seals, collars and isolators in the documented order, and use the specified tightening procedure. Do not clamp harder to close a gap caused by a misplaced spacer.
Reconnect lighting only by the correct procedure. Confirm each connector lock engages and route the wire where it cannot be pinched by the cowl or pulled at full steering lock. Remove every temporary tie or cap that is not part of the road configuration.
Check:
- low and high beam where applicable;
- front and rear turn signals;
- taillight and brake-light activation from both controls;
- running lights and license-plate light where fitted;
- dashboard warnings;
- mirror security and usable rear view.
If the headlight, nose or fairing stay moved, verify beam position before night riding using the procedure in our headlight-aim guide.
Perform the Public-Road Readiness Check
Do not let the pressure to leave the paddock shorten the final inspection. In daylight and with the motorcycle stationary, complete the following:
| Area | Before track use | Before public-road use |
|---|---|---|
| Headlights | Prepare exactly as the organizer directs | Tape removed; required functions restored and aim checked if disturbed |
| Mirrors | Fold, remove or secure as directed | Correct hardware installed; stable rear view confirmed |
| Signals and brake light | Follow event instruction | Required functions restored and tested |
| Upper cowl | Check security after removal work | Check seams, tabs, screen and mirror-base load |
| Steering | Full-lock inspection after preparation | Repeat after street parts are reinstalled |
| Hardware | Store removed pieces by location | Account for every fastener, spacer, seal and tool |
Then make a short, conservative check within the venue where permitted. Stop if a mirror moves, a warning remains, a control binds or a new front-cowl noise appears. Do not enter public traffic until the motorcycle is safe and correctly equipped for that road.
Track-to-Road Checklist
- Current event requirements reviewed for the exact group and motorcycle
- Transport plan determines where track-only changes occur
- Original street configuration photographed before disassembly
- Headlight and tape surfaces cool, clean and compatible
- Tape applied without loading panel seams or blocking vents
- Mirrors supported during removal; spacers and hardware labeled by side
- Signal wiring and connectors handled by the service procedure
- Full-lock steering, throttle and brake-hose check completed after preparation
- Bodywork inspected before technical inspection
- Motorcycle cooled before tape removal after the final session
- Residue removed with a surface-compatible method
- Mirrors, lights, signals and brake light restored and tested
- Headlight aim checked if lamp or nose position changed
- Full-lock and hardware checks repeated before public-road use
A Reversible Track Setup Ends With a Complete Road Bike
The useful test of a dual-purpose setup is not how quickly the headlights can be covered. It is whether every temporary change can be reversed without damaged paint, missing collars, trapped wiring or uncertainty at the paddock exit.
Treat tape, mirrors and connectors as parts of one documented transition. Follow the organizer’s actual rules, keep the motorcycle’s hardware organized, and reserve enough daylight and cooling time for the return-to-road check. The result is more track time with less last-minute improvisation—and a sportbike that is truly ready for the journey home.



