Salt and sea spray do not make every scratched fairing a replacement job. After exposure, the useful first move is to clean the motorcycle as its own owner’s manual directs, then identify which part actually changed: deposited grime, painted surface, plastic edge, rubber receiver, metal fastener, or the bracket behind it. A fresh panel cannot cure a seized screw or a corroded stay.
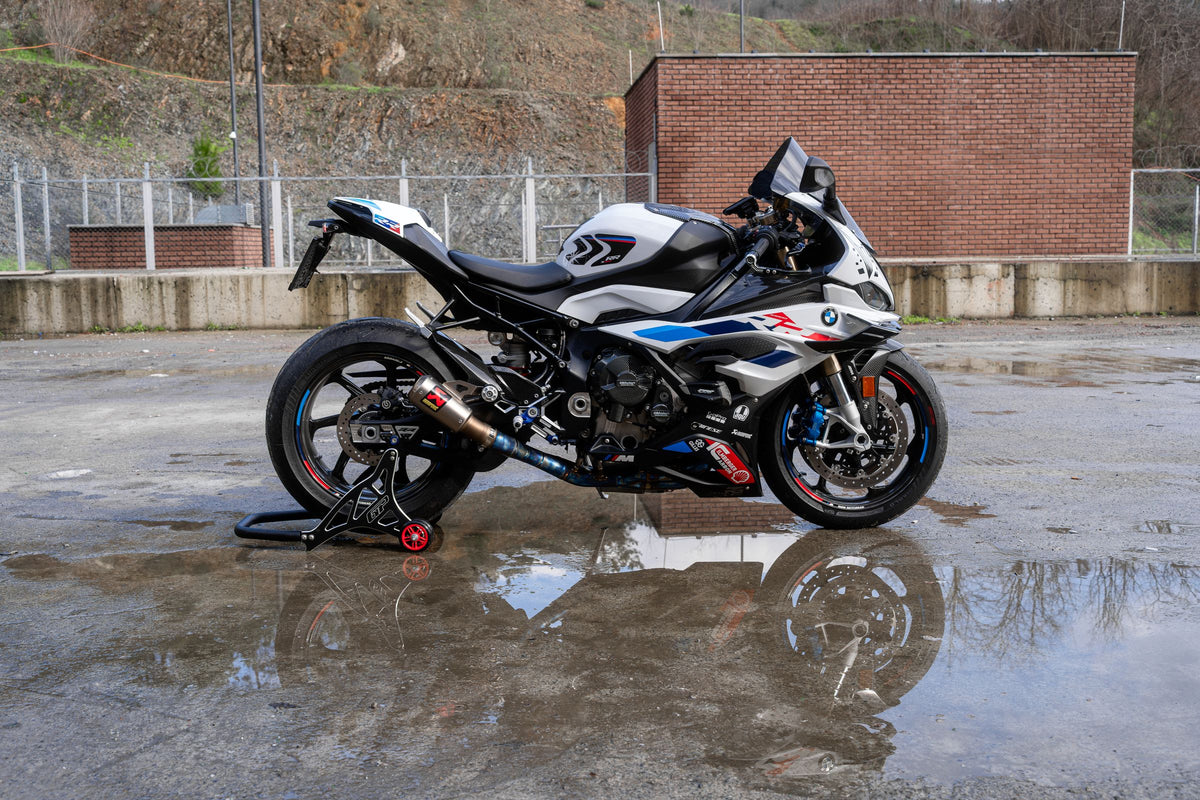
Cover: a real sportbike photographed on wet pavement by Oktay Köseoğlu / Pexels. It illustrates an exposure-and-inspection setting, not verified road salt, corrosion, a NiceFairings product or a customer case. The pictured brand does not endorse this article.
This guide is an inspection plan for year-round sportbike riders, not a laboratory claim about a particular resin or paint system. It separates observations you can photograph from work that requires the motorcycle manufacturer’s instructions or a qualified technician. If a mounting point, brake component, electrical connector or safety-critical part is suspect, resolve that first; do not treat new bodywork as a mechanical repair.
Start with exposure, not a diagnosis
A winter commuter and a coastal garage owner may both find white residue around an inner cowl, but the route by which it arrived can differ. Road spray reaches the lower, rear-facing and wheel-side surfaces of a fairing. Sea air can settle on surfaces while a motorcycle is parked. Neither setting proves that a plastic panel has chemically failed. It tells you where to look, what to clean and which metal connections deserve attention.
Record the date, route, weather, storage conditions and the last wash. Take a whole-bike photograph before cleaning, then close views of the lower cowl, front fender interior, panel joints, mirror bases, screen fasteners and any fastener with visible residue. Keep those original images. A photograph after the bike has been scrubbed cannot recreate the starting condition, and a grimy close-up alone can exaggerate a local mark by hiding the surrounding part.
Ask one question at a time. Is the mark sitting on the finish, or has the finish changed? Does a screw head show surface discoloration, or does the fastener resist normal removal? Is an edge chalky because an unpainted plastic surface has weathered, or merely pale from dried cleaner? Does a panel move because a rubber receiver is loose, or because its supporting bracket is damaged? Those distinctions change the remedy. Ordering a complete painted kit at the first sign of residue is not a climate-maintenance strategy.
Clean according to the motorcycle, not a universal internet rule
Honda UK’s motorcycle maintenance guidance advises washing after winter rides because road salt can corrode metal, and cautions against high-pressure jets that can harm seals or radiator fins. A BMW Motorrad K 1600 GTL owner manual calls for cold water to remove road salt and warns against unsuitable cleaners on plastic. The K 1600 GTL is not a sportbike; these are useful examples of why manufacturer instructions are not an interchangeable recipe for every machine: the advice about water temperature is not identical. Consult the owner’s manual for your exact motorcycle and the care instructions for any aftermarket paint or protective film before you choose a cleaner or washing method.
At a minimum, avoid using a jet to drive water and grit into electrical connectors, bearings, rubber receivers and hidden seams. Never aim a concentrated stream at a hot engine or braking system. If you use a product sold as a salt remover, paint cleaner, corrosion inhibitor or ceramic spray, read its label for the surfaces it may contact and keep it away from tires, discs, pads, grips and controls. A product that is safe for an outer painted panel is not automatically suitable for every adjacent rubber, metal or electrical part.
Clean first, then inspect under steady light. Dry the accessible panel edges and fastener recesses according to the manual. A post-wash photograph from the same angle as the pre-wash image can tell you whether you removed a deposit or exposed a persistent defect. Do not rub aggressively to make a stubborn mark disappear: abrasives can create their own dull patch. If the finish is already blistered, soft, cracked or lifting, stop experimenting and ask an appropriate paint professional to assess it.
Inspect the interfaces without turning a wash into a teardown

Look where a fairing is supported, not only where it shines. With the motorcycle stable and switched off, a visual pass can identify missing fasteners, a rubber receiver that sits proud of its hole, a side panel that no longer follows its neighbor, or a screw head that has visibly corroded. It can also show whether a drain or inner cowl retains road grime. None of those observations proves that a part will fail, but each gives a technician a precise starting point.
Do not test a suspicious screw by applying more and more force. A fastener may be seized in a metal insert, a clip may turn with the screw, or an earlier repair may have changed the hardware. The correct response is to identify the assembly and consult its service procedure. A photograph of a threaded insert does not establish its alloy, corrosion mechanism or removal torque. Likewise, replacing a visible bolt with stainless hardware is not a universal fix: length, shoulder, grade, mating part and electrical compatibility matter. Treat lubricant and anti-seize selection as a model- and fastener-specific service decision, not a blanket blog instruction.
A useful inspection sequence is deliberately modest: first view the intact panel from both sides; then look at accessible heads, receivers and gaps; then compare pre- and post-cleaning photographs. Remove bodywork only if the model instructions, tools and your skill allow it. Label every removed fastener by location, support the panel as the last fixing comes free and avoid prying a tab that may still be held by a hidden clip. If corrosion or a distorted bracket is found, a qualified repairer should determine whether the motorcycle-side component needs attention before a new fairing is fitted.
Read the mark before choosing the remedy
Before deciding whether to buy anything, write two columns in the inspection record: what remains after approved cleaning and which component the mark belongs to. A removable deposit belongs in a care log. A persistent finish change belongs in a paint assessment. A discolored or seized fastener belongs in a model-specific hardware assessment. A cracked tab belongs in a bodywork-and-support assessment. Do not collapse those four findings into a single “salt-damaged fairing” diagnosis. If the defect cannot be localized without removing bodywork, mark it unresolved and arrange a proper inspection.
Four superficially similar photographs may call for four different responses. A dusty white film that disappears with the manual-approved wash is a deposit: keep the before/after record and adjust the cleaning routine. A dull area in the painted clear finish that remains after gentle cleaning is a finish question: document its edges and ask a paint specialist what can be repaired. Rust-colored staining around a screw head is a hardware question: identify the fastener and supporting part rather than blaming the plastic. A cracked tab or elongated mounting hole is a structural interface question for the bodywork: determine why the point was loaded before replacing it.
The inner surface is especially easy to misread. Unpainted plastic may have a different color and texture from the exterior from the day it is made. Dirt can collect in molded recesses. A matte or rough-looking backside is not by itself proof of salt attack. Compare the left and right parts only where the design is meant to be symmetrical, and use older photographs or a known original piece if available. Do not infer the molecular condition of ABS from a phone image.
More serious signs change the priority. If a light, mirror, bracket or stay has moved, if a panel rubs a tire or hot exhaust, or if a control or wiring route is affected, pause riding and have the motorcycle assessed. The question is no longer cosmetic preservation. It is whether the machine is safe and correctly assembled. A replacement fairing should not be forced to cover an unresolved mechanical problem.
Two riders, two different decisions
Consider a hypothetical winter commuter with a white stripe of residue along the lower fairing and a slightly brown screw head. After a careful wash, the stripe disappears; the painted surface is sound. The next useful work is documenting and assessing the fastener and its receiver, not ordering an entire kit. If that screw later needs replacement, the owner uses the exact motorcycle parts information and service procedure. The original panel may remain perfectly serviceable.
Now consider a hypothetical coastal owner whose side fairing has an old crack through a mounting ear and a persistent paint defect on the exterior. There may be a bodywork replacement decision, but the crack still needs a cause. Was the correct collar present? Did the bracket move after a previous tip-over? Was a screw used to pull an ill-fitting panel into place? A new painted shell will inherit that load if the motorcycle-side issue is not corrected. Even if a full set gives a more coherent color result, the order should be scoped to the exact bike and its retained parts.
These examples are decision exercises, not NiceFairings customer cases or test results. The variables that matter are the observed part, its support, the approved cleaning procedure and the condition after cleaning. There is no evidence here for a fixed “two-year fastener life,” a universal salt-proof resin, or an across-the-board replacement interval.
Build a six-image record before ordering parts
-
Whole motorcycle, left side: show the complete panel relationship and any accessories that affect access.
-
Whole motorcycle, right side: do not assume the opposite side is a mirror image.
-
One clean, square-on view of the affected outer finish with a ruler only if scale matters.
-
One view of the panel’s edge, tab or opening, with enough surrounding area to identify the part.
-
One view of the fastener, grommet, collar or supporting bracket that appears suspect.
-
A repeat of the key view after approved cleaning, labeled with the date and the cleaner used.
Keep your VIN, model year, market, existing fairing changes and service history with the photographs. Do not publish the VIN or insurance details in an open forum. When contacting a supplier, send only the information needed to identify the kit and explain the bodywork concern. If a technical question depends on a hidden mounting area, ask a qualified technician to expose and inspect it rather than asking a seller to certify it from an exterior photo.
When a NiceFairings replacement is relevant—and when it is not
If cleaning leaves sound paint and sound panels, no fairing purchase may be needed. If one panel is damaged and the remaining finish is acceptable, a single-panel solution may be preferable; confirm that the exact piece and color can be supplied. If several painted surfaces are damaged or a rider wants a coordinated redesign, begin with the NiceFairings motorcycle collections and confirm the exact model/year application and what the listing includes. The custom-design page is useful when the intended color or graphic treatment needs a written brief.
Ask for the specific panel list, retained OEM components, hardware assumptions, finish choice and any nearby accessory clearance. A fairing set changes the bodywork you receive; it does not straighten a stay, free a seized screw, repair a connector, or certify the bike as roadworthy. If a mounting point was damaged by previous work, resolve that independently before approving a painted set. Likewise, no supplier should turn a general description of ABS or clear coat into a guarantee against road salt, sea air, ultraviolet exposure or years of use without product-specific evidence.
For owners working on older machines, the existing older Honda CBR tabs-and-hardware guide shows how to separate panel condition from supporting hardware. Its model examples are not a fitment promise for another bike; use the same question sequence, not its parts conclusions.
Questions riders often ask
Does salt “eat” ABS fairings?
A photograph of residue or a weathered panel cannot establish a specific chemical mechanism or material grade. Salt exposure is a clear reason to clean and inspect the motorcycle; visible damage should be assessed at the actual finish, plastic and mounting interface. Do not treat a claim about “virgin ABS” as a substitute for product-specific testing.
Should I spray anti-seize on every fairing bolt?
No universal recommendation is justified. Fastener material, thread, torque method and adjacent parts vary. Some products are inappropriate near brakes, tires, electrical connections or specific plastics. Use the exact motorcycle and accessory instructions, and ask a qualified mechanic when a fastener is seized or its specification is unknown.
Is a complete new kit the best fix for winter corrosion?
Only if the bodywork itself is damaged or a full visual redesign is your chosen project. A kit will not repair corroded stays, brackets or fasteners. Inspect and cost those separately before deciding what to buy.
The durable habit is not “replace the plastics every winter.” It is to remove contamination using the right instructions, preserve an honest before/after record and identify which component actually needs work. That decision can save a good panel—and prevent a new one from being installed onto the same unresolved problem.