
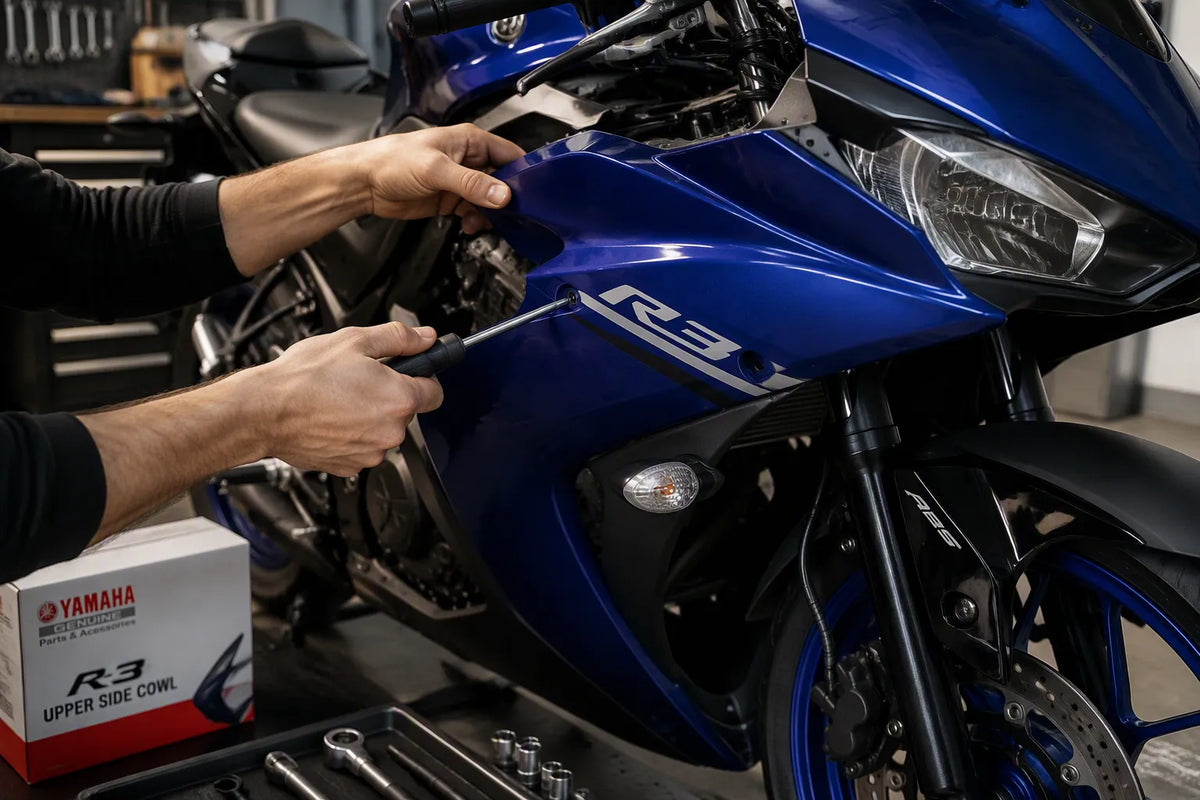
Most fairing replacement mistakes begin before the new panel reaches the motorcycle. A collar is stored with the wrong side, a connector route is not photographed, or a damaged stay is treated as though it were straight. This Yamaha R3 guide focuses on the record that prevents those errors: a photo sequence, a panel-by-panel hardware map and a final inspection sheet.
R3 bodywork changed across generations and markets. Confirm the exact motorcycle by VIN and current parts information before ordering or transferring instructions from another year. Use the applicable Yamaha service information for access, fastener procedures and electrical work. The sequence below is an organizational framework, not a substitute for that model-specific information.
Key Takeaways
- Photograph each panel before and during removal, including hidden collars and wire routes.
- Store fasteners by panel and side; do not rely on a single mixed tray.
- Record reused rubber parts, brackets, heat protection and inner trim separately.
- Dry-fit the connected panel group before final tightening.
- Finish with steering, lighting, clearance and loose-hardware checks before riding.
Create the Record Before Removing the First Panel
Start with four wide photographs: front, rear, left and right. Add close views of every existing gap, scratch, repaired tab and misaligned edge. These images establish the starting condition and help distinguish a pre-existing problem from one created during assembly.
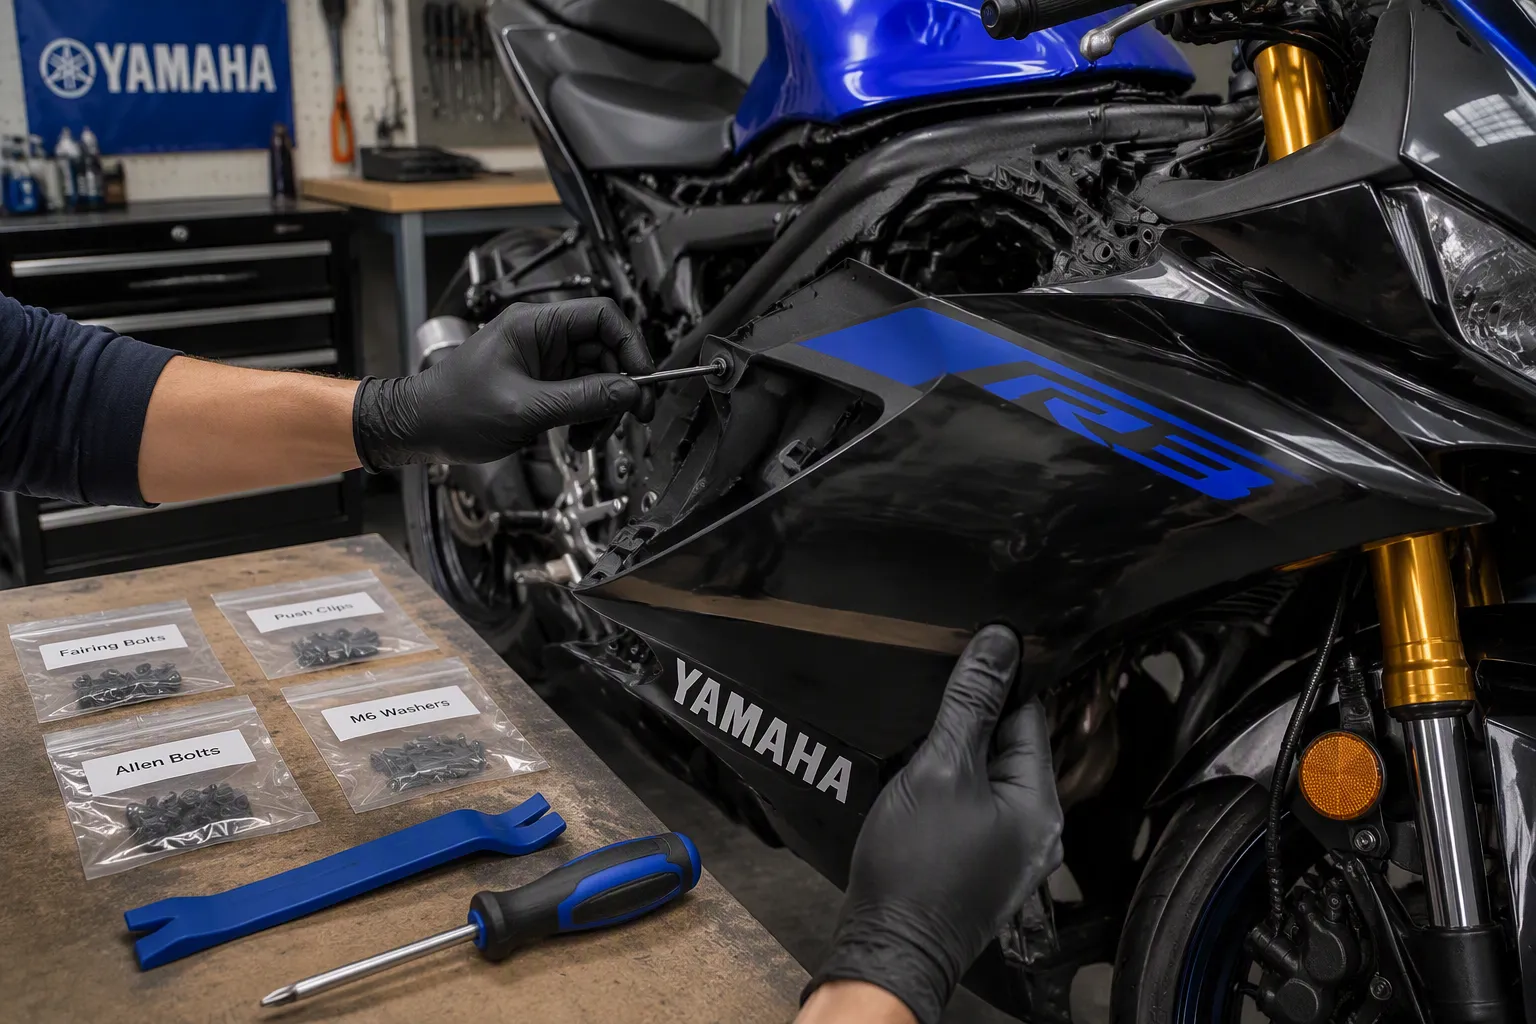
Create labeled bags or divided boxes for left side, right side, nose, tail, inner trim and windscreen. Within each group, note the order of washers, collars and rubber parts. A bolt that looks identical on the bench may have a different shoulder length or sit against a different spacer.
Yes, you can replace the fairings on your Yamaha YZF-R3 at home. This job needs basic tools, patience, and an organized approach. You will save money on labor costs by doing the work yourself. Both OEM and aftermarket options exist. Aftermarket kits are generally much more affordable than OEM panels. OEM panels come from a Yamaha dealer with your VIN. Aftermarket brands like NiceFairings offer injection-molded ABS plastic with OEM-style fitment. Check your model year: 2014-2018, 2019-2024, and 2025-2026 use different kits. A Yamaha R3 fairing replacement project rewards careful work. You will remove old panels, install new ones, and check alignment. The process takes time, but the result transforms your bike's look.
Tools, Parts, And Prep
Essential Tools And Setup
You need a small set of hand tools for this job. A four millimeter hex key removes the hex screws that hold the fairings. A screwdriver helps you pry open clips and fasteners. Pliers are optional, but they help with stubborn fasteners. Patience and caution matter most. Take your time with each part.
A clean workspace makes the job easier. Bright, multi-angle lighting helps you spot hidden bolts. Clear a large area so you can lay fairing pieces flat without stacking them. Use labeled containers or a magnetic tray for bolts and clips. A bag-and-label system works well. Put each panel's fasteners into a labeled bag as you remove them. Take photos of wiring and bracket positions before you disconnect anything. Disconnect the battery and keep the bike upright to prevent electrical shorts.
OEM Vs. Aftermarket Fairings
Aftermarket kits are often injection-molded ABS plastic with OEM-style fitment. Injection molding forces melted plastic into a precise mold. This creates strong, uniform parts with mounting points already formed. The result is about 95% equivalent to OEM fitment. These kits also come with three layers of UV paint, pre-installed decals under clear coat, and two layers of clear coat.
Model-year compatibility is critical. Kits fit 2014-2018, 2019-2024, and 2025-2026 model groups. Check your bike's year before ordering. A kit for one generation will not fit another.
| Feature | OEM | Aftermarket |
|---|---|---|
| Material | High-grade ABS plastic | ABS plastic, fiberglass, or carbon fiber |
| Fitment | Perfect, factory-spec | Excellent to poor; injection-molded is better |
| Cost | Significantly higher | Generally much more affordable |
| Availability | Yamaha dealers; individual pieces | Online; usually sold as full kits |
| Best For | Factory look and value | Customization and budget repairs |
Yamaha R3 fairing replacement: Removal Process
Follow a set order: left side, right side, nose, and tail. This sequence prevents damage and keeps the work straightforward. Bag and label all bolts and clips for each section as you remove them. Use separate bags for left side, right side, nose, and tail. Forcing a panel that does not move means you missed a hidden bolt or clip. Stop, check, and locate the fastener before prying.
Removing Side Fairings And Tank Cover
Next, remove the tank cover. The cover sits on top of the fuel tank. Locate the screws along the front edge and near the seat. Use a hex key or screwdriver as needed. Lift the cover straight up. The cover may have wiring connectors for the fuel cap release. Disconnect them carefully. Place the cover aside with its fasteners in a separate bag.
Always check for hidden bolts before pulling any panel. The side fairings have one screw per side behind the inner plastic covers. Remove those covers first. Use a plastic trim tool to gently pry apart stuck panels. This avoids cracking the plastic. Take photos of bracket positions before you disconnect anything.
Detaching Nose And Tail Sections
Now disconnect the headlight and front turn signal wiring harnesses before removing any nose bolts. Locate the connectors and unclip them. This prevents pulling the harness when the fairing moves. Do not skip this step.
Carefully remove the four plastic windscreen screws by hand or with a Phillips screwdriver. Do not use a drill. Once all bolts are out and the fairing is held only by rear clips, pull it evenly and firmly straight forward. Support the panel with one hand to prevent scratches.
For the tail section, start with the seat. Remove the passenger and rider seats. Unscrew the tail fairing bolts. Find and unclip the connectors for the tail light and turn signals. Label them if needed. Pull the tail fairing rearward to release it from the mounting tabs. Work slowly and check for any remaining fasteners.
This complete removal process sets you up for a smooth Yamaha R3 fairing replacement. With all old panels off, you can inspect the frame and prepare for installation. Taking your time now prevents mistakes later.
Installation Process
Aligning Tabs And Clips
Start your installation with the nose fairing and work backward. This order helps you seat each panel correctly without fighting against a previous piece. Align each fairing panel with its corresponding mounting points on the Yamaha YZF-R3 before you secure anything. The blades of the new side fairings must slot into the grooves on the nose fairing and fuel tank cover. Do not force any part into place. Test-fit each panel first. Hold the nose fairing up to the frame and check that all mounting holes line up. The headlight opening must sit centered over the headlight assembly.
Loosely insert all screws, fasteners, and push rivets for one section. Do not fully tighten any bolts until all pieces in that section are loosely fitted. This method gives you wiggle room for small alignment adjustments. Aftermarket fairings sometimes need gentle pressure or slight adjustment. If a panel will not fit, inspect the motorcycle for extra tabs or brackets that might block the mounting points. A small amount of silicone on stubborn tabs helps them slide into place. It also reduces rattling after installation.
Attach the lower side panels first by sliding them into position and securing the tabs. Install the inner black covers next. Ensure the tabs snap fully into their slots. Fit the side fairings and reconnect the turn signals. Verify that no wiring gets pinched between the panels and the frame. Only tighten all screws after you confirm the panels sit flush against the frame.
Check the alignment of all LED lights and wiring during installation. Verify that the new fairings match your exact model year. Inspect every mounting point on the motorcycle. Look for bent brackets or damaged threads. Fix any issues before you install the new panels.
Align the blades of the new side fairings with the slots on the nose fairing and fuel tank cover. Loosely thread all bolts, fasteners, and push rivets for one section. Do not fully tighten any bolts until all pieces in that section are loosely fitted. This retains wiggle room for small alignment adjustments. You can shift the panel left or right while the bolts are loose. Make these small shifts until the panel sits perfectly even.
Yamaha R3 fairing replacement Installation Tips
Thread each bolt by hand before you reach for a tool. Hand-tightening first lets you feel when a bolt starts to cross-thread. This step saves you from stripping the threads in the plastic mounting holes. After you loosely fit all bolts for one section, go back and tighten them evenly. Tighten in a crisscross pattern where possible. This distributes the pressure evenly across the panel and prevents warping.
Reconnect all electrical components before you push the panel into its final position. Connect the headlight wiring harness first. Then connect the front turn signal connectors. For the tail section, connect the tail light and rear turn signal wiring. Route the wires so they do not get pinched when you press the panel into place. Use zip ties to secure any loose wiring away from moving parts. Pinched wires cause shorts and flickering lights. Check each connector one more time after you seat the panel.
Do not rush the installation. Rushing can damage the fairings or the motorcycle frame. Follow the instructions in your owner's manual. Take your time to ensure a secure and well-aligned fit. If a spot does not fit properly, use silicone or double-sided tape to hold it in place instead of forcing the part. Forcing a panel cracks the plastic or breaks a mounting tab.
Apply gentle pressure when you snap clips into place. The plastic tabs on the Yamaha R3 are strong, but they break under excessive force. Use a plastic trim tool to guide stubborn clips. Check each clip after you seat it. Listen for the clicking sound that tells you the clip is fully engaged.
A Yamaha R3 fairing replacement project succeeds when you treat the panels with care. The new fairings transform the look of your bike. The result looks professional if you take your time during installation. Step back after each section to check the overall look. Adjust any gaps before the final tightening. The finished bike will look like new.
Common Pitfalls
Stripped Screws And Broken Tabs
Stripped screw heads are the most common problem during a Yamaha R3 fairing replacement. The fairing screws look like Phillips heads, but they are actually Japanese Industrial Standard (JIS) screws. A standard Phillips screwdriver does not fit these screws properly. It slips and rounds out the cross pattern. Use a JIS screwdriver instead. This simple tool change prevents most stripping issues. If you already have a stripped screw, try a rubber band between the screwdriver tip and the screw head for extra grip.
Over-tightening bolts cracks plastic tabs. The mounting tabs on your R3 are strong, but they have limits. Tighten bolts until they feel snug, then stop. Do not crank them down. A torque wrench helps you follow the manufacturer specifications. For critical bolts like mirrors and main fairing sections, apply blue threadlocker. This keeps them from vibrating loose on the road. If you do break a tab, plastic weld or epoxy can repair it. Fill the broken area, let it cure, then redrill the hole. A small piece of bailing wire or HDPE plastic strip can also shim a stripped screw hole.
Preventing Wiring Pinches And Scratches
Wiring pinches cause electrical shorts and flickering lights. Before you push any panel into place, check the wiring harness routing. The headlight, turn signals, and tail light wires must stay clear of mounting points and panel edges. Route cables away from moving parts and pinch points. Use zip ties to secure loose wiring. Test your lights before final assembly. This step catches problems early and saves you from removing panels again.
Scratches happen when you handle panels carelessly. Always support each panel with one hand while you remove or install screws. This prevents the panel from dropping or scraping against the frame. Lay removed panels flat on a soft surface. Never stack them on top of each other. For extra protection, consider a clear polyurethane film. This nearly invisible film defends your paint from stone chips, scuffs, and bug splatter. It also adds structural strength to the plastic. Take your time and treat each panel with care.
Final Checks And Cosmetic Finish
Panel Gap And Alignment Check
Walk around your bike and inspect every panel gap. Uniform gaps mean the fairings sit correctly. Test-fit every panel before you tighten any fasteners. Adjust alignment by hand and use gentle pressure to seat the fairings. Check for common fitment problems: gaps between fairings and the frame, panels not flush with the tank or seat, clips popping out, or fairings flexing when pressed. If gaps persist, try using silicone or double-sided tape to hold the panel in place. For stubborn misalignment, trim tabs, file mounting holes, or carefully heat the plastic to soften it for a better fit. Verify all mounting points match your exact Yamaha model year.
After you align everything, run functional tests. Turn the motorcycle's power on and verify that all lights operate correctly. Turn the handlebars left and right to confirm smooth movement and ensure the fairing does not obstruct them. Then take a short, slow test ride around the neighborhood. Listen for unusual rattles, buzzes, or vibrations. If you hear any, stop and locate the source. A loose bolt often causes the noise.
Cleaning And Protecting New Fairings
Clean your new fairings with a soft microfiber cloth and mild soap mixed with water. Avoid harsh chemicals that can damage the finish. For bugs or tar, use a gentle cleaner specifically made for motorcycles. Never use rough sponges or brushes. Always use a dedicated motorcycle cleaner and soft, clean microfiber cloths.
For gloss finishes, apply a quality wax or ceramic coating for UV protection. For matte finishes, use a specialized matte detailer spray because regular wax will ruin the matte look. The most effective fairing waxes blend synthetic sealants with natural carnauba wax. Sealants provide long-lasting protection and water-beading, while carnauba adds warm, glassy depth. These hybrid blends are designed to be gentle on plastics and composite materials, including ABS. Look for products that explicitly mention plastic safety, UV protection, and a balanced blend of synthetic sealants and natural wax. Some aftermarket kits come with a warranty or best fitment documented expectation, so check your kit's documentation.
You can complete a Yamaha R3 fairing replacement at home with rewarding results. Preparation, organization, and patience carry you through every step. Gather your tools first. Label each bolt and clip. Work slowly and check your progress often.
Take your time and enjoy transforming your bike's look. Whether you choose OEM panels or an aftermarket kit, careful work produces a professional result. Step back after each section. Adjust gaps before final tightening. Your R3 will look factory-fresh when you finish.
FAQ
Do I need special tools for this project?
How long does a full fairing replacement take?
Plan for several hours if this is your first time. Rushing leads to broken tabs and misaligned panels. Patience gives you a professional result.
Can I reuse the original bolts and clips?
Yes, as long as you did not strip or damage them. Old plastic clips may lose grip over time. Replace any worn push rivets or screws. Your labeled bags keep everything organized for reuse.
What do I do if an aftermarket panel does not fit perfectly?
Check for hidden brackets or tabs on your motorcycle first. Sand the inner edge of the panel slightly. File mounting holes or apply gentle heat to soften the plastic. Some kits include a fitment documented expectation.


