
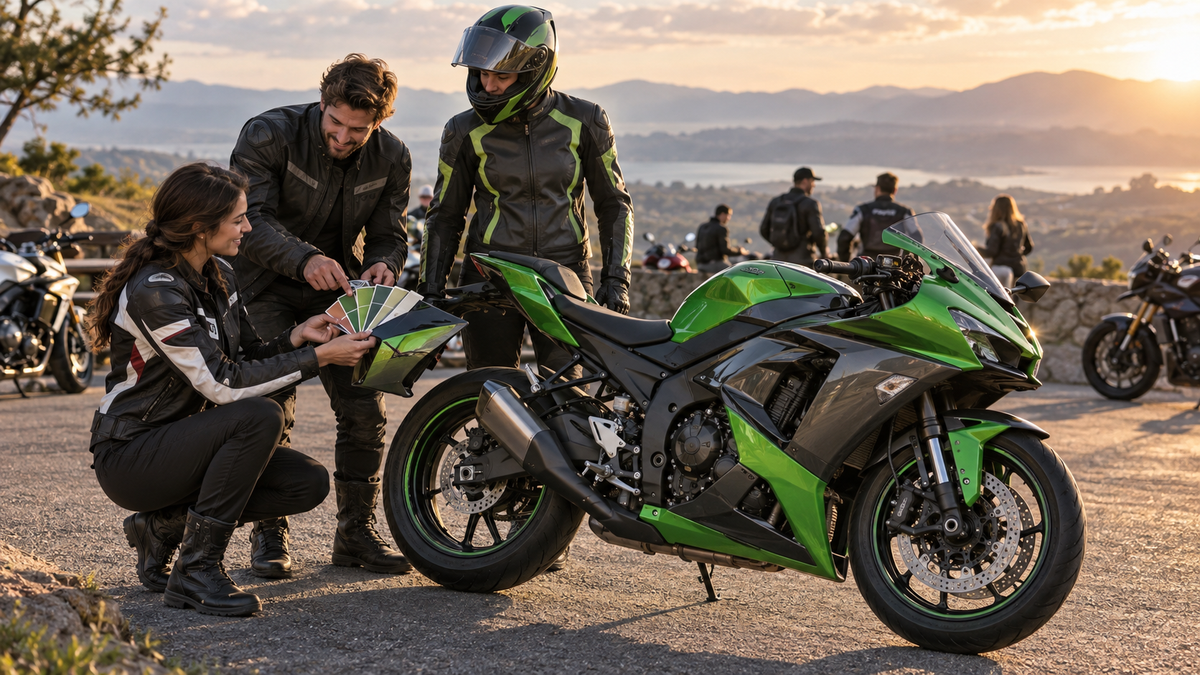
A custom Kawasaki Ninja should look intentional from twenty feet away and still make sense at every panel seam. That result starts long before paint. It starts with a brief that identifies the exact motorcycle, defines a restrained color hierarchy and shows the designer what must align across the nose, sides and tail.
This matters especially when riders use “Ninja 400” and “Ninja 500” as style categories. They are different model projects, and year and market details still matter. A color idea can travel between them; a claim about panel shape or fitment cannot.
Verify the canvas before choosing the colors
Record the VIN, model name, model year, market and trim. Photograph the motorcycle from the front, rear, both sides and three-quarter views. Include close images of the headlight, windscreen, side vents, tank area and tail interfaces.
Also record changes that affect the visual plan:
- frame sliders or crash protection;
- aftermarket screen or mirrors;
- replacement fuel tank or tank cover;
- nonstandard exhaust;
- removed passenger pegs;
- seat cowl or luggage hardware;
- existing wraps, repainted parts or repaired panels.
A clean proof built on the wrong generation is not a successful design. Send identity evidence with the request and ask the supplier to confirm the kit's stated year range and included pieces.
Choose a visual hierarchy
The easiest way to avoid a busy “parts-bin” look is to assign each color a job.
- Primary color: carries the main silhouette across the largest panels.
- Secondary color: defines selected volumes such as the nose, lower or tail.
- Accent color: appears sparingly at stripes, edges or small features.
- Neutral: connects the design to the seat, frame, wheels and unpainted trim.
Write the percentages as a starting point, not a production formula. For example, “mostly charcoal, medium green sections and a small warm accent” communicates hierarchy better than “make it wild.”
Popular ideas such as chalk grey, deep purple, pastel accents or a dark green theme can work, but the shape of the real panels determines where transitions should land. Avoid copying a flat two-dimensional graphic onto curved vents without reviewing the distortion.
Wrap, local paint or a complete painted set?
Each approach is useful for a different goal. Avoid fixed internet labor-hour promises because panel condition, design complexity and installer skill vary widely.
| Approach | Best for | Preparation | Main advantage | Main limitation |
|---|---|---|---|---|
| DIY vinyl wrap | Reversible experiments on suitable surfaces | Clean, sound paint and careful edge planning | Color can be changed without replacing the complete set | Deep vents and tight curves demand skill; edges need ongoing inspection |
| Local paint shop | Repairing or refinishing known panels | Plastic repair, sanding and a complete paint brief | Direct communication and local color evaluation | Labor and matching complexity increase across many pieces |
| Complete pre-finished fairing set | A full visual reset while storing original panels | Exact model verification, proof approval and dry fit | Cohesive design across the set | Requires a complete parts/transfer inventory and patient installation |
Do not call one option universally superior. A wrap may be ideal for a temporary theme; paint may be best when original panels are sound; a replacement set may suit a rider who wants to preserve the factory bodywork.
Use real samples instead of trusting a screen
Phone and laptop displays change color. Outdoor sun, garage lighting and cloudy conditions change it again. Ask what physical references the supplier accepts: a paint code, mailed sample, existing panel or clearly identified swatch system.
If an exact match to the fuel tank matters, photograph the tank in neutral daylight and disclose its age and repaint history. A supplier may still need a physical reference, and aged paint can differ from its original code.
For metallic, pearl, matte or color-shifting ideas, discuss the effect separately from the color. “Dark grey” does not say whether the surface should be glossy, satin, matte, metallic or pearl.

*User-provided production photograph showing visible matte and gloss finish examples. It supports a finish discussion but does not identify a Ninja model or guarantee a specific paint system.*
Build a proof that can actually be approved
A useful proof needs more than one side view. Request front, left, right and rear views, plus a separate detail for any complex transition.
Review in this order:
1. Silhouette
Shrink the proof until the motorcycle is thumbnail-sized. Can you still read the primary and secondary color blocks? If every panel competes for attention, simplify.
2. Seams
Zoom in where stripes cross separate panels. Confirm the intended alignment and note that final physical alignment depends on correct installation.
3. Openings and hardware
Check vents, headlights, indicator areas, fasteners and frame-slider openings. Do not place the focal graphic where it will be cut into fragments.
4. Both sides
Decide whether the design is mirrored or intentionally asymmetric. “Same on both sides” is ambiguous when panel shapes differ.
5. Marks and lettering
Supply authorized artwork and confirm spelling, orientation and size. If permission is unclear, use original graphics rather than copying protected team or sponsor logos.
Record each revision in one message. Scattered comments such as “more green” and “move that line” create uncertainty. A numbered change list gives the designer an auditable approval trail.
Coordinate the motorcycle, helmet and gear without overmatching
A strong look does not require every item to be identical. Repeat one accent or neutral across the bike and gear, then let the other elements breathe.
Photograph the helmet and jacket beside the motorcycle in daylight. If the helmet is visually complex, keep the fairing graphics cleaner. If the motorcycle uses a quiet grey base, a brighter helmet can become the focal point.
Safety and visibility choices belong in the gear selection process, not only the paint plan. Never reduce protective performance to achieve a color match.
Preserve the factory panels as a complete record
If resale flexibility is part of the project, remove original panels carefully and document their condition. Store each piece separately on padding, away from sunlight, fuel vapor and sharp hardware. Label bags by motorcycle zone and keep a diagram of every clip, collar and grommet.
Do not tape hardware bags to painted surfaces or stack large panels on mounting tabs. The stored set only retains its value if storage does not create new damage.
Make the weekend installation realistic
The project is approachable when preparation is complete, but it should not be sold as a fixed one-day bolt-on job. Prior repairs, missing hardware and model variation can add time.
Before starting, gather the correct service information, hand tools, clean padded tables, labels, fastener trays and replacement consumables already verified for the bike. Photograph each stage of teardown.
Transfer retained parts one group at a time. Keep all new panels loosely fitted until adjoining pieces are in position. Never use a screw to pull an offset hole into alignment; static stress plus vibration can damage a mounting feature later.
Check:
- tab and edge engagement before inserting fasteners;
- correct collars and rubber receivers at every mounting point;
- mirror, windscreen and headlight relationships;
- full steering movement with no cable or hose interference;
- lower-panel clearance around the exhaust;
- seat, tank and tail interfaces;
- lighting and required road equipment before riding.
After a short controlled ride, recheck for fresh rub marks, loose edges or a fastener that has settled.
A concise order brief
Send the supplier a single package containing:
- exact bike identity and market;
- photographs of all sides and relevant modifications;
- confirmed kit contents and items to be transferred;
- primary, secondary, accent and neutral colors;
- finish choice for each zone;
- four-view livery reference with seam notes;
- authorized artwork files;
- tank and gear coordination notes;
- shipping deadline stated as a planning need rather than a promise;
- a request for final proof approval before production.
Final approval checklist
- Ninja 400 or Ninja 500 identity and year range confirmed.
- Current modifications disclosed.
- Kit contents listed in writing.
- Color hierarchy is clear at thumbnail size.
- Finish and color are specified separately.
- Both sides, front and tail have been reviewed.
- Graphics do not collide with vents, holes or seams.
- Trademark permission is clear.
- Original panels have a storage plan.
- Installation includes a loose dry fit and post-ride recheck.
Start with the Kawasaki fairing collection, then narrow the request using the motorcycle's exact identity. A successful custom Ninja is not simply louder than stock green. It is visually clear, mechanically respectful and documented well enough that the final set matches the rider's real motorcycle.



