
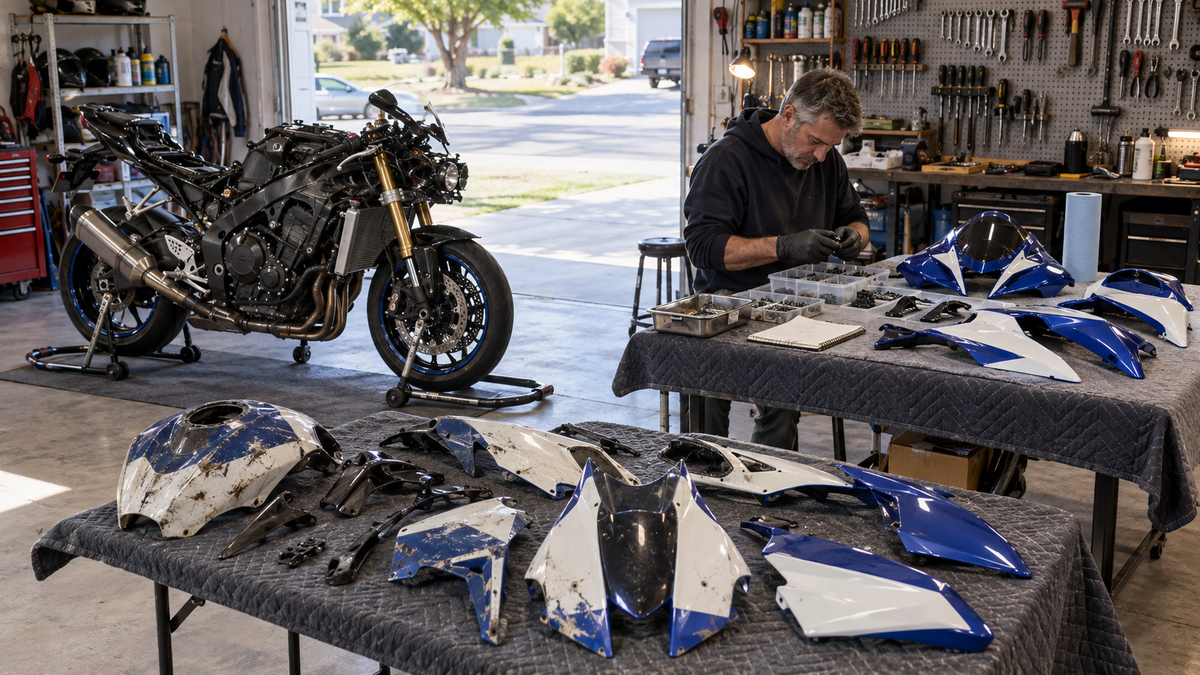
An older Suzuki GSX-R can look like an easy cosmetic project: faded paint, a cracked side panel and a tail section that no longer matches. The mistake is ordering a full kit before learning what the motorcycle has accumulated over ten or fifteen years of repairs.
Used GSX-Rs often arrive with mixed-generation-looking panels, missing inner trim, nonstandard fasteners, repaired tabs or brackets moved after an earlier slide. A new painted set cannot correct those conditions by itself. The best restoration begins with an audit that separates bodywork problems from motorcycle problems.
This guide applies to garage projects across GSX-R600, GSX-R750 and GSX-R1000 families, but it does not claim that panels interchange between capacities or year ranges. Confirm the exact model and generation before ordering.
Start with identity, not color
Write down the VIN, registration model, build label, model year and market. Then photograph the motorcycle from the front, rear, both sides and above. Add close views of the headlight, screen, tail opening, side-panel vents and every mounting point that looks modified.
Do not identify the generation from one painted panel. Bodywork can be replaced, and a previous owner may have created a hybrid appearance. Use the motorcycle's records and chassis identity, then compare current brackets and retained components with the correct parts information.
Create a folder with three groups of photographs:
- whole-bike references for silhouette and panel relationships;
- interface references for tabs, grommets, brackets and overlaps;
- damage references for cracks, missing material, repairs and rub marks.
Those images make a supplier conversation much more useful than “I have a blue 750.”
Remove panels without destroying the evidence
Before teardown, place masking-tape labels near each fastener location and photograph them. Use divided boxes or labeled bags for each zone: nose, left side, right side, lower, tank area and tail.
Support a panel while removing its last fastener. If it still will not release, look for a hidden push pin or interlocking edge. Pulling harder can break the exact tab you need to study.
Record anything unusual:
- bolts with mixed heads or lengths;
- washers stacked to fill a gap;
- cable ties replacing clips;
- drilled holes beside original-looking holes;
- repaired plastic around a mounting point;
- inner panels missing from one side;
- heat marks or abrasion near the exhaust.
These details explain why the old bodywork may have buzzed or sat unevenly. They also tell you which supporting parts need attention before a fresh set goes on.
Make a panel condition map
Lay the pieces on padded surfaces with painted faces protected. Assign each one a status.
| Status | What you see | Next step |
|---|---|---|
| Reuse | Sound mounting points, acceptable finish, no interference | Clean, document and store or reinstall |
| Repair candidate | Local cosmetic damage away from critical edges and mounts | Ask a qualified repair/paint shop to assess |
| Replace | Missing material, severe distortion or damage through mounting areas | Identify the exact replacement panel or set |
| Unknown | Shape or mounting features do not match the rest of the project | Verify generation and source before spending |
A crack is not the only failure. Hardened grommets, crushed collars and missing edge trim can load a good panel incorrectly. Replace worn consumables with the correct parts rather than compensating by tightening harder.

*User-provided production photograph showing visible filling and surface-preparation work on a side-panel-shaped component. It does not identify a Suzuki model or a universal manufacturing process.*
Inspect the motorcycle with the bodywork off
The stripped stage is the best time to check what the panels normally hide. Clean enough dirt to see interfaces clearly, then inspect without bending brackets to “make things fit.”
Look at the fairing stay, side brackets, radiator mounts, headlight support, tail structure and lower-cowl attachment points. Compare left and right where symmetry is expected, but remember that some motorcycles use intentionally different parts on each side.
Check wiring and hoses for improvised routing. A harness trapped between a bracket and panel can create a gap that looks like bad molding. Check that rubber receivers are present and oriented correctly. If a metal bracket is bent or a mounting boss has been repaired, document it before deciding how to proceed.
If structural or steering damage is suspected, stop the cosmetic project and have the motorcycle inspected by a qualified technician.
Choose a restoration strategy
Three common paths can all work when chosen for the right reason.
| Path | Best when | Main advantage | Main risk to manage |
|---|---|---|---|
| Used OEM panel hunt | One rare original piece is missing and originality matters | Factory part and finish history may be preserved | Color aging, hidden repairs and incomplete listings |
| Refinish the current set | Existing pieces are complete and structurally suitable | Keeps known interfaces and allows local color work | Labor grows quickly when many panels need repair |
| Complete painted replacement set | Multiple panels are mismatched or the design needs a full reset | Cohesive appearance and one planned installation | Exact generation, contents and transfer parts must be verified |
Do not compare only purchase price. Include paint correction, shipping, missing trim, hardware, grommets and the time required to make a mixed set coherent.
Build a livery brief that respects the motorcycle
Blue-and-white heritage schemes, period race-inspired layouts and cleaner modern designs can all suit a GSX-R. The right choice depends on the generation's panel lines and the owner's goal.
Start with four views of the exact body shape. Mark where major color blocks should cross seams. Decide which retained parts—tank, wheels, frame, seat and front fender—must coordinate with the new bodywork. If the fuel tank remains original, request a physical color reference or accept that screen colors cannot promise an exact match to aged paint.
For a race-inspired design, separate the visual idea from trademark permission. Use authorized marks or original graphics. Ask for a proof with no missing side and no unexplained logo substitution.
Review the proof at thumbnail size and full size. A design that looks exciting close up can become visually noisy from ten meters away. Check that number areas, stripes and sponsor-style blocks do not collide with vents, fasteners or panel overlaps.
Replace age-related mounting consumables deliberately
Rubber parts harden with time and heat. A new panel mounted into a split well-nut or flattened grommet may rattle, sit low or crack around the hole. During the audit, count and identify the consumables rather than buying a random universal bag.
Match shoulder lengths, collar dimensions and thread sizes to the motorcycle's parts information. Keep original hardware that is correct and serviceable. Replace damaged items individually or with a verified kit. A shiny collection of bolts is not useful if the shoulders and collars do not control panel spacing correctly.
The loose-fit installation sequence
Before final installation, place protective material over painted contact areas and work with clean hands. Install the main reference pieces loosely, then add adjoining panels. Engage locating tabs by hand. If a tab meets the wrong side of an edge, remove the panel and reset it; do not twist it into position under bolt tension.
Leave fasteners finger-tight until the nose, side cowls, lower and tail transitions look natural. Check gaps against the motorcycle's known reference points, not against an internet photograph of another year.
After alignment:
- confirm every collar and rubber receiver is present;
- tighten in a gradual sequence using model-specific service guidance;
- turn the steering through its full range;
- inspect exhaust and radiator clearance;
- run the motorcycle only after tools and loose hardware are removed;
- complete a short controlled ride and recheck for rub marks or loose edges.
What a fresh set cannot fix
Replacement bodywork cannot straighten a stay, repair a cracked headlight housing, correct a shifted radiator or prove that an old motorcycle has never been crashed. It also cannot guarantee that a previously modified exhaust will clear the lower cowl.
That is why a restoration audit adds value. It turns a cosmetic order into a controlled project with known unknowns.
Restoration checklist
- VIN, model, year, market and capacity recorded.
- Current motorcycle photographed before teardown.
- Every removed panel labeled and mapped.
- Brackets, stays, lights and radiator mounts inspected.
- Reuse, repair, replace and unknown panels separated.
- Grommets, collars, clips and fasteners counted.
- Kit contents confirmed in writing.
- Livery proof reviewed on all visible sides.
- Dry fit completed without pulling holes together with bolts.
- Steering, cooling and exhaust clearances checked before the first ride.
Browse the Suzuki GSX-R600/750 fairing collection or the wider Suzuki fairing collection only after the identity audit is complete. The most satisfying “Gixxer rebirth” is not the fastest color change. It is the one that explains every bracket, fastener and panel before the new finish hides the work.



