A used CBR600F4i can tell two different stories. The registration says one year; the plastic, seat and hardware on the bike may tell another. That matters most at the rear. Honda listed a one-piece seat as new for the 2004 F4i. If you are replacing damaged bodywork, planning a new color, or putting a previously modified bike back together, the silhouette of the seat and the parts underneath it deserve more attention than the color in a product thumbnail.
This is not a claim that every 2001–2003 tail part is incompatible with every later part. Markets, prior repairs and individual components complicate that conclusion. It is a practical ordering rule: identify the motorcycle, then verify the tail assembly that is actually on it before approving a painted kit. A fairing can be the right color and the wrong shape.
What Honda actually changed
Honda's 2004 CBR600F4i features sheet calls out a one-piece seat in its “New for 2004” list. That is a stronger starting point than a forum shorthand about an “early” or “late” F4i. It tells us what Honda announced for the 2004 US model; it does not, by itself, establish that a complete tail conversion is a bolt-on job or that every adjacent panel, bracket and latch crosses the change without modification.
For a shopper, the seat is an easy visual cue. On the earlier layout, rider and passenger cushions are visibly separate. On the later one-piece arrangement, the cushion runs continuously into the passenger area. Look at the seat-to-tail seam from both sides, not just a cropped three-quarter beauty shot. Also look underneath: a missing latch, improvised bracket or damaged fastener can make a correctly shaped painted panel sit badly.
The real 2005 F4i pictured below shows why a side view is useful. You can trace the continuous seat and the adjacent tail panel, rather than judging fit from graphics alone. This is an editorial photograph of a rider's motorcycle, not a NiceFairings product installation or a promise that a listed kit will match this bike.

2005 CBR600F4i, photographed in Tallinn by Silver Kalve, CC BY-SA 2.5. Original photo; the frame includes the motorcycle's rear seat and tail.
Start with the VIN, then look beyond it
Begin with the year on the registration and the VIN identification. Use the owner documentation or a Honda dealer to confirm what model and market that number represents. That step prevents a common mistake: shopping for a CBR600RR because a seller wrote only “CBR 600,” or shopping for a carbureted CBR600F4 because the “i” is missing from an old advert. A photograph of a fairing graphic cannot resolve a model identity.
Next, photograph the machine you have. A used F4i may have an aftermarket seat, replacement subframe, race tail or a mix of original and replacement panels. The year is still the correct starting point, but the year alone cannot tell you whether a prior owner changed the rear assembly. Compare your photos against the exact product listing and ask for confirmation if anything looks different. Never order a later-looking kit solely because you want the later seat silhouette. That can turn a bodywork purchase into a seat, latch and bracket project.
Send a supplier a useful photo packet instead of a vague “will this fit?” message:
- A full left side and full right side, with the whole motorcycle in frame.
- A straight rear view showing the taillight, indicators, license-plate support and tail width.
- A view from above of the complete seat, including the seam or continuous cushion.
- Close-ups of the seat latch area, tail mounting tabs and both side-panel junctions.
- The year and market confirmed from the motorcycle's records, plus any known tail or subframe conversion.
The first four photographs answer different questions. A side view reveals the main shape. The rear view exposes light and bracket openings. The top view clarifies the seat arrangement. The close-ups expose repaired plastic or improvised hardware that a distant image can hide. If you have only one photo, make it a clean, uncropped side view; then gather the others before paying for paint.
The tempting shortcut: “It is all F4i, so it must fit”
The F4i name stayed familiar while Honda changed the seat presentation. The NiceFairings F4i collection currently separates offers labeled 2001–2003 from offers labeled 2004–2007. That is useful shopping information, but a collection is an index, not a mechanical compatibility certificate for a modified motorcycle. Open the individual product, read its stated years and options, and compare its photographed tail outline with your bike. If the product page is unclear about the pieces supplied, ask before ordering.
This matters especially if a seller says “complete fairing kit.” The phrase may describe a set of painted panels, while the seat, lamp, screen, grommets, clips and mounting hardware may be separate or reused from the motorcycle. Do not infer the box contents from a layout photo. Ask for the actual parts list for the exact selected product and keep the answer with your order. The fairing-kit contents guide explains why that check saves time at installation.
There is also a difference between a pictured tank cover and the actual fuel tank, between a windscreen shown as styling context and one included in the order, and between visible painted panels and the small black infill pieces around them. Make a list of what is damaged on your bike, then match each item to an explicit line in the offer. If an item is uncertain, record the answer before committing to a custom color. This is especially useful on a motorcycle that came with a box of spare pieces from a previous owner: the box may contain a mix of original, aftermarket and unrelated fasteners.
The second shortcut is to compare only paint. An early red and black F4i and a later red and black F4i can appear close in a small image. Paint can be changed; mounting geometry cannot be confirmed by color. Zoom in on the seat edge, tail side-panel top line, rear lamp opening and visible fasteners. If you are choosing between two listings, make a side-by-side screenshot of those areas. The result often makes the next question obvious.
If a previous owner mixed parts, pause the order
An F4i that has been repaired after a low-speed drop is not automatically unsafe or a bad buy. Painted panels are replaceable. Yet a mixed tail asks for a more careful inspection. Remove the seat with the correct procedure and look for cracked or repaired tabs, missing rubber support points, bent brackets, fasteners that bottom out before the panel is seated, and wiring squeezed between plastic and frame. If anything structural looks bent, let a competent technician assess it rather than treating new bodywork as a straightening tool.
Keep the inspection factual. A wide gap is evidence of a gap, not proof of a crash. It could come from a worn grommet, an incorrectly routed cable, a prior aftermarket kit, or a support out of line. Equally, shiny paint is not proof that everything underneath is straight. The goal is to locate the interface that controls the fit before a fresh panel is pulled into position with screws.
The safe trial-fit sequence is simple: preserve the original pieces as references; sort their screws and rubber parts; offer the replacement panel up without force; start every fastener by hand; and check the seat and lights before final tightening. Stop if a tab must flex sharply just to reach its hole. On an older machine, the state of the mounting hardware may matter as much as the advertised quality of the plastic. Our older Honda CBR hardware audit goes deeper on that inspection.
After the dry fit, test the parts as a system. Open and close the seat several times. Check that the latch releases without pulling the side panels inward. Look at the taillight and indicator wires with the tail installed, then confirm that no connector is trapped by a screw. With the motorcycle safely stationary, turn the bars from lock to lock to check the front bodywork too. A panel can look tidy in a still photograph and interfere with normal service access. Do not use a road ride as the first test of a binding latch or loose lamp mount.
If you do find an uneven seam, measure it and photograph both sides before changing anything. Loosening neighboring panels and settling the assembly in the correct order can solve a small alignment problem. Drilling new holes or cutting a painted edge is a different decision. First establish whether the mounting point, the supplied panel or a previously repaired part is responsible; otherwise a permanent modification can hide the original cause and complicate a return or future repair.
A better question to ask the supplier
“Is this 2003 or 2004?” is necessary, but incomplete. Try this instead:
“My VIN and registration identify a [year, market] CBR600F4i. The bike currently has [separate rider/passenger cushions or one continuous seat]. I have attached full side, rear, top-seat and mounting-point photos. Does this exact listing match the current rear assembly? Which tail panels and hardware are included, and which original parts must be reused?”
That gives the support team the information needed to answer a real fitment question. It also creates a record of what was confirmed. If you are planning a conversion, state that separately and ask what additional Honda parts or fabrication would be required; a painted fairing listing alone should not be assumed to supply them.
For a straightforward replacement, preserve any undamaged original plastic at least until the new kit has been fully trial-fitted. The original panel is a physical template for hole locations, edge shape and fastener order. It can also help distinguish a supplied part issue from an older repair on the motorcycle. If you later sell the bike, photos of the original assembly and the replacement process make the story easier to explain.
That record is worth keeping even when the new color is the only reason for the swap. Take a dated photo of both complete sides before disassembly, then of the exposed tail with the seat and side panels off. Label hardware bags by location rather than by guessed bolt size. If the bike has a nonstandard fender eliminator or aftermarket indicators, photograph their fixing points separately. Those accessories can be the source of a fit problem that looks like a tail-panel problem from a distance.
Shop the actual machine, not the thumbnail
The appeal of an older F4i is that it can be both a usable road motorcycle and a distinctive sportbike. A color change should support that, not create a puzzle at the seat. Begin in the Honda CBR600F4i fairings collection, choose the listing for the confirmed model-year range, and compare the tail details against the bike in your garage. If the photos disagree, send the photo packet before checkout. We can help review the listing's stated fitment and clarify its published contents; physical condition and any nonstandard conversion still need to be checked on the motorcycle.
The shortest rule is also the most useful: confirm the F4i, confirm the year, confirm the seat, and confirm the actual tail hardware. A complete, honest photo set is worth more than a confident guess from a tiny product image.
If the seat has been changed, write down the answer you still need before ordering: which seat, latch and mounting arrangement is installed now, and which arrangement does the pictured tail panel expect? When a seller cannot resolve that from clear photographs and the exact listing, delay the cosmetic purchase. A few minutes spent identifying the assembly protects both the finished paint and the time you would otherwise spend forcing incompatible pieces together.
Sources and photo credit
- Honda, 2004 CBR600F4i Features, published September 2003. Honda explicitly identifies the one-piece seat as new for the 2004 US model.
- NiceFairings, Honda CBR600 F4i Fairings. Product year labels and availability should be checked on the live listing at the time of purchase.
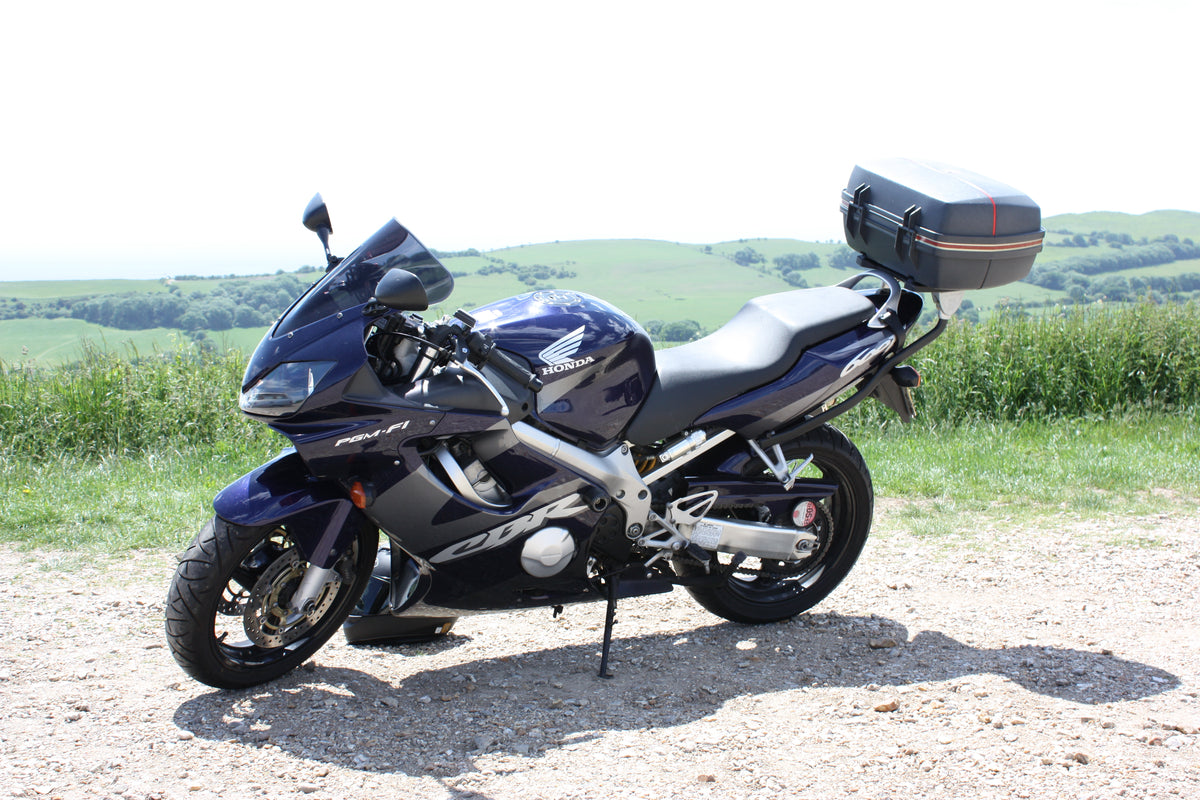
- Cover: Adam Woodford, Honda CBR600F4i, Wikimedia Commons, CC BY 2.0. Original image, photographed outdoors.
- Inline image: Silver Kalve, Honda CBR 600 F4i 2005, Wikimedia Commons, CC BY-SA 2.5. Original image.