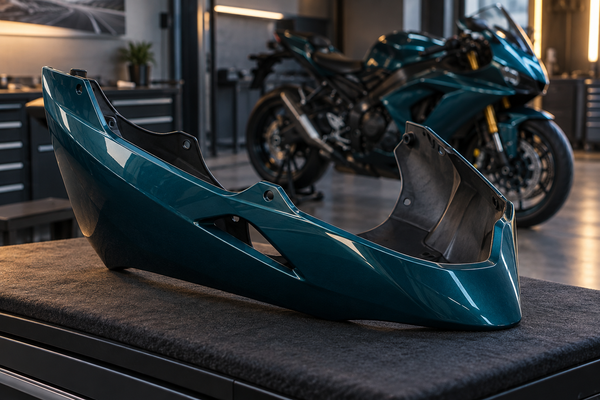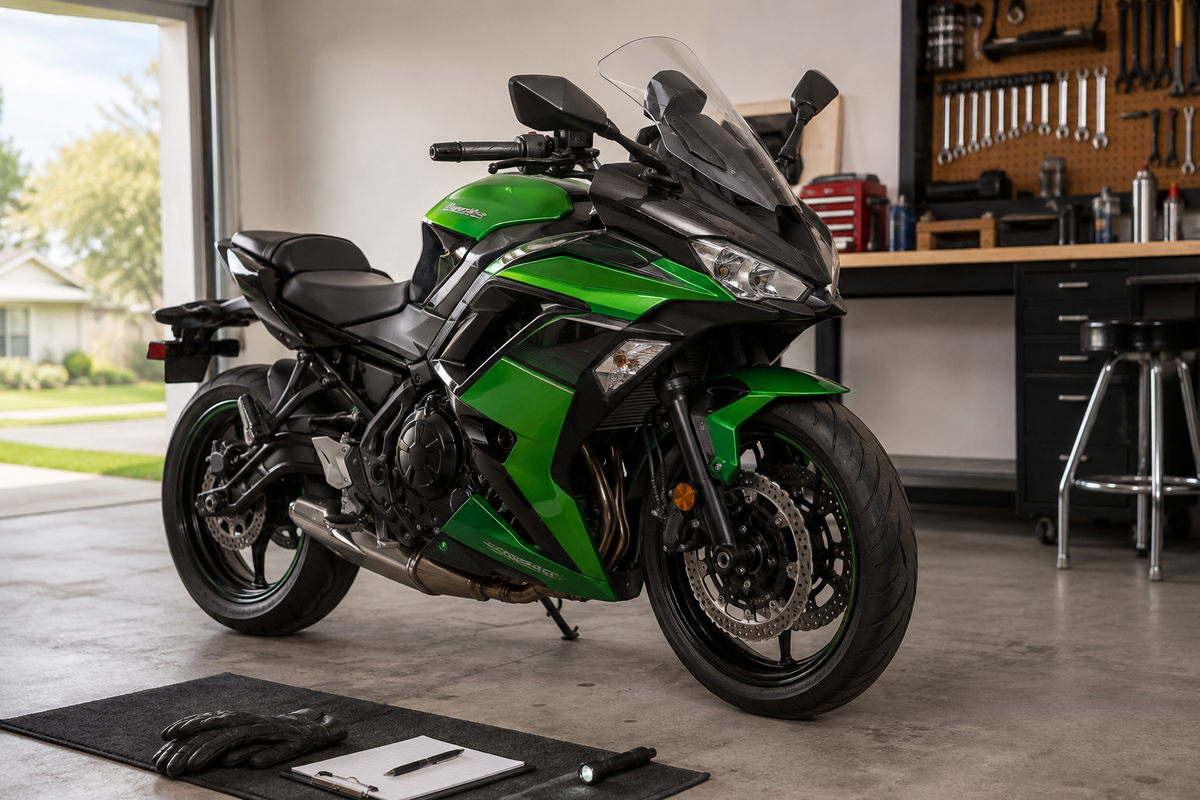
The Kawasaki Ninja 650 is known as a reliable, flexible street bike. But its stock body panels often leave riders wanting more visual appeal. A quality fairing kit changes your bike's whole look without touching its engine or performance.
You face a real choice: finding Kawasaki Ninja 650 fairings that fit your 2020-2026 model perfectly, look great, and stay within your budget. This guide covers how to check fitment, what makes good materials, top kit picks, custom styling ideas, and how to get ready for installation. Every suggestion focuses on real street riding needs-strength against daily use, visibility for safety, and looks that last beyond the new-bike shine.
Key Takeaways
Fairing kits made for 2020 through 2026 fit every Ninja 650 model.
Check your exact submodel before buying fairings.
ABS plastic is better at handling hits than fiberglass.
Good kits come with threaded inserts already put in.
OEM-style kits match the factory colors exactly.
Custom kits give you special designs and looks.
Unpainted kits cost less but need painting.
Check that every panel fits correctly before you install them for good.

Fitment: Kawasaki Ninja 650 Fairings for 2020-2026
Why Model Year Accuracy Matters
You might think any fairing kit labeled for the Ninja 650 will fit your bike. That guess can waste your time and money. The 2020 through 2026 Ninja 650 models share the same frame design and mounting spots. Sellers confirm this fit across all seven model years. You can order with trust that the main body panels will line up correctly.
Frame and Mounting Point Consistency
Kawasaki kept the Ninja 650's frame steady during this generation. The frame rails, subframe mounts, and radiator shrouds stay in the same places. Fairing makers build their kits around these fixed points. You will see that upper fairings bolt to the same brackets, and lower panels attach to the same tabs. This sameness means a kit made for a 2021 model fits a 2025 model without changes.
Submodel Variations (Standard, R, L)
You still need to check your exact submodel before buying. The standard Ninja 650 and the Ninja 650R share the same bodywork. The LAMS-approved Ninja 650L also uses the same fairing setup. But some markets get different headlight units or turn signal setups. Look at your owner's manual or VIN plate to confirm your model. This quick check stops you from ordering a kit with wrong openings for your bike's parts.
What a Complete Kit Includes
A full fairing kit replaces every big plastic part on your bike. You should know exactly what comes in the box before you buy. Complete kits save you from hunting for missing pieces later.
Upper, Lower, and Tail Fairings
The upper fairing wraps around your headlight and gauges. It gives the sharp front look you see from the seat. The lower fairings cover the sides of your engine and radiator. These parts give the Ninja 650 its sporty, full-bodied style. The tail fairing replaces the rear plastic near your passenger seat and taillight. Together, these three sections change the bike's whole shape.
Inner Panels, Windshield, and Bolt Kit
Good kits include more than just the outer shells. Inner panels sit behind the main fairings and guard wires and airbox parts. A clear windshield mounts to the upper fairing and pushes wind away from your chest. The bolt kit has every fastener, grommet, and rubber nut you need for setup. Make sure these items are listed in the product details. Some cheap kits skip inner panels, so you must reuse old damaged ones.
OEM-Style vs. Custom Fairings
Your pick between OEM-style and custom fairings sets your bike's final look. Each choice serves a different need and budget. Knowing the difference helps you decide well.
Replacement Kits for Stock Appearance
OEM-style kits copy the factory colors and designs. You get a bike that looks fresh from the showroom, matching Kawasaki's original paint codes. These kits fit riders who want to fix a damaged bike or like a clean, factory look. The easy bolt-on design means you skip color matching guesswork. You get panels ready to install with no extra painting needed.
Custom Kits for Unique Street Identity
Custom fairing kits let you break away from factory style. You can pick bold colors, race-style graphics, or themed art that shows who you are. Many riders choose custom kits to make their Ninja 650 stand out among other stock bikes. These kits often have better paint with extra clear coats. You pay more for this uniqueness, but the result grabs attention at every light. When you shop for Kawasaki Ninja 650 fairings, think about the look versus your budget and how you ride.
Some sellers list their kits for smaller year ranges, like 2020-2022 or 2023-2026. This usually just reflects stock control, not real fit differences. The panels stay the same across the whole generation. You can safely order a kit listed for a nearby year range within 2020-2026. Ask the seller if you want written proof before you buy.
Quality Benchmarks for Ninja 650 Fairing Kits
Not every fairing kit offers the same quality. You must know what makes a durable set different from one that cracks, fades, or shifts out of place after a riding season. Three key points matter most: the material, the paint system, and the mounting hardware. Each one affects your bike's look and how long the kit lasts.
Material: ABS Plastic vs. Fiberglass
The material you pick decides how your fairings handle real street riding. Two main choices fill the market: ABS plastic and fiberglass. Each has clear pros and cons you should think about before you spend money.
Impact Resistance for Daily Riding
ABS plastic deals well with the bumps and shakes of everyday commutes. Its high flexibility means it dents instead of breaking on impact. A small rock or a light drop might leave a mark, but the panel stays whole. Fiberglass also offers good strength, but it acts differently. It resists cracking under normal stress, yet a hard hit can cause it to break rather than bend. For city streets with debris and tight parking spots, ABS gives you more room for error.
Flexibility and Fitment Tolerance
ABS panels bend a little during setup. This flexibility helps you line up bolt holes without struggling against the material. Fiberglass stays more rigid, which can make mounting harder if your frame has small differences. The table below shows the main differences:
Dimension |
ABS Plastic |
Fiberglass |
|---|---|---|
Weight |
High density, not ideal for performance |
Lighter than ABS, better for weight reduction |
Flexibility & Stiffness |
Low rigidity, prone to permanent deformation |
Lower stiffness than carbon, but can flex under load |
Impact Resistance |
Highly ductile, dents rather than shatters |
Good toughness, resists cracking |
For a street-focused Ninja 650, ABS plastic gives the best mix of toughness and simple setup. You get panels that handle the rough use of daily rides without breaking.
Paint and Finish Durability
Your fairings' paint faces constant attack from sun, rain, and road dirt. A good finish resists chipping, keeps its color under UV rays, and stays easy to clean without losing shine. You want panels that still look new after two or three years of parking outside.
UV Protection and Clear Coat Quality
Long UV exposure causes fading and wear on motorcycle fairing paint and clear coat. Quality kits use multi-layer UV-resistant paint processes. These seven layers shield the ABS plastic underneath, keeping colors bright and glossy even after long sun exposure. Some top options add graphene-infused ceramic coatings. These give extra UV protection, scratch resistance, and water repellency, keeping the finish good for nearly ten years. Multi-layer paint systems also add protection against things like bird droppings and tree sap.
Gloss, Matte, and Textured Finishes
Your finish choice affects both style and care. Gloss finishes show dirt and scratches more easily but give that showroom shine. Matte finishes hide small flaws well but need special cleaners to avoid shiny spots. Textured finishes add grip and hide wear well, though they limit your color choices. Pick a finish that fits how much time you want to spend cleaning.
Hardware and Mounting Precision
Even the best-painted panels fail if the hardware does not line up. Exact engineering in the mounting system saves you hours of frustration during setup.
Pre-Installed Threaded Inserts
Quality kits come with threaded inserts already placed in the plastic. These metal receivers give your bolts a strong hold without damaging the material around them. Cheaper kits skip this step, leaving you to screw straight into plastic. That method leads to stripped holes and loose panels over time.
Grommets, Fasteners, and Alignment
A full hardware set includes rubber grommets that cushion each mounting point. These reduce vibration transfer and stop cracks from forming around bolt holes. Fasteners should match the factory sizes exactly. When you shop for Kawasaki Ninja 650 fairings, check that the product listing mentions pre-installed inserts and a full fastener kit. Proper alignment means every panel gap looks even, and no edges catch the wind at highway speeds.

Top Kawasaki Ninja 650 Fairings Kits for Street Builds
You have three main paths when shopping for replacement bodywork. Each path serves a different goal, budget, and skill level. The right choice depends on how you plan to use your bike and how much work you want to do yourself. Below you will find the strongest options in each category, with honest pros and cons to guide your decision.
Best OEM-Style Color-Matched Kits
OEM-style kits reproduce the exact factory paint codes for your Ninja 650. You get panels that match your tank and other stock parts perfectly. This option works best when you want a clean, professional look without custom design work.
Factory-Color Reproduction
ABS Fairings builds their OEM-style kits using the original Kawasaki color codes. The paint layers include a base coat, color coat, and clear coat that mirrors the showroom finish. You will not see mismatched tones between your new fairings and your fuel tank. The color stays consistent across all panels because the same batch of paint covers every piece. This matters most for popular colors like Candy Lime Green or Metallic Spark Black, where small differences stand out clearly.
Direct Bolt-On Convenience
These kits arrive ready to install with no painting or prep work. Every panel comes with pre-drilled holes that line up with your bike's factory mounting points. The included hardware kit has all the grommets and fasteners you need. You can complete the swap in an afternoon using basic hand tools. The price point sits around $670 for a full set, which includes upper, lower, tail, and inner panels.
Pros:
Perfect color match with factory paint codes
No additional painting costs
Complete hardware included
Cons:
Limited to stock color options
Higher price than unpainted alternatives
Best Custom Painted and Graphic Kits
Custom kits let you break away from factory styling completely. You choose the colors, graphics, and finish that reflect your personality. These kits turn your Ninja 650 into a one-of-a-kind machine that stands out in any crowd.
Unique Color Schemes and Finishes
ZXMOTO specializes in custom themes that range from subtle to bold. You can select from dozens of pre-designed graphic packages or request a fully bespoke paint job. Popular choices include metallic flake finishes, color-shifting paints, and two-tone schemes that flow from front to rear. The paint quality matches or exceeds factory standards, with multiple clear coats for deep gloss and UV protection.
Personalization Options (Anime, Shark, etc.)
Themed kits offer the most dramatic transformation. Anime character wraps, shark-tooth graphics, and racing stripe designs rank among the most requested styles. You can match your kit to your helmet, your riding gear, or your favorite racing team. Some riders choose abstract geometric patterns that catch light differently at various angles. The customization process takes longer than buying stock panels, usually two to three weeks for production and shipping.
Pros:
Unlimited design possibilities
Higher-quality paint with extra clear coats
Creates a unique street identity
Cons:
Longer wait time for production
Premium pricing for custom work
Best Budget-Friendly Unpainted Kits
Unpainted kits offer the lowest entry price for riders who want to save money. These panels come with a primered surface ready for paint. You handle the finishing work yourself or hire a local shop to spray them.
Primered Surfaces for Local Painting
another aftermarket supplier provides unpainted kits with a gray primer already applied. The surface accepts automotive paint without additional sanding or prep. You can take these panels to any auto body shop and ask for a custom color match. This route gives you the freedom of custom colors without paying a premium for factory-matched paint. The primer also protects the ABS plastic from UV damage during storage before you paint.
Cost Savings for DIY Enthusiasts
The price for unpainted kits lands around $600, which undercuts painted options by a significant margin. If you have spray equipment and a clean workspace, you can paint the panels yourself for another $100 to $200 in materials. This approach suits riders who enjoy hands-on projects and want total control over the final finish. You also avoid paying for paint colors you do not want.
Pros:
Lowest upfront cost
Full control over final color choice
No wasted factory paint
Cons:
Requires painting before installation
-
DIY painting risks imperfections
Kit
Price
Material
Finish
Best For
ABS Fairings OEM-Style
~$670
ABS Plastic
Factory color match
Stock restoration
ZXMOTO Custom
Varies
ABS Plastic
Custom graphics
Unique street style
another aftermarket supplier Unpainted
~$600
ABS Plastic
Gray primer
DIY painting projects
When you compare these options, think about your long-term goals. A factory-matched kit holds resale value well. A custom kit expresses your personality every time you ride. An unpainted kit stretches your budget further. All three choices use quality ABS plastic that handles daily street use. The final decision comes down to your priorities for cost, appearance, and installation effort. Browse the full Kawasaki Ninja 650 fairings collection to see current options and pricing before you commit.
Street-Style Customization Trends
Color trends change every season, and the Ninja 650 aftermarket follows along. You can change your bike's look with the right color scheme. Street riders today like finishes that mix aggression with everyday usefulness. Your color and graphics choice shapes how people see your bike at stoplights and parking lots.
Popular Colorways for 2024-2025
The market for 2020-2026 Ninja 650 fairings shows clear favorites among street riders. You will see these popular styles dominating online galleries and local bike meets:
Matte "stealth" finishes
Forged carbon fiber textures
Custom lifestyle graphics (Anime, Shark themes)
These options move away from the shiny factory look. They give your bike a purposeful, quiet presence that still gets noticed.
Matte Stealth and Forged Carbon
Matte stealth finishes cut down glare and give your Ninja 650 a tactical, modern look. The flat surface hides fingerprints and small swirl marks better than gloss. You can pair a matte black base with subtle accent lines for a clean, professional build. Forged carbon textures offer a different path. This finish looks like real carbon fiber with a unique, swirled pattern. It adds visual depth without the high price of genuine carbon parts. Many riders mix matte panels with forged carbon accents on the front fender or tail section.
The Gloss Carbon Fiber Style with Red finish stands out for the Ninja 650R. This bright option pairs carbon texture with bold red highlights. It creates an eye-catching look that appeals to sportsbike fans who want extra energy in their ride. You can also check out the Chameleon Look finish, available for all Ninja 650 models from 2020 through 2026. This color-shifting paint changes color based on your viewing angle and lighting.
High-Visibility Accents for Safety
Street riding demands visibility. You can add high-visibility accents without giving up style. Bright yellow, orange, or fluorescent green sections on the lower fairings or tail make you visible in traffic. These accents work well with darker base colors like Concrete Grey or Gloss Black. You get a bike that looks good and keeps you safer during commutes. Light Blue panels also stay a popular pick for riders who want a cooler, calmer look that still stands out.
Graphics and Finishing Touches
Graphics finish your bike's transformation. You can pick between vinyl wraps and painted graphics, each with different trade-offs. Your budget and how long you want it to last guide this choice.
Custom Vinyl Wraps vs. Painted Graphics
Aspect |
Vinyl Wrap |
Professionally Painted Graphics |
|---|---|---|
Cost |
$700 - $1,500 |
$1,000 - $30,000 (depending on design complexity) |
Durability |
5-10 years with proper care |
Longer-lasting; more durable with good-quality materials and clear coat |
Vinyl wraps cost less upfront and are easier to remove. You can change your design every few years without repainting. Painted graphics cost more but give a permanent, smooth finish. The clear coat shields the artwork from UV rays and road debris. For a daily street bike, painted graphics often earn their higher price through lasting longer.
Working with a Professional Painter
A skilled painter turns your vision into reality. You should bring reference images and talk about color codes before work starts. Ask about their clear coat process and whether they use UV-resistant materials. A good painter will also prep the ABS plastic correctly, making sure the paint sticks without peeling. You can request custom themes like anime characters or shark graphics. These designs need an artist with experience in detailed automotive work. Expect to wait several weeks for complex jobs. The result rewards your patience with a bike that truly shows your personality.

Installation Prep and Fairing Maintenance
Pre-Fit Checklist Before Installation
You should never bolt new panels straight onto your bike without checking them first. A pre-fit saves you from discovering alignment problems after you have already drilled or painted. This step takes thirty minutes and prevents hours of frustration later.
Dry Fitting All Panels
Dry fitting means placing every panel against your bike without tightening any bolts. You hold each piece in position and check how it lines up with the mounting points. Start with the upper fairing, then move to the lower sections, and finish with the tail. Look for gaps between panels that should sit flush together. Check that edges do not catch on wires or cables underneath. A panel that fits poorly during dry fitting will not improve once you tighten bolts. You can sand small edges or trim tabs at this stage, but major gaps mean you should contact the seller before proceeding.
Verifying Fastener Alignment
Each bolt hole should line up with its matching mount on the frame. You can insert a single bolt through each hole by hand to confirm the thread catches properly. Do not force any fastener into place. A bolt that resists turning usually means the panel sits slightly off position. Adjust the panel gently until the bolt slides in smoothly. Check that rubber grommets sit flush in their recesses and that no plastic edges block the fastener path. This verification prevents stripped threads and cracked panels during your final installation.
Essential Tools and Workspace Setup
Gathering the right tools before you start keeps the installation smooth. You do not need a professional garage, but you do need a clean, organized space with adequate lighting.
Required Socket and Wrench Sizes
Most Ninja 650 fairing bolts use 8mm and 10mm sockets. You will also need a set of Allen keys for the smaller fasteners that hold inner panels and the windshield. A Phillips screwdriver handles a few remaining screws. A trim removal tool helps pop plastic clips without scratching your new paint. Keep a torque wrench nearby if you want to tighten bolts to factory specifications. You can find the exact torque values in your owner's manual.
Protecting Fuel Tank and Frame
Your fuel tank sits directly beneath the upper fairing and can scratch easily during installation. Drape a thick moving blanket or old towel over the tank before you start. This cushion catches any panel that slips from your hands. You should also protect the frame rails with painter's tape where the lower fairings pass close by. These simple precautions keep your bike looking clean while you work.
Caring for Your New Fairings
Your new Kawasaki Ninja 650 fairings need proper care to keep their finish looking fresh. The right washing routine prevents swirl marks and keeps the clear coat glossy for years.
Proper Washing and Drying Methods
Use the two-bucket method for hand washing. Fill one bucket with motorcycle shampoo and water, and keep the second bucket filled with plain rinse water. Submerge a wash mitt in the soapy bucket, wash one section of your fairings, then rinse the mitt in the plain water bucket to remove dirt before dipping it back into the soap. This technique stops grit from scratching your paint. Always use a clean mitt or sponge, never steel wool or rough scrubbers. Wash in straight lines with gentle pressure, paying attention to crevices where dirt collects. Rinse frequently while you work around the bike.
Dry your fairings with a blow dryer on the wand setting, starting at the tank and working downward. This method removes water from tight spots where droplets leave marks. Follow up with a microfiber towel to catch any remaining moisture and prevent water spots.
Applying Paint Protection Film (PPF)
Paint protection film adds a transparent layer over your fairings that absorbs impacts from small rocks and road debris. You can buy pre-cut kits designed for the Ninja 650's specific panel shapes. Apply the film to high-impact areas like the front of the upper fairing and the leading edges of the lower panels. Clean the surface thoroughly before application, then use a squeegee to push out air bubbles. PPF costs less than a repaint and keeps your investment looking new through many riding seasons.
The best fairing kit balances quality, fitment, and price for your specific street-use case. For overall quality, the ABS Fairings OEM-style kit delivers factory color matching and direct bolt-on convenience. ZXMOTO offers the strongest custom option with unlimited graphic possibilities. another aftermarket supplier provides the best budget choice for DIY painters.
Before ordering, verify your exact model year and submodel. After your kit arrives, complete the pre-fit checklist before final installation. This step prevents alignment surprises and saves you hours of frustration.
Explore the full Kawasaki Ninja 650 fairings collection today to see current options, colors, and pricing for your 2020-2026 model.
FAQ
Will fairings from a 2020 model fit my 2025 Ninja 650?
Yes. The 2020 through 2026 Ninja 650 models share the same frame and mounting points. Kawasaki Ninja 650 fairings designed for this generation fit all seven model years without modification.
Can I install a fairing kit without professional help?
Yes. You need basic hand tools and a clean workspace. Most riders complete the swap in an afternoon. The included hardware kit has every fastener. Follow the dry fitting steps before tightening anything.
How do I clean my new fairings?
Use the two-bucket method with motorcycle shampoo and a clean wash mitt. Dry with a microfiber towel. Avoid harsh chemicals or rough scrubbers. This routine keeps the clear coat glossy and prevents swirl marks.
What is the difference between ABS plastic and fiberglass?
ABS plastic bends under impact and resists cracking. It suits daily street riding. Fiberglass is lighter but more rigid. It can break rather than dent on hard impacts. ABS is the better choice for commuting.
Do I need to paint unpainted fairing kits?
Yes. Unpainted kits come with gray primer applied. You can take them to a local body shop for custom color matching. If you have spray equipment, you can paint them yourself and save money.
How long does a custom painted kit take to arrive?
Custom kits take two to three weeks for production and shipping. The extra time covers the painting process with multiple clear coats. The result gives you a unique look that matches your personal style.
Will aftermarket fairings affect my warranty?
Aftermarket fairings should not affect your powertrain warranty. They are cosmetic parts. Keep your stock parts in case you need to return the bike to factory condition for dealer service.
Browse the full Kawasaki Ninja 650 fairings collection to see current options for your build.

See Also
Top Five 2025 Ninja 400 Fairing Designs To Consider
Complete Guide To Best Kawasaki Ninja 400 Aftermarket Fairings
Best 2024 Suzuki GSX-R600 And 750 Fairing Kits Under $500
Most Popular Ninja 300 Fairing Kits Loved By Customers
Thorough Performance Review Of Kawasaki Ninja 650 Fairing Kits
Related Fitment and Buying Resources
- Explore the related NiceFairings collection
- Explore the related NiceFairings collection
- Plan a custom-painted fairing kit
- Use the motorcycle fairing pre-fit checklist