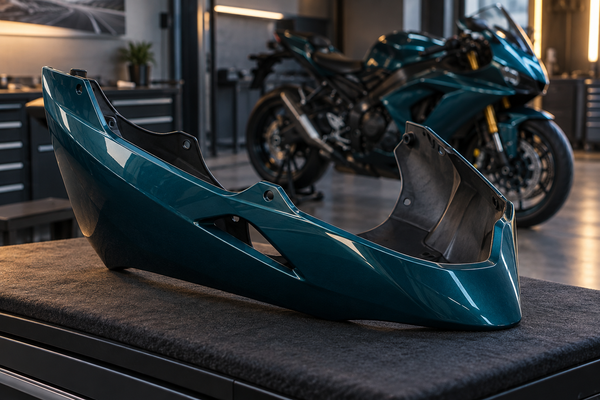
A displacement badge and similar styling do not establish whether a particular fairing panel fits. This Ninja 400 versus modern Ninja 500 guide organizes the information a buyer needs: the exact motorcycle, component references, surrounding equipment, supplier application and return conditions. It does not certify universal interchangeability or universal incompatibility. Keep the older Ninja 500R separate from the modern Ninja 500 when searching.
Images are AI-generated editorial illustrations, not photographs of the supplied product or evidence of model-year fitment, dimensions or safe installation. Use actual product documentation and motorcycle records for technical decisions.
Key Takeaways
Do not assume either that all panels interchange or that no components are shared. Verify the exact application.
Record the exact model year, model designation and market; ask a dealer to resolve identification uncertainty.
Match the OEM part number to your exact bike model and market.
Compare the specified mounting interfaces and required surrounding components, with installer help where needed.
Agree a suitable pre-fit inspection with your installer and supplier before modifying parts.
OEM-style describes an intended replacement style, not a guarantee of fit or kit contents.
Avoid listings that say 'Fits Ninja 400/500' without a year range.
Read the actual return policy, including any exclusions, fees and shipping responsibilities.
Ninja 400 vs Ninja 500 Fairings: The Short Answer
You cannot treat fairings from the Ninja 400, the modern Ninja 500, and the older Ninja 500R as one universal set. Each model has its own bodywork design. A panel that bolts on one bike may leave gaps, rub the frame, or miss every mounting point on another. The safe approach is simple: check the exact part for your model year and market before you pay.
No Blanket Interchangeability Assumption
Many riders hope Kawasaki made these bikes share body panels. That hope leads to costly mistakes. The Ninja 400 and the modern Ninja 500 look alike in style. They do not share a guaranteed fairing platform.
You must treat every fairing piece as model-specific until you confirm otherwise. That means checking the upper fairing, the side panels, the lower sections, the windscreen, the lighting openings, and the inner trim as separate items. A kit that fits the 2022 Ninja 400 may not fit the 2024 Ninja 500. Even within the same nameplate, a different model year can bring changed mounting tabs or reshaped panels.
Race bodywork deserves separate assessment. A supplier may specify shared race-bodywork applications or a conversion involving different supports and equipment. Neither establishes that an unrelated street panel interchanges. Record the exact race product and intended configuration instead of transferring conclusions between categories.
Do not assume that a displacement badge, a similar silhouette, or a seller's confidence replaces a part number check and a test-fit.
Why "500" on a Badge Proves Nothing
The model name is not a component reference. The older Ninja 500R and modern Ninja 500 are distinct motorcycle generations, and the modern model should not be searched as though it were simply an old 500R with new paint. Use the exact model year and market in the parts enquiry; a number on a badge does not identify tabs, openings or required supports.
A shopper who sees "500" and assumes all 500-badged fairings interchange will likely buy the wrong part. The same logic applies to the "400" badge. The Ninja 400 has its own fairing design that does not automatically carry over to the newer 500.
A combined listing title can be a starting point, but it needs a documented application. It may refer to a genuinely shared component, a conversion product, a race-specific configuration or simply unclear catalog wording. Read the detailed year range, product type and exclusions before deciding which interpretation applies.
What This Guide Will Help You Verify
Start by identifying the actual motorcycle through ownership records and manufacturer or dealer information. Use photographs to communicate its present configuration, especially if previous owners changed parts. Visual resemblance and engine family alone do not identify every fitted bodywork component.
Next, you will compare the panels that matter most. The upper fairing, side sections, and lower pieces each have their own mounting logic. The screen, lighting openings, and inner trim add more variables. Mounting tabs, grommets, and hardware locations complete the picture.
Then compare product references, relevant interfaces and supplied contents. Before ordering, agree how the supplier will confirm the application and what inspection is permitted after delivery. Measurements and photographs help describe a concern; they are not independent certification of fit.
Street replacement kits and race conversions serve different configurations. An OEM-style aftermarket label does not prove every support, opening or accessory matches the factory assembly. A race application may require its own installation conditions. Ask which category the listing actually covers.
Finally, you will learn common pitfalls in online listings. Stock photos that do not match the part, vague model year claims, and return policies with restocking fees all cost you money. A purchase decision matrix helps you write down the right details before you order. You will know what questions to ask a seller or dealer. You will also know when to walk away.
The core message stays constant. Ninja 400 vs Ninja 500 fairings require exact verification, not assumption. Patience at the research stage saves you from a costly return and a bike that sits unfinished in your garage.
Three Model Names: Verify Each Application
The 2024-on Ninja 500 Is Not the Old 500R
The modern Ninja 500 arrived in 2024 as a new model. It shares a family resemblance with the Ninja 400, not with the discontinued 500R. The old 500R used a different chassis, a different engine family, and a completely different bodywork layout. You cannot treat these two bikes as the same machine just because both carry a 500 badge.
Keep old 500R results separate from modern Ninja 500 results in your shortlist. An old-model complete bodywork listing is not evidence of modern-model application. Any claimed shared individual component or conversion still needs its own documented reference and conditions; this guide has not checked every component across those generations.
Ninja 400 and New 500: Similar Styling Is Not Fitment Evidence
The Ninja 400 and modern Ninja 500 have a recognizable sportbike family appearance. That resemblance is not enough to decide which exact component, if any, is shared. Compare official component applications and the actual aftermarket product documentation. Avoid turning a general model comparison into an unsupported all-panels compatibility verdict.
Compare the named components and their required interfaces. The nose, side and lower panels, screen, lamps and inner trim may each have their own application conditions. This guide has not measured a side-panel mismatch between the two models. Obtain component-specific evidence instead of converting a hypothetical gap into a factual claim.
Why the "500" Name Causes Confusion
The older 500R and modern Ninja 500 belong to different generations. A title containing only “500” therefore leaves a major identification question unanswered. A combined 400/500 listing also needs its exact years, markets and product conditions; do not infer seller intent or compatibility from the title alone.
Read the listing alongside your motorcycle records and the supplier’s application information. A listing without a useful year range or product reference needs clarification. For a used part, ask about the donor motorcycle and any modifications. For an aftermarket kit, ask for its own SKU and verified application, not an invented OEM identity.

Identify Your Exact Bike First
Before comparing parts, you need to know which bike you own. The Ninja 400, modern Ninja 500, and older 500R each have their own bodywork. A part number search works only if you give the right model year, market, and engine family. Start with your ownership papers, then check the details on the bike.
Check Model Year, VIN, and Engine Family
Kawasaki’s 2024 Ninja 500 owner and service manual page identifies documentation for that model. Its selector is not a fairing part number, and the manual listing does not certify a cross-model panel application. Use appropriate component references or dealer assistance for the actual ordering question.
Record the model year, exact variant and sales market shown by reliable motorcycle records. Registration year and manufacturing date may not be the model year. If the identifiers are unclear, ask a Kawasaki dealer to interpret them. Share a full VIN privately with a trusted dealer when necessary, not in public listing photographs.
Read the Frame Sticker and VIN Location
Use the actual owner’s manual to locate the motorcycle identification information. Take readable records without removing bodywork merely for this article. Labels and stamping arrangements can vary; do not rely on a universal sticker location or assume a label contains every ordering detail.
If identification records disagree, stop the parts enquiry and ask the relevant dealer or authority to clarify. A mismatch has more than one possible explanation and this blog cannot diagnose vehicle history. Avoid uploading unredacted VIN or personal ownership documents to public forums.
Spot Visual Cues That Separate the Three Models
Overall photographs can help a supplier see the bodywork currently installed. They are particularly useful when aftermarket panels, lights or paint obscure the original configuration. Styling cues do not replace reliable model identification, and a modified motorcycle may not look like the factory reference.
Use photographs as supporting information, not as sole proof of the motorcycle or panel application.
Take photos of your bike from the front, both sides, and the tail. Compare those photos to listing images before you buy. This habit stops wrong purchases and keeps your Ninja 400 vs Ninja 500 fairings research on track.

Compare the Panels That Matter
You need to compare the panels that matter before you buy. Three main areas hold the fitment clues. The upper fairing, side sections, and lower pieces form the main bodywork. The screen, lighting openings, and inner trim create secondary challenges. Mounting tabs, grommets, and hardware locations complete the picture. These three areas decide whether a fairing piece matches your bike. The core question of Ninja 400 vs Ninja 500 fairings comes down to checking each of these areas one by one.
Upper Fairing, Side, and Lower Sections
For the upper assembly, compare the exact product’s outline, mounting interfaces and required surrounding equipment. Check the relationship to the headlight, windscreen, instruments and supports without assuming every visible feature is supported by the cosmetic panel. Ask which associated pieces are retained, replaced or excluded. This is an enquiry checklist, not a dimensional comparison of every Ninja variant.
For side and lower sections, compare the named panels and their relationships to neighboring bodywork and the motorcycle’s existing equipment. A similar painted outline may conceal different attachment or clearance requirements. Obtain actual product information rather than inventing a specific difference at a tab, radiator or engine location from a generic photograph.
Screen, Lighting Openings, and Inner Trim
Verify the windscreen and lighting application separately from the outer-panel application. Ask about the exact screen, lamps, brackets and trim required by the proposed configuration. A suitable opening does not prove that the surrounding equipment mounts correctly. No cross-model screen dimensions or universal interchange verdict have been verified for this guide.
Inner trim and hidden supports are not automatically part of a full kit. Their roles and attachment arrangements vary by component. Use an itemized contents list to identify which pieces are supplied and which must be retained or ordered separately. Cosmetic trim should not be assumed to provide structural support for lamps or instruments.
Mounting Tabs, Grommets, and Hardware Locations
Ask for relevant views of the actual product’s tabs, slots and mounting interfaces. Compare them with the documented application and present motorcycle configuration. Some interfaces involve another panel or a separate support rather than the frame itself. Tab count, rubber appearance and hole shape are useful observations, not standalone evidence of compatibility.
Have the installer assess uncertain alignment against the specified assembly information. A gap alone does not identify the cause: existing damage, incorrect surrounding parts or an installation issue may also matter. Do not force or modify the panel to compensate for unexplained misalignment. Resolve the application and return implications first.
The Buyer's Verification Checklist
Before you order any fairing piece, work through this three-step verification process. This checklist answers the practical side of the Ninja 400 vs Ninja 500 fairings question with real actions. These steps stop you from buying a part that does not fit your bike. Skipping any step adds risk to your purchase.
Step 1 — Confirm the Part Number
For genuine components, consult the correct parts catalog or a dealer for the applicable reference and any supersession. A model code such as a documentation selector is not a fairing part number. For aftermarket products, record the seller’s SKU and stated application separately. Our part-number versus SKU guide explains that distinction.
A component reference is helpful only when interpreted correctly. Matching an OEM reference can support a genuine-part enquiry, while an aftermarket kit may legitimately have only its own SKU. Ask the supplier to confirm the application and conditions for that product; neither a copied number nor an “OEM-style” label is a fit guarantee.
If no useful reference or application is supplied, ask for clarification before payment. A reputable aftermarket product need not carry an OEM part number. What matters is an identifiable item, clear intended years and variants, and a supplier able to answer relevant questions. Do not infer a motorcycle family by glancing at an unfamiliar number.
Step 2 — Inspect Mounting Points
Review the attachment interfaces relevant to the exact panel and assembly. Ask the supplier or installer which support, trim, rubber parts and fasteners are involved. This guide has not measured tab locations between these models, so it does not claim a specific offset or mismatch.
Request useful actual product views and compare them with appropriate application information. A difference worth investigating is not a reason to modify the part yourself. Ask the supplier or installer to resolve uncertain interfaces and any required supporting components.
Record any visibly missing, damaged or deteriorated rubber or mounting parts for professional assessment. A count of visible tabs does not automatically match the number of frame points, and appearance cannot establish rubber specification. Confirm the named components required by the documented assembly rather than substituting parts that merely seem similar.
Step 3 — Measure and Test-Fit
Measurements can communicate a question when the supplier specifies the reference points and method. A hand measurement does not establish manufacturing tolerances or a safe fit threshold. Do not invent a universal millimeter limit. If access or interpretation is uncertain, ask an installer to assess the actual components.
Discuss a pre-fit inspection before altering paint, drilling holes or modifying parts. The appropriate assembly order and checks belong to the exact motorcycle and product instructions. A visual check may reveal an unresolved issue, but this article cannot determine whether a particular contact point is intended or whether the surrounding equipment is correct.
Do not force fasteners or bend panels to resolve unexplained alignment. Stop and document the issue for the supplier and installer. Follow the specified assembly procedure and torque information rather than a generic sequence from a blog. The cause may involve the product, its application, existing supports or another component.
Clarify the supplier’s inspection and return conditions before the parts arrive. Modification, handling or installation may affect those terms, but the actual policy governs. Record the condition on arrival and keep packaging until the application and any concerns are resolved.
The test-fit step protects you from a wrong purchase. Rushing through a test-fit costs you more money than waiting for the right part.
This checklist applies to every fairing piece you consider. Whether you buy an upper, a side panel, a lower section, or a full kit, run these three steps. The time you spend verifying now saves you from a return and keeps your bike ready to ride.

Street Kits vs Race Conversions
The kind of fairing you buy changes how you check the fit. Street replacement panels follow factory shapes and mounting rules. Aftermarket kits may say they fit many bikes, but you must check them closely. Race bodywork uses custom brackets and takes off street parts. Know which group your purchase belongs to before you order.
OEM-Style Replacement Fairings
OEM-style aftermarket bodywork is intended to resemble or replace a particular factory configuration. The description does not by itself guarantee identical materials, geometry, hardware or included pieces. Read the specific product application and conditions.
Checking them is simple. Match the part number to your model year and VIN. Check the mounting tabs against your frame holes. Look at grommets and hardware openings to make sure they match. A test-fit confirms everything before you install it for good.
If retaining the street configuration is your goal, ask how the product works with the intended lights, windscreen, supports and trim. Contact NiceFairings with the exact listing and motorcycle information to clarify an order. This article does not certify every kit or modified motorcycle.
Aftermarket Street Kits and Fitment Claims
A combined application claim needs product-specific support. It may cover a shared component, a defined conversion or only a certain variant. Ask what the claim includes, what supporting equipment is required and which exceptions apply. Do not assume broad wording is either automatically valid or automatically false.
Check aftermarket kits the same way you check OEM parts. Ask the seller which model years were tested. Ask for photos of mounting tabs and hardware spots. Check if the kit comes with specific brackets or adapters. If the seller cannot give these details, the kit may not fit your bike.
Some kits use universal mounting systems with drilled holes and custom brackets. These take more work to install and may not line up as well as factory-fit panels. Expect to spend time adjusting them. If you want a simple bolt-on replacement, pick a kit made for your exact bike.
Race Bodywork and Track-Only Conversions
Race bodywork serves a different purpose than street fairings. Track panels remove headlights, turn signals, and mirrors. They use different mounting points, often Dzus fasteners or custom brackets. A race kit built for a Ninja 400 may use brackets that do not exist on a Ninja 500 frame.
Do not assume race fairings prove street fitment. The part may have been changed with drilled holes, trimmed edges, and added brackets for a specific bike. Those changes do not carry over to another model. The seller may not know the full history.
Race bodywork materials, attachment systems and retained equipment vary. Do not generalize that all race panels are thinner plastic or use fewer mounting points. Track suitability also does not establish road suitability. For a road motorcycle, retain an appropriately assessed road-use configuration rather than treating a race listing as street-fit evidence.
Treat race bodywork as its own category. Check fitment by test-fitting it on your bike. Ask the seller which model year the part came from, whether brackets were changed, and whether panels were trimmed. This information tells you whether the part can work for your bike.
Common Pitfalls in Online Listings
Online listings for fairings often hide the details you need most. Sellers want to sell parts fast. They write titles and descriptions that attract clicks. That approach creates traps for buyers who need an exact fit. You can avoid these traps when you know what to look for.
"Fits Ninja 400/500" Claims That Hide Model Years
A combined “Fits Ninja 400/500” heading needs a useful year range and exact product definition. Check whether it refers to modern Ninja 500 applications and whether it is a street replacement, shared component or conversion. Older 500R listings must not be silently substituted for modern Ninja 500 information.
You need to read past the headline. Look for a specific year range in the listing. Check whether the seller names the exact model code, such as EX400GNFAL or EX500HRFNL. Ask the seller which bike the part came from. A vague answer means the seller does not know the true application. Walk away from that listing and find one with clear details.
Stock Photos That Don't Match the Part
Many listings use a factory photo or a picture from another bike. The image looks clean and correct. The actual part may have scratches, cracks, or missing tabs. You cannot judge condition from a stock photo. You also cannot confirm the mounting points from a picture that shows only the front side.
Ask the seller for real photos of the actual part. Request shots of the back side, the mounting tabs, and any damaged areas. Compare those photos to your own bike. Check the tab shapes and hole locations against your frame. If the seller refuses to send real photos, treat that as a warning sign. A honest seller will show you what you are buying.
Return Policies and Restocking Fees
Return charges and exclusions depend on the actual seller, product and order terms. There is no verified market-wide fee percentage used in this guide. Check the policy applying to your chosen item, especially for custom finishes or made-to-order products, and ask about unclear terms before paying.
Read the return policy before you pay. Check the time limit for returns. Look for restocking fee language and who pays shipping. A kit that costs a few hundred dollars can lose a large chunk of its value when you send it back. That money comes out of your pocket. Confirm the return terms first. Then decide whether the risk is worth it.
A clear return policy protects you. A vague one leaves you holding the cost.

Purchase Decision Matrix for Ninja 400 vs Ninja 500 Fairings
A decision matrix turns your research into a clear record. You write down the facts that matter before you spend money. This habit protects you from wrong purchases and costly returns.
What to Write Down Before You Order
Record the exact model year, variant and market from reliable motorcycle information. Keep the supplier’s SKU separate from OEM references and documentation model codes. Ask a dealer about unclear identification or superseded genuine parts. Your worksheet should show the source of each conclusion rather than mixing several types of number into one field.
List the named outer panels, inner trim, supports, screen, lighting-related parts and hardware relevant to the proposed work. Mark each as included, retained, separately required or not yet confirmed. “Full kit” is not a universal contents specification; our kit-contents checklist provides a related enquiry framework.
Item to Record |
Your Bike's Details |
Listing's Claim |
|---|---|---|
Model year and code |
||
VIN |
||
Upper fairing part number |
||
Side and lower panel numbers |
||
Screen and lighting openings |
||
Inner trim included? |
||
Mounting tab count |
||
Return window and fees |
Questions to Ask the Seller or Dealer
Ask which exact bike the part came from. Request the model year, model code, and market version. A US model may differ from a European or Asian version in lighting and trim. Ask for real photos of the back side, mounting tabs, and any damage. Stock photos do not show condition or tab positions.
Ask whether the kit includes inner trim, grommets, and hardware. Ask about the return policy and restocking fees. A vague answer on any of these points signals risk. You can also compare product details at NiceFairings against your recorded facts.
When to Walk Away From a Deal
Pause when the supplier cannot clarify the item’s application, included parts or return conditions. For used parts, seek condition photographs and donor details. For a new made-to-order kit, clarify representative imagery and the exact item being produced. An absent OEM number alone is not a reason to reject a properly documented aftermarket product.
Patience at the buying stage costs nothing. A wrong kit costs you time, money, and a bike that sits unfinished.
Your matrix gives you a written record. Compare every listing against it. Buy only when the facts line up.
The useful outcome is a verified enquiry for an exact product, not a blanket answer about two model names. Record the motorcycle, relevant configuration, supplier application, contents and permitted inspection process. Confirm uncertainties before payment, and keep any later pre-fit assessment within the product instructions and agreed return conditions.
Build a quick-reference table you can screenshot. List model year, VIN, part numbers, tab count, and return terms. Confirm fitment with a dealer or trusted source like NiceFairings before you order.
Patience at the buying stage saves you from costly returns. A few extra minutes of research beats a wrong kit every time.
FAQ
Do Ninja 400 and Ninja 500 fairings swap directly?
There is no blanket answer for every component or kit. Verify the exact panel or product, model years, variants, required supporting parts and supplier conditions. A shared application for one component does not establish whole-kit interchangeability; nor does a different model name prove that nothing is shared.
Is the 2024 Ninja 500 the same as the old 500R?
No. Keep the modern Ninja 500 and older Ninja 500R as distinct model generations in your search. Their names are not interchangeable ordering references. Check the actual year and variant before interpreting any component application claim.
Where do I find my bike's model code?
Consult your owner’s manual and reliable motorcycle records, or ask a Kawasaki dealer to identify the correct model information. Documentation selectors and model codes are not bodywork part numbers. Do not assume the same label location or code format applies to every motorcycle.
Can I trust a listing that says "Fits Ninja 400/500"?
Treat that phrase with caution. It often hides the actual model years and market versions the part fits. Ask the seller for the exact bike the part came from. Request the part number and real photos of the mounting tabs. A vague answer means walk away.
What should I check before ordering a fairing kit?
Record the exact motorcycle and product application, identify the required surrounding components, confirm included parts and read the actual return conditions. Ask the supplier and installer how any pre-fit inspection should be performed after delivery. Resolve uncertainty before paying or modifying the product.
Do race fairings prove that street fairings interchange?
No. Race bodywork often uses custom brackets, drilled holes, and trimmed panels. Those changes do not carry over to OEM-style street fairings. A race kit built for one model does not confirm that a street kit will bolt onto another. Treat race panels as their own category.
How do I avoid restocking fees on a wrong kit?
Verify fitment before you order. Match the part number to your bike. Request real photos of tabs and holes. Ask about the return window and fee percentage. A few minutes of research protects you from losing part of your purchase price on a return.