The most expensive mistake in a Daytona 675 tail refresh may be choosing the color first. A replacement tail can look right in a product gallery while the exhaust already on the motorcycle requires a different tail arrangement. One concrete example is Hindle's 2006–2012 Daytona 675 underseat slip-on: Hindle says that its particular adapter and muffler fit only a race tail section and will not retain the stock turn signals or taillight. That does not mean every Daytona exhaust requires a race tail. It means the name “Daytona 675,” a model-year range, and a picture of a painted tail cannot answer an exhaust-and-lighting compatibility question.
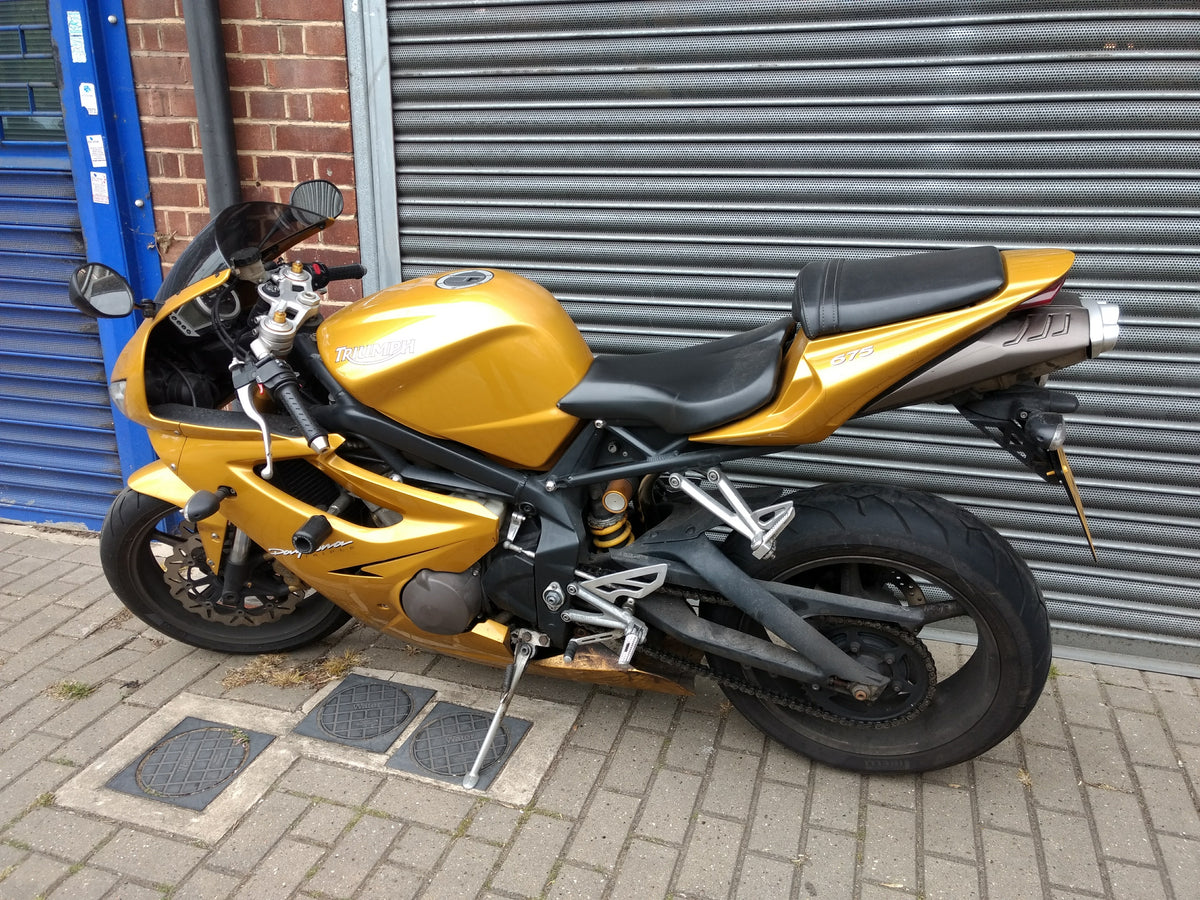
Cover: real Daytona 675 photographed by Philafrenzy, CC BY-SA 4.0. The unmodified editorial photograph shows one existing motorcycle, not a NiceFairings kit or a fitment test.
If your bike is a road-going Daytona, first identify the exhaust system and the rear equipment you need to keep. Then decide whether you are buying painted street replacement bodywork, planning a separate race-tail build, or still need answers from the exhaust maker. NiceFairings lists Daytona 675 bodywork by 2006–2008 and 2009–2012 year groups. Those listings are a starting point for a bodywork enquiry, not evidence that an unlisted exhaust, race tail, light assembly, or bracket is included or compatible.
The small line in an exhaust listing that changes the whole project
“Underseat” describes where a muffler sits; it does not promise that its outside dimensions, mounting path, heat protection, or rear-light clearance match the original exhaust. Hindle's product page is unusually explicit. The company says its slip-on adapter puts the muffler under the seat in the original stock location, yet the same page limits that product to a race tail and says it will not retain the original turn signals or taillight. The location sounds familiar. The required bodywork and lighting outcome are different.
This is why “it uses the stock location” is not enough to clear a street-tail order. The hanger, canister shape, outlet, connector pipe and surrounding hardware can change what fits around it. Conversely, a different slip-on may have its own instructions and may be compatible with the original rear arrangement. Check the documentation for the exact part number actually on your bike, not a review of another exhaust with the same brand. If there is no part number, photograph the canister badge, mid-pipe, hanger and outlet and ask the manufacturer to identify it.
The decision is wider than heat. On a street motorcycle, the rear arrangement also has to accommodate a functioning taillight, brake light, turn signals, registration equipment and whatever your local road rules require. An exhaust maker's race-tail restriction should stop a street-bodywork purchase until those requirements have a verified solution. A seller's fairing photo cannot override that restriction.

Street replacement and race conversion are different orders
A painted replacement fairing kit can renew the visible panels of a road bike. A race-tail conversion may replace the seating and rear-light arrangement and can require its own mounting, electrical and event-rule decisions. Calling both “new fairings” hides important scope. Before contacting any supplier, write down which result you want:
| Intended result | What must be established first | What a fairing photograph cannot establish |
|---|---|---|
| Restore a road-going Daytona with its present exhaust | Exact model/year; exact exhaust; required lights, passenger arrangement and rear brackets | That the exhaust will clear every new panel or that all original rear hardware can be retained |
| Return a modified road bike to the original tail layout | Which exhaust, hanger, lights, shields and brackets have been removed or changed | That buying painted plastic alone reverses the modification |
| Build a track-only race tail | Exhaust maker's restrictions; race-tail mounting and the applicable organizer's rules | That a street kit can be trimmed into an approved race tail |
If the bike came from a previous owner, do not assume you know which column it belongs in. A tail that looks stock from five paces may have a replacement muffler, improvised hanger, modified light bracket, deleted shield, or altered latch underneath. None of these proves the bike is unsafe, but each changes the information needed for a sensible order. If you cannot determine the installed configuration, have a qualified technician inspect it before committing to painted parts.
Make an evidence record before removing the old tail
The best first tool is a phone camera. Photograph the motorcycle as it sits, while the exhaust is completely cool. Take a full left side, full right side, straight rear and three-quarter rear view. Then record the muffler outlet, each hanger or bracket you can safely see, the seat and passenger-seat edges, taillight, turn signals and licence-plate mount. Photograph labels and part numbers without guessing what they mean. Add a frame/VIN image for model identification, but keep the full VIN out of public posts.
This record does two jobs. It lets a bodywork seller see which surfaces and rear equipment you intend to keep. It also gives you a reference when reassembling the bike. A cropped beauty shot may show paint and graphic shape; it usually omits the inner tail, underside and original hardware that determine whether the rear goes back together. If a listing has only glamour photos, ask for the underside and included-parts list rather than inferring what is in the box.
Do not strip the entire motorcycle just to send an enquiry. If a safe visual inspection requires removing panels, follow the correct Triumph service information for your exact motorcycle and let the exhaust cool completely. Keep fasteners and rubber pieces identified by location. A missing original damper or heat shield can masquerade as a “bad fairing” after the new panels arrive. Compare your disassembly photos with the parts you actually have before blaming either plastic or exhaust.
Our separate Daytona 675 VIN and year-photo guide covers why a 2009 label alone is an incomplete bodywork answer. Use it to establish the bike's identity. This article addresses the next question: what existing exhaust and rear equipment must the chosen tail work with?
Ask the exhaust maker one question and the fairing seller another
The exhaust manufacturer is the authority on its own system's installation restrictions. Ask whether your exact exhaust part number is designed to work with the original street tail, original lights and original heat-protection arrangement. Ask for the installation instructions and the named tail configuration, including any exclusions. Do not translate “fits Daytona 675” into “fits every tail that could be fitted to a Daytona 675.” Hindle's named race-tail restriction demonstrates why these are separate claims.
Ask the fairing seller for the bodywork scope: the listed model-year group, whether the pictured tail pieces are included, what other panels are included, and whether any hardware, heat insulation, inner panels, light housings, seat cowl or windscreen are included. If the answer is not written in the listing, get it in writing before approval. A complete-looking gallery is not a packing list. The NiceFairings Daytona 675 collection lets you select a listing and color direction; use the individual listing and support conversation for the actual bill of parts.
There is also a third authority: the bike's service information and a competent installer. Neither the exhaust maker nor the painted-panel seller can remotely certify that a used motorcycle still has straight brackets, intact fasteners, correct light wiring and adequate clearance. If a bracket has been bent or a component has been moved, the answer for a stock reference bike may not apply to your bike. This is especially important where a previous owner already modified the exhaust or tail.
Heat protection comes after the physical layout
The rear of an underseat-exhaust motorcycle is a tempting place for shortcuts. Reflective material on the inner face of a panel can be useful only where the vehicle and product instructions specify its use and where the exhaust already has the required physical clearance. It is not a spacer. It does not make a panel safe when the canister, pipe or hanger touches it. It also does not replace an absent original shield simply because both items are called “heat protection.”
Inspect the existing tail for glossy soft spots, discoloration, distorted edges, missing foil or shields, and marks where a hard part has contacted plastic. Treat these as clues, not a diagnosis from a photograph. Their position matters: a mark above the muffler has a different possible cause from a mark at a seat latch or a bracket bolt. The point is to identify the source before installing freshly painted parts over the same arrangement.
During a dry fit, the installer should be able to place the panels without forcing a fastener to pull them into position and inspect the exhaust, lighting and latch interfaces throughout assembly. Follow the model and exhaust manufacturer's instructions for the actual tolerances and fasteners; no universal gap number is given here. If the bike cannot be assembled without contact, missing shields, trapped wiring, altered light function or a seat that will not latch normally, stop before riding. The article on new lower fairings beside a non-stock exhaust addresses a different heat zone and has a useful general principle: define the hardware you actually have before ordering.
Decide what to keep before the new paint is approved
Many owners want a fresh design while preserving the option to return to the original appearance. That is easier when the old tail, seat, lights, brackets, shields and hardware are inventoried and stored as components rather than thrown together in one box. Keep a dated photo of each side of the bike and of the removed pieces. Label packaging by location; avoid stacking painted surfaces against bolts or exhaust hardware. Record broken tabs and missing parts honestly. A future owner or installer should be able to tell what was changed without interpreting an unexplained pile of plastic.
If your plan is to retain a street bike, ask for a street-tail path that maintains the functions required in your location. If your installed exhaust is explicitly race-tail-only, this may mean revising the exhaust plan instead of buying a street fairing and hoping the panels bend around it. If your plan is a dedicated track bike, separate the race-tail purchase from a street replacement kit and check the event organizer's current rules. Do not assume that an organizer will approve an arrangement merely because the exhaust manufacturer calls it a race tail.
Paint approval should come last. Choose between a restrained factory-inspired finish and a bold custom graphic only after the model, year group and tail arrangement are resolved. If a product photo shows a Daytona from another year group, use it as a color reference only. The NiceFairings custom-fairing page explains how to discuss a design; it does not convert a race-only exhaust into a compatible street installation.
A message that gets a useful answer
Send a concise note with specific attachments rather than “Will this fit my Daytona?” For example:
I own a [model year] Triumph Daytona 675 [market, if relevant]. I want to keep it street legal with its current seat, taillight and turn signals. The exhaust maker and exact part number are [details]; photos of the exhaust outlet, hanger, both tail sides and rear are attached. I am considering this [link to the exact NiceFairings listing]. Which pictured rear panels are in that kit, and which original brackets, shields, rubber parts and light components would I need to retain? Please tell me any compatibility point you cannot verify from these photos.
For a race-tail build, replace the street-light sentence with the actual race-tail part number and the organizer whose rules apply. If your exhaust is Hindle's named 2006–2012 underseat adapter, include its product page and its race-tail limitation. If your exhaust is a different Hindle system or another brand, do not copy that restriction without checking the exact instructions. The useful outcome of this message might be a confirmed bodywork scope, a request for one more photo, or a clear “we cannot verify this configuration.” All three are better than a confident but unsupported checkout.
The order of decisions
Start with the motorcycle's exact identity and the exhaust actually mounted on it. Read the exhaust instructions and establish whether you are preserving a street tail or building a race tail. Record the lights, brackets, shields and seat parts that must remain functional. Then compare the Daytona 675 fairing listings with that record and request an itemized answer for the one kit you want. Approve the design only after the physical plan makes sense.
That sequence is less exciting than choosing a paint color. It is also the difference between a fresh-looking Daytona and an expensive set of panels waiting beside a motorcycle whose tail was never ready to accept them.