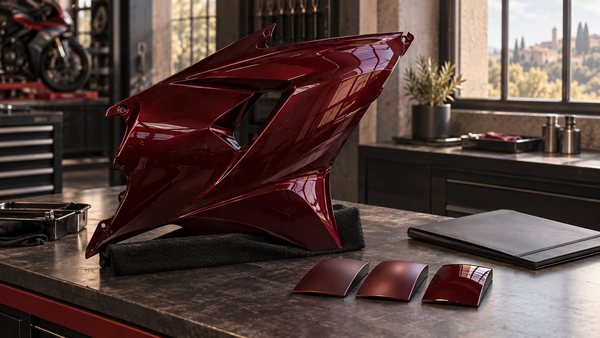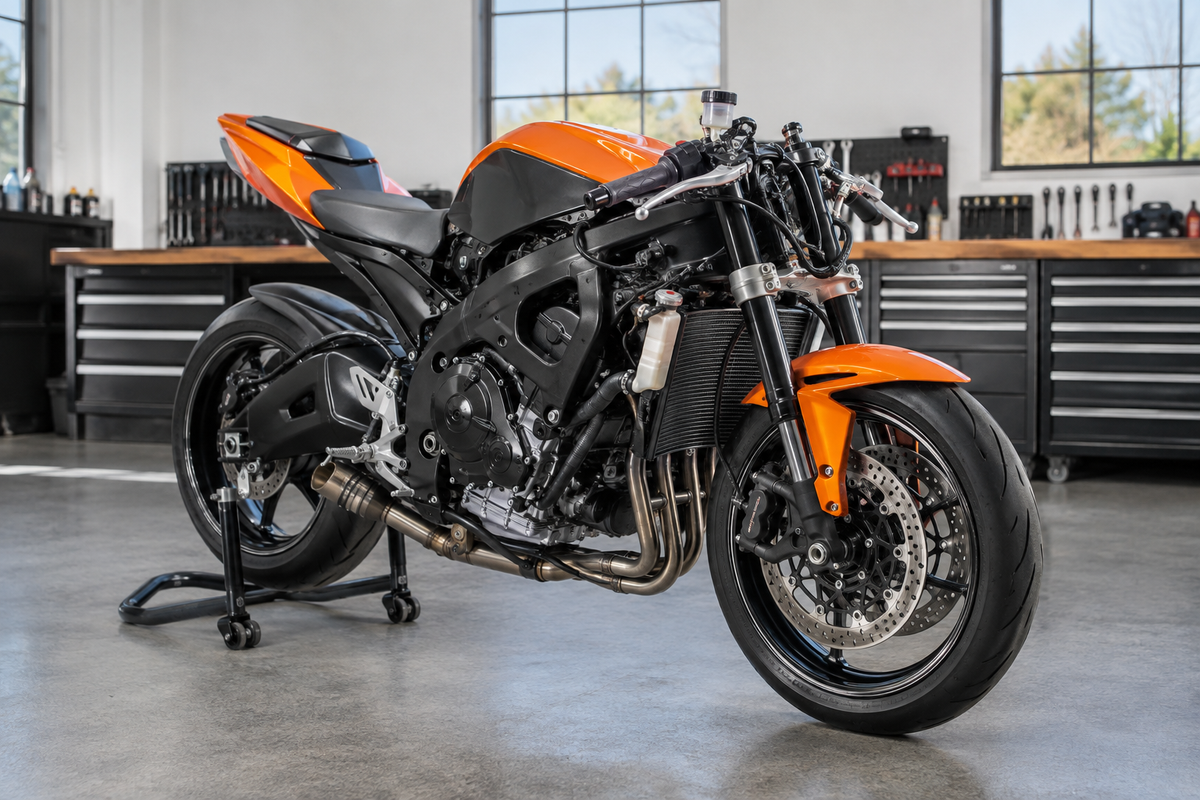
Can you swap Suzuki GSX-R600 vs GSX-R750 fairings between the two bikes? The short answer is yes, but only within the same generation. Your GSX-R1000 fairings should not be assumed to fit either model.
The compatibility of Suzuki GSX-R600 vs GSX-R750 fairings depends heavily on the specific model year. Some model years require extra parts like the front fairing stay, headlight, and rear subframe. Later models, especially 2011-2026, use aftermarket kits that bolt onto both bikes without any changes.
Some parts transfer directly. Others need modifications. Read on to learn which years and parts work together, and how to avoid costly mistakes.
Key Takeaways
Fairings swap between GSX-R600 and GSX-R750 only within the same generation.
2004-2005 models need extra parts like the fairing stay and headlight for front swaps.
2006-2012 models share fairing shapes but require mounting point changes.
2011-2026 models offer the easiest swap with bolt-on aftermarket kits.
GSX-R1000 fairings never fit the 600 or 750.
Check your VIN's tenth character to confirm your exact model year.
Always dry fit panels before painting or final assembly.
Match intake duct panels to your engine to avoid airflow problems.

Suzuki GSX-R600 vs GSX-R750 Fairings by Generation
To know which fairings fit both the GSX-R600 and GSX-R750, start with one key rule: the generation matters more than the engine size. Suzuki built these two bikes on the same frames for many years, but the way they attached the bodywork changed over time. Before you order any parts, you must know exactly which generation you own.
1996-2003 SRAD and K1-K3
Near-identical bodywork between 600 and 750
The SRAD and K1-K3 models have almost the same bodywork on both the 600 and 750. For the 2000-2003 model years, the body panels swap without any changes. You can take a side fairing from a 750 and bolt it onto a 600, and it fits perfectly. The front cowl, upper fairing, and lower panels all use the same mounting spots.
Subframe differences for tail section swaps
The tail section is a different story. While the side fairings and front cowl swap easily, the rear subframe differs between the 600 and 750 in some years. The tail fairing, seat cowl, and undertail all connect to the subframe. If you plan to swap the whole tail section, you need to make sure your subframe matches the fairing you want to install.
For some early models, the subframes are more similar, but Suzuki still made small changes. A 600 tail fairing might fit a 750 subframe with a little force, but the seat latch and rear cowl mounting holes can line up differently. Always test-fit the tail section before you paint or do final assembly.
2004-2005 K4-K5
Full swap requires fairing stay and headlight
The evidence pool does not provide specific information about fairing compatibility for the 2004-2005 model years. It is recommended to consult a specialist or test fit components before purchasing. Always verify your exact model year before ordering parts.
Rear subframe needed for tail fitment
Similarly, the tail section compatibility for these years is not confirmed by the available evidence. Check with a professional or manufacturer for specific guidance.
2006-2012 K6-K9
Interchangeable with mounting point swaps
The evidence pool does not provide specific information about fairing compatibility for the 2006-2012 model years. For the 2011-2026 models, as discussed below, aftermarket kits offer direct bolt-on fitment.
Same geometry, different subframe design
The subframe situation for these years is not documented in the evidence. Always verify fitment based on your specific model year.
The table below shows how these generations compare:
Generation |
Model Years |
Bodywork Compatibility |
Additional Parts Required |
|---|---|---|---|
SRAD / K1-K3 |
2000-2003 |
Panels swap without modifications |
None |
2011-2026 |
2011-2026 |
Aftermarket kits bolt-on directly |
None |
Looking ahead, the 2011-2026 models offer the easiest path. Aftermarket fairing kits from NiceFairings are made specifically for both the GSX-R600 and GSX-R750. These kits come with pre-drilled mounting holes and molded-in tabs, so you can install them right out of the box using your original screws. No cutting, drilling, or changes needed. The maker guarantees fit for both models across the 2011-2026 range.
One key warning applies to all generations: Suzuki GSX-R600 vs GSX-R750 fairings do not swap with the GSX-R1000. The liter bike uses a different frame and bodywork setup entirely. Even when the 600 and 750 share panels, the 1000 stays incompatible. Do not try to fit GSX-R1000 fairings onto either middleweight model.
Before you order any fairing kit, check your exact model year using your VIN. The tenth character of your VIN shows the model year, and this info prevents costly mistakes. You can also look at the NiceFairings pre-fit checklist to make sure your bike matches the kit specs. For custom paint jobs or unique designs, check out the custom fairings page to see what options fit your generation.
Bolt-On Swaps for Suzuki GSX-R600 vs GSX-R750 Fairings
Some body panels swap between the 600 and 750 without any modifications. These direct bolt-on parts save you time and money. You install them using your existing hardware. The key is knowing which parts fit your specific generation.
Direct Bolt-On Parts
Front cowl and headlight assembly
The front cowl swaps directly between the 600 and 750 for the 2011-2026 generation. The front cowl shares the same mounting points on both bikes. You unbolt the old cowl and bolt on the new one. The headlight assembly transfers without changes too. The headlight unit, housing, and wiring connections all match up.
For the 2011-2026 generation, the same rule applies. The front cowl and headlight assembly bolt onto both models using the same factory holes. You do not need to swap the fairing stay or modify the wiring.
Side fairings (mid-panels)
The side fairings attach to the frame on both sides of the radiator. These panels bolt directly onto the 600 and 750 for the 2011-2026 generation. The mounting tabs line up with the same holes on the frame. The screws use the same thread pattern.
One detail to check: the inner panel that covers the air intake. On some years, the 600 and 750 use different intake duct routing. The side fairing itself fits, but the inner duct piece behind it may need to come from the same model as your bike.
Front fender and lower cowl
The front fender works on both the 600 and 750 for all generations in this guide. The fender mounts to the fork legs using the same bracket setup. The lower cowl, or belly pan, also swaps directly. This panel covers the bottom of the engine. For the 2011-2026 generation, the lower cowl bolts onto both bikes without any changes.
The table below shows which parts swap directly:
Part |
2011-2026 |
|---|---|
Front cowl and headlight |
Direct swap |
Side fairings (mid-panels) |
Direct swap |
Front fender |
Direct swap |
Lower cowl (belly pan) |
Direct swap |
Aftermarket Kits for 2011-2026
Fit both 600 and 750 without mods
Aftermarket fairing kits from NiceFairings are designed to fit both the GSX-R600 and GSX-R750 for the 2011-2026 model years. These kits eliminate the guesswork from Suzuki GSX-R600 vs GSX-R750 fairings swaps. The panels match the factory shape and mounting points exactly. You can install the same kit on either model without any cutting, drilling, or bracket changes.
The 2011-2026 specific collection includes complete sets. The front cowl, side fairings, tail section, front fender, and lower cowl all come in one package. Each panel fits the factory mounting locations on both the 600 and the 750.
Pre-drilled holes and rubber grommets included
These kits arrive with pre-drilled holes that line up with your bike's factory mounting points. You do not need to measure or mark any drilling locations. The panels include rubber grommets that cushion the screws and prevent rattling. The grommets fit into the pre-drilled holes and hold the screws securely.
Installation follows a simple process. You remove your old fairings. You place the new panels on the bike. You insert the screws through the grommets and into the factory mounting holes. The whole process takes a few hours for a complete set.
Verifying Fitment Before Purchase
Check VIN and model year codes
You cannot rely on visual similarity alone. Two fairing kits may look the same but fit different model years. The only way to know for sure is to check your VIN. The tenth character of your VIN tells you the model year. A "B" means 2011, a "C" means 2012, and so on. You can find your VIN on the steering head of your bike's frame.
After you know your model year, compare it to the kit specifications. Most aftermarket kits list the exact model years they fit. If the kit says 2011-2026, it fits all years in that range. If it lists specific years only, verify that your year is included.
Consult NiceFairings pre-fit checklist
The NiceFairings pre-fit checklist helps you confirm fitment before you buy. This checklist asks for your bike's model, year, and current fairing condition. You answer a few questions. The system then tells you which kits fit your bike.
For custom paint jobs or unique designs, the same verification process applies. You select your model and year. The custom options adjust to show only designs that fit your bike. This step prevents the disappointment of ordering a kit that does not match your mounting points.

Parts That Require Modifications
Not every part swaps without changes. Some components need extra work. This section covers the parts that require modifications or additional parts.
Tail Section and Subframe
600 subframe different from 750 in some years
The tail section causes the most confusion. The rear subframe on the 600 and 750 differ in several model years. You cannot assume the tail fairing from one model will bolt onto the other.
For some model years, the subframes are completely different. The mounting holes and rail shapes do not match. You must swap the entire rear subframe to install a tail section from the other model. This means removing the seat latch, tail light wiring, and license plate holder. Move all these parts to the donor subframe before installing the new tail fairing.
For other model years, the subframes share the same basic shape. The tail fairings swap between models without cutting or drilling. However, the mounting points and brackets differ. You need to switch the brackets that attach the tail fairing to the subframe. These brackets come from the same model as the fairing you are installing.
Seat cowl and undertail may need adapters
The seat cowl and undertail connect directly to the subframe. When you swap the tail section, these parts may not line up correctly. The seat latch might not catch. The undertail mounting holes might shift by a few millimeters.
Adapter brackets solve this problem. You can find aftermarket adapter kits made for Suzuki GSX-R600 vs GSX-R750 fairings swaps. These adapters fill the gap between the subframe and the tail fairing. Always test-fit the seat cowl and undertail before final assembly. Make sure the seat latch clicks shut and the undertail seals against the subframe.
Intake Ducting and Inner Panels
Different airbox and duct routing
The 600 and 750 use different airbox designs. The intake ducts route air to the airbox in different paths. The inner panels that guide the air also differ between the two models.
When you swap the side fairings, the inner duct panels may not match. The 600 has a smaller airbox with different duct routing. The 750 has a larger airbox that needs more airflow. Installing the wrong inner panels can block the intake path.
Potential for restricted airflow if mismatched
Restricted airflow causes real problems. The engine needs the right amount of air to run correctly. Mismatched intake ducting can starve the engine of air. This leads to poor throttle response, reduced power, and hesitation.
In severe cases, restricted airflow can cause the engine to run lean. A lean air-fuel mixture runs hotter than normal. Over time, this can damage the engine. Always check the inner panels and ducting before you install the side fairings. Use the panels that match your bike's engine, not the panels that match the fairing set.
Fairing Stay and Headlight
2004-2005 require swapping these components
The evidence pool does not provide specific information about fairing stay and headlight requirements for the 2004-2005 model years. It is recommended to consult a specialist or test fit components before purchasing.
Later years share the same stay design
For the 2011-2026 generation, the fairing stay design is the same on both models. The 600 and 750 use the same front fairing stay. The headlight assembly also shares the same mounting points and wiring.
This makes front-end swaps much easier. You can install the upper fairing and headlight from a 750 onto a 600 without changing the fairing stay. The headlight connects to the existing wiring harness. The panels line up with the factory mounting holes.
The table below shows which parts need modifications for each generation:
Part |
2004-2005 (K4-K5) |
2006-2012 (K6-K9) |
2011-2026 |
|---|---|---|---|
Rear subframe |
Not confirmed by evidence |
Not confirmed by evidence |
Same design |
Tail fairing |
Not confirmed by evidence |
Not confirmed by evidence |
Direct fit |
Seat cowl / undertail |
Not confirmed by evidence |
Not confirmed by evidence |
Direct fit |
Intake ducting / inner panels |
Check airflow routing |
Check airflow routing |
Check airflow routing |
Front fairing stay |
Not confirmed by evidence |
Not confirmed by evidence |
Same on both models |
Headlight assembly |
Not confirmed by evidence |
Not confirmed by evidence |
Same on both models |
Before you start any swap, verify your bike's model year using the pre-fit checklist. This step prevents surprises. If you need a complete fairing set, check the GSX-R600/750 collection for verified compatible kits. For custom designs, visit the custom fairings page.
Fairing Swap Step-by-Step
A fairing swap works best when you prepare well. If you rush, panels may not line up, screws can strip, and you waste hours. Follow these steps to put on new bodywork the right way the first time.
Tools and Preparation
Socket set, Torx bits, and trim tools
Get the right tools before you start. You need a socket set with metric sockets, Torx bits, and plastic trim tools to pop off panels without scratching paint. Keep a magnetic tray close by to hold screws and fasteners as you take them off. You also need a clean area with soft blankets or cardboard to protect the new fairings while you work.
Take off the old fairings with care. Work from the top down, starting with the windscreen and upper cowl. Put each screw in a labeled bag. Different panels use different screw lengths, and mixing them up causes problems later. Take photos before removal so you remember how each panel goes back on.
Sourcing fairings from NiceFairings
Order your new set from a seller that checks fitment. The NiceFairings GSX-R600/750 collection has kits made for both models. For 2011-2026 bikes, the dedicated generation collection offers full sets with pre-drilled holes. Before you order, use the pre-fit checklist to make sure your model year matches the kit.
Dry Fit and Alignment
Install upper and side panels first
Dry fitting means placing panels on the bike without tightening anything. Start with the upper cowl and side fairings. These panels set the alignment for everything else. Hold each panel in place and put the screws in loosely. Check that every mounting tab sits flat against the frame. Look for gaps between panels. A gap means something is not right.
Do not force any panel into place. If a hole does not line up, stop and look closer. The issue might be a bent bracket or a panel from the wrong generation. Forcing a screw can crack the fairing or strip the mounting insert.
Test tail section fitment with subframe
Move to the tail section next. Place the tail fairing over the subframe without securing it. Check the seat latch alignment. The latch must catch properly when you close the seat. Make sure the undertail seals against the subframe without gaps. On some generations, the 600 and 750 subframes differ, so confirm your subframe matches the tail section you bought.
Adjust rubber grommets and Dzus fasteners
After the main panels sit correctly, adjust the rubber grommets. These cushions sit inside the mounting holes and hold screws firmly. Push each grommet fully into its hole. If a grommet sits crooked, the screw will not thread properly. For panels using Dzus fasteners, test each one. The fastener should turn smoothly and lock with a clear click.
Final Installation
Use OEM or aftermarket hardware
Once dry fitting passes, start final assembly. Use the original factory hardware whenever you can. OEM screws and fasteners match the thread patterns and lengths exactly. If you need replacements, pick high-quality aftermarket hardware from a trusted seller. Avoid generic screws from hardware stores, as they often have different thread pitches that damage mounting inserts.
Torque specs and avoiding over-tightening
Tighten every fastener to the right spec. Over-tightening cracks fairings and strips threads. Under-tightening lets panels rattle loose at speed. Check your service manual for exact torque values. If you do not have a manual, tighten screws snugly with a screwdriver, then give them a quarter turn. Plastic panels do not need heavy force. The rubber grommets provide the tension that holds screws in place.
Work through the bike in order. Install the upper cowl, then side panels, then the lower cowl, and finish with the tail section. Check each screw after installation. A final walk-around catches loose fasteners before they cause problems.
Step |
Action |
Key Check |
|---|---|---|
1 |
Remove old fairings |
Label all screws by location |
2 |
Dry fit upper and side panels |
Confirm mounting tabs sit flush |
3 |
Test tail section |
Verify seat latch engages |
4 |
Adjust grommets and fasteners |
Ensure smooth operation |
5 |
Final tighten |
Avoid over-tightening |
For custom paint schemes, visit the custom fairings page to explore design options that match your generation.

Common Pitfalls to Avoid
Assuming Year-to-Year Uniformity
Many riders think all years in a generation use the same parts. That idea causes trouble. Suzuki made changes between model years even when the bikes looked alike. You cannot treat all bikes in a generation the same just because they look similar.
Mid-cycle updates in some model years
Some generations look the same from outside. But Suzuki made changes in certain model years. These updates affected inner panels and mounting brackets. Screw holes shift a few millimeters. Windscreen mounting tabs change shape. Always check your exact model year before ordering panels. Never assume a part from one year fits another year just because they look alike. The pre-fit checklist helps you confirm which parts match your year.
Headlight and bracket changes
The headlight assembly also changed during these updates. Headlight brackets on some model years differ from earlier ones. Wiring connectors may not match. Mounting tabs sit at different angles. If you swap the front fairing without checking the headlight bracket, the headlight points wrong. The beam pattern shifts. You lose visibility at night. Always verify the headlight bracket matches your model year. The GSX-R600/750 collection lists the exact years each part fits.
Subframe Mismatches
600 vs 750 subframe dimensions
The rear subframe on the GSX-R600 and GSX-R750 is not always the same. For some model years, the subframes differ completely. Mounting holes do not line up. Rail shapes are different. You cannot simply bolt a 600 tail section onto a 750 subframe. For other model years, the subframes share the same basic shape, but mounting points still differ. You must check subframe dimensions before buying a tail section.
Consequences for tail fitment
A mismatched subframe makes the tail fairing sit crooked. The seat latch may not engage. The undertail may leave gaps that let water and dirt inside. Tail light wiring may not reach connectors. In some cases, the tail fairing rubs against the rear tire under load. This damages the fairing and creates a safety hazard. You must either swap the entire rear subframe or use adapter brackets to fix fitment. The 2011-2026 collection includes tail sections made for both models, reducing subframe issues.
Intake Duct Oversights
Restricted airflow from wrong ducting
Intake ducts route air to the airbox. The 600 and 750 use different duct paths. Inner panels that guide air differ between models. When you swap side fairings, inner duct panels may not match. The 600 has a smaller airbox with different duct routing. The 750 has a larger airbox that needs more airflow. Installing wrong inner panels can block the intake path. This is one area where Suzuki GSX-R600 vs GSX-R750 fairings need careful attention to inner parts.
Impact on engine performance and reliability
Restricted airflow causes real problems. The engine needs the right amount of air to run correctly. Mismatched intake ducting can starve the engine of air. This leads to poor throttle response, reduced power, and hesitation. In severe cases, restricted airflow can make the engine run lean. A lean air-fuel mixture runs hotter than normal. Over time, this can damage the engine. Always check inner panels and ducting before installing side fairings. Use panels that match your bike's engine, not the fairing set. For custom fairings, you can specify your model year to ensure duct panels match your engine.
Pitfall |
Cause |
Consequence |
|---|---|---|
Year-to-year uniformity assumption |
Mid-cycle updates in some model years |
Misaligned panels and headlight issues |
Subframe mismatch |
Different 600 vs 750 subframe dimensions in some years |
Crooked tail section and seat latch failure |
Intake duct oversight |
Wrong inner panel routing for airbox |
Restricted airflow and potential engine damage |
Suzuki GSX-R600 and GSX-R750 fairings interchange within the same generation. The specific year matters greatly. Some model years need extra components: fairing stay, headlight, and rear subframe. Other model years require mounting point and bracket changes. The 2011-2026 models offer the easiest path with bolt-on aftermarket kits from NiceFairings.
Remember, GSX-R1000 fairings never fit either middleweight model. Check your VIN's tenth character to confirm your model year. Always perform a dry fit before painting or final assembly. This simple step prevents costly mistakes.
Visit NiceFairings for verified compatible kits. Use the pre-fit checklist to ensure success. Explore custom designs for a unique look.
FAQ
Can I swap fairings between any GSX-R600 and GSX-R750?
No. Compatibility depends on the generation. The 2011-2026 models share bodywork between the 600 and 750. Some other model years may need extra parts like the fairing stay and headlight. Always verify your exact model year before ordering.
Do I need to change the subframe for a tail swap?
For some model years, yes. The subframes may differ completely between the 600 and 750. For other model years, you may need to switch mounting brackets. The 2011-2026 models share the same subframe design. Check your generation before purchasing a tail section.
Will GSX-R1000 fairings fit my 600 or 750?
No. The GSX-R1000 uses a different frame and bodywork setup entirely. Even when the 600 and 750 share panels, the 1000 stays incompatible. Do not attempt to fit GSX-R1000 fairings onto either middleweight model.
What makes the 2004-2005 models different?
The evidence pool does not provide specific information about the 2004-2005 model years. It is recommended to verify fitment with a manufacturer or try a test fit. Without proper checking, panels may not align correctly.
Are aftermarket kits truly bolt-on for 2011-2026?
Yes. Kits from NiceFairings fit both the 600 and 750 without modifications. They arrive with pre-drilled holes and rubber grommets. You install them using your factory screws. No cutting or drilling required.
How do I verify my exact model year?
Check the tenth character of your VIN. This character indicates the model year. A "B" means 2011, a "C" means 2012, and so on. You can find your VIN on the steering head of the frame. Use the NiceFairings pre-fit checklist to confirm compatibility.
What happens if I ignore intake duct differences?
The 600 and 750 use different airbox designs. Wrong inner panels can restrict airflow to the engine. This causes poor throttle response and reduced power. In severe cases, the engine runs lean and hot. Always match inner duct panels to your engine, not your fairing set.
Where can I find verified compatible fairings?
The GSX-R600/750 collection lists kits for both models across multiple generations. For custom paint schemes, visit the custom fairings page. Each product page specifies the exact model years it fits.
Question |
2004-2005 (K4-K5) |
2006-2012 (K6-K9) |
2011-2026 |
|---|---|---|---|
Front fairing swap |
Not confirmed by evidence |
Not confirmed by evidence |
Direct swap |
Tail section swap |
Not confirmed by evidence |
Not confirmed by evidence |
Direct swap |
Aftermarket kit fitment |
Not confirmed by evidence |
Not confirmed by evidence |
Bolt-on guaranteed |

See Also
Affordable Suzuki GSX-R600 And 750 Fairing Kits For 2025
Kawasaki ZX-6R Fairings: Racing Or Street Use Compared
Nicefairings Versus Monsterfairings: Which Brand Offers Better Fairings
Ninja 500 Fairings: Factory Versus Aftermarket Options Compared
2014 Suzuki GSX-R1000 Black And White Fairing Kit Advantages
Related Fitment and Buying Resources
- Explore the related NiceFairings collection
- Explore the related NiceFairings collection
- Plan a custom-painted fairing kit
- Use the motorcycle fairing pre-fit checklist