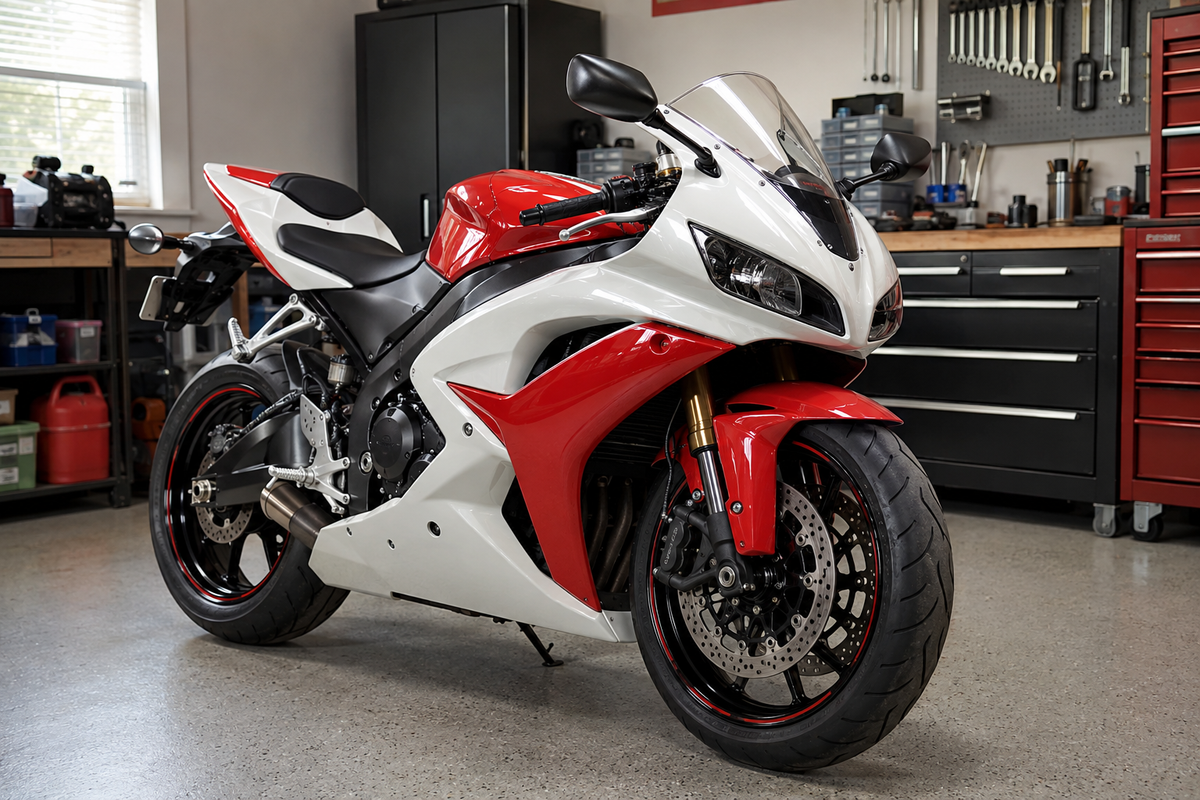
Few frustrations match wrestling ill-fitting bodywork onto your CBR600RR. Gaps appear. Rattles emerge. You wonder: what is the correct order to install fairings on a Honda CBR600RR without alignment problems?
The answer is simple: use a methodical, loose-fit-first approach. Start from the bike's core structure and work outward. This Honda CBR600RR fairing installation 2007-2012 guide walks you through the exact sequence, common pitfalls, and gap fixes that protect your plastic.
Patience and preparation matter more than force. A CBR600RR rewards careful work. Rushing causes cracks. Take your time with each Honda panel. Your fairing installation will succeed when you respect the process.
Remember: every Honda CBR600RR responds to deliberate technique. The CBR600RR fairings align when you follow sequence. Your Honda deserves precision. A CBR600RR fitted right looks factory-perfect. The CBR600RR will thank you. Honda engineered these CBR600RR panels with Honda quality—you just need the right method. CBR600RR owners know this truth. Your CBR600RR again proves it.
Key Takeaways
Use the loose-fit method: put all fasteners in by hand, and only tighten them once every panel is in place.
Start installing from the middle of the bike and move outward. This helps stop parts from jamming and cracking under stress.
Check brackets and rubber mounts for damage before installing new fairings so they align correctly.
Move the rubber grommets and heat shields from the original panels to the new fairings so everything fits snugly.
If a panel resists, stop and check it; forcing plastic can cause cracks.
Check the steering and cable clearance when the handlebars are fully turned to prevent damage while riding.
Tighten screws from the center mounts outward, using thread locker only on areas that vibrate.
If you are patient and get everything ready beforehand, your CBR600RR will look like it came straight from the factory.
Honda CBR600RR Fairing Installation 2007-2012: Pre-Installation Prep
Check the base parts before you touch any panels. Your Honda CBR600RR service manual has torque numbers and order diagrams. Your NiceFairings kit also has its own tips. Read those papers first. This guide helps but does not replace them.
Inspecting Brackets and Subframe for Damage
Your CBR600RR fairings sit on metal brackets and a subframe. These parts get damaged. A fall or a poor repair can bend them. You cannot fit new plastic on bent metal. Begin by checking everything.
Checking for Bent Tabs and Cracked Welds
Take off all old fairings. Look at each bracket with a bright light. Find tabs that point in different ways. Check left and right sides. A bent tab messes up every panel it touches.
Look at weld joints with care. Thin cracks hide under paint. Move your finger along each weld line. Feel for rough spots or looseness. Tap brackets softly with a screwdriver handle. A dull sound means a good weld. A rattle means trouble.
Fix small bends with pliers. Replace very damaged brackets. Honda sells these parts alone. Your local dealer can get them for you. Do not skip this step. A bent bracket ruins your whole honda cbr600rr fairing installation 2007-2012.
Verifying the Condition of Rubber Mounts
Rubber mounts stop vibration. They keep your fairings from making noise. Old rubber gets hard and cracks. Heat and time cause that. Squeeze each mount. Soft, bendy rubber works fine. Hard or crunchy rubber needs new parts.
Check the grommets in fairing holes. These small parts stop metal from touching plastic. They also stop rattles. OEM-style grommets fit well. Aftermarket ones often have wrong sizes. You can get good grommets from the NiceFairings collection for CBR600RR parts. Using the right grommets makes a big difference in ride feel.
Gathering Tools and Organizing Hardware
A clean work area stops lost screws and trouble. Get all your tools before you begin. You need basic hand tools and a way to keep track of bolts.
Using a Labeled Tray for OEM Fasteners
Each fairing panel uses its own screws. Mixing them causes trouble. Some screws are longer. Others have different thread patterns. Using the wrong screw strips threads or cracks plastic.
Put a magnetic tray with dividers. Mark each part with the panel name. Write "front upper," "left side," "right lower" on small tape pieces. Put each screw in its marked spot as you take it off. This system takes a few minutes to set up. It saves hours of confusion later.
Take pictures with your phone before you take things apart. Capture where each screw goes. These photos help when putting it back. Put all hardware in one container. Keep it near your work area. You will need these screws soon.

Panel Inventory and Grommet Transfer
Lay out every new panel from your kit before you touch the bike. Compare each piece against the stock fairing you removed. Check that all mounting holes line up. Verify that every tab exists. This quick inventory prevents surprises halfway through your honda cbr600rr fairing installation 2007-2012.
Identifying Fastener Types and Locations
Your CBR600RR uses several different fasteners across its bodywork. Each one serves a specific purpose. Knowing which screw goes where saves you from stripped threads and cracked plastic.
Mapping Screws, Bolts, and Push Rivets
Walk around your Honda and note each fastener location. The front upper cowl uses small Phillips screws at the dash area. Side fairings attach with larger hex bolts near the frame. The tail section relies on push rivets along the rear edges.
Take a close look at each screw's shoulder. Some screws have a smooth section near the head. That shoulder fits into a rubber grommet. It lets the panel float slightly. Other screws have threads all the way up. Those go into metal brackets only.
Mark each fastener type on your labeled tray. Group them by panel section. This mapping takes ten minutes. It saves you from hunting for the right screw mid-installation.
Understanding the Role of Well-Nuts
Well-nuts appear in several spots on your CBR600RR. These rubber sleeves have a threaded brass insert inside. When you tighten the screw, the rubber expands. It grips the surrounding plastic firmly.
The front upper fairing uses well-nuts at the lower mounting points. The tail section has them near the seat area. These fasteners absorb vibration. They prevent metal-to-plastic contact that causes rattles.
Inspect each well-nut before reuse. Old ones lose their elasticity. A hardened well-nut will not expand properly. Replace any that feel stiff or cracked. Fresh well-nuts make your fairing installation feel solid.
Transferring Grommets and Heat Shields
Your new aftermarket fairings may arrive without rubber grommets installed. The manufacturer leaves them out because each bike uses different mounting hardware. You must transfer these parts from your stock panels.
Techniques for Seating Rubber Grommets
Work slowly when removing grommets from your old fairings. These rubber parts tear easily. Push each grommet from the back side. Use a flat-blade screwdriver to gently pry the lip free. Pull straight through the hole without twisting.
Clean each grommet with soapy water. Let them dry completely. Apply a thin layer of silicone spray to the outer edge. This lubricant helps the rubber slide into the new hole without tearing.
Press each grommet into place with your thumb. Start one edge first. Work your way around the circumference. The grommet seats fully when both lips sit flush against the plastic. A properly seated grommet holds the screw firmly without binding.
Applying Heat Protection on the Exhaust Side
The lower cowl sits close to your exhaust system. Heat from the header pipes can melt plastic over time. Honda engineers solved this problem with heat shields on the stock fairings.
Check your new lower cowl for heat shield material. Some aftermarket kits include it. Many do not. If your kit lacks this protection, transfer the OEM heat shield from your stock lower cowl.
Remove the heat shield carefully. It attaches with small rivets or adhesive. Clean the new panel surface with alcohol. Press the heat shield into place. Use new rivets if the old ones stripped during removal. This step protects your investment from costly heat damage.

The Correct Loose-Fit Installation Sequence
The loose-fit method forms the foundation of every successful honda cbr600rr fairing installation 2007-2012. You start every fastener by hand. You only snug each screw down. You do not tighten anything until all panels hang on the bike. This approach prevents binding. It stops stress cracks from forming. The panels find their natural position when nothing forces them into place.
The general order for hanging bodywork starts with the lower cowl. Next come the side panels. The tail section follows. The front upper cowl goes on last. Your specific kit instructions may vary. Always check those papers first. This guide follows a reliable sequence that works for most aftermarket panels. Proper fitment comes from following the correct order.
Step 1: Mounting the Inner Brackets and Front Upper
The inner brackets support the entire front end. Your honda cbr600rr uses metal stay brackets to hold the dashboard area. These brackets must sit straight before you touch any plastic. The honda cbr600rr front end needs precise bracket alignment.
Aligning the Stay Brackets and Dash Mounts
Start with the left and right stay brackets. Bolt them to the frame loosely. Leave enough play to shift them by hand. The dash mount points need to match each other side to side. Measure from the frame to each bracket tip. Adjust until both sides read the same distance. The cbr600rr dash mounts need even spacing on both sides.
Your service manual shows the exact bracket positions. Follow those numbers. Tighten the bracket bolts just enough to hold them in place. Do not torque them fully yet. You may need to shift these brackets later when you fit the upper cowl. The Honda engineers designed these brackets for precise adjustment.
Attaching the Windscreen Before the Main Cowl
The windscreen bolts through the front upper panel. Install the windscreen first. Lay it on a soft surface. Align the screw holes with the plastic. Start each screw by hand. Snug them gently. The windscreen sits flush when you do not overtighten.
Now hang the front upper cowl on the bike. Guide the mounting tabs into the stay brackets. The dash area needs careful positioning. Start all screws by hand. Leave them loose. The upper cowl needs to float while you hang the side panels. This cbr600rr panel needs room to settle.
Step 2: Hanging the Side Panels and Tail Section
The side panels connect to the front upper cowl and the tail section. Their alignment depends on the panels around them. This is why you leave everything loose. The honda cbr600rr side panels need to find their natural position.
Seating Front Tabs into the Upper Fairing Slots
Each side panel has a front tab. This tab slides into a slot on the upper cowl. Look at the slot shape. The tab must enter straight. Angled insertion cracks the plastic. Guide the tab in with your fingers. Push gently until it seats.
Hold the side panel in position. Start the screws along the bottom edge. Use the screws that match each hole. A longer screw in a short hole damages the panel. Work from front to back. Leave every screw a few turns loose. The Honda hardware uses specific lengths for each location.
Aligning the Tail Section with the Subframe
The tail section wraps around the rear subframe. Set the tail in place without forcing it. The mounting holes should line up with the subframe brackets. If they do not, check the subframe alignment. A bent subframe pushes the tail off center. The honda cbr600rr tail section needs a straight subframe.
Start the rear screws by hand. The push rivets along the seat edge go in last. The cbr600rr push rivets hold the tail in place. Align the tail so the gap to the side panels looks even on both sides. Leave the screws loose. The tail section shifts slightly when you adjust the side panels. This Honda tail section responds to small adjustments.
Step 3: Fitting the Lower Cowl and Belly Pan
The lower cowl connects to the side panels and the frame. This is the last major piece to install. Its position depends on the panels above it. The honda cbr600rr lower cowl completes the bodywork.
Connecting Lower Side Fairings to the Main Panels
The lower side panels attach to the bottom of the side panels. The mating surfaces must meet cleanly. Look for alignment tabs along the edge. These tabs guide the lower panel into the correct position.
Start the lower screws at the front. Work toward the rear. The lower cowl needs to sit flush with the side panels. If you see a gap, check the screws above. A tight screw in the side panel pulls the lower piece out of alignment. The Honda fairing system works together.
Ensuring Radiator Duct Alignment
The lower cowl directs air to the radiator. The duct opening must line up with the radiator core. Look through the duct opening. You should see the full radiator face. Blocked airflow overheats your engine. The cbr600rr cooling system depends on proper duct alignment.
Adjust the lower cowl position until the duct aligns. Shift the panel at the mounting points. The cbr600rr ducts need proper alignment. The screws hold the position once you tighten them. Check the alignment from both sides. A centered duct ensures proper cooling. Your engine runs cooler with correct fairing fitment.

Clearance Checks and Final Torque Sequence
Check steering clearance before your first ride. Turn the handlebars fully left. The upper cowl must clear the frame and cables. Turn fully right. Check again. A honda cbr600rr fairing that hits at full lock damages the plastic.
Your honda uses specific routing paths for cables. The new panels must not pinch cables. The cables need free movement. Adjust the guides if panels press against cables. The honda cbr600rr needs proper cable clearance.
Verifying Steering and Cable Clearance
Turn the bars lock-to-lock. The cbr600rr panels should clear all fixed parts. Listen for rubbing. Any contact means adjustment.
Checking Lock-to-Lock Steering Movement
Turn the bars fully left. The upper cowl edge of your honda must clear the frame. Turn fully right. Check the same space. A panel that touches needs adjustment. Loosen the fairing screws. Shift the panel away. Retighten.
Inspecting Throttle and Clutch Cable Routing
Look at the throttle cables near the right side panel. The clutch cable on the left needs the same check. The honda uses specific paths. Bend each cable away from the panel. Use a zip tie to secure loose cables. Your honda cbr600rr needs free cables.
Confirming Exhaust Heat Shield Clearance
The lower cowl on your honda sits close to the exhaust. A heat shield protects the panel. The cbr600rr exhaust produces significant heat.
Checking the Gap Between Lower Fairing and Exhaust
The lower cowl of your honda should not touch the header pipes. A gap of several finger widths provides safe clearance. Push the lower cowl sideways. The cbr600rr lower panel needs space. Check for melting after a warm-up cycle.
Adjusting the Exhaust Hanger Bracket if Necessary
The exhaust hanger bracket holds the muffler. A bent bracket pushes the exhaust toward the panel. Check the bracket alignment. Loosen the bolts. Shift the muffler. Tighten evenly. Your cbr600rr cools better with proper clearance.

Finish With a Slow, Safe Inspection
After the panels sit evenly, check steering movement from lock to lock with the engine off. Confirm that no cable, hose or wiring loom is pinched, stretched or rubbing a sharp edge. Verify that the lower bodywork stays clear of the exhaust and moving parts. Use the motorcycle service information and the instructions supplied with the kit for fastener locations and tightening guidance; do not guess a torque value or force a hole into position.
Take clear photos of the final gaps around the headlight, tank, seat and belly pan. These become a useful reference after the first short ride, when you should inspect the fasteners and panel interfaces again. If anything shifts, vibrates or contacts a hot or moving part, stop riding and correct it before continuing.
Useful NiceFairings Resources
Continue with the Motorcycle Fairing Guides, browse motorcycle fairings by bike, review custom fairing options, understand production and shipping, check the FAQ, read the return policy, or contact NiceFairings with fitment questions.