
If you own a Kawasaki ZX-14 or ZX-14R, start with the motorcycle's exact model year, not a paint scheme you like. NiceFairings currently separates its catalog into 2006–2011 ZX-14 / ZZR1400 and 2012–2025 ZX-14R / ZZR1400 listings. Those are the seller's stated applications for the complete kits. A photo of a similarly shaped nose, or the shared ZZR1400 name, is not evidence that panels can be exchanged across that boundary.
That distinction matters on a large sportbike whose upper cowl, center panels, lower bodywork, lights and mounting pieces must meet as one assembly. A close color match cannot rescue a kit ordered for the wrong application.
Two catalog groups, two orders to verify
| Your bike as documented | NiceFairings catalog starting point | What to confirm before production |
|---|---|---|
| 2006–2011 Ninja ZX-14 / ZZR1400 | 2006–2011 collection | Exact model year and market, existing nose and lamp assembly, current supports, selected design and included panels. |
| 2012–2025 Ninja ZX-14R / ZZR1400 | 2012–2025 collection | The same information, plus any changes to the screen, exhaust, inner trim or mounting hardware. |
The table describes what the store lists today; it is not a Kawasaki interchangeability chart. Kawasaki's own parts catalog lists a 2006 ZX-14 cowling assembly and a separate 2012 ZX-14R center-cowling assembly. Those diagrams are useful for identifying the pieces and hardware on a specific original motorcycle. They do not, by themselves, prove that every part within either broad sales range is identical, or that an aftermarket kit fits a modified bike without further checks.


Identify the motorcycle you actually have
Take the model year from registration, the VIN record or the manufacturer information for your market. Do not use the first registration date as a substitute for the model year. A bike registered in one calendar year may be a different model year. If the motorcycle has been repaired or converted, photograph the bodywork currently fitted as well as documenting what it was originally.
Send the seller a full front view, both sides and a rear view. Add close-ups of the headlight and upper cowl, the transition from upper to center panels, the lower fairing near the exhaust, and the rear mounting area. Photograph any broken tabs or bent stays separately. The objective is to make an unknown condition visible before a kit is painted. This is especially useful when buying a used ZX-14 whose earlier owner may have changed lights, screen, brackets or bodywork.
If you have a 2011 or 2012 machine, state that boundary year in the first line of the inquiry. Ask the seller to repeat the exact generation and year in its reply. If the bike's current parts do not look like the relevant original parts drawing, stop and identify the discrepancy. A written product range is useful only after the motorcycle in the garage has been identified correctly.
Treat a flat-lay photo as a design view, not a manifest
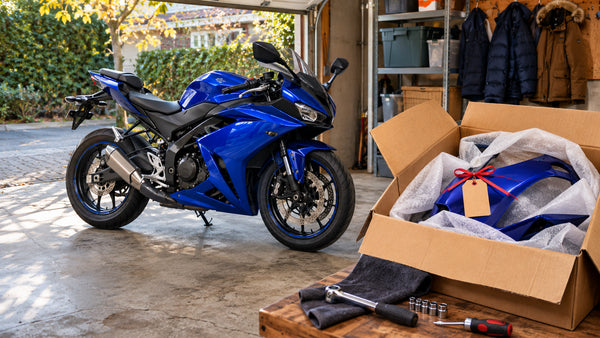
Both store examples above are real photographs of painted bodywork. They help compare the visible panel shapes and color layouts. They cannot tell you which bolts, rubber wells, inner trims, screen, heat shielding or brackets will be in your specific carton. Kawasaki's 2006 lower-cowling diagram lists not only plastic pieces but also nuts, well nuts, washers, rivets, collars and bolts. That is a concrete reminder that a fairing installation relies on more than the photographed outer shells. It is not a claim that all those OEM items ship with an aftermarket kit.
Before ordering, write a short parts matrix with four columns: provided with my selected kit, reuse from my bike, buy separately, and still unknown. Put the upper, sides, lowers, fender, tail pieces and any tank-cover-shaped component on separate rows. Give the screen, rubber mounts, fasteners, inner pieces and heat protection their own rows as well. Ask NiceFairings to confirm the kit column for the exact product and option. Ask your installer to inspect the condition of any original part you plan to reuse. Our order-specific parts matrix guide explains this handoff in more detail.
Make the paint decision last
Once the application and parts scope are agreed, compare colors with the motorcycle as a whole. The tank, wheels, frame and seat remain in the composition unless you plan to change them too. An all-black scheme, bright accent or two-tone race-style design can each work, but judge the full bike rather than a detached panel image. Ask for finished photos from the front and both sides under reasonably consistent light when available. A photograph can show graphic placement and obvious finish problems; it cannot guarantee a perfect match to aged original paint.
If you are replacing only damaged panels, a full new color can create a visible divide between old and new sections. Decide whether the existing tank and tail will stay, whether you need matching paint, and whether the original pieces should be kept for future return to stock. A full kit may be the more coherent design project, but it is a different purchase from a single replacement panel. Make the scope explicit before comparing prices.
The question to send before checkout
I have a Kawasaki [exact model designation], model year [year], market [country]. My bike has [list any changed screen, lamps, exhaust, brackets or bodywork]. I am considering [exact NiceFairings product URL and selected color]. Please confirm that this product is intended for my motorcycle, list the painted pieces and any supplied hardware or heat protection, and identify which original parts the installation assumes I still have. I can send front, side and mounting-area photographs.
That request is more useful than asking whether a ZX-14R kit “looks like it will fit.” It gives the seller a precise application to check and gives the installer a record of what was promised. Browse the ZX-14 / ZX-14R range for a color direction, but settle the year, existing hardware and kit contents before approving paint.
Editorial note: The two photographs are NiceFairings product images for the linked kits. Neither photo establishes a Kawasaki OEM part number, a cross-generation conversion, or an installed fitment result.