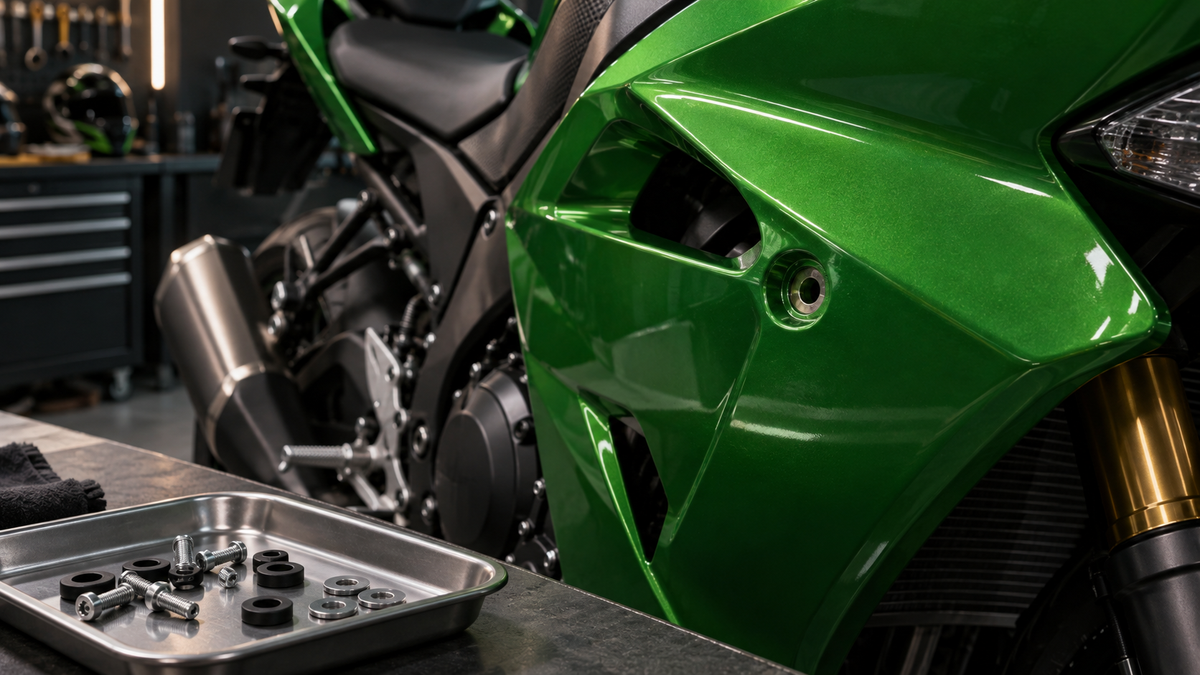
When deciding whether to reuse or replace motorcycle fairing fasteners, the correct answer is rarely universal—it depends on a part-by-part physical inspection and what your specific OEM service manual dictates. Shiny appearance or matching thread diameter alone is not enough to determine serviceability. The core dilemma is practical: you want to save money by reusing hardware, but you also worry about a panel detaching at highway speed. A dedicated fastener kit is an investment, but it is not automatically required. This guide helps you evaluate your existing hardware and decide whether to buy a replacement set or proceed with confidence using what you have.
Start by laying out every fastener you removed, organized by original location. Then inspect each piece closely for visible corrosion, stripped drives or threads, missing collars or washers, hardened or cracked rubber grommets, and deformed clips. Identify which parts your service manual designates as nonreusable—these must be replaced regardless of appearance. For all others, classify each as reuse, replace, or confirm with the exact supplier before ordering. Resolve unknown hardware before trial fitting; then follow the applicable pre-fit instructions when the correct parts are available. Allow time to resolve uncertain parts before installation. Remember: the term “nonreusable” comes from the OEM service instructions, not from a visual judgment call.
Key Takeaways
Check each fastener for damage before you decide to use it again.
Look in your service manual for nonreusable parts.
Measure the mounting stack to make sure the bolt fits right.
Ask suppliers for the exact details before you buy a kit.
Reuse only correctly identified, serviceable hardware where the applicable instructions permit it.
Replace damaged or manufacturer-designated nonreusable parts; ask a qualified technician about uncertain findings.
Never change the fairing holes to fit bolts you don't know.
Follow the manual's torque sequence to avoid over-tightening.
Motorcycle Fairing Fasteners Reuse or Replace: Start with an Inventory
Before you decide anything about your hardware, you need to know exactly what you have. This step is very important because a motorcycle fairing kit often does not come with fasteners. Your original hardware is the starting point. Without a full inventory, you risk ordering parts that do not match.
Why Location Matters for Fastener Reuse
Not every fastening point on your motorcycle goes through the same conditions. The location decides how much stress, vibration, and corrosion it faces. You cannot treat all points the same way.
Stress and Vibration Differences Across Panels
Heat, road spray, vibration and previous handling vary with the motorcycle and mounting location. Do not classify a tail or upper-panel fastener as automatically safe to reuse, or a lower-panel fastener as automatically due for replacement. Inspect the actual connection and follow its service requirements.
Corrosion Exposure from Wheel Spray and Heat
Areas exposed to road spray, salt or exhaust heat deserve careful inspection. Exposure is a reason to look more closely, not proof that the hardware has failed. Record visible corrosion, cracking or deformation and compare the finding with the applicable service criteria.
How to Record Original Hardware Before Disassembly
Once you start removing fairing panels, you must track where each piece came from. A single misplaced piece can cause a loose panel or a stripped thread. Recording the original locations can make later identification and reassembly easier.
Using a Grid System or Labeled Bags
Draw a simple grid on a piece of cardboard. Label each section with the fairing location, like "left upper" or "right lower." Push each item through its matching square. Or, use small plastic bags with labels. Write the location on each bag and put the hardware inside. This method stops you from mixing up bolts that look alike.
Photographing Each Fastener in Its Mounting Position
Before you remove a single piece, take a photo of the item in its hole. Capture the area around it so you can see how the washer, collar, or grommet sits. Zoom in on the head to show the drive type and any marks. These photos become your guide when you need to check thread pitch or shoulder length.
Identifying Fastener Types in Your Fairing Set
Motorcycle body panels use several different types. Each fastener type has certain failure points and reuse rules. You must identify each piece correctly.
Bolts, Screws, and Shoulder Bolts
Bolts and screws may be fully or partially threaded; a pointed tip is not a universal distinction. A shoulder fastener has a defined unthreaded section that may establish spacing or support a component. Match the specified part, thread, shoulder and complete washer/collar arrangement rather than substituting a visually similar ordinary bolt.
Well Nuts, Push Pins, and Quarter-Turn Fasteners
Well nuts are rubber sleeves with a threaded brass insert. They expand when you tighten the bolt and grip the panel hole. Push pins have a center pin that expands the outer sleeve. Quarter-turn types have a stud that locks into a holder with a 90-degree turn. Each type needs its own check method. Well nuts with cracked rubber must be replaced. Quarter-turn studs with worn grooves will not lock securely.
Do not forget washers, collars and rubber grommets. These components contribute to the intended mounting arrangement, and missing or damaged pieces can change how a panel is supported. Count them separately and preserve their original locations. An apparently correct bolt cannot compensate for the wrong collar or a damaged mounting tab.

Inspect Each Fastener for Wear and Damage
During this inspection, you answer the question of motorcycle fairing fasteners reuse or replace. Use a clear checklist to guide your eyes. Look for visible corrosion, stripped drives, stripped threads, missing collars, hardened rubber, and deformed clips on every piece. These problems are clear signs of wear. But appearance alone does not decide serviceability. The applicable manufacturer’s service instructions determine nonreusable designations; aftermarket components may have their own instructions. Some parts that look fine may still need replacement per the manual. You can inspect a new fairing kit the same way you inspect your existing hardware. Factory locking treatment, clips, and push pins are not universally single-use. Always check the manual for your specific model before you order a kit. This step helps identify fitment questions.
Thread Condition: The First and Most Critical Check
The threads on your bolt decide how well it holds the fairing panel. Damaged threads can strip the receiving hole. This damage turns a simple replacement into a costly repair. You might need to repair the mounting insert if the threads fail. Always check the threads before you check anything else.
Visual Signs of Stripping or Galling
Look at the threads under good light. Stripped threads have a flattened or missing profile. The peaks look worn down. Galling shows as rough, torn metal on the thread surface. These marks mean the material has already started to fail. You must replace the bolt. A damaged thread will not hold torque properly.
Inspecting Threads Without a Bare-Finger Test
Inspect threads under good lighting, using magnification if needed. Do not run bare fingers over sharp or damaged threads. A smooth-looking thread does not prove correct pitch, remaining strength or suitability for reuse. Compare the part with the correct specification and have suspected damage assessed rather than testing it by forcing it into the motorcycle.
Material Fatigue and Corrosion Indicators
Thread condition is important, but the base material also matters. Rust, cracks, and heat damage can weaken the metal even when the threads look clean.
Rust, Pitting, and Stress Cracks
Visible pitting, cracking, bending or substantial corrosion calls for assessment or replacement according to the applicable instructions. Surface discoloration alone does not measure remaining strength, and cleaning cannot establish that an unknown part is serviceable. Set questionable pieces aside instead of mixing them into the reuse tray.
Discoloration from Heat Exposure
Discoloration may result from coating, contamination, corrosion or heat; color alone cannot establish a fastener’s temperature history or material strength. Compare unexpected marks with the original part specification. If overheating or damage is suspected, ask a qualified technician to assess the fastener and the surrounding mounting area.
Fastener-Specific Failure Points
Different types have different failure modes. You need to check each type for its specific weak point.
Well Nuts with Cracked Rubber or Collapsed Flanges
Well nuts use a rubber sleeve to grip the panel hole. The rubber hardens over time from heat and age. Check the rubber for cracks. Squeeze the well nut gently. Hard, brittle rubber will not expand correctly. Also check the flange. A collapsed flange cannot hold the well nut in place. Replace any well nut with damaged rubber or a deformed flange. A well nut that fails will let the panel rattle.
Quarter-Turn Stud and Receptacle Condition
Quarter-turn systems use a matched stud and receptacle. The locking features and inspection method differ between product families. Check both parts for damage and follow the manufacturer’s engagement and serviceability criteria with the specified panel stack. Do not treat a click or a loose, bare-receptacle trial as a universal pass/fail test.
Decide: Reuse, Replace, or Confirm with the Manual
Now you have checked each part. You have also looked at your manual. Next, sort each fastener into one of three groups: reuse, replace, or check with the manual. This sorting is the main part of deciding whether to reuse or replace your fasteners. You use the checks you did before. You also follow the manual's rules. Some parts that look good must still be replaced. Other parts that look worn may still work if the manual says so. The key is knowing what your specific model needs.
Fasteners That May Be Candidates for Reuse
Clean Threads, Undamaged Heads, and Proper Length
A candidate for reuse must be correctly identified, undamaged under the applicable inspection criteria and permitted for reuse by its service instructions. Check the drive, threads, shoulder, washers, collars and receiving component together. There is no universal fairing-bolt torque based only on M5 or M6 diameter. Use the exact model, connection, hardware and specified lubrication or locking condition; ask for the correct specification when it is unavailable.
Checking Reuse Requirements at Every Location
A location that looks lightly loaded is not enough to approve reuse. Follow the service requirements for that connection and investigate any uncertainty about previous damage, repairs or substitutions. Silence in a general owner’s manual is not confirmation that a particular replacement fastener is suitable.
Checking Replacement Requirements
Checking Whether Clips and Push Pins Are Reusable
Some clips are reusable and others are designated for replacement. Do not apply a blanket single-use rule. For example, the 2020 Honda CBR500R/RA owner’s manual includes both removal and installation instructions for its center-pin clip on printed page 79. That example applies to the depicted component, not every motorcycle clip. Identify your part and replace it if damaged or required by its instructions.
Bolts with Factory-Applied Threadlocker
A factory-applied locking treatment does not by itself establish a universal reuse rule. Depending on the part and instructions, replacement, specified reapplication or another procedure may be required. Do not substitute a liquid product, lubricant or dry patch based on appearance. Obtain the exact service direction and compatible product specification before deciding what to order.
When the Service Manual Overrides Appearance
Locating the Model-Specific Fastener Table
Consult the applicable service procedure, parts diagram and fastener specification for the exact motorcycle and connection. Information may be distributed across several sections; not every manual has one comprehensive hardware table. Record the part number, any supersession, installation conditions and replacement notes. If these cannot be established, obtain help before approving an unknown substitute.
Understanding "Nonreusable" Designations
A nonreusable designation means the manufacturer requires replacement for that application. Appearance does not override that instruction. Record these parts on the order list even if they look undamaged. Do not invent the manufacturer’s test results or reasons when the documentation does not state them.
Keep three clearly separated groups: verified reusable parts, parts requiring replacement, and parts still awaiting identification or professional advice. Do not automatically put every clip or treated bolt in the replacement group. Resolve the uncertain group before purchasing an assortment, so that the order is based on known needs rather than a guessed piece count.

Compare OEM Reuse, Exact Replacement, and Generic Kits
You now have three choices for your fairing hardware. You can reuse your original OEM parts. You can buy exact replacements from the dealer. Or you can buy a generic cosmetic bolt kit. Each choice has different pros and cons. Your choice depends on what you found during inspection and how much you want to spend.
The Case for Reusing OEM Hardware
Cost Savings and Proven Fit
Correct original hardware can provide a useful specification reference and may avoid unnecessary purchases when it remains serviceable and reuse is permitted. However, a previous owner may already have substituted parts. Confirm the identity and condition instead of treating everything removed from the bike as verified OEM hardware.
The Risk of Hidden Fatigue
A visual inspection has limits: it cannot quantify hidden damage or certify a fastener’s remaining life. Known impact, over-tightening, corrosion or uncertain history may justify further assessment. Replacing an unknown part with another unknown part does not resolve this uncertainty. Ask a qualified technician when the correct decision is unclear.
When to Buy Exact OEM Replacements
Matching Thread Pitch, Shoulder Length, and Grade
Ordering the correct OEM part number is a useful way to establish the intended specification, but still verify model, market, supersessions and actual received parts. Material, property class, coating, dimensions and locking requirements all matter. Stainless steel, aluminum or a different finish is not automatically an approved substitute. Seek explicit compatibility rather than assuming harder or softer is better.
Sourcing from the Parts Diagram, Not Guesswork
Your motorcycle's parts diagram lists every fastener. Find your model and year. Locate the fairing section. Write down the part numbers you need. Order those exact numbers from a dealer or trusted supplier. Do not guess based on what looks similar. A bolt from another model may have a different shoulder length. That difference changes how the panel fits. Confirm any ambiguity or superseded part number with the supplier.
What Generic Cosmetic Kits Actually Provide
The Difference Between "Fits" and "Matches"
A seller’s use of “fits” or “universal” is not a standardized technical specification. Ask exactly which mounting locations the assortment covers and which components must be reused or purchased separately. Thread engagement alone does not establish compatibility; head clearance, shoulder dimensions, material and the complete mounting stack also need to match the application.
Why Head Style and Finish Are Not Functional Specs
Color and head appearance do not establish mechanical compatibility. Coatings and material choices can also affect corrosion behavior and installation conditions, so they are not merely decoration. Choose the required functional specification first, then select an available finish that is explicitly suitable for that application.
Choose reuse, exact replacement or an aftermarket assortment according to verified condition, service instructions and the actual mounting requirements. Do not replace every part near the engine automatically, and do not assume a generic set is complete. A location-by-location comparison makes the purchase decision more useful than selecting by color or total piece count.
Confirm the Mounting Stack Before Ordering
You have inspected every fastener. You have sorted each piece into reuse or replace piles. Before you order anything, you must confirm the mounting stack. This stack includes the total thickness of the panel, the frame tab, and any accessory washers or spacers between them. A bolt that fits perfectly in a bare hole may fail completely when you add the panel thickness. Measuring this stack prevents a wasted purchase and a frustrating return.
Measuring Total Panel, Frame, and Accessory Thickness
The mounting stack is the combination of parts retained at a connection. Required length depends on that stack, the receiving thread or receptacle, engagement requirements and clearance. A bolt that bottoms out can feel tight without securing the intended assembly. Terminology varies: use the hardware manufacturer’s drawing instead of treating “grip length” as one universal measurement rule.
Using a Caliper for Accurate Grip Length
A suitable measuring tool can help compare accessible parts with a specified drawing. Do not squeeze rubber, bend plastic, dismantle an unfamiliar connection or measure a compressed assembly arbitrarily. Record the relevant dimensions and their measurement conditions. When access or tolerances make a reliable measurement difficult, ask a technician or supplier to identify the parts.
How Quarter-Turn Fasteners Grip Differently Than Bolts
Quarter-turn fasteners require compatible studs, receptacles and the specified grip range. Southco’s technical glossary explains that DZUS grip includes the outer panel, frame and applicable accessory items. This is terminology, not a recommendation of a particular fastener for your bike. Use the exact product-series drawing and motorcycle requirements before choosing a combination.
Verifying Thread Size, Pitch, and Shoulder Length
Thread size and pitch are two different measurements. Size refers to the outer diameter of the threads. Pitch refers to the distance between thread peaks. Both must match the receiving hole exactly. Shoulder length matters for bolts with a smooth section between the head and threads.
Reading Fastener Markings or Using a Thread Gauge
Head markings may identify a property class or manufacturer, but they do not provide every required dimension or prove suitability. Use the original part specification and an appropriate thread gauge when needed. Do not use the motorcycle’s receiving thread to discover whether an unidentified bolt happens to fit. Keep uncertain parts out of the installation tray.
Why Diameter Alone Is Never Enough
Fasteners can share a nominal diameter while having different pitches, lengths or shoulder dimensions. A wrong-pitch part may start to engage before binding, which is not a compatibility test. Verify the specification before installation and stop at unexpected resistance. Never force a bolt, chase a receiving thread or change a panel hole to accommodate unidentified hardware.
Checking Receptacle and Clip Compatibility
The fastener is only half of the connection. The receptacle or clip on the frame side must also match. A new well nut with the wrong outer diameter will not grip the panel hole. A quarter-turn stud with the wrong receptacle type will not lock.
Matching the Well Nut to the Panel Hole Size
A well nut must suit the specified hole, panel thickness, screw and installation requirements. Compare the actual product drawing and service instructions rather than simply choosing one that looks snug. A deformed flange, split rubber or loose insert needs assessment or replacement. Do not use expansion or extra tightening to compensate for an incorrect part.
Spacers and collars maintain a specified distance or support a mounting arrangement; they are not generally rubber-expansion anchors. Keep them distinct from well nuts in your inventory. Match the relevant length, diameter and position from the assembly information. Do not omit one because the bolt can still reach the receiving thread.
Confirming the Quarter-Turn Receptacle Type
Quarter-turn receptacles have different mountings and product-family requirements. Identify the stud and receptacle from the correct drawing, markings or supplier information. Do not remove a riveted or otherwise fixed receptacle simply to compare it. If identification is uncertain, provide clear photographs and accessible dimensions to a qualified supplier or technician.
Your fitment checks do not end with the bolt itself. The complete assembly includes the panel, the frame tab, any washers, the well nut or receptacle, and the bolt. Every component must work together. A bolt kit that looks complete may still lack the correct well nuts or receptacles. Confirm every piece before you place your order. This comparison can help reduce avoidable extra orders. Your motorcycle deserves hardware that fits correctly the first time.
What Your Motorcycle Fairing Kit Actually Includes
You now know what you need from your inspection. The next step is to understand what the product listing actually gives you. A fairing kit listing may say "includes all hardware." Ask which exact components and mounting locations that phrase covers. You must check the contents yourself.
Reading the Product Listing Carefully
Product listings often use general language. The pictures show shiny bolts spread across a table. The description says "universal fit." None of this ensures your fairing needs are met.
Checking for Bolts, Washers, and Well Nuts
A universal assortment may contain bolts, washers, clips, spacers or tools, but its contents vary by listing. No particular piece count establishes completeness for your bike. Compare the itemized contents against your location-by-location inventory, including any required rubber parts, shoulder fasteners and receptacles. Confirm quantities and specifications before ordering rather than relying on a generic illustration.
Identifying What Is Missing from the Kit
Look at the product listing and note what is absent. Does it include rubber grommets? Does it supply quarter-turn receptacles? Does it include the exact shoulder bolts your panels need? Many kits skip these specialty parts. You will need to order them separately. Your inventory from the earlier section tells you exactly what you need. Use that list to check against the kit contents. If the kit lacks a piece you need, you know it is not a complete kit for your bike.
Asking the Supplier Direct Questions
Do not guess about the contents. Do not assume the listing is accurate. Contact the supplier and ask specific questions. Allow time for the supplier to resolve the specific question.
Requesting the Full Specification Sheet
Ask for the relevant dimensions, materials, quantities and intended locations, preferably in an itemized listing or specification sheet. If the seller cannot resolve an important compatibility question, do not treat that uncertainty as approval to install. The goal is sufficient reliable information for the connection, not a particular document format.
Clarifying Return Policies for Wrong Thread Pitch
Thread pitch mistakes happen often. You order a bolt kit that looks right. The threads do not match your frame inserts. Ask the supplier about their return policy for wrong thread pitch. Some suppliers accept returns only for unopened packages. Others charge a restocking fee. Know this policy before you order. A return policy that covers wrong thread pitch saves you from paying for parts you cannot use.
Using the Pre-Fit Checklist as a Guide
Before installation, use the fairing pre-fit checklist alongside the exact service instructions. This checklist helps you verify that every piece fits before you tighten anything. Some fairing manufacturers provide pre-fit checklists online. These guides walk you through the installation steps and help you confirm fitment before final assembly.
Referencing the Manufacturer's Installation Guide
Your motorcycle's service manual and the fairing manufacturer's installation guide are your best resources. They tell you the exact fastening points and the correct hardware. Follow these guides step by step. Do not skip steps. The guides exist to prevent mistakes. Using them saves you time and frustration.
Contacting Support for Kit Inclusion Questions
If you are unsure what a NiceFairings listing includes, contact NiceFairings with the exact product link. Ask the supplier specifically: "Does your fairing kit include all the bolts, washers, well nuts, and clips for my motorcycle model?" Note that not all suppliers include all hardware. You must ask the exact supplier and check the actual listing. Pre-fit checklists available online provide guidance for your installation preparation.
Your goal is to avoid buying a kit that looks complete but lacks the pieces you need. A universal kit may save you money at first. It may cost you more in shipping charges for missing parts later. Always check the contents against your inventory. Always ask the supplier direct questions. Always use the available checklists and guides. This care helps reduce ordering errors.

Build Your Order Checklist
You have finished checking your parts. You have sorted every fastener into groups. Now you need a clear list for ordering. This list shows what you keep, what your fairing kit gives you, and what you must buy on your own. A written list stops you from buying the same thing twice or forgetting parts.
Sorting Parts You Keep, Parts You Get, and Parts You Buy
Start with three groups. The first group holds your original parts that passed the check. The second group lists parts your fairing kit includes. The third group covers everything you must order separately. This system keeps your buying focused and complete.
Making a Simple Table Without Made-Up Part Numbers
Use the blank table as a location checklist, then attach the verified part numbers, quantities and supplier references. It is a worksheet, not a specification for any particular model. Separate individual mounting points within each panel area when their hardware differs. Leave an unresolved field clearly marked rather than guessing a number.
Fairing Location |
Reuse OEM |
Included in Kit |
Separately Needed |
|---|---|---|---|
Left upper panel |
Record quantity |
Record quantity |
Record quantity |
Right upper panel |
Record quantity |
Record quantity |
Record quantity |
Front nose section |
Record quantity |
Record quantity |
Record quantity |
Left lower cowling |
Record quantity |
Record quantity |
Record quantity |
Right lower cowling |
Record quantity |
Record quantity |
Record quantity |
Tail section |
Record quantity |
Record quantity |
Record quantity |
Print this table or copy it onto paper. Walk to your work area and fill in each row. Count the real pieces in each group. Write the numbers in the right columns. This table becomes your shopping list and your guide for putting things back on.
Listing Amounts by Fairing Location
Hardware types vary by model and mounting point. Do not assume the nose uses quarter-turns or the lower panels use well nuts. Record what the correct diagram and actual verified assembly require at each location. This prevents a total such as five “bolts” from concealing a need for several different fasteners and supporting components.
Avoiding Common Buying Mistakes
Two avoidable purchasing mistakes are modifying a panel to accept unknown hardware and choosing a substitute based only on material or appearance.
Never Change Fairing Holes to Fit Unknown Bolts
Do not enlarge or reshape a fairing hole to fit an unknown fastener. Misalignment may involve hardware, panel choice, brackets, damage or assembly order; it does not automatically mean only the bolt is wrong. Stop and ask the supplier or technician to identify the cause. Modification may affect return or warranty terms, so check the actual policy before proceeding.
Do Not Think Stainless Steel Is Always Better
A stainless or aluminum fastener is not automatically better or suitable merely because it looks similar. Material and property class are only part of the specification; coating, dimensions and installation conditions also matter. Use an explicitly compatible part. Do not choose a substitute from a general claim that harder metal damages threads or softer metal always strips.
When to Ask a Professional for Help
Some cases need expert help. Knowing these cases saves you from costly errors. A professional mechanic has the tools and skill to handle hard jobs.
If You Are Unsure About Mounting Strength
If a receiving thread, bracket or mounting point may be damaged, stop and arrange a qualified assessment. A visual walkaround cannot establish the remaining strength of an insert or hidden bracket. A technician can determine whether repair or replacement is appropriate for that application. Request the scope and estimate rather than assuming a fixed price or repair method.
If You Do Not Have the Right Tools to Measure
If you lack suitable measuring tools or confidence in the measurements, ask a qualified mechanic or specialist supplier for help. Provide the bike identity, original location and available part reference. The time and cost depend on the work. Do not rely on a rough visual match when the specification remains uncertain.
Your order list brings everything together. It shows what you keep, what you get, and what you still need. It stops duplicate buys and missed parts. It helps organize the project but does not replace final installation and safety checks. Take time to finish this list before you order anything. Your future self will be glad you did.

Safe Installation and Handoff Practices
You have checked every fastener. You have sorted each piece into reuse or replace piles. You have ordered the correct hardware. Now you must install everything the right way. A good installation stops loose panels and stripped threads. This section covers the final checks and methods that keep your fairings secure at speed.
Pre-Installation Checks Before Touching the Panels
Before you mount any panel, do a few quick checks. These checks can identify unresolved installation questions; allow sufficient time for the actual assembly.
Verifying the Complete Assembly Before Trial Fitting
Do not seat a fastener in a bare receiving hole to test compatibility when the specified panel, collar or spacer is missing. It may bottom out or contact something behind the mounting point. First identify the complete required assembly, then follow its model-specific trial-fit instructions with secure panel support. Stop at unexpected resistance or misalignment; never force engagement.
Cleaning the Threads and Receptacle Holes
Inspect for contamination and follow the specified cleaning and locking-treatment procedure. Do not spray an arbitrary solvent into an assembled mounting area or strip a factory treatment without instructions. Plastics, paint, rubber and retained chemicals may require different handling. When the procedure is unclear, obtain compatible cleaning guidance before reassembly.
Proper Tightening Technique
Tightening method decides how well the fastener holds. Too loose and the panel rattles. Too tight and the plastic cracks or the well nut collapses. Follow the correct method for each type.
Following the Manual's Torque Sequence
Use the applicable tightening specification and any stated assembly order for the exact connection. There is no universal extra-turn rule for well nuts or plastic fairings. Do not invent a torque when the manual is silent, and do not assume an Allen key prevents over-tightening. Obtain the required instructions and use the appropriate tools and installation conditions.
Avoiding Over-Tightening That Strips Well Nuts
Follow the specific well-nut and assembly instructions. Excessive tightening can damage the rubber, insert or panel, while insufficient retention can leave the assembly loose. Do not use one-and-a-half turns, a particular bulge or hand feel as a universal setting. If the insert spins or the connection behaves unexpectedly, stop and investigate rather than adding more turns.
Final Inspection and Documentation
After you install every panel, do a final inspection. Use the specified final inspection to check for missing parts, insecure connections and other unresolved concerns. Documentation helps you with future maintenance.
Verifying the Intended Assembled Position
Check each connection against its intended assembled position. Some shoulder or supported arrangements do not resemble a countersunk flush head, and some compliant mounting movement may be intentional. Do not tighten until every visible gap disappears or every panel becomes rigid. Resolve unexplained looseness, contact or misalignment using the correct instructions before riding.
Keeping a Record of What Was Replaced for Future Work
Record replaced parts, verified references, locations and any professional work with the service documents. These notes make future identification easier but do not eliminate the need to inspect parts again when disturbed. Keep supplier information and photographs with the record, especially where aftermarket components use their own documented hardware arrangement.
Work through the motorcycle fairing fasteners reuse or replace decision as a simple checklist. Inventory every fastener by location. Inspect threads and material. Check the service manual for nonreusable designations. Measure the mounting stack. Ask the supplier pointed questions before ordering any bolt kit.
Reuse decisions depend on the verified component and applicable instructions, not appearance or an assumption that a mounting point is lightly stressed. Compare the actual cost of the required parts and any assessment with the proposed project, without assuming a replacement always costs less than repair.
Lay out your motorcycle hardware on a clean bench. Sort each piece into reuse and replace piles. Start shopping only after finishing this careful process. A complete kit may still lack specialty pieces, so verify contents against your list.
If a fastener shows fatigue signs, or the manual says replace it, do not risk it. Fairings face aerodynamic forces at speed. A loose panel can cause a crash.
FAQ
Can I reuse a bolt with factory threadlocker if I clean it off?
Check the exact part’s service instructions. Some treated fasteners require replacement; others may have an approved reuse or reapplication procedure. Cleaning alone does not establish suitability. Do not substitute a locking product or guess an installation condition.
How do I know when a well nut needs replacement?
Look for cracking, deformation, a damaged flange or a loose insert and follow the specific part’s inspection criteria. A casual squeeze or placement in a hole does not establish serviceability. Replace damaged parts and confirm the required replacement specification before assembly.
Are quarter-turn fasteners reusable after removal?
Some quarter-turn systems are designed for repeated operation, but reuse depends on the correct matched components, condition and manufacturer’s criteria. Inspect the full assembly as directed; a click by itself is not proof of secure or compatible engagement.
Will a universal bolt kit cover all my fairing needs?
A universal kit covers common sizes, not every mounting point on your specific bike, so compare the kit contents with your inventory list. Check for bolts, washers, well nuts, and clips that match your original parts, and ask the supplier for a full spec sheet before ordering. Missing specialty parts will need separate buys.
What if I lack a caliper to measure the mounting stack?
A rough ruler measurement is not enough where an exact specification is required. Ask a qualified mechanic or specialist supplier to identify the hardware using the correct drawings and suitable tools. Keep unknown parts in the confirm group until the fit and application are established.
When should I stop and ask a professional for help?
Stop if a mounting area may be damaged, the hardware cannot be identified, or you cannot verify the specified assembly and installation requirements. A qualified technician can assess the connection and explain the appropriate next step. Costs and repair options vary with the actual condition.
Does the service manual really matter for plastic fairings?
Yes. Applicable service instructions explain the intended parts and installation requirements, including replacement notes where specified. A general guide or photograph cannot substitute for that information or certify the motorcycle’s condition. Ask for the correct documentation if it is missing.
Your decision process for reusing or replacing fairing fasteners comes down to three steps: inspect each piece for visible damage, check your service manual for nonreusable designations, and measure the mounting stack before ordering any replacement hardware. This process helps identify unresolved questions before installation; it does not certify safety.