You worry about the high cost and permanent nature of a custom paint job. That anxiety is valid. A gap between your mental image and a written specification can create costly misunderstandings.
A custom motorcycle fairing design brief bridges that gap. Think of it as a shared communication record that helps you and the painter agree on the intended result and its practical limitations.
This guide offers a repeatable process for creating a precise brief. You can reduce guesswork, avoidable errors, and frustrating back-and-forth discussion. You can create your own look with confidence.
This guide covers ordering a painted replacement kit from a service provider. It does not cover DIY making or structural changes. Focus here stays on paint, graphics, and included parts. Your unique motorcycle fairing deserves clear direction. The overall look depends on your specification. Custom motorcycle fairings need exact details. Every custom motorcycle fairing order gains from this method. Fairings look best when you define every part clearly.
Key Takeaways
Write down your bike's make, model, year, and market for correct fairing fitment.
Take clear photos from the left, right, and front so the painter can see your bike as it is now.
Use verified paint references and agreed finish samples to clarify your custom paint job.
Make a panel map with unique names to plan how graphics flow across seams.
State the exact text, font size, and placement for lettering and logos on your fairings.
Use one main document with version numbers to keep track of all specifications and changes.
Get written approval for each change so there are no mix-ups while your paint job is being made.
Check your fairings before they are made, after they are made, and when they arrive to make sure they have good quality.
Start with Your Bike's Exact Identity
Every custom motorcycle fairing design brief starts with one key question: what bike do you have? You cannot skip this step. One wrong digit in the model year can create a kit that does not fit. The painter needs your bike's exact details before any talk about color begins.
Document Make, Model, Year, and Market
Why This Matters for Kit Fitment
Motorcycle makers change fairing shapes between model years. Sometimes the changes are small. Other times, they are big. Do not assume that two model years use interchangeable bodywork. Confirm the exact kit listing, generation, mounting points, and installed equipment.
The market matters too. Market-specific equipment can affect compatibility. Confirm the actual headlights, indicators, and brackets on your motorcycle rather than assuming a market label establishes fitment. You must state your market clearly.
How to Record This Information
Write down your bike's details exactly as they appear on the registration document. Include the full model name, not just the short nickname. For example, write "Yamaha YZF-R1" rather than just "R1." Verify the model year using the manufacturer's identification information; the registration year or manufacture date alone may not be the model year. Add the market name.
Fictional Example Brief — Bike Identity Section:
Motorcycle: 2021 Suzuki GSX-R1000R Market: United States (US-spec) Identity Check: Confirm model year and variant against manufacturer documentation Current Modifications: Aftermarket exhaust system, frame sliders, aftermarket windscreen
This example shows the level of detail you need. A short VIN prefix alone does not establish the exact model year or market specification. Your current modifications matter because they can affect fairing fitment. An aftermarket exhaust may change the space around the lower fairing. Frame sliders may need cutouts or clearance not found on stock fairings.
Take Clear Left, Right, and Front Photos
What the Painter Needs to See
Photos give the painter a visual guide that words cannot replace. You need three clear views: the left side, the right side, and the front. Each photo should show the whole motorcycle in good light. Avoid shadows that hide body lines. Park the bike in an open area with a plain background.
The painter needs to see the current mounting hardware, any existing damage, and the exact position of vents and cutouts. These details affect how the new fairings will line up with your bike's structure.
How to Photograph Existing Modifications
Take close-up photos of each change that might affect the fairings. Capture the aftermarket exhaust from several angles. Photograph the frame slider mounting points. Show the painter exactly where your windscreen sits compared to the upper fairing.
Stand at the same distance for each main shot. Keep the camera level with the bike's centerline. This helps keep reference views consistent, but photographs are not dimensional or fitment proof. You can also place a ruler or tape measure in one photo for scale.
These photos become part of your custom fairing kit specification. They help the painter understand your bike's current state. They also protect you by showing what exists before the new fairings arrive. Your custom paint job depends on this base. Take the time to get it right.

Turn Design Concepts into a Written Brief
All measurements, color labels, and order details in the fictional examples below illustrate how to write a brief; they are not specifications for a real kit. Confirm the actual panel dimensions, available finishes, and permissions for any logos or artwork with your provider.
Your inspiration photos and mental picture need structure. A vague idea like "something aggressive" means nothing to a painter. You must translate your design concepts into clear, written language. This step separates a successful custom motorcycle fairing design brief from a frustrating guess.
Define Your Overall Style Direction
Choose a Theme Before Choosing Colors
Start with a theme, not a color. A theme gives your project direction. Ask yourself what feeling you want when you walk toward your bike. Do you want a track-ready machine that looks fast at rest? Or do you prefer an elegant street cruiser with flowing lines? Your answer shapes every later decision.
Fictional Example Brief — Style Direction:
Style Theme: "Factory race replica with modern aggression" Reference: 2022 Suzuki MotoGP livery, simplified for street use Overall Finish: Gloss clear coat over all painted surfaces
This theme tells the painter what mood to capture. It also prevents random color choices that clash with your bike's character. Your unique motorcycle fairing deserves a cohesive direction, not a collection of favorite colors.
Gather and Label Reference Images
Collect images that show your desired style. Use photos of other bikes, factory race liveries, or even automotive paint schemes. Label each image with a note about what you like. Write "the way this red fades to black at the tail" or "the angular shape of this number board." These labels guide the painter toward your specific taste.
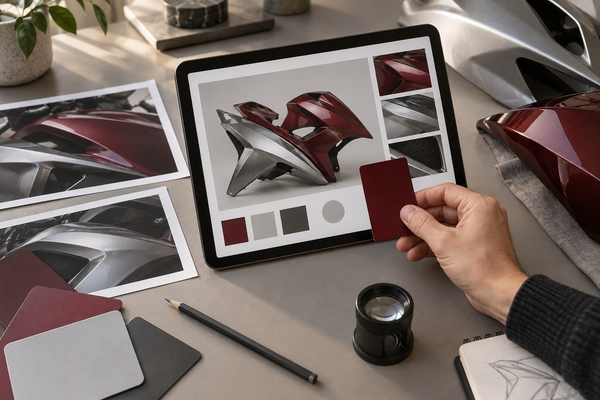
Digital tools help you visualize placement. You can use 3d modeling software to mock up your design on a fairing shape. Simple photo editing also works. However, these tools only help you see possibilities. Your final brief must contain written, measurable terms. A picture alone leaves too much room for interpretation.
Specify Main and Accent Colors with Precision
Use Paint Codes, Not Just Color Names
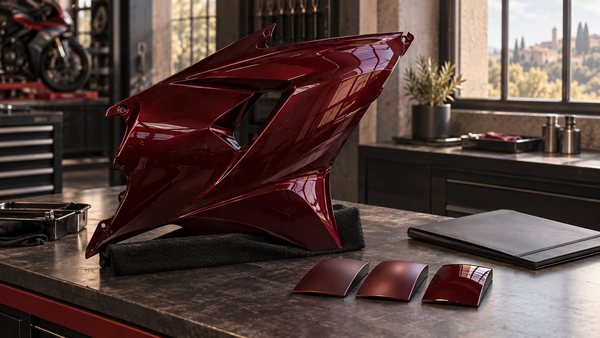
"Red" means different things to different people. A painter might imagine cherry red while you picture orange-red. If a verified manufacturer paint code is available, provide its brand, code, and finish. Otherwise agree on a reference sample or documented color target with the provider. Neither a screen image nor a code alone guarantees an exact match to aged paint.
Ambiguous: "I want a blue bike with white accents." Specific: "Main color: Blue A (agreed reference to confirm), gloss finish. Accent color: White B (agreed reference to confirm), gloss finish."
Label the references Blue A and White B in this fictional example, then have the provider confirm the actual color targets before production. These labels are not manufacturer paint codes.
Understand Realistic Screen-to-Paint Color Limits
Your computer screen shows colors using light. Paint reflects light differently. The same hex code looks different on a glossy surface than on a matte one. No screen can perfectly represent a painted finish. Your brief should acknowledge this limitation.
You can reference the custom motorcycle fairing paint colors guide to understand available options. This resource helps you choose realistic colors. Remember that lighting conditions change how paint appears. A color that looks vibrant indoors may appear darker in sunlight. Set your expectations accordingly.
Describe Graphics and Layouts in Measurable Terms
Use Dimensions, Angles, and Proportions
Graphics need numbers, not adjectives. Describe stripe width in inches or millimeters. State the angle of a diagonal line. Explain how large a graphic should be relative to the panel. These measurements give the painter exact instructions.
Ambiguous: "Put a big stripe down the middle." Specific: "Center stripe: 3 inches wide at the front fairing, tapering to 2 inches at the tail section. Map the stripe along the longitudinal centerline on each relevant panel and confirm continuity on the assembled-bike proof. These illustrative dimensions must be adapted to the actual kit."
Describe the Relationship Between Graphic Elements
Graphics rarely exist alone. You must explain how elements relate to each other. Does the accent stripe overlap the main graphic? Does the number plate sit above or below the stripe? Describe spacing and alignment clearly.
Fictional Example Brief — Graphic Layout:
Front Fairing: Main color Blue A covers the entire surface. A White B stripe runs vertically along each side, positioned 1 inch from the outer edge. The stripe width measures 0.75 inches. Tail Section: The white stripe continues from the side fairings across the tail. It maintains the same width and follows the body contour.
Your fairings will look cohesive when graphics flow across seams. The painter needs this relationship described in words. Ai tools and graphic design software can help you visualize these relationships before you write them down. However, the written description remains your final authority.
Plan Your Graphics and Colors Across All Panels
This part is very important for your custom motorcycle fairing design brief. A graphic that looks great on one panel might not line up when you put the fairings on your bike. The seam between panels breaks the visual flow. You need to plan for this before you write any color names.
Make a Visual Panel Map
Use a Diagram or Template of Your Fairing Kit
Your fairing kit has many panels. Each panel connects to another at a seam. You need a visual guide that shows every panel and how they fit together. Start with a simple diagram. You can draw it by hand or use graphic design software to make a template. The goal is a top-down view of your kit with each panel clearly outlined.
Print this diagram. Keep it near you as you write your brief. This visual anchor stops you from describing a graphic that cannot exist on your specific panel layout. Your custom paint job depends on this spatial awareness.
Give Each Panel a Unique Name or Number
Every panel needs a name or number. Use simple labels like "Front Upper," "Left Side," or "Tail Section." You can also use letters: A, B, C, and so on. Write these labels directly on your diagram. Your brief will use these labels often.
Fictional Example Brief — Panel Identifiers:
Panel A: Front upper fairing Panel B: Left side fairing Panel C: Right side fairing Panel D: Tail section Panel E: Front fender
This system creates a shared language between you and the painter. When you write "the stripe on Panel B," the painter knows exactly which surface you mean. The labels reduce ambiguity about the intended placement; confirm the layout and any tolerances with the provider.
Set Anchor Points and Exclusion Zones
Anchor Points for Graphic Placement
Anchor points are fixed spots on your fairing that you use to place graphics. These spots include the front edge of a side fairing, the top of a center vent, or the mounting hole for a fastener. You describe graphic placement based on these anchors.
Ambiguous: "Put the stripe near the front of the side fairing." Specific: "The stripe on Panel B starts 2 inches back from the front edge and runs parallel to the bottom edge."
The specific version gives the painter a clear starting point. The provider can check your intended graphic placement against the actual panel shape.
Exclusion Zones for Seams, Cutouts, and Vents
Agree on exclusion zones for mounting interfaces, tabs, holes, and other areas the provider identifies. Painted graphics may continue visually across adjacent panels, but must account for the assembled gap. A decal must not physically obstruct a vent opening; painting the surrounding panel is a different issue.
List every exclusion zone in your brief. State the distance you want between the graphic edge and the seam or cutout. This distance stops the painter from putting a stripe too close to a fastener hole.
Write a Panel-by-Panel Specification Sheet
Combine Color, Graphic, and Placement Data
Now you put everything together. For each panel, you write a complete specification. This sheet includes the main color, accent colors, graphic descriptions, and placement data. You use your anchor points and exclusion zones for every element.
Fictional Example Brief — Panel B Specification:
Panel B (Left Side Fairing): Main color Blue A covers the whole surface. A White B stripe runs horizontally, starting 2 inches from the front edge. The stripe is 1 inch wide and ends 3 inches before the tail section seam. The stripe sits 4 inches above the bottom edge. Keep the illustrated graphic 0.5 inches from the vent cutout, subject to confirmation on the actual panel. Do not obstruct the opening.
This gives the painter a concrete proposal to review; resolve any dimensional conflicts on the actual panel map before approval.
Include a "No-Go" List for Each Panel
A "no-go" list says what you do not want on each panel. This list stops unwanted additions. You might write "no logos on Panel A" or "no carbon fiber texture on Panel D." These negative instructions protect your vision just as strongly as positive ones.
Your custom motorcycle fairing design brief becomes complete when every panel has both positive and negative instructions. The painter then works within clear limits.
Panel Mapping Checklist |
|
|---|---|
Diagram made with all panels labeled |
☐ |
Unique name or number given to each panel |
☐ |
Anchor points set for graphic placement |
☐ |
Exclusion zones listed for seams and cutouts |
☐ |
Panel-by-panel specification sheet written |
☐ |
No-go list included for each panel |
☐ |
Ai tools can help you see how graphics flow across your panel layout. You can upload your diagram and try different stripe placements. But these tools only help you plan. The written specification is still your final guide. A detailed brief reduces interpretation errors; AI mockups remain concept illustrations, not manufacturing templates or fitment evidence.

Specify Lettering, Logos, and Included Hardware
Text and logos often cause confusion in custom paint orders. Saying "a cool font" does not help the painter. You need to give the exact words, font type, size, and where it goes. This part removes the guesswork from your custom motorcycle fairing design brief.
Detail Spelling, Font, and Placement for Text
Provide Exact Wording and Font Style
Write the exact words you want on your fairings. Check the spelling more than once. A single wrong letter becomes permanent once the clear coat dries. Name the font family. Common choices are Helvetica, Impact, or custom script fonts. If you want a specific style, describe it clearly.
Ambiguous: "Put my nickname on the side in a cool font." Specific: "Text reads 'VIPER' in Helvetica Bold, uppercase. Font size is 2 inches tall. Text color is White B (agreed reference to confirm)."
Your custom paint job needs this level of detail. The painter cannot read your mind. They can only follow what you write.
Specify Size and Position Relative to Anchor Points
Size matters. A logo that looks perfect on your screen may be too big for a small panel. State the height of each text element in inches or millimeters. Describe the position using your anchor points.
Fictional Example Brief — Lettering Specification:
Panel B (Left Side Fairing): Text "VIPER" in Helvetica Bold, uppercase, 2 inches tall. The text starts 4 inches from the front edge and sits 3 inches above the bottom edge. Text color is White B (agreed reference to confirm). No other text appears on this panel.
This instruction gives the painter all the details needed. Confirm the lettering position on the provider's available proof before production.
List All Parts and Trim Included in the Order
Clarify What is Painted and What is Not
Do not assume a kit includes accessories beyond the listed body panels. Confirm which ordered parts receive paint and which are excluded. Windscreens, mirrors, and indicators may be separate items. A clear list stops arguments when your order arrives.
Ambiguous: "Paint everything to match." Specific: "Paint only the listed ABS body panels in agreed Blue A gloss. Windscreen, mirrors, and indicator housings are excluded from this example order."
This clarity protects both you and the painter. Confirm the included parts and finish scope in writing.
State Which Hardware and Fasteners are Expected
Do not assume mounting hardware is included. You need to know exactly what comes in the box. State your expectation for fasteners, brackets, and rubber grommets. Ask the provider what their standard kit includes before you finish your order.
The custom fairings page is a starting point for discussing your design. Confirm the exact kit inventory, reused OEM components, and separately required hardware with the provider for your model.
Fictional Example Brief — Included Parts:
Expected Hardware: Provider to confirm which brackets, fasteners, and rubber grommets are included, reused from the motorcycle, or purchased separately. No windscreen included. No mirror housings included.
Your design brief becomes a full record of what you discussed. The painter knows every expectation before production starts. You can also use ai tools to see your lettering placement before you write the final spec. These tools help you see sizes and spacing. But your written words are still the final guide for the painter. The overall look of your bike depends on this written clarity.
Master the Approval Process and Version Control
Your design brief becomes a living document the moment you send it to the painter. Changes will happen. Questions will arise. Without a clear approval process, small edits turn into expensive mistakes. You need a system that tracks every decision and keeps both sides accountable.
Establish a Single Source of Truth for the Brief
Use a Single Master Document
One document must hold the complete specification. Do not scatter details across emails, text messages, or phone calls. The master document contains every color code, graphic placement, and panel instruction. When the painter needs an answer, they open this file. When you want to check a detail, you do the same.
Fictional Example Brief — Master Document Header:
Project: 2021 Suzuki GSX-R1000R Custom Fairing Paint Master Document Version: 3.2 Last Updated: March 14, 2025 Status: Pending final approval
This single file prevents confusion. You never wonder which email contained the correct stripe width. You never argue about what you said during a phone call. The master document holds the truth.
Name Files with Version Numbers and Dates
File names matter more than you think. A file called "final_brief_v2" becomes useless when you create version 3. Use a clear naming system that shows the version and the date.
Good file name: GSXR1000R_Brief_v3.2_2025-03-14.docx Bad file name: final_brief_FINAL_v2_REAL.docx
Version numbers track the evolution of your specification. Dates show when each change happened. This system helps you and the painter reference the correct version during discussions.
Create a Formal Change Request Process
Log Every Change with a Unique ID
Changes need tracking. Assign each requested modification a unique identifier. Use a simple format like CR-001, CR-002, and so on. This identifier lets you reference a specific change without repeating the full description.
Fictional Example Brief — Change Request Log:
CR-001: Change stripe width on Panel B from 1 inch to 1.25 inches. Requested March 10, 2025. Approved March 11, 2025. CR-002: Add "VIPER" text to Panel C. Requested March 12, 2025. Pending approval.
This log creates a clear history. You can see what changed, when it changed, and whether the painter received approval. Your custom paint job stays under control because every modification has a record.
Require Written Approval for All Modifications
After discussing a change by phone, send a written recap and request confirmation. This helps both sides reference the same dimensions, colors, cost, and timing instead of relying on memory.
Ambiguous: "Yeah, that sounds fine, go ahead." Specific: "I approve CR-002. Add 'VIPER' text to Panel C as described. Confirmed via email on March 12, 2025."
Written approval protects both parties. The painter knows exactly what you authorized. You know exactly what to expect. This practice prevents scope creep and unexpected costs.
Key Warning: Verbal agreements create confusion. Every change needs written confirmation before production begins. If the painter suggests a modification, ask them to send the details in writing. Then respond with your approval or rejection in writing.
Secure a Final Written Approval Before Production
The "Sign-Off" Meeting
Before the painter starts any work, schedule a final review. This meeting can happen over email, video call, or through the provider's communication system. You go through the master document section by section. You confirm every color, every graphic, and every panel instruction.
Ask the painter to confirm their understanding of the brief. Request that they summarize what they will produce. This summary acts as a final check. If their summary differs from your brief, you catch the error before paint touches plastic.
What the Final Approval Document Must Include
The final approval document records the agreed production reference alongside the provider's order terms and stated limitations. It must contain the complete master document version number, the date of approval, and a list of all approved change requests. Include confirmation of the accepted specification, available proof process, and any agreed limitations or tolerances.
Fictional Example Brief — Final Approval Statement:
"I approve master document version 3.2 dated March 14, 2025, including change requests CR-001 and CR-002. I understand that any further changes require a new change request and written approval."
This statement removes ambiguity. Both sides know what comes next. This reduces the risk of conflicting instructions; inspect the finished parts against the approved reference.
If you have questions about the approval process, contact the provider directly through the contact page. You can also review the FAQ page for common queries about ordering and communication. These resources help you understand what to expect.
The approval process gives you control. You decide what changes happen and when. You track every modification with clear records. Clear records make the finished work easier to review against the agreed specification. The final look of your bike depends on this discipline. You can use ai tools to visualize changes before you approve them, but the written record remains your authority.
Plan Your Budget, Timeline, and Production Reality
Money and time set the limits for your project. Without clear planning, both slip away without you noticing. You need a true picture before you order any custom fairing kit. This section helps you ask the right questions and set expectations that match what can really happen.
Define the Total Delivered Budget
Your budget must cover more than just the painted plastic. Shipping costs, possible customs fees, and mounting hardware all add to the final price. Ask the provider for a complete quote that includes every charge. The total delivered budget becomes your working number.
Break Down Costs by Stage
A single lump sum hides important details. Ask your provider to split the quote into clear stages. The breakdown usually includes the base kit cost, the painting labor, and the shipping fee. Each stage has its own value. You can then see where your money goes and make smart choices about changes.
Fictional Example Brief — Budget Breakdown Request:
Please give me a detailed quote with separate line items for: base ABS fairing kit, custom paint labor, graphic application, and shipping to my address. Include any taxes or fees that apply.
This request gives you a clear record. You know exactly what each part of your custom motorcycle fairings costs. You can compare quotes from different providers with confidence.
Confirm Payment Terms Before Ordering
Ask the provider to explain its actual payment terms before ordering. Deposits, full payment, and milestone arrangements vary; do not assume milestone payments are offered. Review the order, cancellation, and change terms before committing.
Confirm the payment terms in writing. Ask what happens if the project changes during production. A clear record of the provider's accepted payment terms reduces misunderstandings. Your custom paint job stays on track because both sides know the financial plan.
Establish a Realistic Schedule with Built-in Review Time
Time estimates differ between providers. A made-to-order custom fairing kit takes longer than a ready-stock item. You must ask for a timeline and then add extra time for reviews and fixes.
Allocate Time for Each Stage
Production and shipping each take part of your total wait. According to the production and shipping page, typical production runs 15–25 business days. Shipping then adds another 10–20 business days. Your estimated total wait is between 25 and 45 business days. These numbers are just a starting point. Confirm the current timeline with your provider before you order.
Fictional Example Brief — Timeline Confirmation:
Please tell me the current production lead time and shipping estimate for my order. I need to know the expected delivery window before I approve the final design.
Use the confirmed estimate to plan, while allowing for revisions, shipping variation, and customs delays.
Plan for Potential Revisions
Rarely does a custom project move forward without any changes. You might adjust a stripe width or change a font size. Each revision adds time to your schedule. Build extra days into your plan for these adjustments.
Ask your provider how revisions affect the timeline. Some changes require restarting a production step. Others only need a quick update to the digital file. Knowing this difference helps you set realistic expectations for your custom fairing kit delivery.
Understand the Production Process for Your Kit
Knowing what happens inside the shop reduces your worry. Your custom motorcycle fairings start as raw ABS plastic. The painter gets each panel ready, applies the base color, and adds your graphics layer by layer. A clear coat seals everything. This process takes time because each step needs proper drying.
What to Expect from a Custom ABS Kit Order
Your kit arrives as unpainted or painted panels depending on your agreement. The provider prepares your specific panels according to your approved brief. Ask whether production updates and pre-shipping photos are available for your order. Photos can help review layout but cannot confirm exact color, surface quality, or physical fitment.
Ask your provider about their quality check process. What happens if a panel has a defect? How do they handle a color mismatch? These questions protect your money. Your custom look depends on the provider's attention to detail.
How to Prepare for Shipping and Handling
Fairings need careful packing. Each panel should arrive without scratches or cracks. Ask about the packing method before you pay. Confirm whether the provider uses foam inserts and sturdy boxes. You also need to know who handles shipping damage claims.
Prepare your receiving area before the kit arrives. Clear a space where you can unpack and check each panel. Have your design brief ready to compare. This preparation makes the delivery inspection smoother. Your fairings will look their best when you handle them with care from the start.
Ai tools can help you see your design before production starts. You can see how colors and graphics work together on your bike's shape. These tools sharpen your vision. The written brief remains your final guide for the painter.

Execute Delivery Inspection and Pre-Fit
Your custom fairing kit journey ends with careful inspection. This final safeguard protects your investment. You must check the work at three distinct moments. Each verification point catches different problems before they become expensive mistakes.
Verification Point: Before Production Begins
Final Review of the Approved Brief
Read your master document one last time before you approve production. Check every color code against your original notes. Confirm each graphic placement matches your panel map. This review catches small errors that slipped into earlier versions. You want to find mistakes now, not after the painter mixes paint.
Ask yourself whether the brief still matches your vision. Your custom look depends on this final check. If anything feels unclear, rewrite that section before you give approval. A few extra hours now save weeks of frustration later.
Confirm Panel Inventory and Condition
Count every panel listed in your order. Compare the list against the provider's standard kit contents. Verify that you expect the correct number of pieces. Confirm the condition of your existing mounting hardware. You need to know what arrives with your kit and what stays on your bike.
Verification Point: After Production, Before Shipping
Request Detailed Photos and Video
Ask your provider for clear photos before they pack your order. Request images of every painted panel from multiple angles. Video footage helps too. You want to see the gloss level, the graphic edges, and the color depth. These visuals help check the visible design against your specification; request clarification where details are unclear.
Compare the Work Against the Panel Map
Open your panel map and compare each photo against your written instructions. Check the stripe width on Panel B. Verify the text placement on Panel C. Look for any missed exclusion zones. This comparison catches production errors while the painter can still fix them. A visual overlay can help compare layout, but perspective distortion means it is not a precise measurement or fitment test.
Verification Point: At Delivery and Pre-Fit
Inspect in Person or with a Detailed Checklist
Unpack your fairings carefully when they arrive. Check each panel for shipping damage, scratches, or color inconsistencies. Compare the physical parts against your approved brief one final time. Document any issues with photos immediately. Contact the provider right away if something looks wrong.
Perform a Dry-Fit to Check for Physical Interference
A dry-fit test prevents costly installation problems. Mount your new fairings loosely without final tightening. Follow this process:
Install panels loosely without final torque, starting with main locating points and threading hardware lightly, so the entire kit can settle into position together.
Check hole alignment to ensure holes line up without strong force, preventing forced-fit damage.
Verify tab engagement to confirm tabs enter their positions cleanly, avoiding misalignment.
Assess gap symmetry by checking left and right gaps for evenness and ensuring upper/lower edges meet naturally, preventing visible fitment defects.
Route wiring away from pinch points to prevent physical interference and wire damage.
Test steering clearance by moving the bars lock-to-lock to ensure no physical interference with the fairing.
View from a distance to catch unevenness not visible up close, ensuring overall panel alignment before final tightening.
Dry-fitting can reveal alignment or clearance issues before final assembly. Review the pre-fit checklist guide, follow the applicable service instructions, and obtain qualified help if anything binds or remains uncertain. Do not ride with loosely fitted panels.
Your custom motorcycle fairings will only match your vision when your specification matches your imagination. The painter's skill matters, but clarity matters equally. Every step you followed—from documenting your bike's identity to inspecting the final delivery—builds a stronger bridge between your ideas and their hands.
View your design brief as a collaboration tool, not paperwork. It gives you control and confidence. Your unique motorcycle fairing deserves this precision. The process protects your investment and your peace of mind.
Start your brief today. Use this structure to create your own look. Use the approved brief as the reference for reviewing your finished fairings.

FAQ
Do I need a formal design brief for every custom fairing order?
Yes. A written brief stops costly mix-ups. It guards both you and the painter. Your final look depends on clear talk. Without it, loose words lead to results you do not want.
What if I change my mind after sending the brief?
Send changes in writing with a new version number. Check with your provider on how they handle edits. Some changes may shift the timeline. Always get written approval before work goes on.
How do I know my screen colors will match the paint?
They will not match exactly. Screens use light, paint uses pigment. Use verified paint references or agreed physical samples, not color names alone. Check the custom motorcycle fairing paint colors guide for realistic choices. Set your hopes the right way.
Can I use photos of other bikes as my design reference?
Yes. Mark each photo with what you like about it. Write notes like "the stripe angle here" or "the fade pattern here." Photos alone leave room for guesswork. Pair them with written, exact details.
What happens if graphics don't line up at the seams?
Misalignment can arise from the design, panel positioning, or production variation. Document the issue, compare it with the approved panel map, and contact the provider before modifying the parts. Planning across assembled seams helps reduce this risk.
How detailed should my panel-by-panel specification be?
Very detailed. Include main and accent colors, graphic sizes, placement from anchor points, and no-go zones. Prioritize the details that affect the finished appearance and agree on practical tolerances.
What if the painter suggests a design change during production?
Ask your provider about their change request process. Ask for all ideas in writing. Reply with your written yes or no. Follow up verbal discussions with a written recap. This keeps your project on course.