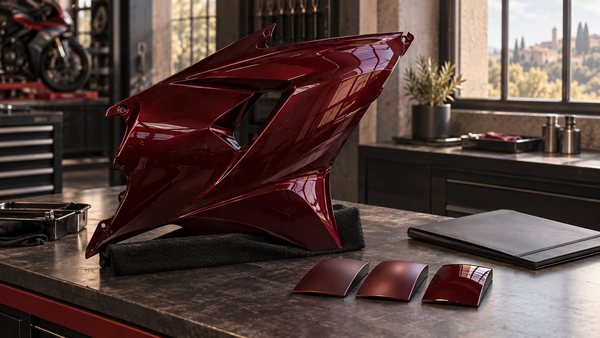
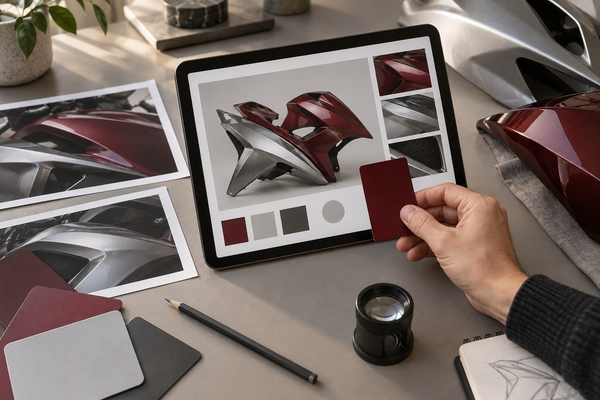
You just got your sportbike bodywork back from the painter—it looks amazing. Now you want to protect it with paint protection film. Before you hand it over, ask the right questions. Cure time depends on your paint system, so no single wait time works for every job. Plan to settle five things: clear coat compatibility, cure verification, surface inspection, coverage choices, and installer handover. This is a coordination guide for paint protection film on newly painted motorcycle fairings, not a step-by-step installation guide. The 3M PPF FAQ is a main resource, and our guide to motorcycle paint protection covers readiness in more detail.
Images are AI-generated editorial illustrations, not photographs of a supplied kit or evidence of model-year fitment. Use real product information and your own motorcycle records for ordering decisions.
Key Takeaways
Check with your painter to make sure the paint is fully cured. Follow the paint supplier's guidelines.
Have your painter and film installer talk directly. They should confirm the cure status and compatibility.
Check the fairings for any problems. Have your installer look for dust, orange peel, and dry spots.
Ask for an itemized quote covering the film, preparation, labor, coverage boundaries, applicable edge treatment, warranty terms and removal policy.
Do what the film maker says for aftercare. They tell you when to wash and how to deal with sun exposure.
Ask if the installer has worked with motorcycle fairings and fresh paint before. Ask to see photos of their past work.
Make sure the installation area is controlled. Temperature, humidity, and dust control are important.
Record the paint condition, agreed scope and removal policy so both parties have a clear project reference.
What Paint Protection Film Can and Cannot Do for Your Motorcycle
Before you spend money on film, know what to expect. Our painted vs. unpainted motorcycle fairings buyer guide helps you understand your coating choices. But the film adds new questions. What does PPF really do for your motorcycles? Where does it fall short? This section builds realistic expectations for your motorcycle paint protection journey.
Realistic Protection: Scratches, Chips, and UV Fade
PPF is intended as a sacrificial surface layer, with protection that depends on the specific product and exposure. It may reduce some light surface marks or damage from small debris, but does not make the underlying finish immune. Ask which performance claims the manufacturer documents for the quoted film and keep those separate from expectations about crash or impact damage.
Check the technical information for the exact film being quoted. The 3M PPF FAQ is a film-specific reference; it is not evidence that every PPF product blocks a particular percentage of ultraviolet radiation.
Ask what the manufacturer actually documents about weathering, appearance and warranty coverage for the selected film. Do not substitute a general marketing claim for the product data sheet.
Self-Healing vs. Standard Film Properties
Films differ in their surface finish, care requirements and documented resistance to light surface marks. Some products have self-healing features under specified conditions. Ask the installer to explain the exact film, its limitations and approved aftercare; do not use heat or chemicals based on a generic article.
Ask to see examples of the selected film on similar finishes. Gloss, texture, edges and optical appearance may change after film is applied. Discuss which visible changes are acceptable before approving coverage.
Critical Limits: Not Crash Protection or Paint Repair
PPF has firm boundaries. It does not stop crash damage. It does not fix existing coating issues. The film acts as a shield for light contact, not a safety device. Know these limits before any installation.
PPF Does Not Hide Imperfections or Impact Damage
Dust nibs, orange peel, chips and other coating defects need professional assessment before film application. Film does not repair damaged paint, and existing texture may remain visible. Ask the painter and installer which concerns must be resolved first.
Whether PPF suits the project depends on the condition and compatibility of the coating, the proposed film, the coverage and the owner’s expectations. Do not assume that film will conceal a finish problem.
Why Fresh Paint Needs Special Coordination
Fresh coatings require particular care before an adhesive film is applied. The painter and installer need the actual coating specifications and application history to assess readiness. A surface that looks finished is not automatically suitable for film. Coordinate the two trades before making a booking or treating an attractive finish as evidence that the required waiting period has elapsed.
Outgassing and Adhesion Risks
Drying and curing processes differ by coating system. Applying an adhesive film before the surface is ready can create problems with appearance or adhesion, but bubbles alone do not diagnose the cause. Ask the painter to identify the coating products and relevant recommendations, then have the installer assess the actual surface and proposed film.
Two-part urethane, acrylic lacquer, and waterborne paints each cure at different speeds. Your painter knows the schedule for your specific coating. The installer needs that information. Without coordination, you risk adhesion failure and wasted expense.
The coating guidance and the film application requirements both matter. If they appear inconsistent, ask the painter, coating supplier and installer to resolve that before work begins. Keep their written recommendations with the project record. No general article can establish readiness for an unidentified paint system or guarantee the outcome.
Now you know what PPF can protect and what it cannot. Our protect painted fairings guide covers readiness in more detail. Contact the NiceFairings team if you have specific questions about your fairings. Next, confirm that your coating is ready. That means asking the right questions about cure timing.

Confirming Paint Cure for Newly Painted Fairings
You cannot hurry this step. Fresh paint needs time to settle before any film goes on it. The right window depends on your own coating, not a general rule. This is where the painter and installer must work together.
Why Cure Time Depends on Paint System and Conditions
Every paint system acts in its own way. Temperature, humidity, and film thickness all change the timeline. Your painter controls these things. They know how your coating acts in their booth.
Two-Part Urethane vs. Acrylic Lacquer vs. Waterborne
Different coating systems dry and cure differently. Product names alone do not establish readiness: ask the painter for the exact basecoat and clear-coat products and the applicable manufacturer guidance. The installer should assess the finished coating, not rely on a generic chemistry timetable.
Dry-to-touch condition does not by itself establish readiness for adhesive film. Ask how the painter has assessed the actual coating and whether further waiting or other conditions are required. Do not assign a universal number of days to every repaint. The film installer should also confirm that the proposed preparation and application are suitable for the documented finish.
Questions to Ask Your Painter About Clear Coat
Walk into your painter's shop with a short list. Ask which clear coat they used. Request the product data sheet. Ask how long that exact product needs before film application. Ask whether their booth conditions change the timeline.
Request Coating-Supplier Guidance and Film Requirements
Here is a key difference. 3M makes the film, not your paint. The 3M paint protection film FAQ tells installers to follow the paint supplier recommendations for repainted surfaces. That means your painter's coating manufacturer sets the cure guidance, not the film maker.
Do not accept one waiting period for all jobs. A single number does not fit every coating. Some systems need more time. Some need less. The paint supplier's data sheet is your authority. Ask your painter for that document in writing. Share it with your installer before booking.
For questions about the supplied bodywork or finish, contact the NiceFairings team. Obtain coating-readiness decisions from the painter or coating supplier and film-specific advice from the installer; a bodywork supplier should not be treated as having approved an unrelated coating or film system.
Getting Installer and Painter to Coordinate
Your painter and installer should talk directly. A game of telephone between you and two shops invites mistakes. Put them in contact. Let them confirm the cure status together.
Sample Test Panel Before Full Application
Ask the painter and installer whether a representative sample assessment is appropriate. They should decide the method, timing and acceptance criteria using the actual coating and film manufacturers’ guidance. This is professional assessment, not a recommendation to experiment on the bike.
A sample may provide useful information, but a short observation does not prove complete cure or guarantee long-term adhesion or damage-free removal. Record what was checked and what uncertainties remain.
Confirm the paint supplier’s guidance, share the coating information with the installer, and agree any professional assessment before booking. Pause if either party cannot confirm that the proposed process is appropriate.
For more detail on preparing painted surfaces, see our guide to protecting painted fairings. If you are still choosing between coated and bare panels, our painted vs. unpainted fairings buyer guide explains the trade-offs.

Inspecting Fairings Before Paint Protection Film Application
Before application, ask the installer and painter to review the actual surface condition. Record visible defects and uncertainties while the panels can still be inspected without film over them. Relevant experience can help them explain limitations, but do not assume every installer has handled the same coating or that a quick visual look verifies cure.
Checking Surface for Defects: Dust, Orange Peel, and Dry Spots
Hand your installer a bright light. Ask them to scan every panel at an angle. Dust nibs, dry spray patches, and thin spots show up fast under raking light. Ask one direct question: "Will this defect telegraph through the film?" Your installer can answer from experience with similar paint systems.
Why Imperfections Become More Visible Under Film
The optical result depends on both the film and the underlying finish. Ask the installer to assess gloss, texture and visible defects before quoting, and to explain how the chosen finish may look after application.
Keep a record of the original paint appearance under consistent lighting. Existing coating texture and any texture introduced by film are separate issues. Ask the installer how they will assess these without treating the bike as a test surface.
Ask whether a representative sample with the same documented coating system is available for professional assessment.
Have the painter and installer decide whether film application to that sample is appropriate and how it should be assessed.
Agree the lighting and comparison conditions before interpreting differences in gloss or texture.
Record what the comparison can show and what it cannot establish about long-term adhesion or removal.
A professionally chosen sample comparison may help communicate appearance preferences, but it is not an instruction to experiment on a freshly painted motorcycle. Keep the assessment with the project record and ask the installer to explain its limits. Our painted-fairing protection guide covers related planning questions.
Evaluating Contours, Edges, and Graphics
Motorcycle fairings are compound-curved surfaces. They curve inward in some areas and outward in others. Sharp crease lines, tight radii around air intakes, and narrow panel gaps make them much harder than flat car panels. Ask your installer to walk the panels with you and point out every challenging zone.
Deep Concavities, Sharp Corners, and Wrapped Decals
Curves, recesses, sharp edges and graphics can complicate coverage. Ask the installer to identify the limits of the chosen film on these specific panels. There is no universal number of hours in which an unsuitable film will fail. Agree realistic edge positions and follow-up checks instead of relying on unsupported failure timelines.
How will you handle the deep concave areas near the air intakes?
Do you plan to wrap film around the sharp crease lines or stop short?
How will you treat wrapped decals at the edges?
Their answers reveal whether they understand the demands of your specific fairings.
Documenting Condition and Setting Expectations
Verbal agreements fade. Photos and written notes last. Ask your installer to photograph every panel before any work begins. These images protect both of you.
Pre-Installation Photos and Written Responsibilities
Request close-up photos of each panel under consistent lighting. The installer should note existing flaws in writing. Both parties sign that record. This step matters most when your paint is fresh. A pre-installation record separates pre-existing paint damage from anything that happens during film work. Ask your installer about their removal policy. Film removal risk depends on paint quality and film age. No installer can promise damage-free removal on every surface. Get their policy in writing before you commit.
Your motorcycle paint protection project depends on honest communication at this stage. Ask your installer to inspect the fairings. Request their written assessment. Document everything. Then move to the quote with clear expectations.

Getting the Right PPF Coverage Quote for Your Motorcycle
You have checked that the paint is cured and looked over the surface. Now you need a quote that fits how you ride and what you can spend. The coverage you pick changes the cost and how well it protects. Ask your installer to spell out each option in simple words.
Full Fairing Coverage vs. Partial Kits vs. Custom Cut
Ask for an itemized panel map. Terms such as full coverage or partial coverage do not, by themselves, define which edges, recesses, trim or painted surfaces are included. Confirm exclusions before comparing quotations.
Choose coverage according to the surfaces you want protected, their condition and the installer’s assessment. A larger coverage package is not automatically the right choice for every custom-painted motorcycle.
Request a current written quotation for your motorcycle and the agreed coverage. Film choice, panel shapes, preparation, existing condition and local labor affect the scope. Do not use a generic price range or hypothetical repaint saving as proof that the project will pay for itself.
Pre-Cut Kits vs. Bulk Film for Complex Shapes
A pre-cut pattern must match the actual model, year and panel shape. Replacement bodywork or modifications may change that assessment. Ask whether an existing pattern or a professionally planned custom approach is suitable, and what remains outside the coverage.
What a Professional Quote Should Include
Ask for an itemized quote covering the film product, preparation, labor, coverage boundaries, approved edge treatment where applicable, exclusions and any future removal service. Do not assume edge sealing is necessary or appropriate for every film.
Materials, Labor, Edge Sealing, and Removal Responsibility
Ask for the exact film brand and product line, its data sheet and the approved approach to edges on your panels. Confirm which preparation and labor are included. Ask who would handle removal, how it would be assessed and what risks or charges remain.
Questions About Warranty and Removal Liability
Warranty terms vary by film maker and installer. Ask both for their policies in writing. Do not accept verbal promises.
Film Manufacturer Warranty vs. Installer Guarantee
The film maker may offer a warranty on the product itself. The installer may offer a separate guarantee on their work. These are two different things. Ask what each policy covers. Ask how long each lasts. Ask what voids the coverage. Get copies of both documents. This step protects your motorcycle paint protection investment.
Handover and Aftercare for PPF on Fresh Paint
The last part of your project is handing over the fairings and knowing what comes next. A smooth handover keeps your investment safe. Clear aftercare steps keep your film in good shape. Realistic expectations keep your mind at ease.
Preparing Fairings Before Dropping Off: Cleanliness and Documentation
Ask the painter and installer what preparation, if any, you should perform before handover. Do not remove waxes, coatings or adhesive accessories, or apply cleaners to fresh paint, without their approval. Agree who will carry out any required surface preparation.
Bring the coating product details, the painter’s cure guidance and the history of previous repairs or coatings. These records help the installer assess readiness; paperwork alone is not a guarantee that a surface is suitable.
What to Leave On and What to Remove (Tank Pads, Seats)
Agree with the installer whether the motorcycle should arrive complete or whether specific parts need professional removal. Do not peel off pads or remove seats and accessories merely because a generic guide suggests it. Record responsibility for disassembly, storage and reassembly.
Aftercare Instructions from Film Manufacturer
Your installer will give you aftercare instructions from the film manufacturer. Follow those guidelines exactly. The film maker knows their product best. They say when you can wash the motorcycle, how to handle sun exposure, and what products to stay away from.
First Wash Window, Sun Exposure, and Curing Period
The film needs time to bond with your paint. The manufacturer sets the first wash window. They also give advice on sun exposure during the first curing period. Do not guess these timelines. Ask your installer for the written instructions. Keep them with your motorcycle records.
If you have questions about your fairings specifically, reach out to the NiceFairings team. We can help with product questions while your installer handles film-specific guidance.
Setting Realistic Appearance Expectations
Agree what an acceptable finish looks like before installation. Film and coating appearance can vary with lighting and surface texture. Ask the installer what should be checked at handover and which later changes should be reported. Do not dismiss a concern simply because a generic article calls it normal settling.
Tiny Imperfections, Edge Lift, and Film Settling Time
Agree appearance and follow-up expectations before the work. Ask which temporary effects, if any, are normal for the exact film and when inspection is due. Report lifting edges or unexpected changes to the installer rather than assuming they will disappear with time.
Follow the chosen film’s care guidance and ask the installer about unexpected changes rather than trying an unapproved repair. Maintain the project and maintenance records so future assessment is easier. Care and inspection support sensible maintenance, but cannot guarantee a particular lifespan for the coating or film.

Practical Questions Before Booking PPF Installation
You have confirmed the cure, inspected the panels, and reviewed the quote. Now comes the final step. You must decide whether this installer earns your business. Ask direct questions and listen for clear answers. A confident installer welcomes every one of them.
Installer Experience with Motorcycle Fairings and Fresh Paint
Motorcycle panels can present tight curves, recesses and limited access. Ask about relevant experience with comparable painted bodywork and which parts of this project need special assessment. Past experience is useful context, not proof that every repaint or film combination will behave the same way.
Ask for Photos of Past Motorcycle Repaint + Film Jobs
Request photos of completed motorcycle repaint and film projects. Look for clean edges, smooth curves, and consistent gloss. Ask how those jobs held up after months of riding. An installer with a solid portfolio will share examples without hesitation. If they cannot show past work on motorcycles, keep looking. This decision affects your paint protection film investment for years.
Controlled Environment: Temperature, Humidity, and Dust-Free Booth
Ask how the installer will meet the selected film’s environmental requirements and manage dust during preparation and application. The actual working conditions matter more than a room’s label. Request an explanation of the controls used for your project instead of assuming a particular type of booth guarantees a clean result.
Why a Controlled Space Matters for Adhesion
Temperature, contamination and other application conditions can affect the work. The installer should explain which conditions the product instructions require and how they will be managed. Raise concerns before the motorcycle is handed over. Do not infer suitability from the appearance of the workshop alone.
Pre-Installation Agreement and Damage Liability
Get every expectation in writing before you hand over your fairings. A clear agreement protects both sides. Ask what the document covers. Ask who accepts responsibility for pre-existing flaws. Ask about the film removal policy. No installer can promise damage-free removal on every surface. Risk depends on paint quality and film age.
Document Paint Condition and Film Removal Policy
Read the actual installer agreement and ask how pre-existing damage, installation issues, removal risks and complaints are handled. One business’s waiver or a generic contract template does not establish your legal rights or another installer’s responsibility. Disclose previous paintwork and seek clarification before accepting terms you do not understand.
You now hold the questions that separate a smooth project from a costly one. Use them. A careful installer will respect your diligence. For more on preparing your fairings, see our guide to protecting painted fairings. If you have product questions, reach the NiceFairings team.
You now have a clear plan for paint protection film on newly painted motorcycle fairings. Go through this checklist before you commit.
Confirm paint cure with your painter, using the paint supplier's guidance.
Have your painter and film installer talk to each other directly.
Check fairings for defects, or ask the installer to look.
Get a detailed quote that covers warranty and removal policy.
Follow the aftercare instructions from the film maker.
Use the checklist to record decisions, outstanding questions and agreed responsibilities before handing over the fairings. The painted-fairing protection guide offers related planning context. Written information and appropriate professional assessment can reduce misunderstandings, but neither guarantees a particular service life or damage-free removal.
FAQ
How long should you wait after fresh paint before applying paint protection film to your motorcycle?
Ask your painter. The paint supplier sets the cure time, not a general rule. 3M's FAQ tells you to follow the paint maker's guidelines. If you rush, the film may not stick well to your motorcycle.
Will paint protection film hide paint imperfections on your motorcycle?
PPF is not a repair for chips, poor adhesion or other paint damage. Surface texture may remain visible and appearance depends on the coating and film. Have the painter and installer assess defects before application.
Does PPF protect your motorcycle in a crash?
No. PPF is not crash protection. Any resistance to small surface marks or road debris depends on the particular product and conditions; do not treat it as a guarantee against paint or panel damage.
Can you remove PPF without damaging new motorcycle paint?
Not always. How safe removal is depends on paint quality, cure level, and film age. Ask your installer about their removal policy before you add protection to your motorcycle.
Should your painter and installer talk before the job?
Yes. Direct communication helps the painter and installer resolve coating details, readiness questions and the proposed process. Keep their conclusions and any remaining limitations in writing; communication reduces misunderstandings but does not guarantee a trouble-free result.
Is a test panel necessary for your motorcycle?
Ask the painter and installer whether a representative professional assessment is appropriate. They should choose the method and explain its limits. A sample test does not replace the coating supplier’s cure guidance or guarantee future performance.