
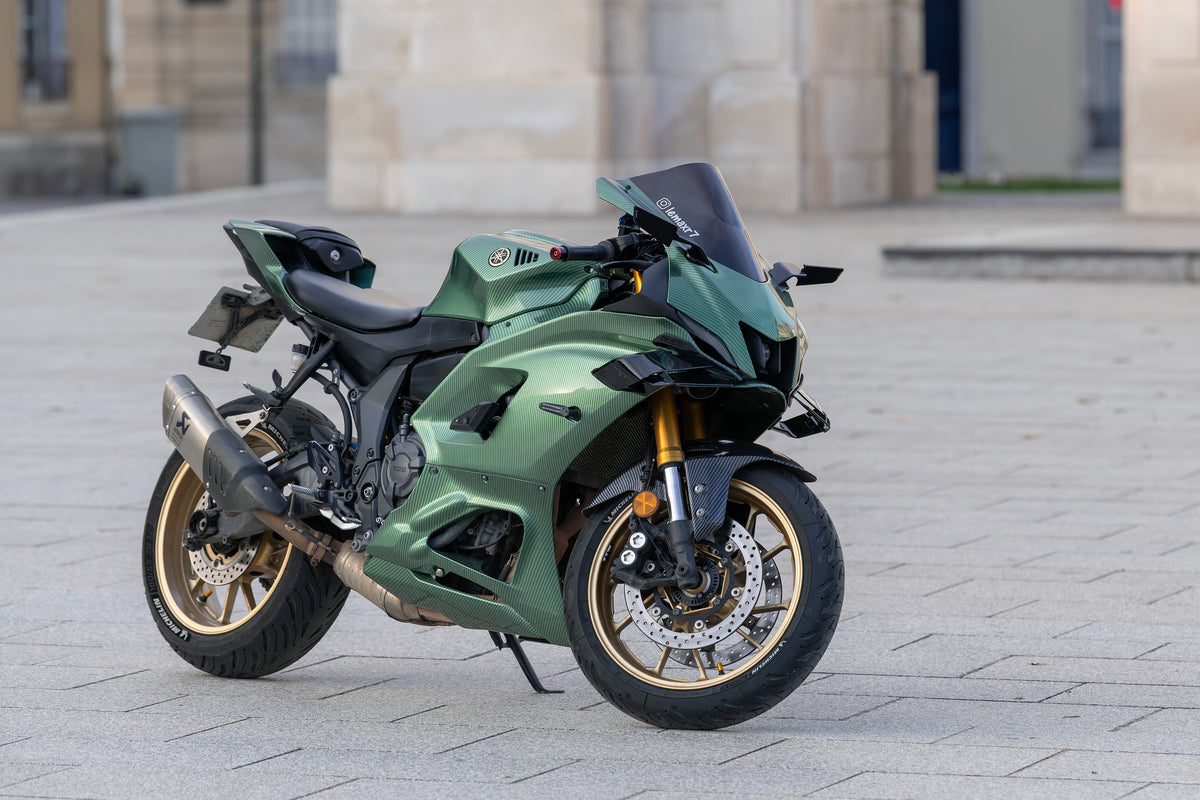
The 2022–2025 Yamaha YZF-R7's front end can fool a buyer who shops from a dramatic side photograph. Yamaha's launch description identifies an M-shaped front duct with a single bi-functional LED headlight at its center and two position lights. That arrangement makes the relationship among the headlight, upper cowl, screen, and adjacent pieces the useful thing to document before buying replacement fairings. Color and “complete kit” language come second. This guide builds a front-cowl evidence packet: the images to take, the parts to identify, the questions to ask and the visual checks to perform without forcing a panel into place.
This guide covers the original 2022–2025 R7 front-end family, not the redesigned 2026 bodywork. It does not assert that every year or market shares each replacement part; confirm the listing against your exact motorcycle.
Cover photograph: Alexandre Prévot / Wikimedia Commons, CC BY-SA 4.0. The original photo is used without editing. It shows a modified R7 with aftermarket bodywork; the pictured bike's model year is not independently verified. It is not a NiceFairings product photo, an OEM-front reference or fitment evidence. Use Yamaha's published model information and photographs of your own motorcycle for the checks below.
Start with the exact R7 in front of you
Write down the documented model year, market and trim. Keep the VIN private unless an authorized dealer or supplier asks for it through a secure enquiry. Do not infer the year from paint, a social-media post or the date of first registration. A previous owner may have fitted a replacement nose, track shell, different screen, signal arrangement or repaired stay. If the bike's history is unclear, photograph the current configuration and state that uncertainty openly rather than describing it as factory original.
Take five wide images first: centered front with bars straight; full vehicle left; full vehicle right; front-left three-quarter; and front-right three-quarter. Put the bike on level ground in daylight. Keep the entire front wheel and cowl in frame so perspective does not turn a normal seam into an apparent offset. Then add high-resolution close-ups of the center headlight, both position-light edges, the M-shaped opening, windscreen seam, mirror bases, inner black trim and lower cowl joins. The goal is not a beautiful listing photo. It is an image set another person can use to name the pieces and see where they meet.
Photograph both sides even if the damage is only on one. A symmetric-looking graphic can conceal different damage or previous repair on the opposite side. The intact side is a useful comparison, not automatic proof that a part can be mirrored. If a crash or tip-over has moved the lamp or stay, comparing gaps on both sides helps isolate the question to ask a qualified inspector. A fresh plastic shell does not straighten a bent bracket.
Read the front as several interfaces, not one shape
Yamaha's original R7 announcement places the single LED headlight centrally in the M-shaped duct and describes paired position lights. The buyer should record each boundary separately: headlight-to-surround, duct-to-painted nose, nose-to-screen, nose-to-side cowl and side cowl-to-inner trim. A product image that shows only a glossy side profile may not reveal any of those interfaces. Request an actual front view of the offered parts plus uninstalled inner-surface views where possible.
Be especially careful with naming. The M-shaped styling feature is not necessarily one removable painted piece. A lamp, duct, inner trim, painted cowl and support can appear to form one visual unit while being different parts in a catalog or kit. Conversely, one physical panel can carry several visual edges. Do not count visible regions in a picture and call them the kit's piece count. Ask for an itemized supplied-parts list and a retained-OEM-parts list. The fairing-openings guide can help you frame questions about hidden interfaces, but the specific R7 listing remains the authority for what ships.
If the center lamp appears tilted or the cowl touches it on one side, pause before assigning fault. Possible explanations include a damaged support, a shifted lamp assembly, absent spacers, mispositioned inner trim or an incorrect bodywork application. Those possibilities require inspection; a blog cannot diagnose your motorcycle from a single image. Photograph the lamp with the cowl on, and photograph the support area if accessible without unsafe disassembly. The headlight-aim guide covers why lighting function and aim must be checked separately from cosmetic alignment.
Use one practical front-end contact sheet
A useful contact sheet is a one-page document with a labeled full-front photo in the center and close-ups around it. Number each boundary; put the same numbers in your supplier email. This is faster than sending twelve anonymous camera files. Add a second page showing the exact product listing, selected option and any modifications. Your aim is to get specific answers while there is still time to change the order.
| R7 front-end question | Evidence image | Ask before ordering | Hold the order if… |
|---|---|---|---|
| Is this the intended model-year/market application? | Registration/model document plus whole-bike front and sides | Confirm exact product application in writing | Year group is implied only by color or a copied photo |
| What forms the central lamp and M-shaped opening? | Square-on nose and close oblique views | Identify supplied cowl/duct/trim versus retained lamp parts | Listing omits a usable front or parts view |
| Where does the screen meet the upper cowl? | Screen edge, fasteners and inner view | State which screen fittings transfer or ship | Mounts are damaged or missing |
| What meets the nose on both sides? | Left and right three-quarter views | Show actual adjacent panels and seams | One side is represented by a mirrored image |
| Are lights and signals retained? | Functioning light images and mirror/signal bases | Confirm openings and retained electrical pieces | Road-equipment arrangement is unclear |
| Is the underlying support sound? | Stay and mount close-ups after appropriate inspection | Clarify what the kit assumes is still present | Damage behind painted panels is unresolved |
The table is a purchasing checklist, not a mechanical specification. It deliberately avoids a universal bolt-hole diagram or “95–98% bolt-on” claim. The only defensible fit conclusion is specific to a specified product and a known motorcycle in a known condition. If a supplier cannot answer an interface from its listing photos, ask for additional images or use the NiceFairings contact page.
Separate cowl fit from previous impact damage
An R7 that has tipped over may show scrape marks at the cowl edge, but cosmetic rash is not the only possible damage. Check, without forcing parts or riding an unsafe bike, whether the screen, mirror mount, lighting support and adjacent panels still sit where expected. A cracked tab hidden under an intact paint surface can later become a vibration or gap complaint. A bent mount can cause a new fairing to look wrong even if its shape matches the product description.
Make a damage map with three labels: visible cosmetic mark, suspected mount/support issue, and confirmed missing or broken component. Add one photograph for each label. If you cannot inspect a support safely, write “unknown” and have a qualified professional assess it. That is better than claiming a replacement kit will solve every gap. The after-drop panel-by-panel guide helps decide whether one piece, several pieces or a larger set is appropriate once the underlying condition is known.
This separation also affects budgets. A single cowl might be all the painted replacement you need, but a damaged lamp stay, screen hardware or inner trim can add work. A complete painted set may create a consistent new look, but it will not supply every hidden bracket or fastener unless the seller specifically lists them. Ask for an itemized quote and retain the old pieces until fit is established. Do not compare a bare panel price to a full project estimate as though they included identical work.
Decide what should stay on a road-going R7
The central headlight is not just a design cue. A road-going motorcycle needs its required lighting and equipment to function according to the applicable local rules. A race-style shell or promotional image may omit a lamp, mirror or signal opening. Do not assume a product called “R7 fairings” is road-cut simply because it is painted or shown on a complete motorcycle. Ask to see the exact headlight opening and clarify which lights, mirrors and electrical pieces are reused.
If you need dedicated race bodywork, define that as a separate project. A painted street kit does not guarantee compliance with any track-day organizer's current rules, and a race shell may omit road-light openings.
Perform a static steering-and-clearance visual check
After the correct parts are identified and a qualified installer is ready to pre-fit them, examine the motorcycle with the engine off and secure. With the front end safely supported as appropriate, observe the upper cowl and nearby components while the bars move through their normal steering range. The check is visual and functional: do the controls, wiring, hoses, screen or fairing interfere? Are any lines pulled taut? Does a new sound or hard contact appear? If there is uncertainty, stop and consult the service information or a qualified technician. This is not a request to loosen steering components or a substitute for a workshop inspection.
The final check belongs on the assembled bike, not a rendering. Photos can record the center, left and right steering positions, but cannot establish hidden clearances or roadworthiness. Do not tighten a reluctant panel to close a gap; use the pre-fit troubleshooting guide to document a mismatch without drilling an uncertain part.
The light test is separate. Verify the central headlight and position lights function as intended, and check headlight aim after any front-end work. A cowl that looks centered under daylight can still shade, misdirect or stress a lamp. Road testing should wait until the motorcycle has passed appropriate mechanical and lighting checks.
Order finish and artwork only after the interface is clear
Once the front assembly and year group are confirmed, color decisions become easier. A single replaced nose may differ from sun-aged adjacent panels even when the color name matches. A coordinated set can reduce visible mismatch across newly supplied painted pieces but cannot guarantee a perfect match to an existing tank, wheels or retained trim. Review the whole motorcycle in natural light and request product photos under more than one angle. Our R7 color and graphic ideas article is useful for inspiration, though its styling suggestions are not technical fit evidence.
Think about how a graphic crosses the front opening. An M-shaped feature, lamp and screen are strong visual landmarks; a stripe that looks straight in a flattened design file may break at a physical gap. Ask for a front proof as well as side proofs. Keep essential openings and lighting areas legible, and do not authorize artwork that obscures an interface the seller has not identified. If you want a heritage, sponsor-inspired or branded scheme, obtain permission for marks you do not own and clarify what the supplier can actually print. A photo of a race bike is not blanket authorization to reproduce its logo set.
Use the Yamaha R7 collection to identify a candidate style. Before checking out, save the exact product URL, selected year/variant, color option, written parts list and shipping/return terms. For a custom arrangement, the NiceFairings custom-fairings page is an enquiry route, not an assurance that a conceptual design or every brand mark can be manufactured. Ask what reference files, approval proofs and product limitations apply to the exact order.
Receive and compare the parts calmly
Photograph the parcel before unpacking, then photograph each delivered part from front and back. Lay pieces on a padded surface and match them against the itemized order. Do not pile painted pieces face-to-face or discard labeled bags. Compare the nose cutout and mating edges with the original before any irreversible adjustment. If a piece appears wrong, pause and send the seller clear images that include the motorcycle, old part, new part and the mismatch in one sequence.
For a multi-panel project, make a small retained-parts tray and label it by location. The screen mounting pieces, trim clips and lamp-adjacent hardware may be less visually exciting than a newly painted side panel, but they determine whether the final assembly is coherent. Follow the exact kit instructions and Yamaha service information for fasteners and torque; this article intentionally provides no generic values. The NiceFairings FAQ and contact route are better places to clarify a particular listing's contents than a universal installation claim.
FAQ
Is the R7's center headlight part of a “complete fairing kit”? Do not assume so. The lamp, surrounding trim, duct and painted cowl may be different items. Ask for the product's actual itemized list and the factory parts that transfer.
Can a 2026 R7 cowl be used on a 2022–2025 bike? This guide does not establish that. Yamaha describes 2026 front-bodywork and support changes; seek specific part-application evidence rather than inferring compatibility from the model name.
Does a straight-looking photo prove the headlight aim is correct? No. Test operation and aim on the assembled motorcycle using the applicable service and roadworthiness guidance.
Will a race-style R7 shell retain street equipment? Only if that exact product says so and the interfaces are confirmed. Event tech acceptance and road legality are separate questions.
The useful purchasing decision is not “which R7 photo looks fastest?” It is “can I identify the exact front-end assembly, know what stays on my motorcycle and get the supplier to confirm the pieces I am actually buying?” A sharp, honest front photograph and a numbered question sheet can answer more than another speculative fitment percentage.
Source and scope note
- Yamaha Motor's 2021 YZF-R7 launch announcement supports the original R7's M-shaped duct, central bi-functional LED headlight and paired position-light description. It is not an aftermarket parts catalog.
- The 2022–2025 range narrows the shopping discussion; it does not mean every year, market or prior modification shares identical replacement parts. Confirm the exact product application and your motorcycle's configuration before ordering.




