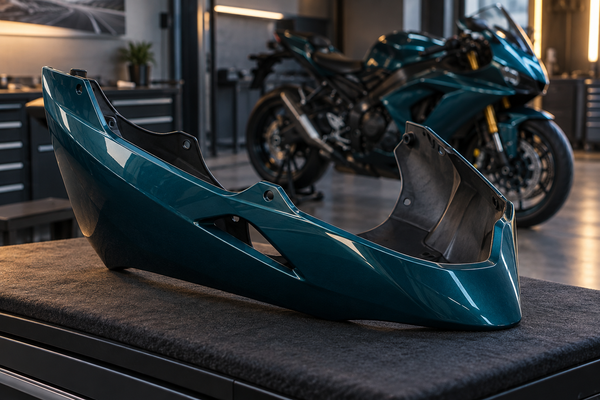
An attractive replacement panel can still leave questions about mirrors, indicators and the parts behind the visible openings. Before ordering, separate the cosmetic aperture from the actual supporting or electrical assembly. This guide helps you organize product references, accessible photographs and supplier questions. It does not provide thread specifications, a lighting conversion procedure or a road-use approval.
Images are AI-generated editorial illustrations, not photographs of the supplied product or evidence of model-year fitment, dimensions or safe installation. Use actual product documentation and motorcycle records for technical decisions.
Key Takeaways
Look at three main fairing openings: mirror mounts, turn signal cutouts, and hidden parts like fasteners.
Identify the actual mirror assembly and supporting parts; do not infer a thread specification from the cosmetic opening.
Check the turn signal openings to make sure their shape and size fit your signal housings.
Check hidden parts like clips, grommets, and foam dampeners for damage or missing pieces.
Use a worksheet to write down each opening's location, type, size, and condition.
Use accessible overview and detail photographs to support the enquiry, without treating a ruler photograph as precision verification.
Check what you found against OEM diagrams or kit contents to make sure the parts fit.
Stop and get help from an expert if any opening is damaged, not lined up right, or changed.
Motorcycle Fairing Openings: Mirror Mount Compatibility
A visible mirror opening may provide clearance or trim while another component supports the mirror. Identify the actual assembly before interpreting a hole as a threaded mount. Record the selected panel, mirror and required supports separately. Do not assume the left and right sides use identical hardware or geometry.
Threaded Insert Types and Sizes
Obtain the exact specification for the actual assembly
Thread diameter, pitch, length and engagement requirements belong to the actual fastening arrangement. The cosmetic panel may contain no thread at all. Ask the relevant supplier or installer which specification applies, using the correct motorcycle and product documentation. A generic sportbike size list is not a safe substitute.
For a useful ordering record, keep identification and measurements separate:
Record the exact mirror or accessory product reference and intended motorcycle application.
Identify which component supports the mirror and which opening is only cosmetic clearance.
Ask the supplier which measurements or detail photographs are useful and how the reference points are defined.
Have uncertain threads or hardware identified by an appropriately qualified person; do not identify a thread system from a rounded caliper reading.
Label unverified measurements as observations rather than confirmed specifications.
Block Off Plate Considerations
A cosmetic blanking plate is not a substitute for required road equipment
A block-off plate can cover an opening but does not replace the function of a mirror or indicator. This buying guide does not approve removing, relocating or replacing road equipment. Retain an appropriately assessed configuration and obtain applicable local requirements through the relevant authority or qualified professional.
Look at the area around each mounting hole for cracks, stress marks, or repaired plastic. Cracks spread under vibration. A cracked mount can fail even if the thread looks fine. Write down any damage in your worksheet. Get a qualified opinion before you install anything.
Left-Right Symmetry and Alignment
Checking for vibration and mirror clearance
Record each side separately. Asymmetry may be intentional, and a gap does not by itself diagnose vibration or a mounting fault. If position or clearance is uncertain, have the actual assembly assessed. Do not use generic left-right measurements as proof that an opening or bracket is correct.
Remember, a cosmetic hole is not always a structural mirror support. Some panels only have a trim opening, while a separate bracket holds the mirror weight. Look behind the panel for inner brackets, trim pieces, and rubber parts. Find out which part takes the stress before you judge fitment.
Exact manuals and a qualified person tell you the right hardware and setup for your model. Do not force a bolt into a wrong insert. Do not use unspecified adapters to fill a gap. If the thread, depth, or spacing is different from your original parts, stop and check the spec first.
General kit-contents and photo guides help organize enquiries; they do not show the exact support or thread specification for every motorcycle. Use the relevant service or product documentation and supplier clarification for the actual assembly. An owner’s manual may not contain detailed fastening or aperture data.

Turn Signal Cutouts: Opening Shape and Placement
For indicators, distinguish the cosmetic opening from the lamp, support, attachment and wiring arrangement. Similar outlines do not establish that the selected equipment is compatible. Ask which original parts are retained and what the replacement panel is designed to accept. Do not alter the opening or wiring to compensate for an unexplained mismatch.
Integrated vs. Separate Pod Openings
Molded recesses versus circular holes
Indicator designs use a variety of openings, recesses, brackets and retaining arrangements. They are not limited to two universal styles. Record the actual lamp and panel references, along with visible geometry, rather than assuming an integrated or pod-style label determines the attachment.
Compare the selected product information with the intended assembly and ask about required adapters or retainers. A paper outline or similar appearance cannot certify support, electrical compatibility or road suitability. Use measurements only as an agreed enquiry aid, not as authorization to install or modify a component.
If dimensions are requested, agree the reference points with the supplier or installer and record uncertainty. Depth and outline observations may help communicate a question, but no universal recess-depth rule is provided here. The actual product instructions and assembly assessment determine suitability.
Grommet and Routing Hole Condition
Rubber grommet integrity and wiring pass-through size
A wiring pass-through may use a grommet or another specified protective arrangement. Identify what belongs in that exact location. Do not assume every opening uses the same type of rubber part or that a grommet makes an assembly waterproof.
Inspect each grommet for cracks, hardening, or missing sections. A hardened grommet crumbles under vibration. A missing grommet lets the wire rub against bare plastic. That wear can cut insulation over time. Replace any grommet that shows damage before you install the panel.
Do not cut the panel, connector or wiring because a component appears unable to pass through an opening. The correct service sequence and routing may differ from that assumption. Ask a qualified installer to assess the actual assembly and product documentation before attempting changes.
Flush Mount Signal Compatibility
Do not infer an alternative signal location from an unused opening
A flush-mount description does not define a universal hole shape or installation method. Verify the exact lamp and panel application, supporting parts and instructions. This article does not approve an adapter, a lighting modification or a road-use configuration.
Do not treat an unused mirror opening as an approved alternative location for a signal. The supporting assembly, product application and applicable road requirements need their own assessment. This guide does not approve relocating equipment and provides no wiring, resistor or adapter instructions.
If the selected panel and lamp requirements are unclear or inconsistent, pause the order and ask the supplier and installer. General NiceFairings guides support the enquiry, but are not lamp-approval documents or model-specific aperture specifications. Use the appropriate product and service references.

Hidden Parts: Clips, Grommets, and Fasteners
Big openings like mirror mounts and turn signal cutouts get the most attention. But the smaller hidden parts of your motorcycle fairing openings need just as much checking. Clips, grommets, and fasteners hold your panels to the frame. Missing or broken hardware causes shaking, loose panels, and cracked tabs. When you look at used fairings, check every attachment point. Write down any missing retention hardware. These small items add cost and hassle if you miss them.
Plastic Rivets and Push Pins
Fairings can use several types of clips, pins, screws and supports. Their required dimensions and retention arrangements depend on the actual assembly. Record visibly damaged or uncertain pieces, and have condition assessed where needed. An empty opening does not automatically mean a fastener is missing.
Common sizes and replacement sources
There is no universal push-rivet size or assortment that this guide recommends for every sportbike. Use the table to distinguish sources of information from actual component approval. Obtain the specified item instead of choosing solely by apparent hole diameter.
Information needed |
Where to clarify |
Limit of the evidence |
|---|---|---|
Exact motorcycle application |
Appropriate manufacturer or dealer reference |
A diagram callout is not always an orderable reference |
Aftermarket kit requirements |
Kit supplier |
A general accessory assortment does not define the kit’s required hardware |
Original fastener identity |
Dealer or qualified installer |
Appearance and nominal hole size alone do not identify all dimensions |
Condition of retained parts |
Qualified installer |
New-looking or intact-looking hardware is not automatically suitable |
Package contents |
Written quote and inventory |
Full kit is not a universal hardware list |
Replacement availability |
Supplier for the exact item |
Price and delivery must be confirmed for the current order |
Compare relevant locations with the documented assembly. Have unclear retention or condition assessed before ordering substitutes. Do not force a pin that seems too tight or treat a visually empty hole as proof that a generic clip belongs there. Record the concern and ask for the appropriate component.
Foam Dampeners and Paint Protection
Some assemblies include specified isolation, protective or sealing materials. Their roles and locations vary, and not every contact area needs added foam. Identify what belongs in the actual assembly before diagnosing a noise or assuming material is missing.
Preventing rattles and paint wear
Record visible worn, displaced or deteriorated material for assessment. Do not add generic automotive foam to silence an unexplained rattle or fill a gap. Use the required component and placement information for the actual assembly. A wear mark may have more than one cause and should not be diagnosed from a blog photograph.
Access Panels and Fastener Receptacles
Access panels and their fastener receptacles let you reach mirror mounts and wiring. These are removable sections built into the fairing design. The fasteners holding them are often ignored until you need to service something behind the panel.
Removable sections for mirror or wiring access
Access to hidden mirror supports or wiring differs between motorcycles. A procedure shown for one rebuild is not a general removal sequence. Use the exact service information and appropriately qualified help. This article deliberately does not give electrical disconnection, mirror-removal or front-cowl removal instructions.
Before arranging service access, prepare the following information for the installer:
The motorcycle’s exact model, year, variant and any known bodywork or accessory changes.
The selected replacement panel and mirror or lamp product references.
The visible concern, such as a damaged opening, displaced trim or uncertain support.
Any known impact or repair history relevant to that area.
The supplier’s requested photographs and the service documentation available for the exact assembly.
Let the qualified installer determine the appropriate access, support, electrical handling and reassembly requirements. Do not infer connector count, locking method, lubricant use, panel weight or fastener sequence from another motorcycle. Ask for the relevant findings to be recorded so the replacement enquiry reflects the actual assembly rather than generic assumptions.
Check that all fastener receptacles on your fairings are intact. A stripped screw hole or a broken clip receptacle makes the panel impossible to secure. Note any damaged receptacles in your worksheet and add the repair cost before you finish your purchase.
Stock Fairings vs. Aftermarket Bodywork
When you compare stock fairings to aftermarket bodywork, you need to keep two things apart. Cosmetic panel openings are the holes and recesses you can see in the plastic. Structural brackets are the metal or reinforced plastic parts that hold mirror weight and panel load. A trim opening may look right, but the bracket behind it could be missing or different. Race bodywork has its own rules, so keep that topic separate from street equipment. Any mismatch or change needs a qualified check before you install anything.
Factory Hole Patterns and Kit Contents
Year-specific differences and included parts
Confirm the actual model-year and variant application for the selected component. This article has not verified a ZX-10R generation split or an R6 cross-year fitment verdict, so it supplies neither. Similar styling does not prove interchangeability, while a different year does not automatically prove incompatibility. Use component-specific references and supplier conditions.
Ask for an itemized scope covering the outer panels, relevant trim, supports, hardware and any separately required pieces. No universal price, quality percentage or hardware quantity applies across aftermarket kits. Compare the actual quote and required assembly rather than a generic cost table or an assumption that a windscreen and thermal material are always included.
Modified Fairings and Repaired Areas
Relocated mounts, filled holes, or reinforced tabs
Used fairings often carry hidden repairs. A seller may move a mount, fill an old hole, or reinforce a cracked tab with extra material. These changes can look fine under paint. They can also change how the panel sits and how load moves through the plastic. Check every motorcycle fairing openings area for filler, sanding marks, or uneven thickness. Compare the left and right sides for symmetry.
You cannot judge a repaired mount by appearance alone. A filled hole may hide a weak section. A reinforced tab may sit too thick and stop the panel from seating. Record what you find and photograph it. Then ask a qualified technician to assess the repair before you buy or install the part. Do not force a bolt through a repaired opening. Do not use unspecified adapters to bridge a gap.
Aftermarket Component Compatibility
Mirror and signal adapters that do not require cutting
A no-cut adapter claim still needs the exact application and installation conditions. It does not by itself establish mirror support, clearance, electrical suitability or road compliance. Ask the component supplier and qualified installer to resolve compatibility; do not fit unspecified spacers or adapters to compensate for an uncertain opening.
General kit and photo guides help you ask clearer questions, not certify a particular accessory conversion. Keep the actual panel, supporting assembly and accessory specifications together. If they cannot be reconciled, pause before ordering or modifying any part.

Pre-Purchase Inventory Worksheet
A worksheet turns messy notes into a clear record. You compare that record against the seller's listing or the kit description before you pay. Build the worksheet before you look at any panel. Then fill one row for every opening you find.
Worksheet Columns: Location, Type, Size, Condition
Use a simple measurement table
Use Location, Observed Type, Supplier-Requested Measurement and Condition/Questions as worksheet columns. Distinguish observations from confirmed specifications. Only include accessible measurements that the supplier has explained how to take; leave hidden or uncertain items for the installer. The illustrative rows below are not motorcycle specifications.
Location |
Type |
Measurement status |
Condition |
|---|---|---|---|
Upper cowl, left mirror mount |
Support arrangement to confirm |
Not specified by this guide |
Record actual visible condition |
Upper cowl, right mirror mount |
Support arrangement to confirm |
Not specified by this guide |
Ask about any observed damage |
Left side panel, signal cutout |
Molded recess |
Use agreed reference points |
Required retainer to confirm |
Right side panel, signal cutout |
Molded recess |
Use agreed reference points |
Record actual condition |
Add a Notes column if you need room for part numbers or seller comments. Keep every entry in the same units so you can compare rows quickly.
Tools for Accurate Measurement
Use supplier-defined reference points; leave technical identification to qualified assessment
Start with reliable product information and clear photographs. If the supplier needs a dimension, ask which points and method are relevant. A caliper, thread gauge or spacer assortment is not a universal inspection kit, and a spacer should not be used to compensate for an unexplained gap. Technical identification belongs with appropriate knowledge and documentation.
Keep each measurement with its method, units and uncertainty. Repeating a reading may catch a transcription error, but it does not turn an unsuitable measurement method into a verified specification.
Cross-Reference with OEM Parts Diagram
Online microfiche or manual for original specs
Use the appropriate component catalog, service information and product instructions for the actual motorcycle and accessories. An owner’s manual or parts diagram may not provide detailed thread, opening or installation data. Ask a dealer or supplier to resolve missing specifications rather than inferring them from a drawing.
General NiceFairings guides organize the enquiry and are not model-specific assembly references. Mark discrepancies or unresolved rows clearly and seek clarification before ordering. The goal is a useful record, not a worksheet that appears complete because uncertain entries were guessed.

Documenting Openings with Ordering Photos
A clear accessible photograph supports the supplier’s enquiry but cannot guarantee an avoided return. Include context and relevant detail, with a scale reference only where useful and safe. Do not dismantle the motorcycle merely to obtain a close-up.
What to Photograph for Each Opening
Close-ups with scale ruler, show depth and threads
Show the accessible mirror area in a context photograph and a clear close-up. A nearby ruler can indicate scale when appropriate, but an angled image cannot verify thread pitch, depth or load-bearing suitability. Ask which additional information the supplier actually needs before attempting access or measurements.
Move to the turn signal cutout. Photograph the full opening shape with the ruler along the longest edge. If it has a molded recess, take a side shot to capture recess depth. Then photograph the routing hole behind it showing the grommet and wiring pass-through.
Photograph accessible retention areas without disassembly. Hidden condition may need service access by a technician. A photograph can show an observation, but it does not certify that every clip or support is present and serviceable.
Finally, take an overall panel photograph. This separate cover shot gives context for all the close-ups.
Lighting and Angle for Accuracy
Avoid flash glare, capture shadows
Bad lighting hides cracks and twists measurements. Stay away from strong direct sunlight. It makes harsh shadows that hide edges. Use bright but soft light instead.
Shoot in the shade of a building, tree, or garage to spread the light evenly.
Wait for a cloudy day. Clouds scatter sunlight into an even glow across the panel.
Shoot at dusk or dawn for soft, warm light that shows edges without harsh highlights.
Use a desk lamp or flashlight to fill shadows without glare.
Avoid flash glare; review whether the lighting actually preserves visible detail.
Check your shot before moving on. The image should show clear edges, visible threads, and readable ruler markings.
Labeled Photo Set for Communication
Combine with worksheet for supplier or seller
Organize your images by panel and opening type. Name each file clearly using a pattern like "LeftMirrorCloseup." Place all opening images and the cover image in one folder.
Pair each photograph with the relevant worksheet row and describe what is observed versus uncertain. This helps the supplier understand the enquiry but cannot eliminate every fit or return risk. Retain the written application and contents confirmation alongside the pictures.
Use the NiceFairings photo guide as a communication example. Its editorial illustrations are not photographs of your delivered product or proof of a specific opening’s dimensions. Photograph your actual components when that can be done safely and use the exact supplier references.
A useful enquiry separates the cosmetic opening, the actual supporting assembly and the selected mirror or lamp. Record exact references, accessible observations and unresolved questions. Obtain product-specific clarification before ordering, and leave uncertain hidden access or technical identification to appropriate professional assessment.
Remember that any damaged, misaligned, or modified opening needs a qualified technician to check it before installation. Never force a part into a hole that does not match.
Now share your own fairing-opening experiences or tips in the comments below. Your story might help another rider avoid the same mistake.
FAQ
What should I measure first on a mirror mount opening?
First identify the mirror product, supporting assembly and cosmetic panel. Ask which actual specification or measurement the supplier needs. Do not assume the visible opening is threaded, that both sides are identical or that a generic thread size applies.
How do I know if my fairing uses a molded recess or a circular signal hole?
Record the visible geometry, but do not reduce all indicator arrangements to two opening types. Confirm the exact lamp and panel application with the supplier. A similar outline or tracing alone does not verify attachment, wiring suitability or road compliance.
Can I use the mirror holes for flush mount signals?
Do not assume that an opening intended for another component is a suitable signal location. Obtain appropriate product-specific and road-use assessment rather than modifying the panel or fitting an unspecified adapter.
What hidden parts should I check on used fairings?
Check every clip receptacle, grommet, and push-pin location. Look for missing foam dampeners and stripped screw holes. Note any damaged retention hardware in your worksheet. These small parts add cost and cause rattles if you miss them.
Which tools do I need for a fairing opening inspection?
Clear records and accessible photographs are a starting point. Ask the supplier which measurements are needed and use appropriately qualified help for hidden access or uncertain technical identification. No generic tool set can certify all fairing openings.
How do I photograph a fairing opening for a supplier?
Take an accessible overview and a clear close-up under lighting that preserves detail. A scale reference may help explain size, but cannot verify threads or hidden condition. Label the image and pair it with the exact product and motorcycle information.
What if my worksheet row does not match the OEM diagram?
Mark the discrepancy and ask the supplier, dealer or installer to clarify it. A diagram may omit dimensions, and existing modifications may matter. General photo and contents guides support the enquiry but are not the final specifications for the actual assembly.
Do aftermarket mirror adapters always fit without cutting?
No. Some adapters fit existing holes, but you must verify. Record the thread size, depth, and opening shape of each mount. Compare that data against the adapter maker's published requirements. If your panel and component do not match, stop and seek a qualified assessment.