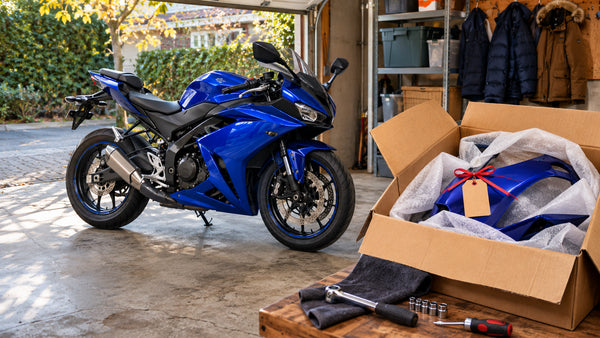

An October morning can make heated grips sound like a simple improvement. Before calling the job finished, check whether the new right grip lets the throttle close freely, whether the leads clear the controls, and whether both remain true after the front bodywork goes back on.
This is a parked-motorcycle acceptance checklist, not a universal installation procedure. The exact bike and grip manuals govern installation, electrical connection, adjustment and reassembly. If a grip binds, a lead becomes taut or a lever's movement changes, stop and correct the cause before riding. Use a qualified shop if needed.
An inner cowl can conceal a problem that was obvious while the cockpit was open. Check before final fastening and again after closure.
Key takeaways
- Identify the bike, its existing grips and the exact heated-grip model before taking anything apart; do not choose by appearance alone.
- Establish how the original throttle and levers feel on the parked bike, then compare after the new parts are fitted.
- Check throttle opening and positive return at center and at both steering limits, following the applicable manufacturer instructions.
- Watch the right-grip lead throughout throttle travel; check the controller side against clutch movement and normal hand positions.
- Repeat the checks after the inner panels and upper cowl are fitted. A clear open cockpit is not a final result.
- Treat a failed check as a no-ride condition, not as something to “wear in” over the first cold commute.
Why this is a separate problem from ordinary fairing wiring
A typical accessory-cable plan asks whether a wire is protected from heat, rubbing and a pinched panel. Heated grips add a moving part at the rider's hand: the right grip is fitted to the throttle tube, and its lead has to tolerate throttle movement as well as steering movement. A cable can look relaxed with the bars straight and become tight at full lock; a grip can feel acceptable in one position and drag in another. The left controller, if separate, must also coexist with the clutch lever and switchgear.
For broader routing questions, see our dashcam/display fairing-clearance map and steering-clearance check. Here we focus on the heated grip's moving interface, not a universal route, connector or fuse.
Two manufacturer examples show why the distinction matters. Honda's 2023 heated-grip attachment instructions for the SCL500 call for checking that the throttle opens smoothly and automatically snaps closed from any opening in all steering positions, and that reinstalled parts do not pinch the harness. This is not a sportbike-specific procedure or a claim that the SCL500 kit fits your bike. Oxford's HotGrips Advanced Integrated instructions likewise require a free-returning right grip and say controller exit wires must not foul the clutch or anything affecting operation. Use these as evidence for what to verify, while using your own kit's documents for how to install it.
Assemble a reference packet before purchase or disassembly
Record the motorcycle's make, exact model, model year and market. Note whether it already has an accessory controller, bar-end hardware, hand guards, changed clip-ons or a non-original front cowl. Photograph the original right grip with the throttle closed, the left switchgear and clutch lever, and a rider-seat view of the cockpit. Keep the photos tied to one machine; that avoids asking a seller or technician to infer layout from a generic motorcycle image.
Next, obtain the grip maker's current instructions for the exact model and variant you intend to buy, including any model-specific adapter or controller. Compare grip length, throttle-tube interface, bar-end arrangement and stated electrical requirements with your bike's documentation. Do not transfer a trimming allowance, adhesive instruction or wire exit angle from another product. Even variants within a brand can differ. If the compatibility evidence is absent, pause the order and ask the manufacturer or a qualified installer; a “sport” label is not a fitment confirmation.
Keep three columns: known from the manual, visible on my bike, and still unconfirmed. A missing specification is not an invitation to guess. The NiceFairings shop-by-bike entry identifies painted bodywork, not heated-grip compatibility.
Make a baseline that can reveal a change
Before the original grip is disturbed, stabilize the parked bike, switch the engine off and ensure it cannot roll. With the bars near center, turn the throttle a little and observe how promptly it returns when released. Repeat at the steering limits according to the service manual. Do not start the motorcycle to see whether a sticky throttle “clears.” Note any pre-existing stiffness, damaged bar end, contact with a hand guard, or lever issue; an accessory should not be blamed for a problem already there, but that problem still needs resolving.
Record the control area from the rider's seat at center and near each lock. A change from the original feel calls for investigation. If the baseline already fails the bike's criteria, repair that fault first.
Note how the inner cowl meets the bars and levers. Aftermarket clip-ons, mirrors and bodywork can alter clearance. Our photo-and-label workflow helps tie detail shots to one bike.
Dry-fit the controls before committing to the final layout
Follow the kit maker's dry-fit instruction, if provided, before using any product-specific adhesive or making irreversible changes. A grip that does not fit with the permitted effort is not made compatible by hammering it on. The Oxford document, for its named product, explicitly warns against forcing the grips and calls for checking free right-grip return. That does not authorize filing, trimming or using Oxford's adhesive on a different grip. The correct remedy depends on the actual throttle tube and kit instructions.
Consider the right grip in three relationships: its inner end to the switch housing, its outer end to the bar-end assembly, and its lead to the rotating grip and nearby controls. Check for unintended contact without assuming a universal millimeter gap. If it binds after being positioned, ask whether the new grip is pressed against adjacent hardware, whether its own fit on the tube is wrong, or whether the lead is being pulled. Do not choose a longer bar-end bolt, remove a protective piece or cut a grip just to make the photo look flush.
On the left, check that the controller remains reachable in the normal riding position but does not interfere with clutch travel, indicator/horn operation or the rider's glove. A controller can be visible and still be badly placed. The final position should be confirmed through the kit instructions and a stationary control check, not by a staged cockpit photograph.

Test the right grip through two different movements
First consider throttle rotation with the steering near center. The engine stays off. Open the grip through the range specified by the bike/kit instructions, release it from several openings, and check for a consistent return to closed without catching or abnormal friction. The Honda SCL500 accessory instruction states the throttle should snap closed from any opening in all steering positions. The Oxford instruction states the right grip must rotate freely and return without abnormal friction. Apply the acceptance principle, but do not substitute either manual for your bike's service procedure or freeplay specification.
Second consider steering sweep. Turn the bars slowly from center toward each lock while watching the grip lead and neighboring cables. Recheck the throttle in the positions prescribed by the motorcycle's instructions. Do not hold an electrical lead taut as a “test”; observe whether the installed route naturally has enough movement. A line that lifts, snags or pulls on the grip at one steering angle fails the check even if the heater powers on. Follow the applicable instructions for correcting it, and seek qualified help rather than improvising a hidden tie point.
Do not confuse “the throttle can be forced shut” with “the throttle returns normally.” Nor does one successful snap at center prove behavior at full lock. If the bar-end weight, hand guard, controller lead or surrounding bodywork changes the feel, investigate that interaction before continuing. This is not a place for a road test as the first confirmation.
Check controller, clutch and brake separately
A separate controller is usually seen as an electrical accessory, but its location can be a control problem. With the bike parked, move the clutch through its normal travel while watching the controller body and its exit wires. Check access to the switches and the space a gloved thumb actually uses. Oxford's named kit says its controller wires must not foul the clutch lever or anything affecting handling. Again, that is a principle to check, not a mandate to mount another kit in the same location.
On the right, watch the front-brake lever through normal travel while the throttle is opened and closed. A grip lead should not snag a lever, stretch when the throttle turns, or sit where an ordinary hand movement pushes it into the mechanism. Check with the bars at appropriate steering positions. The exact permissible routing and attachment points come from the component maker and motorcycle service material, not from an AI illustration.
If you use winter gloves, repeat the stationary reach check wearing them. A bulky glove can change how easily a controller button is pressed or whether the switchgear remains accessible. But a glove test is an additional ergonomic check, not a substitute for the mechanical return test. Our rider-gear contact check for painted fairings covers a broader question of clothing and bodywork contact; this guide stays at the hand controls.
Repeat the checks with the cowl temporarily in position
Before final fastening, place the relevant inner panels and upper cowl in the way the motorcycle and bodywork instructions specify. Look for a cable or connector that only becomes trapped when plastic is seated. Move the steering slowly while the bike is secure; verify the newly enclosed path does not tug the grips, snag a lever, scrape an edge or change the throttle return. Do not ride with loosely positioned panels: this is a workshop check while parked, followed by correct final assembly.
The part being checked is specific. A painted upper fairing may be near the wiring, but the safety-critical question is still whether the control and its harness move correctly. A new shell is not a solution to a badly routed grip lead. Conversely, if the actual cowl is cracked, distorted or incompatible with the motorcycle's support, record that as a separate bodywork problem. The upper-cowl alignment guide explains why a changed gap can involve the support structure rather than just the visible painted part.
For an aftermarket shell, confirm its exact model/year application and the location of genuine contact. Do not cut a painted panel merely because a wire is inconvenient. If a cowl is being replaced anyway, check the product listing for included pieces and interfaces and obtain written confirmation for modified cockpits. The NiceFairings custom-fairings process is an enquiry route for a bodywork design or scope; it is not a heated-grip approval or a promise of wiring clearance.
Close the bodywork, then repeat the acceptance test
Once the applicable instructions have been followed for final routing and reassembly, repeat the same control checks. Check throttle return at the steering positions required by your bike's documentation, observe the clutch and brake, and verify normal switch and lighting operation as the manuals call for. Honda's SCL500 instruction explicitly says not to pinch harnesses when removed parts are reinstalled and to verify lights afterward. Its specification belongs to that motorcycle and accessory; your own documentation may require more or different checks.
Use the baseline photographs and notes, but do not make “looks like before” the only criterion. Confirm the fairing sits without forcing, fasteners are fitted to the correct specification, and no lead disappears into a closing seam under tension. If closing the cowl changes the throttle feel, reopen and find why. Do not leave out an inner panel or loosen a control assembly to make an interference vanish without proper repair guidance.
The winter battery-maintainer lead-routing guide treats a different accessory that may live behind a fairing. Its storage and charging context is not a substitute for the moving throttle checks here. A useful final record for this project is a set of center/left/right control photos and a note of the actual kit, installer, manual revision and any issue corrected.
A final no-ride decision
If the grip drags only with the bars turned, a lead becomes taut, the controller fouls a lever, or the control feel changes after closing the cowl, reopen and find the cause. Heating function does not prove mechanical safety, and binding will not reliably “wear in” on a ride. Follow the exact manuals or use qualified service, especially if the throttle tube, cables, wiring or front support has been modified.
When NiceFairings is relevant—and when it is not
NiceFairings supplies bodywork, not the heated grips described here. If the fairings are sound, finish the accessory correctly rather than buying new panels. If a panel is damaged or a refresh is planned, use the NiceFairings model catalog and verify the exact product scope.
For a bodywork enquiry, send make, model, year and market; photos of the whole bike, cowl edge and modified cockpit; and a list of clip-ons, bar ends, guards and screen. State whether you need a panel, set or custom design. The custom design brief guide helps separate appearance from fitment. Ask what is included; another motorcycle's editorial photo is not proof.
Warm hands matter; so does a free-returning throttle.
Sources and image scope
- Honda SCL500 heated-grip attachment instructions, 2023, pages 2, 10–11: model-specific instructions for throttle return, harness tension, reassembly and lighting checks. Not sportbike fitment guidance.
- Oxford HotGrips Advanced Integrated instructions, pages 2–3 of the English instructions: model-specific controller, lever-clearance and right-grip return cautions. Confirm the exact Oxford variant if using that brand.
Both images are AI concepts, not verified installation or product photos. Use the actual manuals to confirm clearance.