
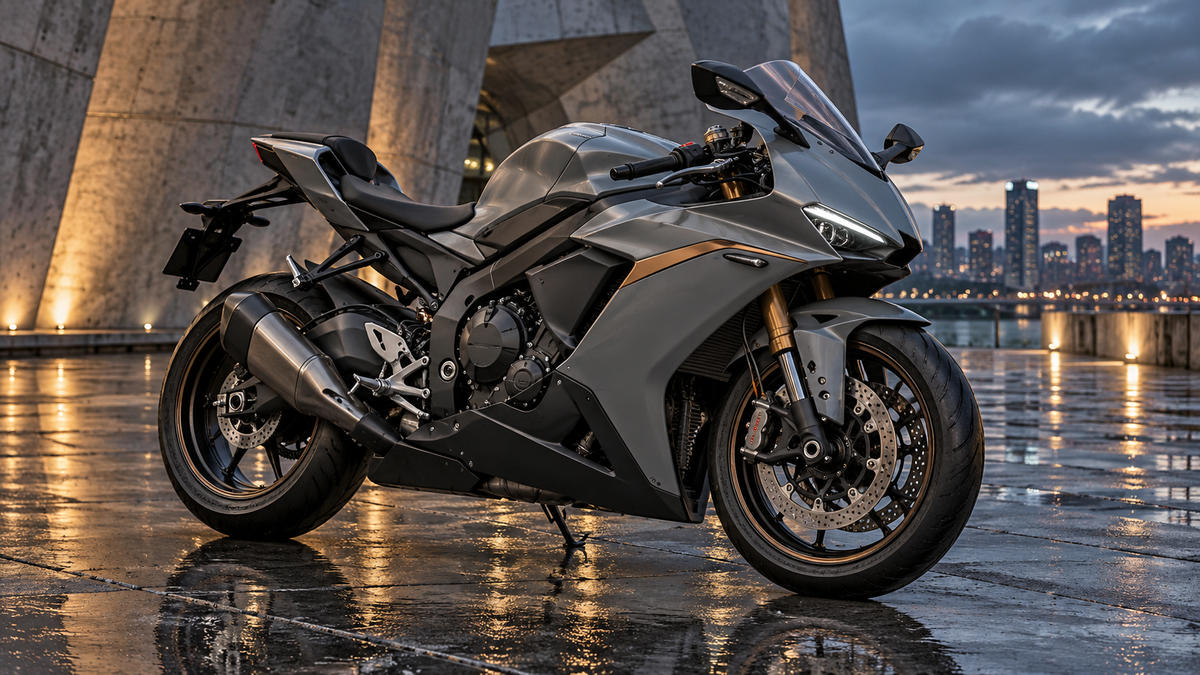
“Nardo grey” is not a complete paint brief. On one screen it may look warm and almost beige; under a blue sky it may shift cool; under garage LEDs it can appear flatter and darker. Add gloss, satin or matte clear, then place the color beside a black frame, bronze wheels or a blue-tinted windscreen, and the same grey can tell a completely different story.
The useful question is not whether grey is “taking over social media.” We have not verified a market-wide popularity claim. The useful question is how to specify a clean grey fairing scheme so the supplier, painter and buyer are approving the same visual direction.
This article focuses on the design brief. For panel-by-panel finish placement, also read our guide to mixing matte and gloss motorcycle fairings.
If you are still deciding which bodywork project to brief, review the current motorcycle fairing listings first. Confirm the actual model, year and panel scope before treating any color concept as an order specification.
First choose the grey family
Grey is a low-chroma color, but it still has an undertone. That undertone becomes obvious when the motorcycle moves between daylight, shade and artificial lighting.
Warm concrete grey
A warm grey leans slightly beige or brown. It can coordinate with bronze, gold, tan and warm metallic parts. On a motorcycle with a bright aluminum frame or cool blue wheels, it may create a deliberate contrast—or an accidental mismatch if the brief never considered those parts.
Cool blue-grey
A cool grey can feel technical and crisp beside black, silver and blue accents. Under warm garage lighting it may look more neutral; under cool LEDs or an overcast sky the blue influence can become stronger.
Neutral battleship grey
A neutral mid-grey keeps the body shape prominent and gives accent colors more influence. Because it occupies the middle of the value range, the black lower fairing, tires and dark windscreen must remain visually distinct. If every component is a similar dark mid-tone, the panel architecture can disappear in photographs.
Chalk or pale grey
A pale grey gives the motorcycle a cleaner, architectural appearance but shows contamination and color contrast clearly. It can work well with a dark lower section that visually grounds the bike. Ask how the pale body color meets the tank, front fender and tail so the scheme does not look like separate unfinished groups.
Do not select from a compressed social-media image alone. Request a named reference, physical sample or approved spray-out process. PPG’s refinishing training emphasizes that pigments and light interact and that correct lighting and viewing angles matter during color evaluation.
Then specify sheen as a separate decision
Color and sheen are related but not interchangeable. “Matte grey” can describe many gloss levels and textures. A painter needs a more specific finish target and an approved sample.
| Finish direction | What it emphasizes | Design risk | Approval question |
|---|---|---|---|
| High gloss grey | Reflection depth, sharp body lines and color clarity | Surface variation and mismatched neighboring gloss become visible | Which panels share the same gloss target? |
| Satin grey | Controlled reflection with visible shape | Can look patchy if sheen varies across panels | What approved sample defines the satin level? |
| Low-sheen matte grey | Silhouette and industrial texture | Contact polishing, uneven care and repair difficulty | What care method and repair limitations apply? |
| Mixed gloss and matte | Panel hierarchy and deliberate contrast | Random-looking boundaries or adjacent finish mismatch | Where does each finish begin and end on all views? |
Axalta’s matte-clear technical data shows why “matte” is not one fixed result: actual gloss level can depend on the basecoat color, materials, film thickness and drying method, and the manufacturer recommends spraying out and verifying the gloss level before application. Use that principle when approving any custom finish. A phone image cannot replace a physical or process-controlled reference.
Build contrast around the parts that will remain
Before designing the fairings, inventory the motorcycle’s retained visual elements:
- Fuel tank or tank cover.
- Frame and swingarm.
- Wheels and rim stripes.
- Front fender.
- Windscreen.
- Seat and tail trim.
- Exhaust finish.
- Fork color.
- Levers, rearsets and visible hardware.
- Carbon-look or real composite accessories.
Take neutral daylight photos from both sides, front, rear three-quarter and rider-eye height. Grey bodywork can make a bright retained part dominant. A gold fork may become the accent even if the design brief never calls it one. Blue wheels may shift a neutral grey scheme toward a cool palette. A large stainless exhaust can compete with a subtle satin body unless the lower section is planned around it.
If the tank remains original, use our guide to planning new fairings around the existing tank color before approving the palette.
Use a three-level visual hierarchy
A minimalist scheme still needs structure. A reliable brief assigns three roles:
- Primary body color: the grey family that covers the largest visible fairing areas.
- Structural neutral: usually black, charcoal or a dark metallic used on lower panels, vents or inner areas.
- Controlled accent: one limited color or material cue that directs the eye.
The accent can be a thin bronze line, a small wheel-color echo, a red intake edge or a silver graphic that follows a real panel crease. It should have a stated start and stop point. “Add a little bronze” invites interpretation; “a narrow bronze line from the upper side-panel crease to the tail transition, ending before the vent” is reviewable.
Minimal does not mean unfinished. Remove arbitrary sponsor marks, but keep enough contrast to show how panels meet. If every surface is the same mid-grey, vents and seams may merge. If every inner panel is deep black, it can create a strong silhouette but also make gaps appear larger in low light. Review the entire motorcycle at card-size and full-size views.

Editorial concept: this image demonstrates undertone and sheen review. It is not a paint formula, product sample or guarantee of final color match.
Approve grey under more than one light source
Ask for the same sample or finished-panel reference in:
- Indirect daylight.
- Open shade.
- Warm indoor light.
- Cool workshop LED light.
Keep camera limitations in mind. Automatic white balance, exposure and screen settings change how grey appears. A photograph documents the sample but does not create an exact digital color standard.
Compare the sample beside retained parts, not on a white desk alone. Place it near the tank, wheel, frame and windscreen. Evaluate face-on and at an angle because reflection and texture affect perceived brightness. If the scheme uses two grey finishes, photograph them touching at the intended boundary.
Create an approval sheet that records:
- Color reference and acknowledged matching limits.
- Warm, cool or neutral undertone.
- Gloss, satin or matte target.
- Panel-by-panel finish map.
- Accent color and exact boundaries.
- Retained motorcycle parts.
- Decal or logo permissions.
- Required proof views.
For a complete format, adapt our custom fairing paint brief.
Once the bike identity, palette and proof views are ready, the NiceFairings custom design page explains how to start a design request. If the model year, market or required panels remain unclear, contact NiceFairings before approving paint.
Grey can modernize a build without pretending to change its model year
A restrained color scheme can make the lines of an older sportbike feel cleaner, but it does not turn the motorcycle into a newer model or alter its structure. Avoid “2026 concept bike” claims when the actual motorcycle is a 2012 model. Accurate descriptions protect the buyer and make the finished build more credible.
Work with the geometry that exists:
- Use dark lower panels to visually reduce mass where appropriate.
- Place a brighter accent along a genuine crease rather than inventing a false vent.
- Keep graphic lines continuous across panel seams.
- Avoid copying newer-model headlight, winglet or intake shapes into a paint proof as though they are included parts.
- Confirm that the design proof uses the correct model and year before approving paint.
If the motorcycle carries mixed-year or repaired bodywork, resolve fitment and panel identity first. Paint does not establish interchangeability.
Gloss grey, satin grey and matte grey need different care expectations
The finish decision should include ownership, not just the reveal photo.
Gloss grey
Gloss can usually be discussed in terms of washing, protection and possible professional correction under the coating maker’s instructions. Do not assume every ceramic product, polish or solvent is compatible. Keep the exact finish documentation.
Satin and matte grey
Axalta’s matte-finish care bulletin warns against conventional gloss waxes and polishes, dry wiping and aggressive rubbing, because they can create shiny or blotchy areas. It recommends products intended for matte finishes and following manufacturer guidance. This supports a practical rule: approve the care routine before choosing the finish.
High-contact zones deserve special attention. The rider’s knees, luggage contact, cover movement and frequent wiping can change how a low-sheen surface looks. A gloss tank area with satin side fairings may be easier to manage than making every touched surface ultra-matte. The best division depends on the actual motorcycle and use.
Our matte fairing cleaning guide explains the maintenance limits in more detail.
Avoid the five grey-build mistakes
1. Using a trademark-style color name as the only specification
Names such as Nardo, chalk, cement and battleship are visual shorthand. They do not tell the painter the approved formula, undertone or sheen. Use a reference and sample process.
2. Approving only a side view
Grey schemes can look clean in profile but collapse at the nose or tail. Review both sides, front and rear three-quarter views.
3. Forgetting the tank and wheels
The largest retained colors can overpower a subtle new fairing scheme. Put them into the proof.
4. Calling every dark component “stealth black”
Gloss black, satin black, textured inner plastic and carbon-look patterns reflect light differently. Label each surface role.
5. Treating generated images as paint evidence
AI concepts can help explore composition, but they do not establish the exact color, panel geometry, finish quality or product contents. Use them for direction, then approve real samples and the correct model-year proof.
Three practical design recipes
These are briefing frameworks rather than fixed products.
Warm battleship grey + satin black + bronze
Use warm mid-grey on the main side and upper panels, satin black on lower and inner areas, and a restrained bronze line that echoes gold or bronze hardware. Confirm that the grey does not clash with cool blue wheels or frame finishes.
Cool chalk grey + gloss black + one wheel-color echo
Use pale cool grey for the body, gloss black for the nose center and lower section, and one small accent drawn from the wheel or brake color. Keep the accent narrow so the pale body remains dominant.
Neutral gloss grey + matte dark lower + no graphics
Use reflective neutral grey to show body lines, a matte dark lower to anchor the motorcycle and no added logos. This approach depends on excellent finish boundaries and coordinated retained parts; without them it can look like unmatched replacement panels.
Pre-approval checklist
Before setting a deadline, review the store's production and shipping overview and frequently asked questions. Use the current information for planning rather than turning an example timeline into a delivery promise.
- Confirm motorcycle model, year, market and actual panel list.
- Decide warm, cool or neutral grey.
- Define gloss, satin or matte with an approved sample.
- Photograph all retained parts in neutral light.
- Create a panel-by-panel color and finish map.
- Review left, right, front and rear three-quarter proofs.
- Check graphic continuity across seams and vents.
- Compare samples under daylight, shade and workshop lighting.
- Record care instructions and repair limitations.
- Keep AI concepts labeled as inspiration, not product evidence.
Grey looks simple because it removes visual noise. Achieving that simplicity requires more precise decisions, not fewer. Undertone, sheen, retained parts and lighting must agree before paint begins. When the brief records those choices, a minimalist build feels intentional in the garage, on the road and in photographs.



