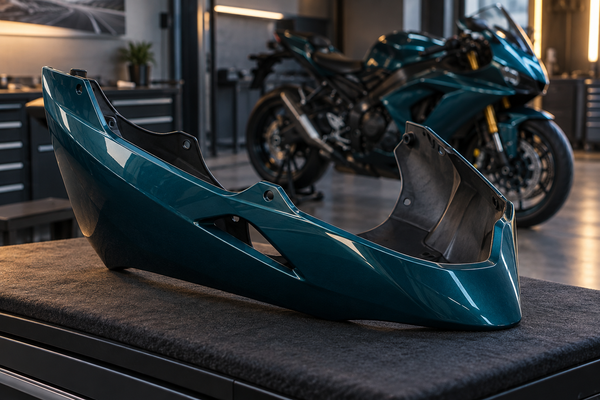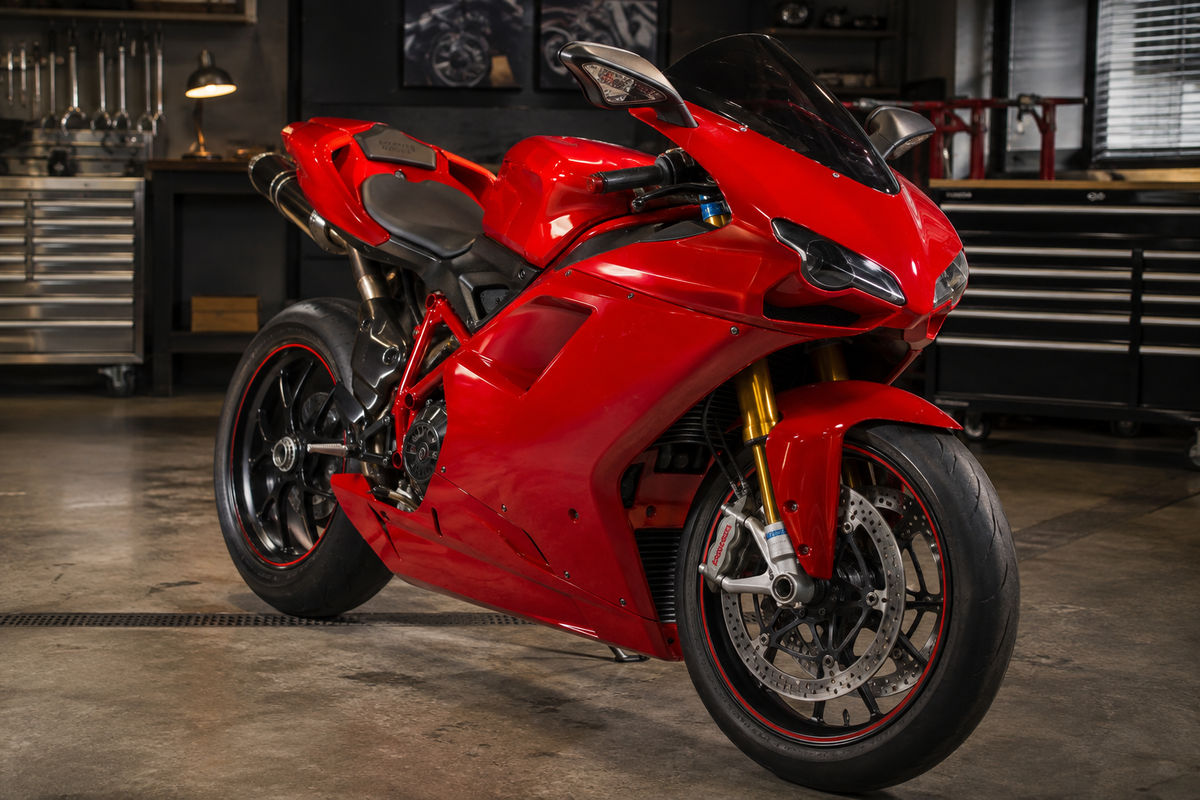
You found a set of Ducati 1098 fairings online. But will they fit your exact Ducati? Buying the wrong 1098 parts wastes your time and money. This guide covers five key checks: confirming your exact model, picking the right style, choosing a full fairing kit, checking for heat damage, and pre-fitting. Follow these steps for your 1098 setup with care. This Ducati guide helps you avoid costly errors. You will buy with confidence for your Ducati superbike. Your 1098’s performance depends on a proper fit. Good performance needs correct alignment. Your Ducati deserves the best. This 1098 model needs close attention.
Key Takeaways
Check which Ducati 1098 model and year you have before you buy fairings.
Choose ABS plastic for street riding, or pick fiberglass if you want to save weight on the track.
A full fairing kit gives you paint that matches and fits better than buying single panels.
Check used fairings close to the exhaust for heat damage, such as warping.
Put all fairings on your bike loosely before painting to see if they line up right.
Verify the Exact Ducati Before Shopping
Start with the VIN, registration, model year and variant shown on the motorcycle. Do not assume bodywork for an 848, 1098 or 1198—or for a special variant—will interchange simply because the bikes share a family resemblance. Check the seller's stated fitment against the original headlight, front stay, air ducts, side-panel joints, belly pan and tail interfaces on your bike.
Ask for a complete panel list and photos of the inner mounting surfaces. If the listing combines several models or years, request written confirmation for your exact motorcycle before ordering. For official documentation, consult the Ducati owner-manual library or a Ducati parts specialist.

Choose Street vs. Track Fairing Style
Your riding habits determine which fairing material suits your ducati superbike. You must decide between street-focused panels and track-oriented components before you order. This choice affects durability, weight, and legal road use. Your ducati 1098 deserves panels that match your actual riding environment.
Compare ABS and Fiberglass Fairings
ABS plastic is a common choice for street bodywork because it can provide a useful balance of flexibility, finish and serviceability when the kit is well made. This material flexes under impact instead of cracking. It absorbs vibrations from the road and resists minor bumps. You can ride your 1098 through city traffic without worrying about stone chips or parking lot scuffs. ABS panels also hold their shape well over time.
Fiberglass provides a lighter and stiffer alternative. Track riders favor this material because it reduces overall weight. The stiffness improves aerodynamic performance at high speeds. However, fiberglass cracks more easily upon impact. It also transmits more vibration to the mounting points. You must consider these trade-offs carefully.
Track-specific fairings often lack essential road features. Many fiberglass kits omit headlight openings, turn signal mounts, and mirror brackets. These panels make your ducati illegal for street use. You cannot ride legally at night without proper lighting. You cannot signal turns without indicators. Check each product listing for these provisions before you buy.
Match Style to Your Riding Use
Your primary use case should guide your aesthetic choice. Commuters and weekend riders need practical panels with full lighting provisions. Track day enthusiasts can prioritize weight savings and aerodynamics over road legality.
OEM-inspired red fairings recreate the classic stock appearance. This choice suits riders who want a factory-fresh look. The iconic Ducati red paint matches the original design language. You maintain the visual identity of your 1098 with this option.
Dark custom finishes offer a stealthy alternative. Black or charcoal panels give your ducati superbike an aggressive presence. These finishes hide dirt well and suit riders who prefer a subdued appearance. You can pair dark panels with custom graphics for personal expression.
Track-inspired street styling bridges both worlds. These fairings mimic race bike silhouettes while retaining road-legal features. You get the aggressive look of a racing machine with functional headlights and mirrors. This option works well for riders who frequent both street and track environments.
Your final decision must reflect your needs, not just visual appeal. A track-only fiberglass kit frustrates you during daily commutes. A heavy ABS setup slows you down on race day. Evaluate your riding patterns honestly. Choose the fairing that serves your ducati 1098 best in its primary environment. The right material and style enhance your overall riding experience.

Decide on a Complete Fairing Kit
When you shop for ducati 1098 fairings, you have a big choice to make. You can buy a full set or just the pieces you need. Each option works best in different situations. Your choice changes the cost, how the bike looks, and how hard the install is. Think about what you want before you decide.
Why a Full Kit Helps
A full fairing kit gives you several clear pluses. The maker builds every panel at the same time. This means the paint color matches on all parts. You skip the small color differences that happen when parts are made in separate batches. Your ducati 1098 looks clean and well put together.
The good design goes past paint color. Full kits get careful planning. Each panel fits next to its neighbors from the start. The holes line up right. The gaps between panels stay even. You do not have to guess if parts from different brands will work together.
Price is another reason to pick a full kit. Makers sell complete sets for less than buying each part alone. You save money versus building a set piece by piece. A normal kit comes with the key parts: the front nose, the left and right side panels, and the front fender. This covers the main body for a full restyle or fix-up.
When to Buy Single Panels
Buying single panels makes sense in some cases. A small crash often hurts just one area. You might break the left side panel while the rest is fine. Replacing only that piece costs less than a whole kit. You keep your other good panels.
Getting the paint to match is the hard part with single buys. Your current fairings have seen wear. Sun and washing fade the old finish over time. A new panel with fresh paint may not look the same as your older ones. The color gap shows up in bright light. Makers cannot copy the exact shade of your used ducati superbike.
Think about how old your current body is. A newer bike with little fading gives you a better chance for a good match. An older bike with years of sun brings more risk. You might need to repaint nearby panels to make everything look even.
If you worry about color matching, go with the full kit. This removes the chance of mismatched parts. You get a fresh, even set of aftermarket fairing kits with a smooth finish everywhere. The extra money protects your bike's look and your peace of mind. A full set also keeps quality steady across all mounting points.

Inspect Fairings for Heat Damage
Heat can quietly harm your ducati 1098 fairings. You may not spot the damage right away. Long exposure to high heat weakens the material inside. You need to know where heat strikes and how to see the warning signs before buying.
Locate High-Heat Risk Zones
Your ducati superbike makes strong heat in certain spots. The lower side fairings sit nearest to the exhaust headers. These headers give off extreme heat on every ride. The inner panels near the engine face constant heat stress. The area around the radiator also builds up heat, especially in traffic.
ABS plastic does poorly with long heat exposure. The material can warp, change color, or turn brittle over time. You might see a small shape change first. Fiberglass has different issues. Heat makes the resin separate from the cloth, causing weak spots that crack under pressure.
Evaluate New and Used Fairings
For new fairings, check the material rating. Make sure the maker lists high-heat resistance for panels near the exhaust and engine. Any heat shielding must follow OEM or product instructions. Do not think aftermarket panels match factory heat protection. Ask the seller about heat ratings if the listing does not say.
For used fairings, check these zones closely. Run your fingers along the lower edges and inner surfaces. Feel for rough spots, soft areas, or bubbles under the paint. Look for color changes that show the plastic has overheated. Check the mounting holes for stretching, which means the material softened and pulled.
Heat damage weakens the structure. A fairing that melted or separated can fail at speed, creating a serious safety risk.
You should also check the back of each panel. Heat damage often shows first on the inside where you cannot see it from outside. Shine a flashlight across the surface at a low angle. This trick shows slight warping that direct light hides. A warped panel will not line up with your ducati 1098 mounting points, no matter how well you pre-fit it.
The quality of your buy depends on this check. A fairing with hidden heat damage will fail you later. Your ducati relies on panels that keep their shape and strength. Take the extra time to look at every surface. Your safety and your ride depend on this care.

Pre-Fit Your Fairings for a Perfect Fit
Pre-fitting your fairing set is not optional. You must do this step before you paint or install anything. A dry fit reveals problems you cannot see on a flat workbench. Your ducati 1098 has complex curves. Panels that look correct in a box may not align on your actual bike. Take the time to mount each piece loosely. Use the stock hardware from your existing setup. Do not tighten any bolt fully. This loose mounting lets you shift each panel for the best position. A good pre-fit saves you from wasted paint and frustrated hours later. Your ducati deserves this careful attention before final assembly.
Dry-Fit to Check Mounting Points
Start with the front nose piece. Place it in position and insert the mounting bolts. Leave them finger-tight. This lets you shift the panel side to side. Move to the side panels. Attach them to the nose piece and to the frame brackets. Check that each mounting hole receives a bolt without force. Forced holes mean the panel does not sit correctly.
Never force a bolt into a misaligned hole. Forcing creates stress cracks that grow over time. The performance of your final setup depends on stress-free mounting.
You may need to enlarge a hole slightly. Use a round file or a small drill bit. Remove material a little at a time. Test the fit again after each adjustment.
Work through every panel in the kit. The left and right side panels must meet the nose piece at even gaps. The front fender must align with the fork legs. The tail section must sit flush with the subframe. Pay attention to the areas where two panels meet. Uneven lines here stand out after painting.
Your 1098 motorcycle uses specific fastener locations. These locations differ between the base model, the S, and the R. Verify that your new panels match the original mounting points from your ducati. If a hole does not align within 2 mm, stop and investigate. Do not force the panel into position.
Document any misalignments you find. Write down which holes need adjustment. Mark the spots with a pencil. This record helps you make consistent changes across all panels. Your ducati 1098 kit will fit better after you address these small issues.
Verify Clearance and Alignment
Clearance checks protect your safety and your bike's performance. Start with three critical checks:
Move the handlebars from lock to lock. Watch the nose piece as it rotates. The panel must not touch the frame, the forks, or the instrument cluster. Any contact during steering limits your control. Your ducati 1098 needs full steering range for safe riding.
Compress the front suspension several times. The front fender must not hit the lower panels or the radiator. Repeat this check with the rear suspension. The tail section must clear the rear tire under full compression. Your 1098 suspension moves through its travel during every ride. The fairings must follow this movement without interference.
Check the gaps between panels. A consistent gap of 3 to 5 millimeters looks professional. Use a spacer or a small piece of cardboard to check the gap width. Adjust the panel position until the gap matches on both sides. Your ducati 1098 looks best when panel gaps stay even.
Minor trimming may be necessary. Some aftermarket panels have extra material around the edges. Use a fine-tooth file or sandpaper to remove this excess. Take off small amounts and test the fit each time. You cannot add material back. The goal is 100% fitment with your stock hardware.
Use rubber well-nuts or OEM-style fasteners for the final installation. Rubber well-nuts absorb vibration. They prevent the plastic from cracking around the mounting holes. They also stop the panels from loosening over time. Your 1098 benefits from this extra care. The fasteners from your original ducati work well for this purpose.
A successful pre-fit gives you confidence. You know every panel fits before you apply color. You avoid the frustration of a piece that does not mount correctly. Your ducati 1098 looks clean and professional. The bike performs better because the panels stay secure at speed. Loose fairings create drag and noise. Proper fitment eliminates these issues. Your ducati runs better with panels that stay in place.
Take your time with pre-fitting. Rushing this step leads to mistakes. Work through each panel methodically. The time you invest now pays off in a smooth, worry-free installation. Your ducati 1098 will reward you with clean lines and reliable fit.
Your ducati purchase requires five critical checks. Know your ducati model exactly. Choose the right material for your ducati riding. Decide on a complete kit or individual panels. Inspect your ducati fairings for heat damage. Pre-fit your ducati components before paint. This ducati guide helps you buy with confidence. Your ducati 1098 performance depends on correct fit. Good performance needs proper alignment. Your ducati needs patience. Your 1098 fairings will look great. Your 1098 rewards careful work. Your 1098 handles better with correct panels. Your 1098 investment is protected. Your ducati needs this attention. Your ducati deserves care. Your 1098 deserves your time. A little diligence prevents major headaches. Your 1098 will serve you for years. Your 1098 needs this care. Your 1098 setup needs care. Your 1098 rewards your patience. A little patience now pays off. Your fairings will fit perfectly.
Final Ducati 1098 Buying Checklist
- Confirm the exact model, year and variant.
- Compare every visible mounting point and opening with your original bodywork.
- Decide whether the bike needs one panel or a complete, color-consistent set.
- Inspect heat shielding and clearance near the exhaust.
- Dry-fit all panels before irreversible adjustment or final assembly.
A careful fitment check is more valuable than a dramatic paint scheme. Choose the correct foundation first, then choose the finish that suits how you actually use the motorcycle.
Useful NiceFairings Resources
Continue with the Motorcycle Fairing Guides, browse motorcycle fairings by bike, review custom fairing options, understand production and shipping, check the FAQ, read the return policy, or contact NiceFairings with fitment questions.