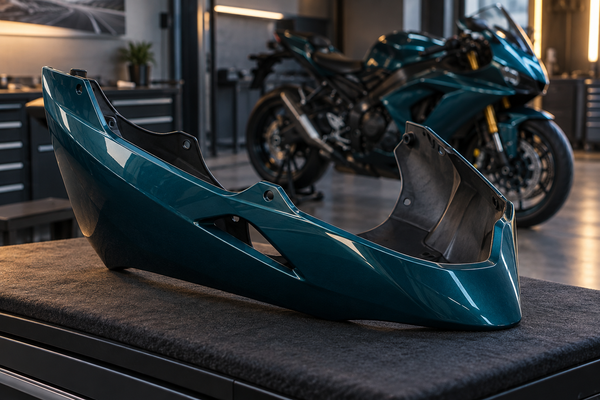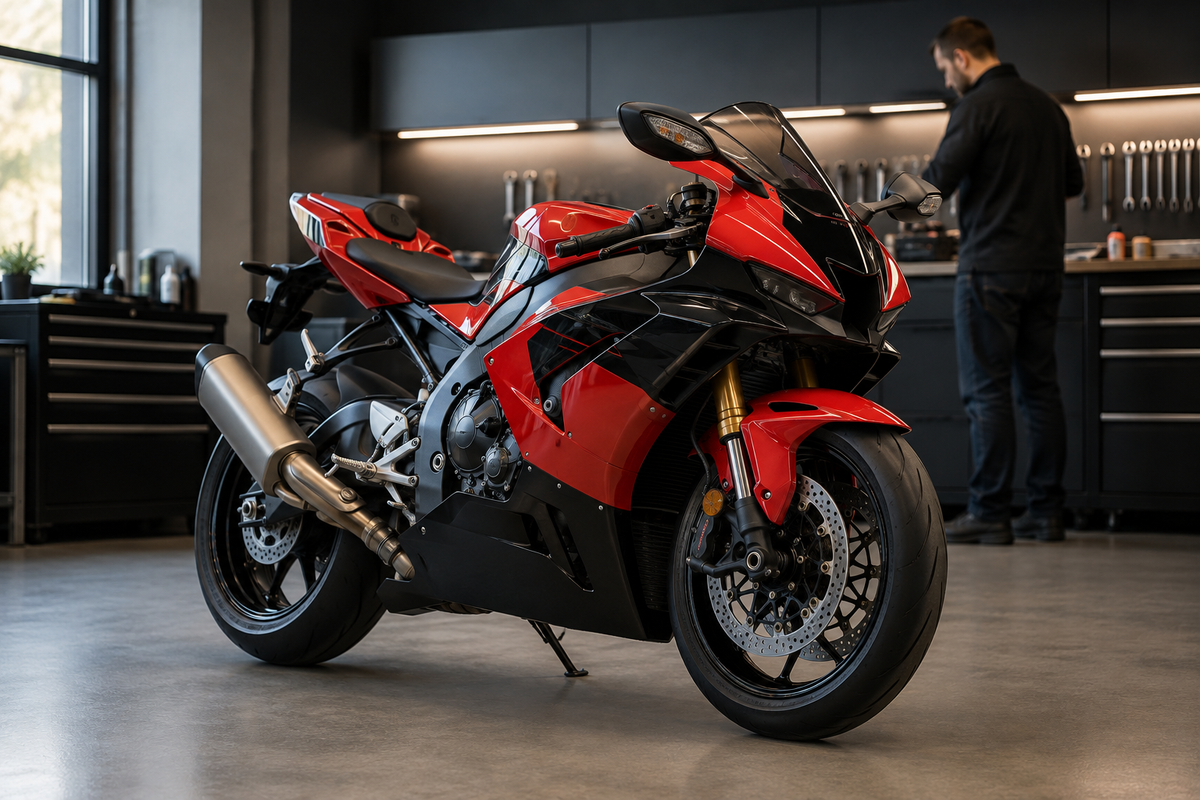
Useful resources: Explore the exact NiceFairings collection, review the featured fairing kit, follow the pre-fit checklist, check the NiceFairings FAQ, and use the official Honda CBR1000RR-R model page for manufacturer context.
Upgrading your 2024-2026 Honda CBR1000RR-R with new bodywork is exciting, but pre-ordering comes with real risks. How can you make sure your pre-ordered CBR1000RR-R fairings fit carefully, arrive on time, and look just like you pictured? One small mistake in choosing the model year or kit can cause weeks of delays and frustration.
This article is your complete guide, with a step-by-step checklist that covers VIN verification, removing stock parts, and key pre-order steps. You will learn how to avoid expensive errors and handle this process with confidence for your motorcycle. The time you spend now pays off when you install the right kit. The checklist helps you steer clear of common mistakes. Follow it closely for a smooth experience.
Key Takeaways
Check your VIN and sub-model to make sure the fairings match your specific motorcycle.
Check OEM diagrams against product photos to make sure the panels line up correctly.
Pick a full kit or single panels depending on what you need to fix and how well the colors match.
Check the paint codes and production times with the seller before you order.
Do a dry assembly before you install it, so you can spot any fitment problems early.

Verify Your CBR1000RR-R Fairings Fitment
The 2024-2026 CBR1000RR-R has brand-new bodywork that looks different from older Fireblade models. You can't just assume that fairings from a 2020-2023 bike will fit your new one. The mounting points, air intake shapes, and panel contours all changed in this new version. Before you even start looking at fairing options, you must know exactly which motorcycle you own.
Check Your VIN and Sub-Model
Your motorcycle's Vehicle Identification Number (VIN) tells you which fairings will fit. Find the VIN on the steering head tube, the right side of the frame, or on your registration papers. The tenth character in the VIN shows the model year. For 2024 models, this character is R. For 2025 models, it is S. For 2026 models, it is T. Write down this character and keep it where you can see it while you shop.
You also need to know your sub-model. Honda makes two versions of the CBR1000RR-R: the standard model and the SP version. The SP has different suspension parts, but for your needs, it shares the same bodywork mounting points as the standard model. However, some cosmetic details differ between the two versions. The SP may have extra air vents or different winglet designs depending on the model year. Check your owner's manual or the VIN sticker on your frame to confirm whether you have the standard or SP version.
Check your VIN and sub-model against official Honda model resources. Honda's website has model-specific documents and parts diagrams for each year. You can also ask your local Honda dealer to confirm your exact setup using your VIN. This check takes ten minutes and saves you from weeks of frustration later.
Cross-Reference with CBR1000RR OEM Diagrams
Once you confirm your VIN and sub-model, compare what you found with OEM parts diagrams. Honda publishes detailed diagrams showing every body panel and where it mounts. These diagrams show small differences between model years that photos often miss. For example, the 2024 model has revised side cowls with different fastener positions compared to earlier versions.
Visit the NiceFairings collection for the 2024-2026 CBR1000RR-R to see available cbr1000rr-r fairings. The collection page shows each kit with detailed product images. Compare these images against the OEM diagrams you reviewed. Pay close attention to the shape of the front cowl, the position of mounting holes, and the contour of the tail section. The Shopify pre-fit guide gives you extra visual proof of how these panels line up with the motorcycle's frame.
This cross-referencing process is your main fitment check. You are looking for visual matches between the aftermarket bodywork and the factory panels. If the kit's shape matches the OEM diagram for your specific year and sub-model, you have strong proof it will fit. If anything looks different, contact the seller with your VIN and photos of your current bodywork before you order.
Remember that cbr1000rr fairings for this generation do not fit earlier models. Honda changed the mounting design a lot. The air intake ducts now route differently, and the front cowl attaches at new points. A kit made for a 2020-2023 model will not line up correctly on your 2024-2026 bike, no matter what any listing says. Your careful checking during this phase decides whether your new bodywork installs cleanly or needs extra work.
Take screenshots of the OEM diagrams and the product images so you can compare them. Save your VIN details and sub-model information in a note on your phone. This record helps you talk clearly with any seller or manufacturer. When you contact customer support, you can give exact details about your motorcycle instead of vague descriptions. This clarity lowers the chance of ordering the wrong kit.
The time you spend on these fitment checks now saves you from the letdown of getting bodywork that does not match your motorcycle. A few careful comparisons today prevent a costly return and a long wait for the right replacement.
Choose Your Fairings: Full Kit vs. Panels
Once you know your motorcycle's exact details, you face another choice. You need to pick between a full kit or single panels. This choice affects how you order everything. Knowing what each option includes helps you avoid confusion later.
Understand What's Included in a Full Kit
A full kit gives you every outside body panel your CBR needs. You get the front cowl, both side panels, the tail section, and the front fender. Some kits also come with the belly pan and the rear seat cowl. These parts have pre-drilled holes that match your motorcycle's factory mounting spots. This bolt-on design means you don't have to drill or change anything when you install it.
Single panels serve a different job. You might buy just one side fairing to fix a broken piece. This works well when only one section has a crack or scratch. But mixing an aftermarket panel with factory bodywork can cause slight color differences. The new panel may not match the faded look of your original parts. A full kit avoids this issue because all panels come from the same paint batch and finish.
Think about your goal before you choose. If you want a new look or a full color change, a full kit makes sense. If you only need one section fixed, a single panel saves money. The NiceFairings collection shows both options clearly. You can compare what each package includes before you decide.
Decide Between OEM-Style and Custom Designs
Aftermarket options for the CBR1000RR-R come in two main material types. Injection-molded ABS plastic offers UV protection and resists fading from sunlight. This material suits street riders who want durability and easy care. Racing versions use reinforced carbon fiber or Kevlar construction. These materials provide stiffness for track conditions but cost more than standard ABS.
Your design choice matters just as much as the material. OEM-style bodywork copies the factory look with stock colors and graphics. This option appeals to riders who want a like-new appearance after damage. Custom designs let you show your personality through unique paint schemes and graphics. You might pick a racing-inspired livery or a completely original color mix.
Custom graphics require clear communication with the manufacturer. You must describe your vision exactly or provide reference images. Ask about digital proofs before production starts. This step confirms the design matches what you want. For OEM colors, find your paint code on the VIN sticker or owner's manual. Share this code with the seller to ensure accurate color matching. The pre-fit guide on the product page helps you see how different designs look on your specific model year.
Your material and design choices affect both appearance and how long the parts last. Take time to weigh these factors against your riding habits and budget.

Confirm Honda CBR Fairings Paint Codes
Paint codes change with each model year and trim level. The 2024 CBR1000RR-R comes in colors like Pearl Glare White. The 2025 version may use different hues. The SP model often features the HRC Tricolor scheme. These codes tell the manufacturer what color to apply to your new panels. Getting the wrong code means your cbr1000rr-r fairings arrive in the wrong shade. You must find your exact code before you order.
Match OEM Colors for 2024, 2025, and 2026
Find your paint code on the VIN sticker attached to your frame. The sticker sits on the left side of the steering head. You can also check your owner's manual for a color reference page. The code looks like a short combination of letters and numbers. Write it down and keep it with your order information.
Each model year has its own set of codes. The 2024 model uses code Y289 for Pearl Glare White. The 2025 model may use a different code for the same color name. Never assume the color name alone gives you the right match. Provide the code to the seller when you order pre-painted fairings. This step ensures the manufacturer applies the correct formula to your panels.
The SP trim adds another layer of complexity. This model often comes with the HRC Tricolor paint scheme. This scheme uses three separate colors across different panels. The manufacturer needs to know each color's position on the bodywork. Share a photo of your current motorcycle along with the paint codes. This visual reference helps the seller confirm the layout fitment matches your expectations.
Ask the seller to confirm the color before production begins. Most manufacturers work with specific paint formulas. They may not match the exact factory OEM finish. The color will look very close but not identical to the original. This difference matters for riders who want a carefully match after a partial replacement. A full kit avoids this issue because all panels come from the same paint batch. An aftermarket painted kit gives you a consistent look across all panels. Your new kit arrives ready for installation.
Select Custom Graphics and Finish
Custom graphics let you create a unique look for your motorcycle. You can choose racing stripes, geometric patterns, or full custom artwork. The manufacturer applies these graphics over the base color during production. This process gives you a finished product ready for installation.
Clear communication makes custom graphics work well. Send reference images of the design you want. Describe the colors, shapes, and positions as clearly as you can. Ask the manufacturer for a digital proof before they start production. This proof shows how the design will look on your cbr1000rr bodywork. Review it carefully and suggest changes if needed. This step prevents surprises when the package arrives.
The finish of your bodywork also matters. You can choose between gloss, matte, or satin clear coats. Each finish changes how the paint reflects light. Gloss gives a shiny, showroom look. Matte offers a flat, modern appearance. Satin sits between the two. Decide which finish suits your style before you order.
The manufacturer sends your custom motorcycle fairings as a complete set. All panels match each other in color and finish. You do not need to paint or clear coat anything after installation. Prepare for removal of your old bodywork before the new kit arrives. The cbr1000rr fairings arrive ready to bolt onto your bike. Make sure your workspace is ready for the removal process.
Remember that custom designs require extra lead time. The manufacturer needs to create artwork, mix colors, and apply graphics. Plan for this additional time when you place your order. The result is a one-of-a-kind look that sets your CBR apart.
Evaluate Seller and Production Timeline
Pre-ordering cbr1000rr-r fairings means you join a production schedule, not a simple warehouse purchase. Manufacturers build bodywork in batches. Your kit enters the queue when you place your order. Understanding this timeline helps you plan your project without frustration.
Ask About Lead Times and Production Batches
Contact the seller before you commit. Ask directly about their current production batch schedule. Find out when the next batch starts and when your kit will dispatch. A reputable seller gives you a clear window, not a vague promise. The NiceFairings collection for the 2024-2026 CBR1000RR-R provides product details and contact options for these questions.
Ask whether your chosen design affects the timeline. Custom graphics often require extra production days compared to stock colors. Pre-painted fairings with standard OEM colors may move faster through the shop. Confirm this difference before you place your order.
Request written confirmation of the estimated dispatch date. Save that email or message for reference. This documentation helps you track your order and gives you a baseline if delays occur. A seller who hesitates to share production details may not offer reliable communication later.
Clarify Shipping and Customs Policies
Shipping costs vary widely depending on your location. US buyers typically pay domestic freight rates. European riders face international shipping plus potential customs duties. Ask the seller whether the quoted price includes these fees. Some sellers include duties in their total. Others leave that responsibility to you upon delivery.
Customs clearance adds time to your delivery window. Your package may sit at a border facility while authorities process paperwork. This delay sits outside the seller's control. Plan your removal of stock bodywork around this uncertainty. Keep your motorcycle rideable until your new kit arrives.
Confirm the shipping method and tracking availability. A reliable seller provides a tracking number once your package leaves their facility. This number lets you monitor progress and prepare for arrival. Ask about packaging standards as well. Proper crating protects your investment during long transit routes.
Your careful questions now prevent surprises later. A seller who answers clearly about production and shipping earns your trust. This trust matters because you are investing in a significant bodywork replacement for your cbr. The right information lets you schedule your installation with confidence.

Plan for a Smooth Installation
Your new fairings arrive at your door. The excitement feels real. But before you rush to remove your old panels, take a step back. A smooth installation starts with preparation. Your CBR deserves this level of care. Two simple steps will save you from headaches later.
Perform a Pre-Fit Check and Dry Assembly
A dry assembly means you test the fit before you mount the panels for good. You hold each piece against your motorcycle. You check that every pre-drilled hole lines up with its mounting point. Your CBR1000RR uses specific mounting locations. This step catches problems early. You avoid the frustration of removing a painted panel because a hole sits off by a few millimeters.
The NiceFairings product page includes a pre-fit guide. This guide shows how the bodywork should align with your bike. Study the guide before you start. Compare the images to your own CBR. If anything looks different, contact the seller before you proceed.
Do not skip this step. A dry assembly takes thirty minutes. It reveals whether your kit needs adjustment. It also confirms that all panels fit together. The tail section meets the side panels without gaps. The front cowl aligns with the headlight opening. The side fairings sit flush with the frame.
You perform this check before any removal of your old panels. Keep your current bodywork on the bike. Set the new pieces against them. Compare the shapes and mounting points. This comparison gives you confidence in the fitment. The replacement process becomes predictable.
Gather Necessary Tools and Hardware
Most kits include the basic hardware you need. Screws, bolts, and clips often come in the package. But some items are better to have as spares. OEM rubber grommets wear out over time. The old ones may crack when you remove your original panels. New grommets ensure a secure fit for your new fairings.
Check your kit's contents list when it arrives. Compare it against the hardware you already have. If the kit includes everything, you still benefit from having extra fasteners on hand. Honda uses specific clips and washers for the CBR. Local dealers stock these parts. Order a set before your kit arrives.
You do not need a long list of tools. A basic socket set, screwdrivers, and trim removal tools usually cover the job. The exact tools depend on your model and your personal method. Your specific model year matters for fastener types. The point is to have everything ready before you start. You do not want to pause your work to search for a missing tool.
Lay out your tools and hardware on a clean surface. Organize them by type. This preparation makes the installation flow smoother. You focus on the task instead of hunting for parts.
Your careful preparation now pays off during the installation. A dry assembly and the right tools turn a stressful job into a straightforward process. The CBR's design rewards this attention to detail. The entire installation becomes predictable. The time you invest here saves you from delays and errors later.
Final Pre-Removal Checklist and Next Steps
You have checked your VIN, picked your kit, confirmed paint codes, and looked into the seller. Now you are at the last step before you click "pre-order." This pre-removal checklist is your final guard against costly mistakes. Go through each item with care. The time you spend now stops weeks of regret later.
Review Your Order Confirmation and Documentation
Open your order confirmation and read every line. Make sure the model year matches your motorcycle exactly. Check that you picked the right sub-model, whether standard or SP. Confirm the paint code looks just like the one you gave. One wrong number in a color code means your cbr1000rr fairings show up in the wrong color.
Compare your order details with the notes you saved during your research. Your VIN character, your sub-model, and your paint code should all line up with what the seller has. If anything looks off, reach out to the seller right away. Do not expect them to spot the mistake. This check takes five minutes and guards your whole purchase.
Keep all paperwork in one spot. Store your order confirmation, emails, and any digital proofs together. Take a screenshot of the product page showing your chosen design. This record helps you fix problems if the delivered kit does not match what you ordered. A full paper trail gives you backup and peace of mind.
Prepare for Arrival and Post-Installation Care
Your new bodywork will come in a crate or strong box. Set aside time to look over every panel as soon as it arrives. Search for cracks, scratches, or shipping damage. Check the edges of each piece for chips. Look at the clear coat for marks. Take photos of any issue right away. Clear pictures from the delivery day back up your claim with the seller or shipping company.
Store your stock fairings the right way before you start removing parts. Clean them gently and wrap each panel in soft cloth or bubble wrap. Put them in a dry spot away from direct sunlight. You may want these original parts later for resale or for track days. A motorcycle with its factory bodywork often sells faster than one with only aftermarket panels.
Your installation day will go well because you got ready. Lay out your tools, look over the pre-fit guide, and do the dry assembly first. The full kit you ordered includes every panel you need. Take your time when you remove your old panels. Label each fastener as you take it off. This order keeps the replacement process simple.
The time you put into this pre-removal checklist pays off when your new fairings sit flush against your CBR. You avoided the common traps that catch unprepared buyers. Your motorcycle now shows your vision, and you finished the project with confidence.
Your successful pre-order comes from careful verification, not luck. You checked your VIN, confirmed your model, matched paint codes, and evaluated the seller. Each step protected your investment.
The "measure twice, cut once" philosophy applies carefully to fairing kits. One overlooked detail can delay your entire project. Revisit this checklist before you finalize your purchase. Confirm every specification one final time.
Your diligence ensures a flawless result. Whether you pursue a full replacement or a custom look, your cbr will showcase bodywork that fits correctly. The time invested now delivers a motorcycle you will ride with pride. Your honda deserves this attention. Proceed with confidence, knowing you prepared thoroughly for this installation.

FAQ
What should I do if my paint code is not listed?
Contact the seller or a Honda dealer directly with your VIN and your model year. Provide a photo of your current bodywork. Many manufacturers can match custom colors. Give as much detail as possible.
Can I install the fairings myself at home?
Yes, with basic tools and patience. The cbr kit uses pre-drilled holes for a bolt-on fit. Follow the pre-fit guide on the product page. A dry assembly before mounting helps confirm alignment.
How do I handle shipping damage?
Inspect every panel of the cbr kit upon arrival. Take photos of any damage immediately. Contact the seller with your documentation. Most sellers resolve damage claims quickly for your motorcycle.
What if a hole does not align during dry fit?
Stop and check the kit against your cbr's mounting points. Compare with OEM diagrams. Contact the seller before making any modifications. Do not enlarge or drill new holes.
Do I need to remove the stock panels before the new kit arrives?
Keep your stock panels on the cbr until the new kit arrives. Perform the dry fit with the old panels still installed. This lets you compare shapes and mounting points. Only begin removal after confirming fitment.
Ready to compare finishes? Return to the matching NiceFairings collection and verify the exact listing for your motorcycle before ordering.