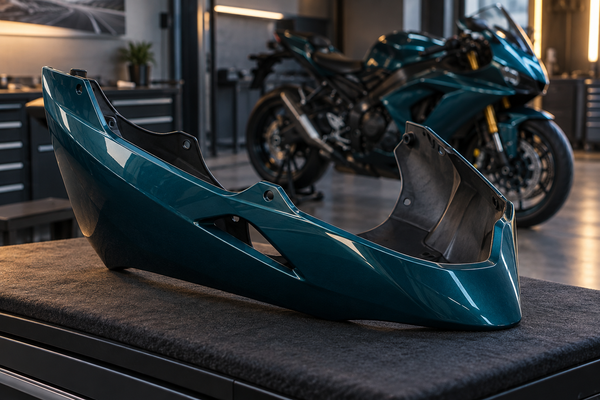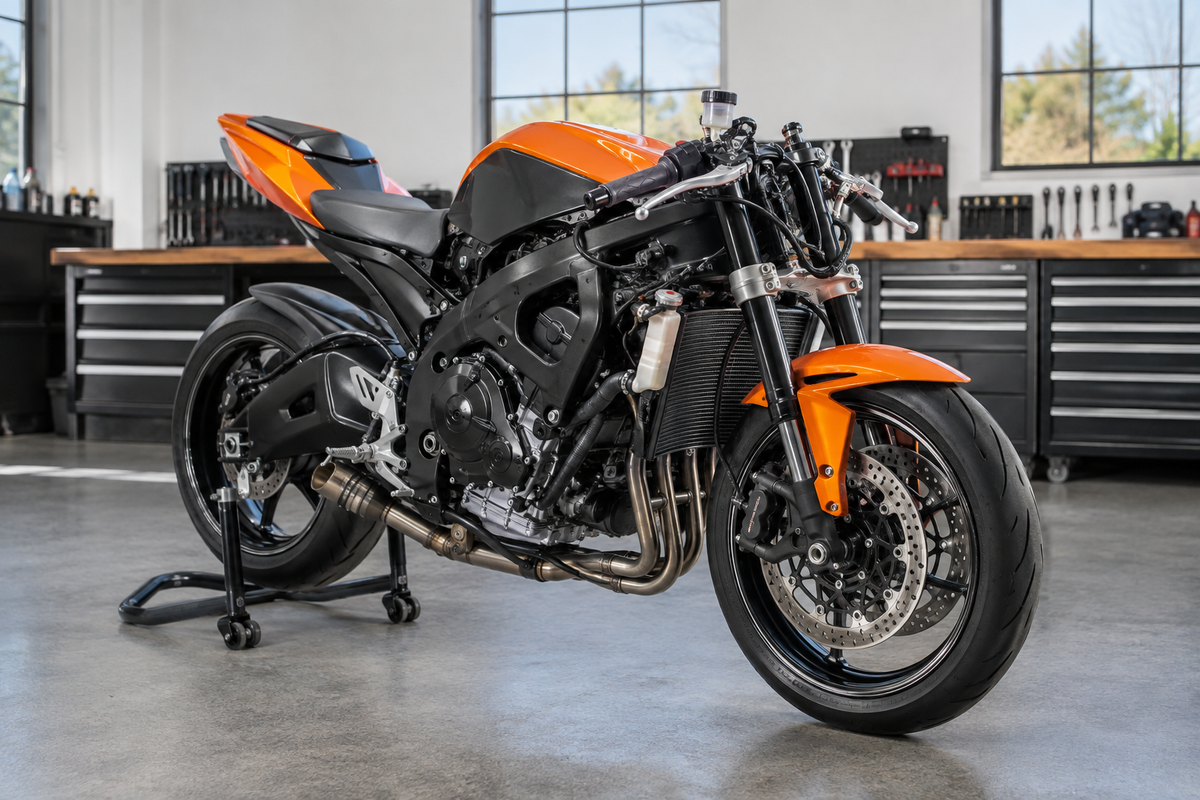
Useful resources: Explore the exact NiceFairings collection, review the featured fairing kit, follow the pre-fit checklist, check the NiceFairings FAQ, and use the official Suzuki GSX-R750 model page for manufacturer context.
The secret to a carefully fairing install comes down to three steps: always test-fit all panels before painting, put them back on in the opposite order you took them off, and line them up by starting at the front and moving to the back. This method works for both the GSX-R600 and GSX-R750 from model years 2011-2026 (K11), since they use the same fairing designs. Following these steps helps you avoid paint damage, keep gaps even, and lower stress on mounting tabs. For a good GSXR600 fairing installation, you need to focus on these details. The test-fit step lets you check every tab and hole before the final setup. That way, you can fix any issues without harming the paint. The right order stops extra strain on the plastic and brackets. Getting your workspace ready, test-fitting correctly, using the proper sequence, and knowing how to solve common problems are all key.
Key Takeaways
Always test-fit every panel before painting so you can spot fitting problems early.
Put the fairings back on in the opposite order you took them off: tail first, nose cone last.
Line up panels starting at the front and moving to the back for even gaps.
Tighten the bolts starting from the middle and moving toward the edges to avoid stress cracks.
Use original Suzuki parts and a torque wrench to prevent damage.

Workspace Prep and Essential Tools
Setting Up a Clean, Organized Area
You need a clean workspace before you touch any fairing panel. A garage or well-lit workshop gives you the best environment. Clear the floor of debris, tools, and old parts. Lay down a soft blanket or mat to protect the painted surfaces. This setup prevents you from losing small fasteners during the process. It also stops scratches from forming on your new plastic.
Good lighting helps you see every tab, hole, and alignment point clearly. You can spot potential issues before they cause problems. Use small trays or containers to sort bolts by location. Label each container so you know where every fastener belongs. This organization saves time when you reassemble the bike.
The GSX-R600 and GSX-R750 K11 models share the same mounting points. The fairing installation process works identically for both bikes. You can follow the same preparation steps regardless of your model. The panels fit into the same brackets and rubber grommets. A clean workspace makes this process much easier to manage.
Gathering the Right Tools and Fasteners
You need a basic set of tools for a proper installation. A metric socket set covers most frame bolts. Phillips and flathead screwdrivers handle the remaining fasteners. A torque wrench helps you avoid over-tightening any bolt. Plastic trim tools let you remove panels without damaging the paint. These tools give you control over every step of the job.
The hardware you choose matters more than the tools. Always use the original Suzuki mounting bolts and rubber grommets. Aftermarket bolts often have different thread pitches or head sizes. They can strip the plastic threads or fail to hold the panel securely. Check every grommet for cracks or wear before you begin. Replace any damaged parts to ensure a tight fit.
You can find pre-drilled fairing kits at NiceFairings. Their collection covers the GSX-R600 and GSX-R750 from 2011 through 2026. All mounting holes come already drilled for your convenience. This saves you the time and effort of measuring and drilling yourself. Visit the collection at https://nicefairings.com/collections/suzuki-gsxr600-gsxr750-2011-2026-fairings to see the available options.
Dry Fitting: The Non-Negotiable First Step
Why Dry Fitting Prevents Costly Mistakes
Dry fitting means putting every panel on the bike without tightening the bolts. You check gaps, alignment, and tab positions before painting or final assembly. This step takes extra time, but it saves you from expensive errors later.
Think about what happens when you skip this process. You paint your panels first, then find a mounting tab sits slightly off. You try to bend the bracket a little. The paint cracks around the fastener hole. Now you must strip the panel, fix the crack, and repaint the whole section. That mistake costs hours and money.
A proper dry fit shows these problems while the panels are still unpainted. You can trim a tab, adjust a bracket, or sand an edge without ruining your finish. You also check that every hole lines up with its rubber grommet. This check prevents stripped threads and cracked plastic during the real installation.
The GSXR600 fairing installation process depends on this prep. You handle each panel carefully during the dry fit. You learn exactly how each piece sits against the frame. You understand which fasteners go where before you commit to the final setup. This knowledge makes the actual installation smoother and faster.
Dry fitting also helps you spot damaged parts early. You might find a cracked tab from shipping or a grommet that fell out during transit. Finding these issues now means you can order replacements before you start painting. You avoid the frustration of pausing mid-installation to wait for parts.
How to Mark Alignment Points Without Damage
You need the right tools for marking alignment points. Low-tack painter's tape works best for this job. Regular masking tape leaves sticky residue on your panels. Duct tape can pull paint off when you remove it. Painter's tape holds firmly but releases cleanly without damage.
Start by placing the panel against its mounting position. Do not force it into place. Let it rest naturally against the brackets and grommets. Look for gaps between the panel and the frame. Check that each tab sits close to its corresponding hole. Note any spots where the panel presses tightly against another surface.
Apply small pieces of painter's tape to mark key alignment points. Place one piece on the panel and another on the frame where they meet. These tape markers show you exactly where the panel should sit during final installation. You can remove the panel, paint it, and return it to the same position every time.
Check every tab against its rubber grommet during this process. The grommet cushions the fastener and prevents vibration damage. A tab that misses its grommet will crack under stress. You can see this misalignment clearly during the dry fit. Adjust the bracket position or trim the tab as needed.
Never force a panel into position. ABS plastic flexes only so far before it cracks. Brackets bend permanently when you apply too much pressure. If a panel does not fit naturally, stop and investigate the cause. Look for obstructions, misaligned brackets, or tabs that need adjustment. Gentle persuasion works better than brute force.
Use a flashlight to inspect tight areas. You need to see how panels interact behind the fairing. Shadows hide misalignments that become obvious later. Take your time with this inspection. A thorough dry fit now prevents a frustrating installation later.
Remember that the K11 fairing design shares mounting points across the 600 and 750 models. You can reference the NiceFairings collection at https://nicefairings.com/collections/suzuki-gsxr600-gsxr750-2011-2026-fairings for pre-drilled kits that simplify this process. The dry fit remains essential even with pre-drilled holes. You still verify alignment before committing to paint.

GSXR600 Fairing Installation: Step-by-Step Sequence
Starting from the Tail Section
Begin your GSXR600 fairing installation with the tail section. This rear assembly connects to the subframe. You removed it first during disassembly, so it goes back on first. This sequence prevents you from trapping other panels underneath.
Place the tail section against the rear subframe. Do not tighten any fasteners yet. Insert each bolt through the panel and into the mounting bracket. Turn each fastener by hand until it catches the threads. Leave every bolt loose so the panel can shift into position.
The tightening order determines the final gap quality. Start from the center of the panel and work outward. Tighten the middle bolts first, then move to the edges. This method pulls the panel flat against the frame without distorting the plastic. Tightening outer bolts first often causes the center to bow or gap.
Check the gaps on both sides of the tail section. Look at the space between the tail and the seat. Look at the gap between the tail and the side panels you will install next. Adjust the panel position while the bolts remain loose. Shift the plastic until the gaps look equal on both sides. Tighten all bolts evenly after the alignment looks correct.
A torque wrench helps you avoid over-tightening. Suzuki specifies a moderate torque for these fasteners. Overtightening cracks the plastic tabs or strips the threads. Undertightening lets the panel vibrate loose. A firm hand gives you the right result every time.
Fitting Side Panels and Air Ducts
The side panels come next in the sequence. These pieces cover the radiator area and connect the tail to the front. The left and right sides differ, so check each panel against its matching side. Hold the panel up to the bike before inserting any fasteners. Confirm the mounting tabs align with the rubber grommets on the frame.
Insert the front tab of the side panel first. Push it gently into the rubber grommet until it seats. Guide the rear tab into its grommet next. Do not force any tab that resists. Stop and check for obstructions. A misaligned bracket or trapped wire can prevent proper seating.
Once the tabs sit in their grommets, insert the bolts. Start all fasteners by hand before reaching for a tool. Leave each bolt loose at first. This technique lets you shift the panel for carefully alignment. Tighten from the center outward, just like the tail section. The center bolt pulls the panel into the correct position. The outer bolts secure the edges.
The air ducts mount to the side panels or the inner fairing. These ducts channel air to the radiator for cooling. Align the duct tabs with the slots on the side panel. Push the tabs into place, then secure them with the provided fasteners. Check that the duct sits flush against the radiator shroud. An air gap here reduces cooling efficiency.
The lower fairing connects the side panels underneath the engine. Install this section after both sides fit correctly. The lower fairing has more mounting points than the sides. Insert each fastener loosely, then tighten from the center outward. Check the gap between the lower fairing and the side panels. Adjust the lower piece until the seam looks even across the bottom.
The nose cone arrives last. This piece holds the headlight and windscreen. Install the nose cone onto the front brackets. Start all fasteners loosely. Align the nose cone with the side panels and the front stay. Tighten from the center of the nose cone outward. The windscreen installs last. Attach it after the nose cone sits firmly in place. This order lets you access the windscreen fasteners without obstruction.
If you use race fairings, note that they may lack provisions for mirrors or turn signals. Race panels often have blanked-off areas where these parts mount on street panels. Plan your installation accordingly. You may need to drill holes for aftermarket signals or use mirror block-off plates. Following this GSXR600 fairing installation sequence keeps each step logical and prevents rework.
Troubleshooting Common Fitment Issues
Fixing Gaps and Misaligned Holes
Sometimes a hole does not line up with its bracket. This problem happens often with aftermarket panels. First, check the bracket position. A bent bracket causes most alignment issues. You can gently bend it back with pliers. Wrap the plier jaws with tape to protect the finish.
Washers and shims fix many alignment problems. Put a thin washer between the panel and the bracket. This moves the panel slightly. You can stack washers to close a gap. Test the fit after each washer. Stop when the panel sits flush against the frame.
Sometimes the hole is in the wrong spot. You can make it slightly bigger with a round file. Remove a little material at a time. Check the fit often. You cannot add plastic back after you remove it. A better option is to drill a new hole nearby. Fill the old hole with plastic epoxy. Let it cure completely before drilling the new spot.
Rubber grommets can cause hidden problems. A crooked grommet blocks the tab from seating. Press each grommet firmly into its hole before inserting any fastener. Run your finger around the grommet edge. Make sure it sits flat and even on all sides. A seated grommet lets the fastener slide in smoothly.
Preventing Stress Cracks and Over-Tightening
Stress cracks appear when you force a panel or overtighten a bolt. The plastic around the mounting tab turns white first. This whitening means the plastic is stretching too much. Stop immediately when you see this. Remove the fastener and check for damage.
Your GSXR600 fairing installation needs proper torque. The Suzuki owner's manual lists the correct torque for each fastener. Read this manual before you start tightening. Use a torque wrench to match those numbers. A torque wrench clicks when you reach the right value. This tool prevents guesswork and cracked plastic.
Tighten fasteners in small steps. Turn each bolt a quarter turn, then move to the next one. Repeat until all bolts feel snug. This spreads pressure evenly across the panel. Tightening one bolt all the way before another creates uneven stress. That stress pulls the panel out of alignment.
The golden rule of fairing installation: snug beats tight. If you feel too much resistance, stop and check the fastener. A bolt that fights you usually means a cross-threaded hole or a misaligned tab.
Check every fastener after your first ride. Engine vibration can loosen bolts that felt secure. A quick check catches loose fasteners before they cause damage. Re-tighten any bolt that has come loose. This simple habit extends the life of your fairings.
The golden rule stays simple: dry fit, sequence, and align. You test every panel before painting. You install in reverse order of removal. You tighten from the center outward. These three habits prevent most installation problems.
Run through this checklist before you start. Confirm all tabs remain intact without stress marks. Verify every mounting point is clean and holds a rubber grommet. Ensure panels are dry-fitted and marked for alignment. Tighten fasteners evenly without over-torquing. Place the bike on a stable stand.
Patience and precision deliver professional results. If you hit a snag, revisit the relevant section above. You can also consult the NiceFairings pre-fit guide for model-specific advice. Take your time, and your GSX-R will look showroom carefully.

FAQ
Why should I dry fit fairings before painting?
Dry fitting lets you check gaps and alignment without risking paint damage. You can fix misaligned tabs or brackets while the panels remain unpainted. This prevents costly mistakes later.
What should I do if mounting holes do not line up?
Check the bracket position first. A bent bracket causes most alignment issues. Gently bend it back with tape-covered pliers. Use thin washers as shims to adjust the panel position.
Can I use aftermarket bolts instead of Suzuki hardware?
Stick with the original Suzuki mounting bolts. Aftermarket bolts often have different thread pitches or head sizes. They can strip plastic threads or fail to hold panels securely.
How do I prevent stress cracks around mounting tabs?
Never force a panel into position. Tighten fasteners evenly from the center outward. Use a torque wrench to avoid over-tightening. Stop if you see whitening around a tab.
What is the correct installation sequence for K11 fairings?
Install in reverse order of removal. Tail section goes first, then side panels, lower fairing, and nose cone last. Attach the windscreen after the nose cone sits firmly in place.

Ready to compare finishes? Return to the matching NiceFairings collection and verify the exact listing for your motorcycle before ordering.