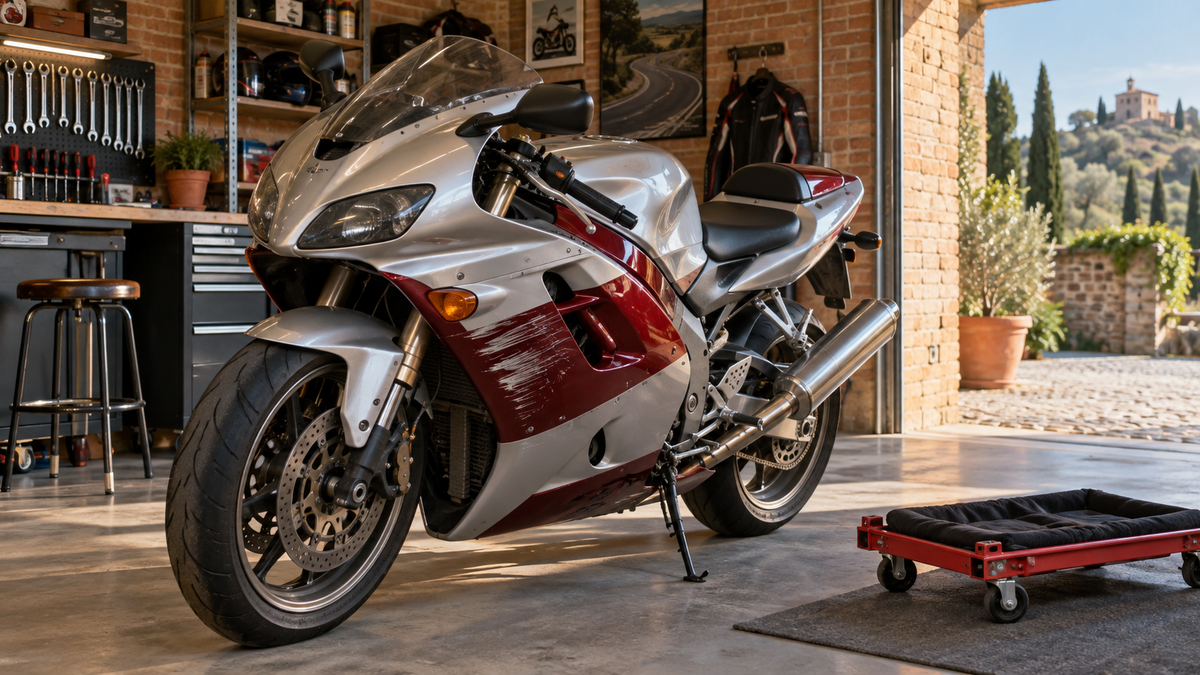
Your used sportbike sits in the garage with cracked, missing, or mismatched panels. You want to fix the look, but you do not want to waste money on parts that will not fit. How do you plan replacement fairings for a used motorcycle you already own without ordering the wrong pieces?
Treat this as a bodywork purchase project. You verify the bike and its current fairings. You document modifications. You choose your scope. You plan the finish. You compare quotes. You pre-fit every panel before you make irreversible changes.
This is not a whole-bike pre-purchase inspection. This is not a crash-diagnosis guide. This is a fairing-buying plan for the motorcycle you already have.
Key Takeaways
-
Write down your bike's VIN and every fairing panel before you buy any parts.
-
Pick your plan: keep the good panels, buy single parts, or order a whole kit.
-
Make sure the replacement fairings fit your bike’s year, model, and market version.
-
Carry out a supported preliminary fit using the appropriate instructions before irreversible finishing or final tightening; never ride with loose or unresolved bodywork.
-
Plan your finish: pre-painted kits save time, while paint-to-match lets you pick custom colors.
-
Ask for a full price breakdown with each cost listed on its own line. This helps you avoid surprise fees.
-
Check used fairings closely for cracks and faded paint.
-
If the parts don't fit, stop and ask for help. Never try to push plastic parts into place.
Document the Bike and Its Current Bodywork
You cannot order replacement fairings without knowing what you own. Start by confirming your motorcycle identity. Then inventory every fairing panel. Record any bodywork changes. This foundation prevents ordering wrong parts.
Confirm Bike Identity and Generation
Correct vehicle identification is the starting point. Compare the manufacturer records with your registration and the current motorcycle. For US-market vehicles, the NHTSA VIN decoder provides manufacturer-reported identification information. Resolve unclear or conflicting results with the manufacturer or a qualified dealer rather than applying a universal internet code table.
The VIN and engine serial number are different identifiers; they are not expected to be identical. If an engine or other assembly has been replaced, record the change and ask a qualified dealer which implications matter for the bodywork order. This article does not diagnose an undisclosed swap from a number mismatch.
Document these details before you search for fairings:
-
The complete VIN
-
The motorcycle model and engine size
-
The order number from your purchase
-
A photo of each existing body panel and its mounting points
Name Every Motorcycle Fairing Panel
You need the correct term for each fairing. A replacement upper cowl differs from a side fairing. Use proper names for your inventory worksheet. Each fairing on your bike has a specific name. The upper cowl covers the headlight area. Side fairings run along the tank. The lower cowl sits under the engine. Aftermarket fairings often come as matched kits. The tail section wraps the rear. The front fender covers the front wheel. Some bikes have a tank cover too. Knowing these fairings helps you order correctly.
|
Panel Name |
Part Number |
Condition |
Modification Notes |
Keep/Replace |
|---|---|---|---|---|
|
Upper cowl |
Record / confirm |
Record / confirm |
Record / confirm |
Record / confirm |
|
Left side fairing |
Record / confirm |
Record / confirm |
Record / confirm |
Record / confirm |
|
Right side fairing |
Record / confirm |
Record / confirm |
Record / confirm |
Record / confirm |
|
Lower cowl |
Record / confirm |
Record / confirm |
Record / confirm |
Record / confirm |
|
Tail section |
Record / confirm |
Record / confirm |
Record / confirm |
Record / confirm |
|
Front fender |
Record / confirm |
Record / confirm |
Record / confirm |
Record / confirm |
|
Tank cover (if applicable) |
Record / confirm |
Record / confirm |
Record / confirm |
Record / confirm |
Use the worksheet to record the actual motorcycle, not an illustrative photo. Enter confirmed references, observed condition and known modifications. Mark uncertain items “Needs assessment” and have them checked before deciding to reuse them.

Record Modifications Without Diagnosing Crashes
Your motorcycle fairing selection depends on accurate documentation. Look for non-standard mounting holes. Check for aftermarket brackets. Notice trimmed tabs. See custom paint. Write all of it down. These modifications affect which fairings fit your bike. Check the fairing surface for cracks too.
Do not decide if the bike was crashed. That is a different job. Just observe and note. This information helps you choose compatible fairings. Retain any sound fairings you already have. New fairings can transform the look. Note how your existing fairings mount to the frame.
Choose Scope for Replacement Fairings for a Used Motorcycle
You know what you own. Now you decide how much to replace. Three paths exist: keep sound panels, buy individual pieces, or order a matched set. Each path carries different costs and different risks. Your choice shapes the entire project.
Compare genuine OEM, aftermarket and used parts as separate sourcing options. Used parts may be OEM or aftermarket, so verify their identity rather than assuming provenance. Material, construction, price and included components vary by product. Your decision should follow actual specifications and quotes, not a blanket claim that one source always wins.
Retain Sound Panels
Not every cosmetically marked panel must automatically be replaced. Obtain an assessment of its condition and a written refinishing or replacement quote where appropriate. A photograph or this general guide cannot establish whether a cracked panel is repairable or suitable for reuse.
Cracks near attachments, missing tabs and uncertain previous repairs need qualified assessment before reuse. Do not assume a repair is permanently sound or predict its failure within an invented number of weeks. Resolve the condition question first; then compare the available purchasing choices.
Compare the full project cost and outcome, not a universal percentage rule. Retaining suitable panels may preserve an existing finish; replacing a single panel may require color work; a kit may involve additional trim and labor. Record those differences in the quote before selecting the scope.
|
Possible scope |
Question before choosing |
Cost comparison |
|---|---|---|
|
Retain suitable panels |
Has condition and any proposed refinishing been assessed? |
Actual preparation, paint and labor quote |
|
Replace selected panels |
Does each part match the adjoining pieces and desired finish? |
Parts plus finish work, trim and labor |
|
Order a listed kit |
Which panels are supplied and which remain on the bike? |
Complete delivered project quote |

Buy Individual Panels
Individual panels can suit a limited replacement project if the available part matches the actual adjoining components. Check the finish against the retained bodywork; age alone does not tell you whether a color match will be acceptable. Ask about availability, return terms and any preparation or blending work.
Request current, itemized quotations for the exact panels and configuration. Include any required trim, hardware, finish work, labor and delivery charges. Do not compare an unpainted single panel with a finished full kit as though they represent the same scope.
For genuine OEM parts, verify the part reference and source with an appropriate dealer. For used or aftermarket parts, verify the seller’s stated application, condition and included components. Reviews can add context, but neither reviews nor a marketplace label replace checking the particular order.
Buy a Matched Kit
A matched kit groups specified panels into one order. It may be useful for several cosmetic issues or a planned color change, but it does not necessarily replace every visible component. Confirm what remains on the bike and compare a complete quotation rather than relying on a generic savings percentage.
Do not assume a full fairing kit includes lights, a fuel tank, a seat, or hardware. Verify the exact listing. Some kits ship without a windscreen, heat shielding, or mounting fasteners. Read the included-parts list line by line.
|
Source |
Verify before ordering |
|---|---|
|
Genuine OEM |
Correct part number, variant, condition, availability and actual price |
|
Aftermarket |
Stated application, material, included pieces, finish and support terms |
|
Used |
OEM or aftermarket identity, visible condition, known repairs, compatibility and return terms |
Second hand motorcycle fairings can serve as a middle path for a matched set. You get OEM curves at a lower price. Inspect each piece for hidden damage. Check every tab and mounting hole. Confirm the seller's return terms in writing. Second hand motorcycle fairings from a different model year may not align with your brackets. Second hand motorcycle fairings with repaired cracks may fail under vibration. Second hand motorcycle fairings in faded factory paint may not match your tank. Second hand motorcycle fairings remain a strong option when you inspect them carefully. Second hand motorcycle fairings reward patience more than speed.
Avoid buying by appearance alone. A strong design does not fix poor fitment. Avoid choosing the cheapest kit first. A low upfront price often hides weak molding consistency. Avoid reading the wrong reviews. Fitment and finish matter more than delivery speed. Avoid assuming pre-drilled means perfect bolt-on. Some adjustment is normal. Heavy force is not.
Check That Motorcycle Bodywork Replacement Parts Will Fit
You have picked your scope. Now you must make sure your chosen panels will really bolt onto your bike. Motorcycle bodywork replacement depends on three things: mounting points, panel curves, and bracket alignment. If any of these do not match, you get fitment problems that no amount of force can fix.
Match Year, Model, and Market Variant
Your motorcycle fairing order must match your exact machine. Year, model, and market variant all change which panels fit. A European-spec model may have different mounting points than a US-spec version of the same year. Check your VIN-derived model code against the seller's fitment chart. Do not trust a generic "fits 2008-2012" label by itself.
Check the drilling and mounting details in the actual listing. A manufacturing-method label or a premium price does not establish a one-millimeter tolerance or a fixed success rate. Ask the supplier how the specified kit is verified for your application and how a fitment concern should be handled.
Check Tabs, Brackets, and Pre-Drilled Mounts
Inspect accessible supports, threaded points and mounting pieces using the appropriate model guidance. Do not scrape away unidentified pads, insulation or adhesive-mounted components as though all residue is unwanted. If removal or cleaning is needed, use material-compatible methods and preserve required protection.
Inspect these areas on your bike:
-
Upper fairing stay
-
Side brackets
-
Lower support points
-
Threaded inserts
-
Signal and light mounting areas
-
Rubber support locations
-
Any place where the old fairings looked stressed or rubbed
A bent stay can make a perfect kit look wrong. You may blame the aftermarket panels when the real problem is on your bike. Check bracket alignment before you order. If you find damage, ask a supplier or qualified technician.
Common fitment problems show up in predictable ways. Use this table to spot them early:
|
Fitment Issue |
What It Looks Like |
Possible Concern To Investigate |
|---|---|---|
|
Misaligned mounting holes |
Hole is close but not natural; panel must be dragged into place |
Stress whitening, cracked tabs, deformed mounting holes, panel never sits relaxed |
|
Bracket interference or bent stay |
Fairing fits badly in one area for no clear reason |
Misdiagnosing the kit when the real issue is a bent stay, damaged bracket, or old support point |
|
Tightening one panel too early |
One section seems secure, but the next panel feels off |
Uneven panel gaps, stressed tabs, holes that look worse as install continues |
|
Over-tightening fairing bolts |
Bolt feels snug, but mounting area pulls inward too hard |
Cracks around holes, crushed rubber supports, stress damage after riding vibration |
|
Panel bending or tab tension |
Panel must be bent hard to reach a mount; tab twists under obvious tension |
Hole area whitening, cracking, or distorting; panel bows without relaxing during loose assembly |
List Separately Sold Trim and Hardware
Your fairing kit may not include everything you need. Read the listing line by line. Check each item before you order.
|
Item or Accessory |
Typically Included? |
Notes |
|---|---|---|
|
Hardware |
Not always included |
Kit contents vary by product and model year |
|
Tank covers |
Not always included |
May need to be ordered separately |
|
Windscreens |
Not always included |
May need to be ordered separately |
|
Heat shielding |
Not always included |
May need to be ordered separately |
|
Bolts, clips, grommets |
Sometimes included |
Some kits include a full hardware package; others require reuse of original fasteners |
Sort your original hardware by section. Keep upper cowl parts, side panel fasteners, lower mounting hardware, signal mounts, and small inserts organized separately. You will need OEM bolts, rubber grommets, well nuts, clip nuts, collars, spacers, heat shields, and small support brackets where they apply. The NiceFairings FAQ page at https://nicefairings.com/pages/faq answers common questions about what ships with each kit.
A successful fitment check takes patience. Test every panel before paint. Check panel alignment at each mounting point. If something feels wrong, stop and look into it. Do not force plastic into place. Do not heat or drill panels to make them fit. A correct fitment means the panel rests naturally with no tension. If you cannot get that, contact the seller or a qualified technician. Your fitment and planning work here prevents costly mistakes later.
Plan Finish and Quote the Project
Once the application questions have been addressed, plan the finish and complete quotation. Final fitment still requires the appropriate checks on the actual motorcycle. Treat finishing and cost decisions as part of the project, not proof that the selected panels are already verified.
Pre-Painted Kits vs. Paint-to-Match
A pre-painted kit arrives with the finish specified in its listing, but it still needs inspection and the appropriate preliminary fit. Do not assume a particular clear coat, molding method, hole preparation or included accessories. Confirm the product details and how any custom color or graphic request is approved.
Paint-to-match panels are good for a bike with sound bodywork that needs a color refresh. A professional painter matches your existing finish. This works well when you replace only one or two panels. It also allows custom colors or graphics that pre-painted kits do not offer. Review the custom fairings options and ask the seller about custom paint support if you need a non-standard color.
Factor In Color Fade and Second Hand Motorcycle Fairings
Existing paint can change with age, exposure and previous refinishing. The same color code alone does not guarantee a visual match. Ask a painter to assess the retained finish and quote any sampling or blending needed. Do not assign standard dollar amounts without an actual quote.
Used panels are another option, but they are not automatically genuine OEM or cheaper once condition and finish work are included. Confirm identity, repairs, mounting areas and the seller’s terms. A new painted kit can simplify coordination of the supplied pieces, yet it may not include the fuel tank or every visible trim part. Check how those retained parts will look alongside it.

Build a Complete Project Quote
A full quote lists every line item. Do not accept a single lump sum. Break down costs by stage. Use this worksheet to record your own prices from actual seller quotes.
|
Line Item |
Your Quote |
|---|---|
|
Base fairing kit or individual panels |
Record / confirm |
|
Trim pieces (windscreen, heat shield) |
Record / confirm |
|
Mounting hardware (bolts, clips, grommets) |
Record / confirm |
|
Paint or prep work |
Record / confirm |
|
Graphic application |
Record / confirm |
|
Professional labor (if used) |
Record / confirm |
|
Shipping |
Record / confirm |
|
Taxes or customs fees |
Record / confirm |
|
Total delivered cost |
Record / confirm |
Request a detailed custom-fairing quote with the base kit, paint work, graphics and shipping separated. Include applicable fees and any professional labor. Ask which hardware can be reused after inspection and what must be purchased separately. No fixed savings amount should be assumed for a bundled bolt kit.
Replacement appearance does not establish roadworthiness. New panels do not guarantee performance, handling, or safety improvements. Treat this project as a cosmetic purchase. Your quote should reflect that scope.

Confirm Order and Pre-Fit Before Irreversible Changes
After the order scope is confirmed and the parts arrive, complete the appropriate supported preliminary fit before irreversible work. Inspect the delivery against the order first. This reduces avoidable surprises but does not replace the motorcycle’s service instructions or a qualified assessment.
Dry-Fit Every Panel First
Follow the model-specific and supplier trial-fit instructions, including the required supports and temporary retention. Do not balance unsecured panels on the bike. Work with a cool motorcycle and protect painted surfaces. If you cannot safely perform the prescribed procedure, arrange professional installation.
During that supported procedure, check the intended tabs, trim, mounts and neighboring components without force. Preserve the specified routing and heat protection. Any unexplained contact, strained tab or misaligned opening should be documented and resolved before final assembly.
Follow the relevant service instructions for assembly sequence, hardware and tightening requirements. This guide supplies no universal torque or installation order. Have the required clearances, retention, controls and lighting checked before returning the motorcycle to service; static panel appearance alone is not a roadworthiness check.
Resolve Discrepancies Before Paint
A hole that is a bit off does not mean you should drill. Loosen the panels around it first. Make sure tabs, grommets, and inner parts are in the right place. One tight bolt elsewhere can move several holes. Do not make a fairing hole bigger or change its shape to fit a fastener you don't know. Misalignment can come from hardware, panel choice, brackets, damage, or how you put things together. It does not always mean only the bolt is the problem.
Stop and ask the supplier or a skilled technician to find the real problem. Changing parts might affect the return or warranty. Check the actual policy before you go ahead. Do not put a fastener into an empty hole to test fit if the correct panel, collar, or spacer is missing. It might hit bottom or touch something behind the mount point. First, identify the full assembly that is needed. Then follow the trial-fit instructions for your model with secure panel support. Stop if you meet resistance or misalignment. Never force it to fit. A part with the wrong thread may start to go in before it gets stuck. That is not a fit test. Check the specification before installing. Stop at unexpected resistance. Never force a bolt, fix a receiving thread, or change a panel hole to fit unknown parts.
Keep the Return Window and Document Fitment
Take close-up photos of each problem from different angles. Use good lighting. Include a wide shot for context. Make a written list that matches each photo to the part name and exact issue. Write a clear and polite message to the seller. Include your order number, name, delivery date, and a factual description of each problem linked to the photos. Use a simple structure: "I found [Issue] on the [Part Name]. See attached photo [filename]." Read the seller's return policy. Ask specific questions about replacement or return shipping.
Installing aftermarket fairings may need DIY skills and patience. Getting professional help is a good choice. Do not ride the bike if the fit is not resolved. Do not heat, drill, or force plastic. A good fit means the panel rests naturally with no tension. If you cannot do that, contact the seller or a skilled technician.
Your plan covers five steps: writing down what you have, picking your scope, checking fitment, planning the finish, and doing a dry fit. Looking at the bike yourself is still the cheapest tool you have. Finish your inventory worksheet. Treat your quote as a living document before you place your order.
Pull the bike into the garage this weekend. Grab a notebook. Start your inventory.
Your replacement-fairing project starts with a clear record of the motorcycle and a confirmed order scope.
FAQ
How do I confirm which fairings fit my specific motorcycle?
Check your VIN and make sure of the year, model, and market variant. Compare these details with the seller's fitment chart. Do not trust a generic year range by itself. Measure your mounting points and bracket alignment before you order. A correct match depends on tabs, curves, and bracket positions lining up with your bike.
Can I mix original and aftermarket fairings on the same motorcycle?
Mixing original and aftermarket pieces requires confirmed compatibility of the actual adjoining parts, not merely similar colors. Verify the application and mounting interfaces, then address finish matching separately. Do not assume every panel sold for the same model is interchangeable with every other supplier’s set.
What should I do if my replacement fairings arrive with fitment problems?
Stop and take clear photos of each issue. Contact the seller with your order number and a factual description. Do not drill, heat, or force plastic into place. Ask the supplier or a qualified technician to find the real cause. Keep your return window open and write down everything.
Do I need to replace every panel at once?
No. Keep sound panels when every mounting tab stays intact and no structural cracks exist. Buy individual panels when only one or two pieces have damage. Choose a matched kit when many panels show cosmetic flaws or you want a uniform finish. Your scope depends on damage extent and budget.
How do I handle color matching when my original paint has faded?
A matching color code may still look different beside retained paint. Ask about physical samples, painter assessment and any blending needed. A kit may coordinate the panels it supplies, but it does not remove every color-matching question, especially around an unchanged tank or trim.
What hardware and trim pieces do I need to buy separately?
Read the exact listing and identify whether the windscreen, heat protection, fasteners, grommets and inner trim are included, reusable after assessment, or separate purchases. Do not treat a hardware bundle as suitable until its application and specifications are confirmed.
Are second hand motorcycle fairings a good option for my project?
Used panels can be an option when their identity, condition and compatibility are established. They may be OEM or aftermarket. Ask for clear actual-item photographs and condition details, then compare the complete cost including any refinishing or required hardware.
When should I get professional help with my fairing project?
Get professional help when you find damaged brackets, bent stays, or unresolved fitment issues. Installing aftermarket fairings may need DIY skills and patience. A qualified technician can find problems you might miss. Do not ride the bike if the fit is not resolved. Your safety depends on correct assembly.