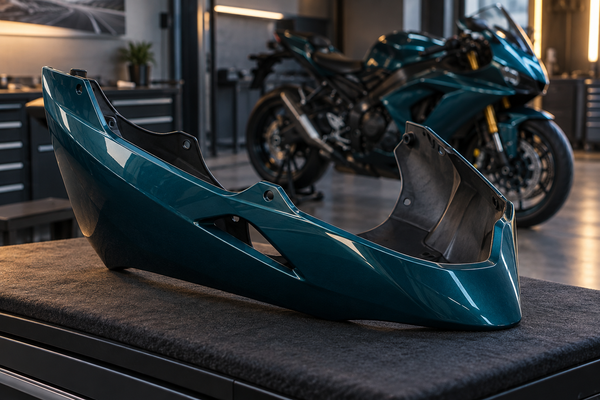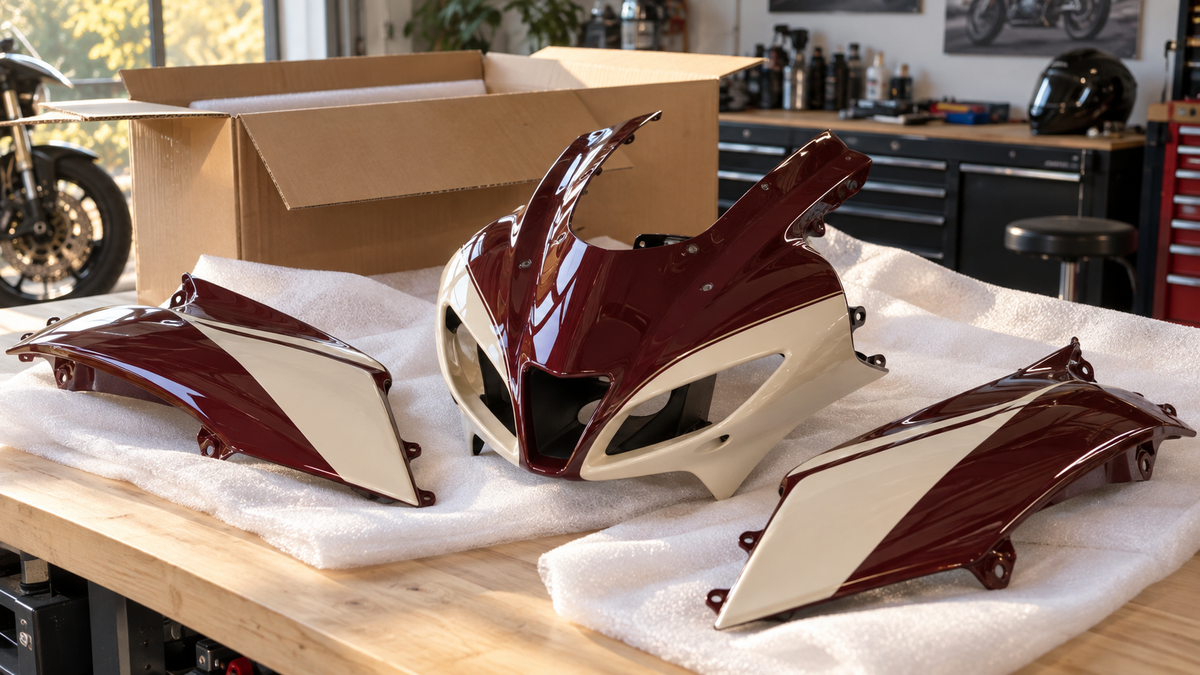
The box sits at your doorstep. Your new motorcycle fairing kit has finally arrived. You feel excited, but stop for a moment. What if a panel is cracked? What if the mounting holes don't line up? Checking the delivery before installation can help you catch problems while the original condition is easier to document. This motorcycle fairing kit unboxing inspection checklist gives you a clear, step-by-step plan. You will record visible condition and order accuracy, then identify any fitment questions that need further assessment. A visual delivery check cannot certify structural safety or complete compatibility. This short routine creates a useful record for any future claim. Use this ultimate inspection checklist to look at each part in good light. Your careful review can help avoid preventable problems later. Follow this checklist and become a smart, ready buyer.
Key Takeaways
Create a clean, bright workspace with soft padding to keep your fairings safe from scratches.
Take photos of the outer box and shipping label from every side before you open it, so you can record any damage.
If useful, record an unboxing video as supporting context; it is not a guarantee that a claim will be accepted.
Open each panel with care and place them on a soft area to see if any pieces are missing.
Look at each panel in bright light to check for scratches, chips, cracks, or color differences.
After documenting delivery condition, follow the exact model-specific pre-fit instructions to assess mounting alignment. Do not force parts or ride with loosely fitted panels.
Write down all defects with close-up photos and a written description for your records.
Contact the seller right away. Share your order number, photos, and a clear note about what’s wrong.
Preparing Your Workspace for a Fairing Kit Unboxing Inspection Checklist
Before you cut that first piece of tape, stop. Your motorcycle fairing kit unboxing inspection checklist starts with the area around you, not the box itself. Painted ABS plastic scratches easily. A clean, tidy space helps you avoid accidental damage before you even touch a panel. You need about the size of a large dining table, free from mess, pets, and curious kids.
Gathering the Right Tools for a Thorough Inspection
Essential Tools: Flashlight, Gloves, and a Soft Workspace
You do not need special gear for this check. Get three simple items first. A bright LED flashlight shows hairline cracks and paint flaws that normal room light hides. Clean, finish-compatible gloves can help keep fingerprints off the painted surface. Make sure the gloves and padding are free of grit. Put a clean moving blanket, thick foam mat, or several soft towels on your work area. This padding protects each fairing piece as you place it down. Use clean, nonabrasive padding rather than a rough or contaminated surface that could mark the finish.
Documentation Tools: Smartphone for Photos and Video
Your smartphone works as your recording tool. Charge it fully before you start. You will take photos of the outer box, the shipping label, and each separate part. A video of the whole unboxing process gives helpful background, but know it does not promise any claim result. Keep your camera settings on the highest quality available. You want clear, zoomable images if you need to show a seller a specific flaw later.
Setting Up a Safe Environment to Protect Painted ABS
Choosing a Well-Lit Space to Spot Subtle Defects
Place your workspace near a big window or under bright ceiling lights. Diffuse daylight or suitable high-quality inspection lighting helps you compare visible color and finish. However, you should know that even great light cannot prove an exact color match. Screens, lighting and viewing angle can change the apparent color. Your check finds visible flaws like scratches, chips, or runs in the clear coat. It does not scientifically confirm paint matching. Use your flashlight at a low angle across each surface. This trick makes subtle waves or orange peel texture easier to see.
Protecting the Fairings from Accidental Scratches
Keep your workspace away from busy areas. A garage corner or spare room works well. Take off watches, rings, and belt buckles that might rub against a painted surface as you lean over the table. Think about placing each fairing piece on its own soft cloth instead of stacking them. Stacked panels rub together and create tiny scratches you might think are shipping damage. Set aside one clean area for parts you have already checked and another for parts still waiting. This simple setup prevents confusion during your check.
Allow enough time to prepare a clean workspace. That effort helps protect the painted bodywork from accidental handling damage. A good workspace lets you focus fully on each panel without worrying about accidental damage. Once your area meets these standards, you can move ahead with confidence to record the package arrival condition.

Documenting the Package's Arrival Condition
Your motorcycle fairing kit unboxing inspection checklist now moves to the box itself. Before you cut any tape, pick up your smartphone. The outer package tells a story. Photographs of that story become your primary evidence if you need to file a shipping damage claim. The seller or carrier may request specific images when assessing a damage claim. You want that evidence ready before you discover a problem.
Photographing the Outer Box and Shipping Label
Capturing All Sides and Any Visible Dents or Tears
Take a complete set of photos showing every side of the box. Shoot the top, bottom, and all four vertical faces. Move around the package slowly. Capture any dent, tear, crush mark, or suspicious stain from multiple angles. A single wide shot does not show the full picture. Get close-ups of each damaged area. Include a clear shot of the box sitting on your doorstep or delivery area if you can. This helps document when and where the condition was observed; no single photograph proves how damage occurred.
Keeping the Shipping Label Visible in the Photos
The shipping label must appear clearly in your photographs. Carriers need to match your claim to the tracking number. Position the label so the barcode and tracking digits are readable. Take one photo of the label alone and another showing the label alongside the damaged box section. This helps the seller or carrier connect the photographed packaging to the shipment.
Ask the seller which carrier handled your shipment and what documentation is needed. Keep the packaging and retain clear views of the damaged item, label and box exterior so you can respond to the actual request. Carrier procedures differ; do not assume that one company's photo list or claim process applies to every delivery.
Keep your personal information private. If you plan to share photos on forums or social media, blur or cover your home address and order details on the label. Your safety matters more than public documentation.
Recording the Unboxing Process on Video
How Continuous Footage Adds Context to Your Photos
A continuous video recording adds context that still photos cannot capture. It shows the order you opened the box and how each panel sat inside the packaging. This footage helps you demonstrate that you handled the package correctly. However, understand that video alone does not guarantee any claim result. Treat it as a helpful supplement to your photographs, not a replacement. Start the recording before you touch the box and keep it running without pauses.
Keeping the Camera Rolling Until All Parts are Unwrapped
If you choose to record, continuous footage can show the unpacking sequence. Clear photographs remain useful; do not let filming distract you from supporting the panels safely. If you find damage, narrate what you see while the camera records. State the date, your order number, and which panel shows the issue. This verbal record adds useful detail to your visual evidence.
Careful documentation creates a useful basis for a conversation with the seller; the time needed depends on the shipment. With your evidence secured, you can move forward to unpacking and inventorying your fairing kit with confidence.
Unpacking and Inventorying Your Fairing Kit
Your motorcycle fairing kit unboxing inspection checklist now moves to the actual contents. This stage requires patience. Each panel inside that box represents a significant investment in your bike's appearance. Rushing through the unpacking process creates the exact scratches and damage you want to avoid.
Carefully Removing Panels from the Packaging
Cutting Tape and Removing Foam Without Damaging the Finish
Use scissors or a box cutter with a shallow blade setting. Cut the tape along the box seams, never reaching toward the contents. Pull the top flaps open gently. Many sellers pack fairings vertically with foam sheets between each piece. Remove that foam slowly. Pull it straight up rather than dragging it across a painted surface. If you feel resistance, stop and check for a trapped edge before continuing.
Laying Out Each Panel on a Soft, Clean Surface
Lift each panel with two hands. Support the widest area of the part, not just an edge or mounting tab. Place each piece onto your prepared foam mat or blanket. Arrange the panels in a logical order. Put the upper fairing at the top, side panels in the middle, and lower pieces at the bottom. This layout mirrors the bike's structure and helps you spot missing parts quickly.
Cross-Referencing Parts Against Your Specific Order
Verifying the Kit Matches Your Motorcycle's Year and Model
Open your order confirmation or the product listing on your phone. Compare the part numbers and descriptions against what you received. Kit contents vary by product and model year. Hardware, tank covers, windscreens, and heat shielding are not automatically included in every purchase. Your order confirmation lists exactly what you should expect. Check that the fairings match your motorcycle's year and model as stated in the listing. This label check does not prove physical compatibility, but it helps you check the received labels against the ordered variant.
Identifying All Major Panels, Inner Pieces, and Windshields
Count every major piece against the listing. Identify the main fairings, inner panels, and any windscreen or vent components. Label the left and right panels from the rider's perspective, meaning the position when you sit on the bike. Place labels on the protective wrapping or alongside the panels; avoid applying adhesive to an unfamiliar finish. This labeling prevents confusion during installation when identical-looking parts need to go on specific sides.
Checking for the Hardware and Fastener Kit
Confirming the Presence of Bolts, Clips, and Grommets
Some kits include a complete hardware package. Others expect you to reuse your original fasteners. Check your order details to know which situation applies to you. If hardware should be included, verify that all bolts, clips, and grommets are present. Lay them out on a small tray or cloth. Count each type against the parts list if one exists.
Identifying Any Non-Standard or Extra Hardware Components
Look for any unusual pieces that do not match the expected hardware. Extra components might indicate a packing error or a kit designed for multiple model years. Set these aside and photograph them. Contact the seller if anything seems out of place. Do not discard any hardware until you confirm the complete kit matches your order.
Your inventory check helps establish whether the listed components arrived; ask the seller to identify anything uncertain. This step protects you from discovering a missing piece halfway through installation. With all parts accounted for, you can proceed to examine each panel's condition in detail.

Inspecting Panels for Defects and Damage
Your motorcycle fairing kit unboxing inspection checklist now reaches its most important step. Every panel needs your full focus. This visual check tells you if your new bodywork arrived in good shape. Take your time. Move slowly from one piece to the next. Your careful eyes catch problems that quick looks miss.
Examining the Paint and Clear Coat Finish
The painted surface is the most visible part of your purchase. Scratches, chips, and clear coat flaws ruin the look of new fairings. You need good lighting to find these issues. Your flashlight becomes your best tool here.
Looking for Scratches, Chips, and Runs Under Bright Light
Hold your flashlight at a low angle across each painted surface. This trick shows small flaws that straight-on light hides. Move the beam slowly across every part of the panel. Pay extra attention to edges, recesses, and areas around mounting holes. These spots often hide damage from packaging friction.
Inspect the overall finish in diffuse light, then use an angled light to investigate a specific mark. Photograph unexpected runs, embedded debris, lifting areas or exposed substrate rather than trying to rub, scrape or polish them away. Compare your observations with the finish you ordered and ask the seller about anything uncertain.
Inspect the surface visually before touching it. Document unexpected texture, raised edges or thin-looking coverage, then compare these observations with the agreed finish and seller guidance. Different areas may have intentional textures or unpainted mounting interfaces; appearance alone does not establish the cause of a suspected defect.
Checking for Color Consistency Across All Panels
Place all painted pieces side by side on your soft workspace. Step back and look at them together under natural daylight. Color matching between panels matters for the final assembled look. Different paint batches can create slightly different shades. Your eyes notice these differences when panels sit next to each other on the motorcycle.
Move the panels into different positions and angles. Look at them from a normal viewing distance, not just up close. Screens and indoor lights do not prove exact color matching. Use consistent diffuse lighting for a preliminary visual comparison, and ask for help if the result is uncertain. If one panel looks clearly darker or lighter than its neighbors, take photos to record that difference.
Visually Inspecting the Plastic for Damage
The paint matters, but the plastic beneath it matters just as much. Look for visible cracks, distortion or damaged attachment features. This visual check can flag concerns, but it does not measure material strength or certify riding safety.
Visually Checking Edges and Tabs Without Bending Them
Look at every edge and mounting tab before you touch anything. Check along the full length of each edge under bright light. Hairline cracks often show up as thin, dark lines that catch shadows. Turn the panel to change how light hits the surface. This movement reveals cracks that hide at certain angles.
Support each tab with one hand while you look closely at its base. Inspect the junction between each tab and the panel body, where damage can be difficult to see. Do not bend or force any part of the fairing. Your inspection stays visual only. If you see a suspicious line, photograph it and contact the seller before moving on.
Looking for Warping or Bends in the Main Body of the Panel
Support each panel in its natural shape on clean padding. A curved panel is not expected to lie flat, and rocking on a table is not a reliable defect test. View its contours from several angles and compare suspected distortion with the correct product reference. Do not press the panel flat.
Left and right fairings can intentionally differ because of the motorcycle's equipment and design. Compare each piece with the correct side-specific reference rather than assuming mirror symmetry. Set aside any piece that looks distorted. Photograph it from several angles for your records.
Verifying the Condition of Mounting Points and Tabs
The mounting points decide how well your fairings attach to the motorcycle. Poor alignment or damaged holes create installation headaches. This check can identify visible attachment concerns; it cannot confirm complete fitment on its own. Proper fitment depends on clean, undamaged mounting areas.
Ensuring All Pre-Drilled Holes are Aligned and Clear
Look through every pre-drilled hole on each panel. Shine your flashlight through each opening to confirm nothing blocks the passage. Packaging foam or debris sometimes gets stuck inside holes during shipping. Compare the openings with the correct part reference. Apparent misalignment needs investigation and is not, by itself, proof of a molding error.
Use the exact side-specific product reference or applicable parts information to check openings. The two sides need not have symmetrical holes, and a suspected missing opening may have several explanations. Do not try to drill new holes yourself. Contact the seller if any hole looks missing or misaligned.
Checking for Stress Marks or Damage Around Fastener Recesses
Inspect the recessed areas where bolts and fasteners sit. These pockets take pressure during packing and transit. Look for white stress marks around the edges of each recess. Whitening, cracks or deformation deserve documentation and assessment. Do not infer the exact cause or remaining strength from a photograph or surface mark alone.
Run your flashlight beam around each recessed area at a steep angle. This lighting shows surface fractures that appear as thin bright lines. Check the back side of each mounting point as well. Damage often shows first on the hidden surface. Record any stress marks or cracks with close-up photos. Include a written note about which panel and which mounting point shows the issue.
A careful check can reveal visible concerns before installation adds handling marks or makes the original condition harder to document. The visual evidence you collect supports any talk with the seller. With your inspection done, you can move forward to test the fitment of your new bodywork.

Performing a Preliminary Fitment Check
Your motorcycle fairing kit unboxing inspection checklist now moves to a test without installing. This test fit checks how your new bodywork lines up with your motorcycle. You want to check hole positions and panel gaps before you do a full install. Think of this step as a practice, not the real thing.
How to Test Fit Fairing Panels Safely
A good test fit needs patience and a soft touch. You will hold each panel against your motorcycle without pushing hard. The goal is easy: make sure each piece lines up with its mounting points. Use the actual service instructions and seek qualified help if the mounting arrangement is unclear.
Aligning the Upper Fairing to the Headlight Area
Follow the model-specific assembly order rather than assuming the upper fairing always goes first. When checking the upper cowl, support it securely without loading delicate tabs or forcing it against brackets. Check the gaps where the fairing meets the headlight housing. Key spots to check include the spaces around the headlight, the seams where panels meet the tank, and the gaps at the tail section. Look for even spacing on both sides. There is no universal 3 mm pass/fail threshold for fairing gaps. Compare the exact assembly with model-specific instructions and the supplier's reference. You should correct the alignment issue before final tightening of all fasteners.
Do not force the panel into place. If the upper fairing resists your light push, stop. A panel that needs a lot of pressure to line up will cause problems later. Forced alignment indicates the fairing no longer aligns naturally, and mounting under stress may cause later structural failure. Set the panel aside and write down the issue.
Checking Side Panel Alignment with the Tank and Tail
Move to the side panels next. Place each one against the motorcycle without attaching anything. Check how each panel sits compared to the tank and tail sections. Look for unexplained contact or irregular spacing against the correct assembly reference. Gaps may vary around the bodywork, and left and right sides need not be identical.
Look for any pressure points where a panel touches another part too hard. These contact spots create stress that leads to paint damage over time. Unexpected bowing or contact can have several causes, including part selection, assembly order, brackets or hardware. Stop and investigate with the supplier or a qualified technician rather than declaring a manufacturing defect from appearance alone.
Verifying the Fit of Major Panels and Gaps
Your test fit keeps going with a closer look at how panels work with each other. This step shows fitment problems that only show up when many pieces sit together. Take your time and watch each connection point carefully.
Checking Alignment with the Specified Mounting Hardware
Use only the correctly identified hardware and complete mounting stack required by the service instructions. Do not choose an arbitrary number of bolts, use an unknown fastener, or omit required collars and grommets. If the instructions call for a loose trial assembly, support the parts and follow that procedure without forcing alignment. If you must bend the panel hard to reach a mount, stop right away.
Watch for tabs that twist under clear tension. Whitening or cracking around holes signals stress that will get worse over time. These are reasons to stop the trial assembly and seek assessment. Support the panel, follow the applicable removal instructions and document what you see.
Identifying Any Gaps or Pressure Points That Indicate a Poor Fit
Check every seam between connected panels. Small gaps may change as you add nearby pieces. This adjustment is normal during assembly. But visible uneven gaps that stay after loose assembly point to a bigger problem.
Think about how fitment issues start. Rushing or forcing a tab during installation breaks or moves that tab. The moved panel then presses against its neighbor, causing that neighbor to sit crooked. You see a visible uneven gap between the panels. To fix that gap, you might tighten a bolt too much, creating a pressure point. That extra force cracks the plastic near the mounting hole. This chain of events turns a small alignment issue into damage.
Knowing When to Stop and Contact Support
Your judgment during this test fit decides if you keep going or stop. Knowing the difference between normal adjustment and real problems saves you from costly mistakes.
Recognizing the Difference Between a Tight Fit and a Wrong Part
Some fairings fit tight at first. Light hand pressure helps holes settle into place. Gaps get better as you add collars, grommets, and mounts. Alignment gets better when you follow the right installation order. These situations show normal adjustment steps.
Abnormal signs look different. A panel that must bend hard to reach a mount does not fit. Tabs under visible tension require investigation; possible causes include part choice, mounting hardware, brackets, damage or assembly order. Whitening, cracks or unexpected distortion around holes are reasons to stop and request assessment. They do not establish the cause or quantify remaining strength. Do not continue an assembly that loads a damaged tab or mounting area.
Ceasing the Test Fit if Any Modification Seems Necessary
If your test fit shows that a panel needs sanding, drilling, heating, or any change to line up, stop right away. Do not try to change the bodywork. Modifying a questionable panel can complicate assessment or affect the seller's return terms. Review the actual policy and get instructions before making changes. Contact the seller with your paperwork instead.
Cracks around a mounting hole deserve assessment before installation. Their appearance alone does not establish whether the cause was shipping, handling, fitment, manufacturing or previous use. Do not attempt to resolve uncertain fitment by modifying the part yourself. Ask the supplier or a qualified technician to identify the cause and appropriate next step.
A model-specific pre-fit can reveal alignment concerns, but it is not a substitute for complete installation and final safety checks. Never ride with loosely fitted bodywork. Finding fitment problems now saves hours of frustration later. With your inspection done, you can note your findings and contact the seller if needed.

Documenting Findings and Contacting the Seller
Your checklist for the fairing kit ends with clear records and a direct message. This step turns your careful review into action. A well-organized file gives the seller all they need to help you fast. Your records also protect you if you need to take the issue further.
Creating a Comprehensive Evidence File
Taking Close-Up Photos of Every Defect Found
Get your smartphone and look at each flaw you found during your inspection. Take close-up photos of every scratch, chip, crack, or misaligned hole. Capture each defect from multiple angles. Include a wide shot that shows where the problem is on the panel, then zoom in for detail. Good lighting is important here. Use your flashlight to light the flaw clearly. Blurry or dark images do not help your case. Check each photo right away to make sure it shows the issue clearly before you move on.
Writing Down the Specific Part Name and Issue for Each Photo
Make a simple written record that matches each photo to a description. Write the part name, like "left side fairing" or "front upper cowl," and note the exact issue you see. For example, "scratch on the outer clear coat near the mounting tab" or "pre-drilled hole on the lower right does not line up with its match." This written list helps you stay organized when you write your message. It also shows the seller that you did a thorough check and know exactly what you got.
Drafting a Clear and Professional Message to the Seller
Including Your Order Number, Photos, and a Detailed Description
Open your email or the contact form with your order number in the subject line. Say your name and the date you got the package. Describe each problem clearly and point to the photos you attached. Keep your tone polite and factual. Avoid emotional language or blame. A factual, organized description makes the issue easier for the seller to assess. Attach your best photos to the message. Label each image file with the part name and issue so the seller can match them to your description.
Example Message Structure: 'I found [Issue] on the [Part Name]. See attached photo.'
Use a simple structure for each problem you report. Write one sentence that names the issue and the part. Then point to the attached photo. For example, "I found a hairline crack on the right side panel near the upper mounting hole. See attached photo IMG_2041." Do this for each defect. This format keeps your message clear and easy for the seller to handle. End your message by asking what steps they suggest next.
Understanding the Seller's Return and Warranty Process
Reviewing the Current Policy on the Seller's Website
Before you send your message, check the seller's current policy. Policies change, so use the website instead of old information. For NiceFairings, the production and shipping page says that you should contact the store within 7 days of delivery for shipping damage. You must include photos of the outer package, the shipping label, and the damaged items. This timeline is a specific store policy, not a universal legal deadline. Read the full details at the production and shipping page to understand what documentation they need.
Asking Specific Questions About Replacement Parts or Return Shipping
Your message should include clear questions about the next steps. Ask if the seller will send replacement parts or if you must return the damaged parts first. Ask who pays for the return shipping cost. Ask for an estimated time for the replacement to arrive. These questions help you plan your installation schedule. If the seller offers a replacement, make sure the new parts will match your original order. Keep all messages in one email thread so you have a full record.
Contact NiceFairings directly through their contact page with your order number and evidence. A clear, professional message with organized photos gives you the best chance of a smooth resolution. Your records turn a stressful situation into a manageable process.
Allow enough time to complete this motorcycle fairing kit delivery inspection checklist carefully. The required time varies with the number of panels and any issues you find. You protect your wallet and your riding season with every careful check.
Finding a problem now creates a minor inconvenience. Discovering that same issue after hours of work creates a major setback. A thorough inspection sets the stage for a smooth upgrade. You confirm the fitment before you commit to assembly. You verify the panel condition before you mount anything. You avoid the urge to install a fairing that shows defects.
You now know how to handle delivery like a pro. Your next step moves to the installation pre-fit checklist. That guide walks you through the fitment process step by step. Use it alongside the exact service instructions; neither guide guarantees compatibility or replaces a qualified assessment where needed.
FAQ
What should I do first if I spot damage on a panel?
Stop checking right away. Take close-up photos of the damage from different angles. Keep all packaging materials and the outer box. Contact the seller quickly with your order number and clear images. Do not try to install or change the damaged part.
Is recording a video of the unboxing process required?
No, video is not required. Check the seller and carrier requirements for your shipment. Clear photos of the packaging, label and damaged items are useful supporting records, but additional documentation or inspection may be requested. Video adds useful background, but it does not promise any claim result. Put your effort into taking clear, well-lit photos instead.
What happens if my kit arrives with missing hardware or parts?
Compare what you got against your specific order confirmation. Kit contents differ by product and model year. Hardware, tank covers, windscreens, and heat shielding are not always included. If something from your order is missing, photograph your inventory and contact the seller with your order number.
Should I test fit the fairings on my motorcycle right away?
A quick fitment check helps confirm alignment before full installation. Hold panels loosely against mounting points without forcing anything. Check gaps and hole positions with your eyes. If a panel needs pressure or changes to align, stop right away and contact the seller. Never drill, sand, or heat a part you are unsure about.
How can I tell the difference between a minor flaw and a real defect?
Small issues like slight texture changes may be okay. Real defects include visible scratches, chips, cracks, warping, or misaligned mounting holes. Look at the finish in natural daylight. Trust your eyes for clear problems. When you are unsure, document what you see and ask the seller for advice before moving forward.
Can I install the fairings if I notice a small scratch?
A small scratch does not always make the kit unusable. But you should document it with photos and tell the seller before installation. Installing the panels can make the original condition harder to assess; check the seller's actual terms before proceeding. Your inspection record helps the seller assess the issue; it does not determine legal rights or guarantee a replacement.
How should I store the fairings if I cannot install them immediately?
Keep each panel wrapped in its original protective foam or soft cloth. Support their natural contours on a clean, dry surface away from direct sunlight and extreme temperatures; do not press curved panels flat. Do not stack panels directly on top of each other. Label each piece clearly so you remember which side it belongs to later.
What information should I include when contacting the seller about a problem?
Include your order number, your name, and the delivery date. Describe each issue clearly with the specific part name. Attach well-lit photos showing each defect. Ask about replacement parts, return shipping, and estimated timelines. Keep all communication in one email thread for a complete record of your inspection findings.