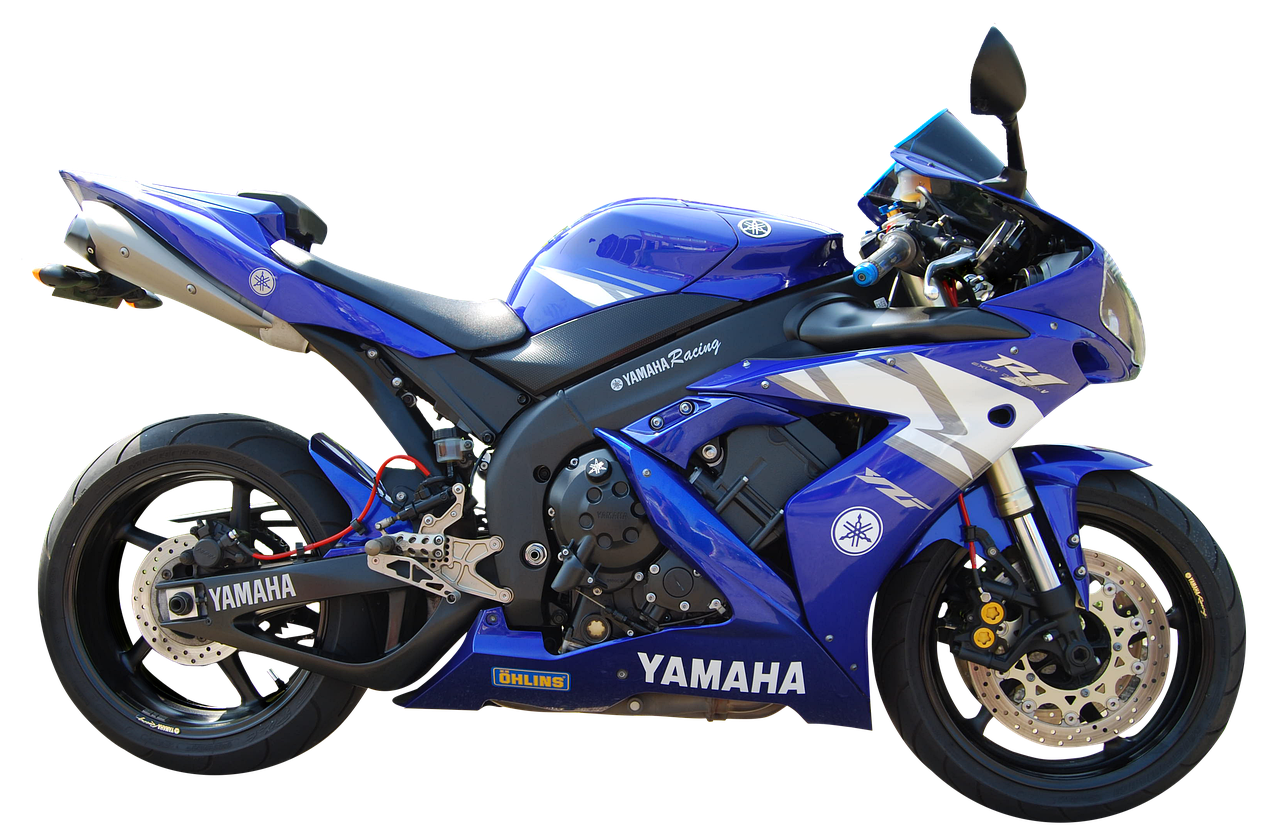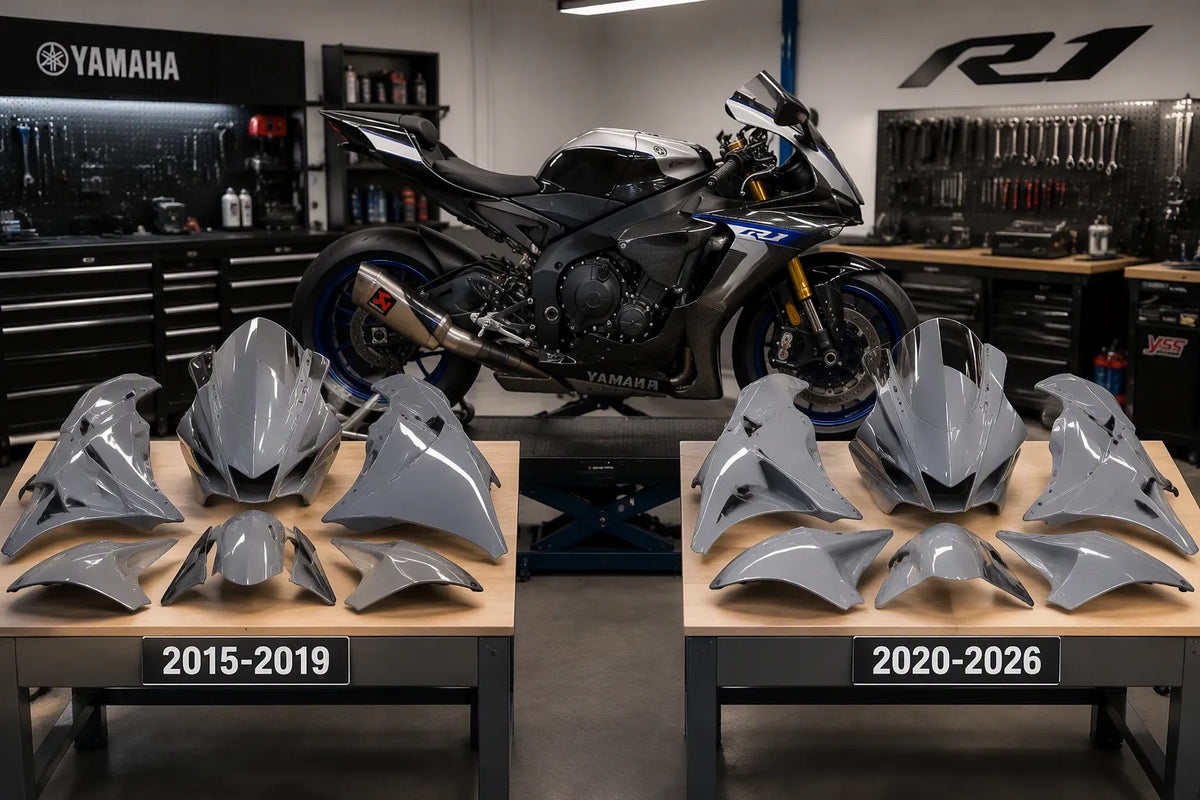
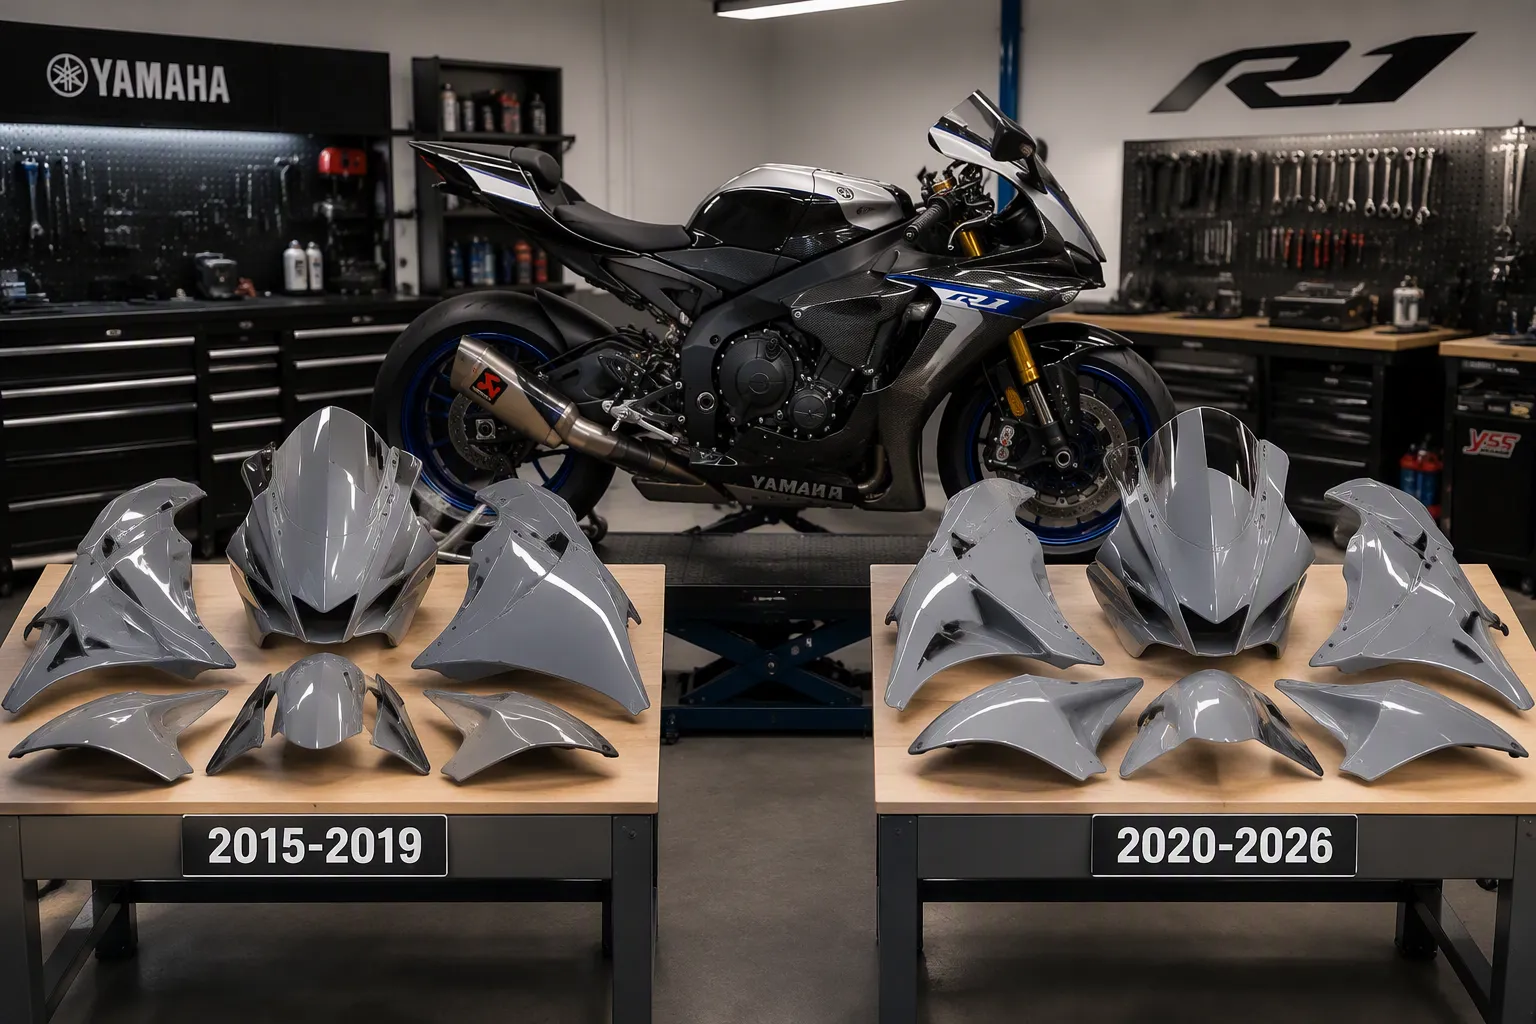
No, fairing kits from 2015–2019 R1s will not fit 2020–2026 models. Yamaha redesigned the YZF-R1 in 2020 with a new headlight, subframe, and bodywork. This guide helps you identify your generation and avoid buying the wrong parts.
The 2020 redesign changed the front end completely. The single LED headlight and side intakes replaced the dual-headlight design. The cast aluminum subframe replaced the steel unit. These changes affect every fairing panel's mounting points.
You need a generation-specific yamaha r1 fairing kit fitment solution for proper compatibility. OEM quality matters for installation success. Whether you ride for performance or racing, check the 2015-2019 collection or the 2020-2026 collection for correct options.
Key Takeaways
To find out your R1's generation, look at the headlight design or the 10th character of the VIN.
The steel subframe from 2015–2019 and the cast aluminum subframe from 2020–2026 need different fairing kits.
Conversion kits are available, but they require replacing the entire subframe and having a professional install them.
Pick ABS plastic if you want your fairings to last on the street, or go with fiberglass or carbon fiber to save weight on the track.
Dry fit all panels before tightening them to prevent misalignment and stress cracks.
For 2020–2026 models, make sure the built-in air ducts line up exactly with the airbox opening.
Choose a kit made for your bike’s year from a reliable brand like NiceFairings to get a perfect fit.
YZF-R1 Generation Identification: 2015–2019 vs 2020–2026
Before you order any fairing parts, you must know which generation you own. The 2020 redesign changed more than looks. Yamaha changed the whole front structure, subframe, and mounting system. These changes mean you cannot swap body panels between the two generations without major modification.
Visual Cues: Headlight and Nose Fairing
The quickest way to tell your generation is the front end. Look at the headlight design and the intake layout. These visual differences are easy to spot once you know what to check.
2015–2019 dual headlight and central ram air intake
The 2015–2019 YZF-R1 has two separate headlight units placed side by side. A central ram air intake sits between them, sending cool air straight into the airbox. This design creates a unique "catfish" look that many riders know right away. The nose fairing wraps around both lights and the intake, forming one single piece. You will see the intake opening clearly in the middle, pulling your eye toward the center of the bike.
2020–2026 single integrated LED headlight with side intakes
The 2020 redesign brought a big change. Yamaha swapped the dual lights for a single integrated LED headlight unit. The ram air intakes moved to the outer edges of the nose fairing, sitting on both sides of the headlight. This new layout gives the front end a sharper, more aggressive look. The nose fairing itself has a totally different shape, with angular lines and recessed duct openings. If you see one headlight with intakes on the sides, you are looking at a 2020–2026 model.
Subframe and Mounting Points
Beyond the visual differences, the subframe change affects every panel you might replace. The subframe gives the structural anchor points for your tail section and side panels. Different subframes mean different bolt patterns.
Steel subframe on 2015–2019 models
The 2015–2019 R1 uses a steel subframe made from welded tubing. This design offers proven strength and simple mounting points. The tail section bolts directly to this steel structure using a specific pattern. Side panels and the belly pan also attach to brackets welded onto this frame. Aftermarket fairing kits for this generation copy these exact mounting spots.
Cast aluminum subframe on 2020–2026 models
Yamaha switched to a cast aluminum subframe for the 2020 generation. This change cut weight and boosted rigidity. However, it also changed every mounting hole location and bracket angle. The tail section for 2020–2026 models uses a completely different bolt pattern. You cannot attach a 2015–2019 tail to this subframe without custom fabrication. The R1M model within this generation may have a carbon fiber front fairing, but the mounting points stay the same as the standard R1.
VIN Decoding for Model Year Confirmation
Visual checks help, but you should confirm your model year through the Vehicle Identification Number. This method removes any guesswork.
Locating the VIN on the right side of the steering head
You will find the VIN stamped on the right side of the steering head. This seventeen-character code holds all the details about your motorcycle. Clean the area with a rag if dirt hides the stamping. A flashlight helps you read the characters clearly.
Interpreting the 10th character for exact year
The tenth character of your VIN shows the model year. For 2015 models, this character is "F." The sequence continues alphabetically: "G" for 2016, "H" for 2017, "J" for 2018, and "K" for 2019. Starting in 2020, the character becomes "L," followed by "M" for 2021, "N" for 2022, "P" for 2023, "R" for 2024, "S" for 2025, and "T" for 2026. You can check this info through the National Highway Traffic Safety Administration's VIN decoder for official confirmation. This quick check ensures you buy the correct generation-specific kit for your bike.
Fairing Compatibility Across Generations
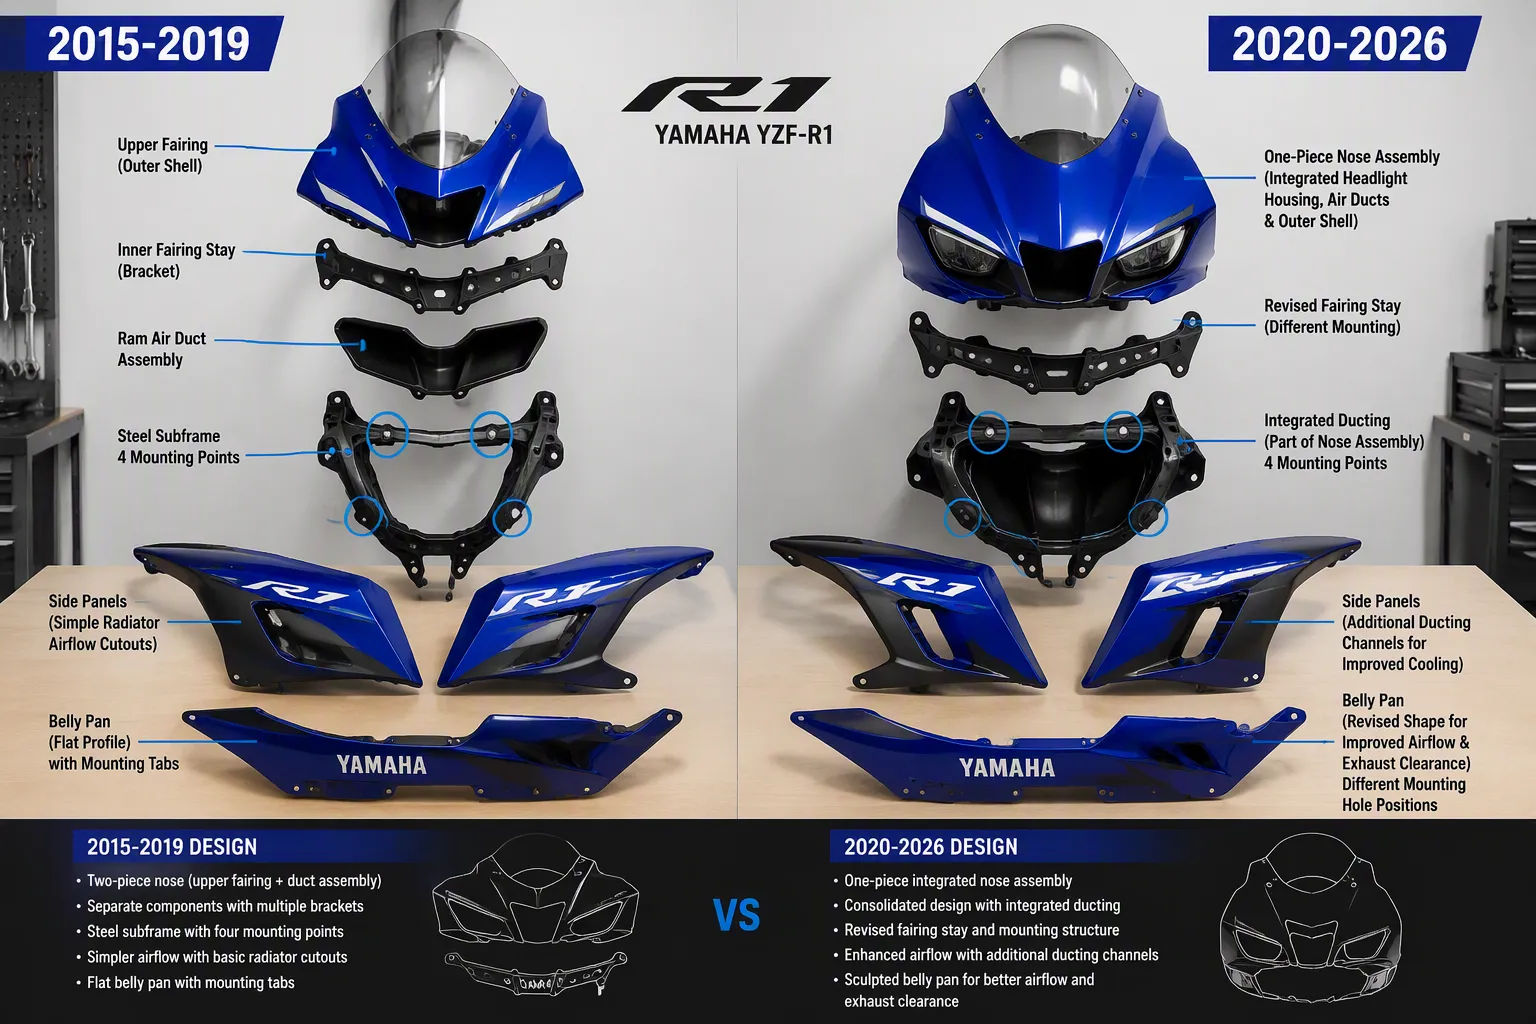
The 2020 redesign changed more than just the headlight. Every major body panel on the YZF-R1 got new mounting points, new ducting, and new structural needs. Knowing these differences helps you avoid costly mistakes when ordering replacement bodywork.
YZF-R1 Fairing Compatibility: Key Differences
The front end is the biggest challenge. You cannot swap a 2015–2019 nose onto a 2020–2026 bike, and the reverse also fails. The mounting hardware and internal structure differ completely between generations.
Nose and fairing stay: two-piece vs one-piece design
The 2015–2019 R1 uses a two-piece nose design. The upper fairing and inner fairing stay separate from the ram air duct assembly. This setup lets you remove the outer shell while leaving the ductwork in place. The fairing stay bolts to the frame using four mounting points that match the steel subframe geometry.
The 2020–2026 model takes a different approach. Yamaha designed a one-piece nose assembly that combines the headlight housing, air ducts, and outer shell into one structural unit. The fairing stay for this generation mounts differently and supports more weight. The integrated air ducts must align precisely with the airbox inlet. Aftermarket kits for this generation must copy these ducts exactly. If the ducts sit even a few millimeters off, you lose performance and risk overheating the intake charge.
Side panel and belly pan: different ducting and mounting holes
Side panels show another layer of incompatibility. The 2015–2019 side panels have simple cutouts for radiator airflow. They attach to the fuel tank, frame, and belly pan using a specific bolt pattern. The belly pan has a flat profile with mounting tabs that align with the steel subframe brackets.
The 2020–2026 side panels add extra ducting channels. These channels route cooling air around the revised exhaust headers and the updated radiator position. The mounting holes sit in different spots because the cast aluminum subframe changes the bracket angles. The belly pan also has a deeper profile with integrated aerodynamic strakes. You cannot bolt a 2015–2019 belly pan onto a 2020–2026 bike without drilling new holes and making custom brackets.
Tail Section and Rear Subframe
The rear bodywork is the most frustrating compatibility issue for owners. Many riders want to swap tail sections for a custom look. Unfortunately, the subframe change makes this swap nearly impossible without significant fabrication work.
2015–2019 rounded tail vs 2020–2026 pointed integrated tail
The 2015–2019 tail section has a rounded, organic shape. The tail light sits in a recessed housing, and the passenger seat cowl blends smoothly into the rear bodywork. This design follows the earlier R1 styling language that Yamaha used throughout the 2010s.
The 2020–2026 tail section looks completely different. Yamaha sharpened the lines and created a pointed, aggressive rear end. The tail light integrates directly into the bodywork with no recessed housing. The tail section also extends further rearward, changing the overall length of the motorcycle. These visual differences reflect the underlying structural changes.
Bolt pattern differences due to subframe change
The steel subframe on the 2015–2019 model uses a four-point mounting system. Two bolts secure the front of the tail section, and two bolts hold the rear. The spacing between these bolts measures a specific distance that matches the steel tubing layout.
The cast aluminum subframe on the 2020–2026 model uses a different bolt pattern. The mounting points sit closer together, and the brackets angle differently to fit the aluminum casting. You cannot attach a 2015–2019 tail section to a 2020–2026 subframe. The holes will not line up, and the tail section will sit at the wrong angle. Some owners try to drill new holes, but this weakens both the subframe and the bodywork.
Conversion Kits and Modification Requirements
Some riders want the newer look on their older bike. Conversion kits exist for this purpose, but they require significant additional parts and labor.
Kits that allow 2015–2019 owners to use 2020–2026 style
Several aftermarket companies offer conversion kits that let you mount 2020–2026 bodywork on a 2015–2019 R1. These kits typically include custom brackets, adapter plates, and modified fairing stays. The conversion process requires removing your stock subframe and installing a 2020–2026 subframe. This swap changes the entire rear structure of your motorcycle.
The front conversion proves more complex. You need the complete 2020–2026 nose assembly, including the headlight unit, air ducts, and fairing stay. The wiring harness also requires modification because the LED headlight uses different connectors than the dual-headlight setup. Professional installation is strongly recommended for this type of conversion.
Additional parts needed: subframe, brackets, headlight
A full conversion requires more than just fairing panels. You need the complete 2020–2026 subframe, which bolts to the main frame using different mounting points. You also need the headlight assembly, the wiring harness adapters, and all the brackets that hold the bodywork in place. The total cost of these parts often exceeds the price of simply buying a newer motorcycle.
For most riders, purchasing a generation-specific kit makes more sense. The yamaha r1 fairing kit fitment options from reputable manufacturers match your bike's exact mounting points. You avoid the headache of custom fabrication and ensure proper alignment. The YZF-R1 fairing compatibility guide from NiceFairings provides additional detail on what to check before ordering.
Quality aftermarket kits replicate the OEM mounting points precisely. They use the same hole locations, the same bracket angles, and the same duct alignment. This attention to detail ensures your new bodywork fits without modification. Whether you ride for street performance or track racing, a generation-specific kit delivers the best results.
Yamaha R1 Fairing Kit Fitment Considerations
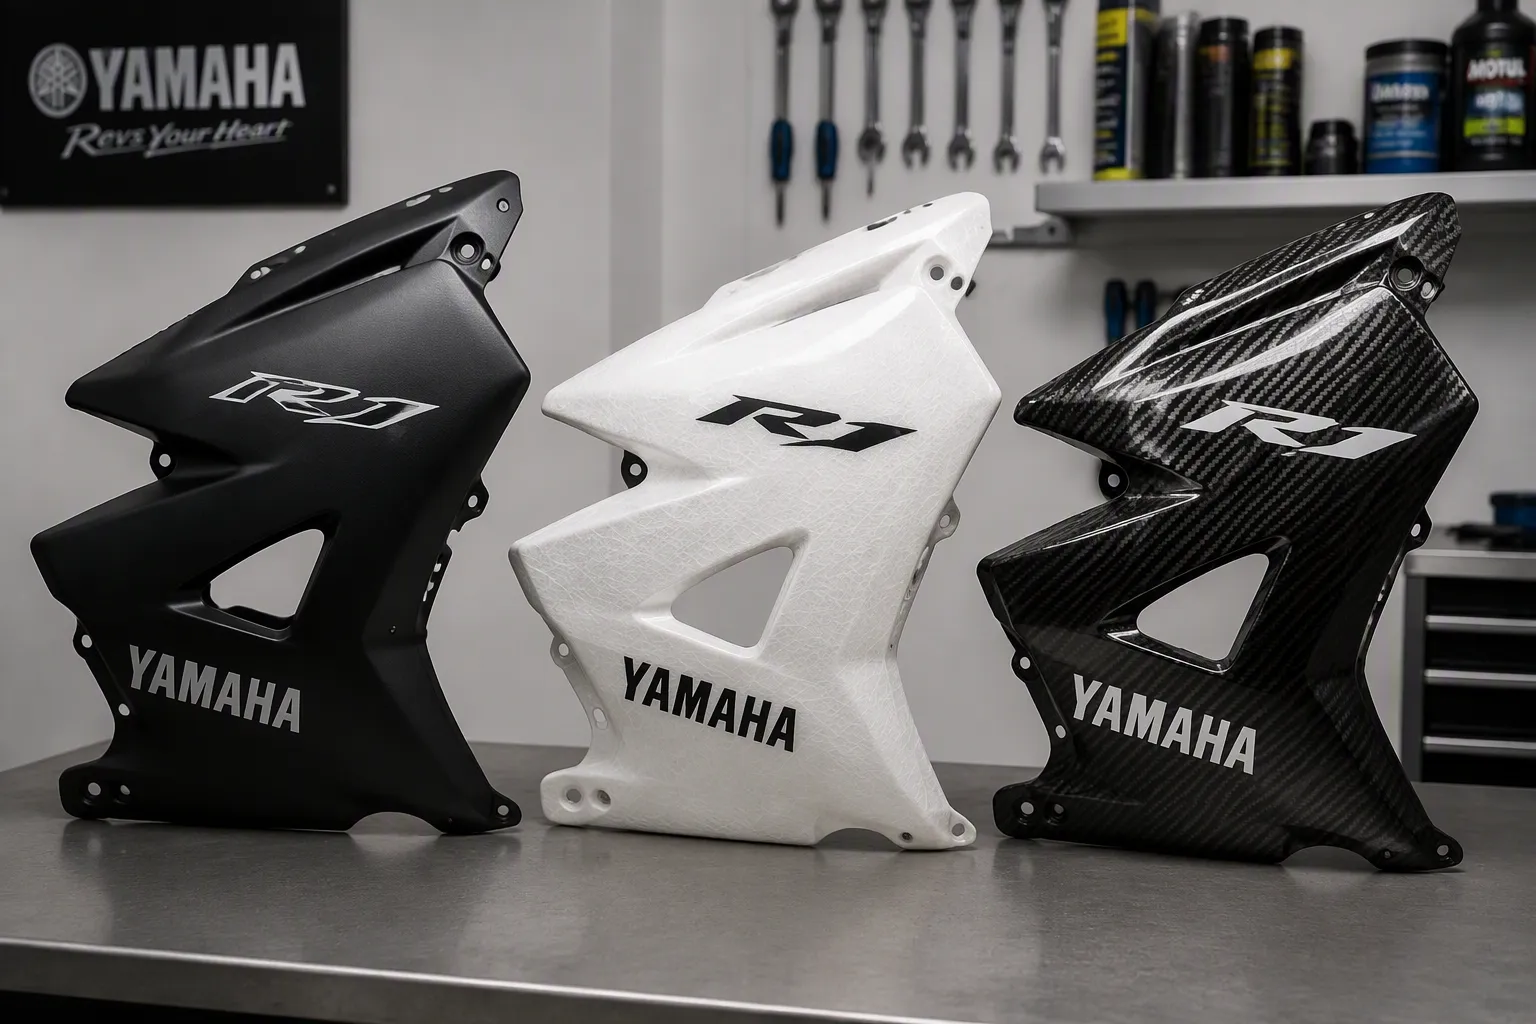
When you look into yamaha r1 fairing kit fitment options, three main things affect your satisfaction: the material, the included hardware, and the finish. Each choice impacts how the kit fits, how long it lasts, and how much work you need to put in. Knowing these factors helps you pick the right one for how you ride.
Material Choices: ABS, Fiberglass, and Carbon Fiber
The material you pick directly changes weight, toughness, and cost. Each option serves a different need. Your choice depends on whether you ride on the street or the track.
ABS plastic for street durability and OEM-like fit
ABS plastic gives the best mix of toughness and flexibility for street riders. This material is dense, so it is the heaviest of the three. But its weight comes with a clear plus. ABS is very flexible. If you hit a rock or bump the bike in the garage, ABS tends to dent instead of crack. You can often fix a dent with heat and pressure. The material also matches the factory fit well because most OEM fairings on the YZF-R1 use ABS or a similar plastic. If you want a kit that installs easily and lasts for daily riding, ABS is your best bet. The material's flexibility also helps soak up vibrations, so there are fewer rattles at highway speeds.
Fiberglass and carbon fiber for track weight savings
Fiberglass and carbon fiber both save a lot of weight over ABS. Fiberglass weighs less than ABS but more than carbon fiber. It offers good toughness and resists cracking. This makes it a popular choice for track-day riders who want to drop weight without spending a lot.
Carbon fiber takes weight loss to the extreme. It is very light and very stiff. However, this stiffness comes with a downside. Carbon fiber is brittle. Under a hard hit, it can crack or break instead of bending. For racing where every gram counts and you replace bodywork after crashes, carbon fiber works well. For street riding, the risk of cracking from a minor tip-over makes it less useful.
Material |
Weight |
Durability & Impact |
|---|---|---|
ABS |
High density (heaviest) |
Very flexible; dents rather than cracks |
Fiberglass |
Lighter than ABS, heavier than carbon |
Good toughness; resists cracking |
Carbon Fiber |
Very light |
Very strong but brittle; cracks under hard impact |
Hardware and Kit Inclusions
The hardware that comes with your kit decides if you can install it with your existing parts or need to buy extra items. Check the kit contents before you order.
Brackets, rivets, and rubber grommets included vs. reused OEM parts
Some aftermarket fairings include everything you need: brackets, rivets, rubber grommets, and fasteners. Other kits expect you to reuse the hardware from your stock bodywork. Reusing OEM parts saves money but requires careful removal. You can strip a screw head or lose a grommet during disassembly. If your kit includes new hardware, you save time and avoid frustration. Always check the kit description. If it says "hardware included," you get all the mounting pieces. If it says "requires OEM hardware," you must save your old parts.
Checking for gen-specific items like headlight mounting brackets
Generation-specific parts matter more than you might think. The headlight mounting bracket on a 2015–2019 YZF-R1 differs from the bracket on a 2020–2026 model. Your kit must include the correct bracket for your generation. If the kit claims to work with both generations, check this claim with the maker. A missing or wrong bracket creates alignment problems that affect the whole front end. Check also for parts like the air duct seals and the windscreen mounting screws. These small items cause big headaches if they are wrong.
Paint and Finish Options
The finish of your fairing kit decides how your bike looks and how long the paint lasts. You have two main choices.
Pre-painted kits matching OEM colors (e.g., Liquid Metal, Vivid Red)
Pre-painted kits come ready to install. The maker applies the paint in a factory, using color codes that match the original Yamaha colors. You can pick colors like Liquid Metal or Vivid Red that match the stock paint exactly. This option saves you the cost and trouble of finding a paint shop. The paint quality on these kits is usually high because the maker controls the process. You get a smooth finish across all panels.
Unpainted or gel-coat kits for custom paint jobs
Unpainted kits give you full freedom. You can pick any color, design, or graphic scheme you want. These kits come in a primer-ready surface or a gel-coat finish. Gel-coat gives a smooth base that takes paint well. You take the kit to your local painter or apply the paint yourself. This route works best for riders who want a unique look. If you want a custom design, check the custom fairings page at NiceFairings for options that match your vision.
Key Considerations Summary
Consideration |
Key Action/Insight |
|---|---|
Model Year Compatibility |
Check the kit matches your specific R1 model year to avoid misalignment |
Alignment Check |
Test-fit pieces before tightening; misalignment causes vibrations |
Slight Modifications |
Be ready for small tweaks; many aftermarket kits need minor adjustments |
User Reviews |
Look for kits with good customer feedback to avoid known problems |
Molding & Quality Control |
Pick kits with high-precision molding for factory-matching shapes |
The quality of your Yamaha R1 kit depends on the molding precision. Kits with high-precision molding match the factory shapes closely. This reduces the need for adjustment and improves the final look. Always check the thickness of the plastic. Thicker plastic is more durable but heavier. For street riding, the extra durability matters more than the weight. For racing, every gram counts.
Installation Tips and Common Pitfalls
Proper installation is what makes a bike look great instead of having rattles, gaps, and stress cracks. You can avoid most problems by following a few simple steps before you tighten anything. The NiceFairings pre-fit checklist walks you through the full process. This section covers the most common mistakes riders make with yzf-r1 bodywork.
Pre-Fit Checklist from NiceFairings
A pre-fit check takes about an hour. That hour saves you from drilling wrong holes or forcing panels into place. You need patience and a clean workspace.
Dry fit all panels before final assembly
Dry fitting means placing every panel on the bike without tightening any fasteners. You check how each piece lines up with its neighbors. Start with the nose fairing and work backward. Look for gaps between panels that should sit flush. Check that all mounting holes align with the brackets underneath. If a hole sits off by a few millimeters, you can often adjust the bracket position. Do not force a panel into place. Forcing creates stress cracks that appear weeks later.
Verify alignment with stock components (windscreen, mirrors, exhaust)
Your new fairing must work with the parts you already own. Place the windscreen in its mounting holes and check the curve matches the nose shape. Mount the mirrors and confirm they sit level. If you have an aftermarket exhaust, check the side panel clears the muffler can. Many riders discover clearance issues only after scratching a new panel. The pre-fit checklist from NiceFairings covers these checks in detail. Following it prevents damage to your new investment.
2015–2019 Specific Issues
The 2015–2019 generation has its own quirks. Knowing them before you start saves time and frustration.
Aftermarket exhaust clearance with side panels
Aftermarket exhaust systems often change the position of the muffler. Some slip-ons sit closer to the swingarm than the stock unit. Your new side panel may rub against the exhaust can. Check the clearance with the bike on a rear stand. You need at least a finger's width between the panel and the exhaust. If the gap is too tight, you can add a small spacer to the mounting bracket. This simple fix prevents melted plastic and annoying vibration sounds.
Frame slider and accessory interference
Frame sliders protect your engine in a crash. They also create obstacles for fairing installation. Many sliders mount using the same engine bolts that hold the fairing brackets. You may need to remove the slider temporarily during installation. After mounting the fairing, reinstall the slider and check it clears the side panel. Some sliders require cutting a small notch in the fairing for proper clearance. Measure twice before you cut. A wrong cut ruins the panel and voids any warranty.
2020–2026 Specific Issues
The 2020 redesign brought more complex bodywork. These models require extra care during installation.
Integrated air duct alignment to the airbox
The 2020–2026 nose fairing includes integrated air ducts that feed the airbox. These ducts must align perfectly with the airbox inlet. Even a small misalignment reduces airflow and hurts performance. When you mount the nose, check the duct openings sit centered on the airbox intake. You may need to adjust the fairing stay position slightly. Professional installation is strongly recommended for this generation. The complex bodywork leaves little room for error.
LED headlight wiring and connector compatibility
The LED headlight unit uses specific connectors that differ from earlier models. Your new fairing kit must include the correct mounting bracket for this headlight. When reinstalling the headlight, route the wiring carefully through the provided channels. Pinched wires cause intermittent failures that are hard to diagnose. Check all connectors click securely into place. Loose connectors create flickering lights and electrical gremlins. Take photos of the wiring before removal so you can reference them during reassembly.
Common pitfalls reported by owners include selecting an incorrect fairing model for their specific r1 year, leaving fasteners loose, and skipping alignment checks. These mistakes lead to rattling, vibration, and poor panel fit. The quality of your installation determines the final result. A quality kit installed correctly looks factory-perfect. The same kit installed poorly looks worse than worn stock bodywork. Take your time, follow the checklist, and you will enjoy your new fairing for years.
Recommended Aftermarket Fairing Kits for Your R1
Once you know your generation, you can shop for yamaha r1 fairing kit fitment with confidence. The right kit changes your bike's look and protects the parts underneath. This section shows proven options for both model ranges and explains how to order custom bodywork that fits your style.
Kits for 2015–2019 YZF-R1
The 2015–2019 generation has strong aftermarket support. Many makers produce bodywork that copies the factory mounting points exactly. You can find choices from street-ready ABS to lightweight track shells.
NiceFairings 2015–2019 Yamaha R1 Fairings
NiceFairings has a dedicated collection for the 2015–2019 YZF-R1. These kits use high-quality ABS plastic that matches the OEM thickness and flexibility. Each panel arrives pre-drilled with holes aligned to the steel subframe brackets. The 2015-2019 collection includes full kits with the nose, side panels, belly pan, and tail section. You can pick pre-painted finishes that match factory colors or unpainted versions for custom work. The molding precision ensures each piece fits without forcing or trimming. This care cuts installation time and prevents stress cracks.
Other reputable brands offering race-ready options
Several other brands serve the track crowd with fiberglass and carbon fiber kits. These options focus on weight savings over street durability. Race-ready kits often have quick-release fasteners and simpler mounting systems. You should confirm that any kit you pick matches your exact model year within the generation. A 2015 kit may differ slightly from a 2019 kit in bracket placement. Check customer reviews and real-world photos before ordering. The yamaha r1 fairing kit fitment depends on exact copies of factory mounting points. Brands that skip mold accuracy create alignment problems during installation.
Kits for 2020–2026 YZF-R1
The 2020 redesign brought complex bodywork with integrated air ducts. Aftermarket kits for this generation must copy these ducts precisely. Poor duct alignment lowers engine performance and can cause overheating.
NiceFairings 2020–2026 Yamaha R1 Fairings
NiceFairings makes a dedicated line for the 2020–2026 models. These kits account for the cast aluminum subframe and the one-piece nose assembly. The 2020-2026 collection includes panels with pre-aligned air duct openings. Each kit ships with the correct mounting brackets for the LED headlight unit. The ABS material gives street durability while keeping the sharp factory lines. You can order these kits pre-painted in OEM colors or unpainted for a custom finish. The precision molding ensures the side intakes line up perfectly with the airbox inlet.
Specialized track kits maintaining aerodynamic ducts
Track-specific kits for the 2020–2026 generation focus on weight reduction without losing duct function. Carbon fiber versions offer the lightest option while keeping the integrated air channels intact. Some makers design these kits for racing only, meaning they lack street-legal parts like mirror mounts or turn signal brackets. Before buying, confirm whether the kit fits your intended use. If you ride on public roads, you need a street-legal version with all required openings and mounts. The main R1 collection gives a broad view of available options across both generations.
Custom Fairings from NiceFairings
Sometimes stock colors do not match your style. Custom fairings let you create a unique look that stands out at any gathering.
Personalized designs and colors via the custom page
NiceFairings offers a custom ordering process through their custom fairings page. You can pick any color combination, add graphics, or request a completely original design. The process starts with choosing your base kit and generation. Then you state your color preferences and any logos or patterns. The team provides a digital preview before production begins. This step ensures you approve the design before any paint touches the panels.
Ordering process for painted and unpainted kits
You have two paths when ordering. Painted kits arrive ready to install with your chosen colors applied. Unpainted kits come in a primer-ready state for your local painter. The ordering process stays the same for both options. You select your generation, choose your finish, and provide your design details. Quality control checks happen at every production stage. This commitment to quality ensures your kit arrives with consistent paint thickness and flawless clear coat. Whether you choose a factory-matching scheme or something wild, the result shows your personal taste.
The 2015–2019 and 2020–2026 YZF-R1 fairings cannot be swapped. Different subframes, headlight designs, and mounting points make these two generations completely different. Always check your model year against the maker's list of what fits before you order. Buying a kit made for your specific generation saves you time, money, and trouble. A good kit made for your exact bike will fit well and last a long time. Whether you race or ride on the street, the right fairing matters a lot. Use the NiceFairings pre-fit checklist to help with a smooth install. Read customer reviews and look at real photos before you buy. Your Yamaha deserves bodywork that fits right the first time, just like the original parts. This guide helps you choose the right parts and ride with confidence.
FAQ
Can you fit 2015-2019 R1 fairings on a 2020-2026 model?
No. The subframe, headlight, and mounting points are all different. You must get a kit made for your specific generation to fit properly.
What tools do you need for fairing installation?
You need basic hand tools: Allen keys, socket set, and screwdrivers. Look at NiceFairings' installation guides for a full list of what you need.
How long does a quality fairing kit installation take?
Plan for several hours if it's your first time. Put all panels on loosely first. Take your time to make sure everything lines up right.
Do you need professional help for the 2020-2026 Yamaha R1?
The 2020-2026 R1 has tricky bodywork with built-in air ducts. Experts suggest having a pro install this generation to avoid alignment problems.
Will aftermarket fairings affect your R1's performance quality?
Good aftermarket fairings won't hurt performance. What matters is that air ducts and mounting points line up correctly with your bike.
What fairing material offers the best quality for street use?
ABS plastic is the best choice for street riding. It's tough and bends instead of cracking when hit.
How do you confirm a fairing matches OEM quality standards?
Check the plastic thickness and how well it's molded. Read customer reviews. Look for kits that copy the factory mounting points exactly.
Does Yamaha recommend professional installation for quality fairing fitment on your R1?
Yamaha doesn't give official advice for aftermarket fairings. Many riders suggest getting pro help for the 2020-2026 models.