
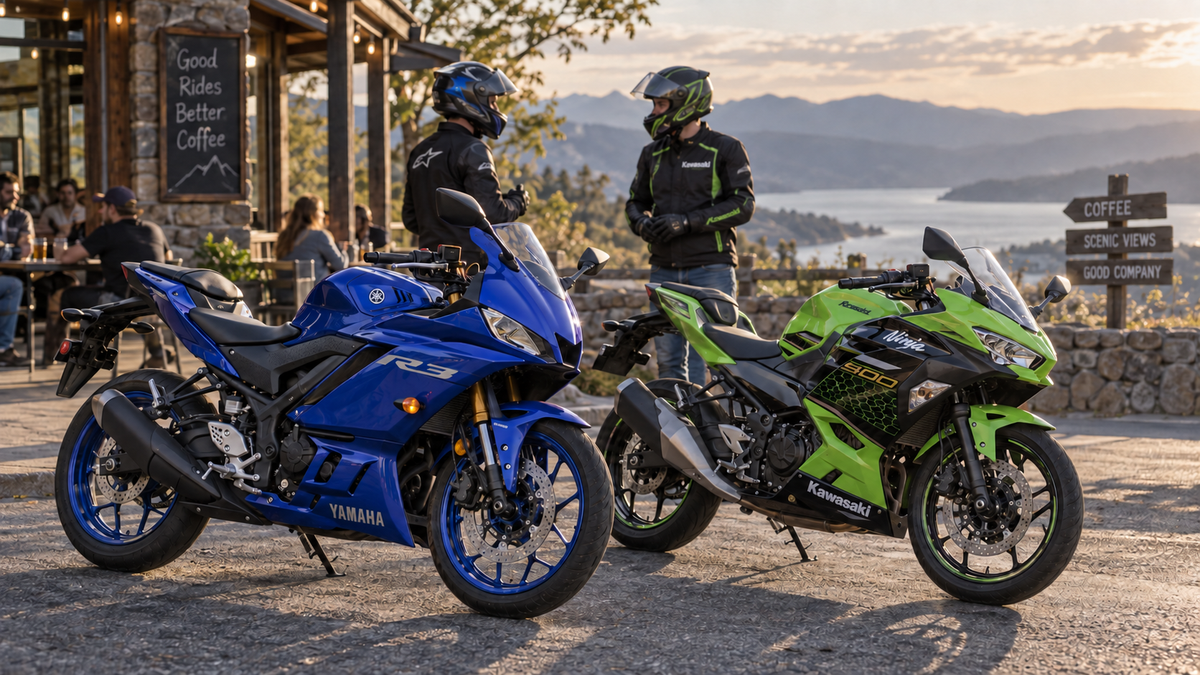
The Yamaha YZF-R3 and Kawasaki Ninja 400 often appear on the same shopping list, but the best choice is rarely decided by a single specification or paint scheme. The useful question is which motorcycle fits your actual riding, budget and ownership plans—and then what its bodywork will cost you to maintain, repair or personalize.
There is also an important market detail to establish before comparing them. In the United States, the YZF-R3 remains a current model for 2026. The Ninja 400 figures used in this guide come from Kawasaki's archived 2023 US specification sheet; shoppers are now more likely to meet a Ninja 400 as a used motorcycle or remaining inventory than as the current equivalent in a Kawasaki showroom. That makes model year, condition and prior work part of the comparison from the beginning.
This is an ownership guide, not a promise that one motorcycle is universally faster, easier or better. Use the numbers to build a shortlist, inspect the exact bike you may buy, and verify every fairing order against its make, model, year and market version.
Define the Two Motorcycles Before Comparing Them
“R3 versus Ninja 400” sounds specific, but sellers and search results may mix generations, ABS and non-ABS versions, regional specifications and modified motorcycles. Before reading reviews or shopping for panels, write down:
- the full model name and model year;
- whether the bike has ABS;
- the country or market in which it was originally sold;
- whether the lights, mirrors, exhaust, rearsets or brackets have been changed;
- whether you are comparing new, used or remaining-stock examples;
- the VIN and the bodywork generation it corresponds to.
This matters twice. It keeps the riding comparison honest, and it prevents an attractive fairing kit from being ordered for the wrong chassis generation. Similar names and colors are not fitment evidence.
Verified US Specification Snapshot
The following manufacturer-published figures create a starting point. They do not replace a test ride or inspection, and “wet weight” and “curb weight” may not be measured under identical manufacturer methods.
| Published specification | 2026 Yamaha YZF-R3 | 2023 Kawasaki Ninja 400 ABS |
|---|---|---|
| Engine | 321 cc liquid-cooled inline twin | 399 cc liquid-cooled parallel twin |
| Front suspension | Inverted telescopic fork; 5.1 in travel | 41 mm telescopic fork; 4.7 in travel |
| Published running weight | 373 lb wet | 366.0 lb curb |
| Seat height | 30.7 in | 30.9 in |
| Fuel capacity | 3.7 gal | 3.7 gal |
| Front brake | 298 mm hydraulic disc; ABS | 310 mm semi-floating disc; ABS |
The displacement difference is real, but it does not settle the purchase. The R3's inverted fork is a visible hardware difference, while the Ninja 400 uses a conventional 41 mm telescopic fork in the cited specification. Neither line tells you whether your wrists, knees and neck will be comfortable after an hour, whether the controls suit your reach, or whether a used example has been maintained properly.
Treat the weights as orientation rather than a victory margin. The published values are close, and the terminology differs. Fuel load, accessories and modifications also change what you feel while moving the motorcycle around a garage or parking space.
Choose for the Roads You Actually Ride
A good lightweight sportbike should make your normal rides inviting. That may mean commuting through traffic, learning corner entry on familiar roads, taking weekend trips or attending an occasional track day. Build the decision around those uses.
For urban riding and skill building
Check low-speed control, clutch feel, throttle response, steering lock and how easily you can support the motorcycle on imperfect ground. Seat height is useful, but seat width, boot sole, inseam and balance can change the result. Sit on the exact motorcycle with appropriate assistance rather than assuming two tenths of an inch decides the fit.
For faster roads and longer journeys
Pay attention to passing response, wind protection, vibration, seat shape and the distance between seat, bars and footpegs. A short test ride can hide pressure points that appear after forty minutes. If possible, test the bikes on a route resembling your real use and compare insurance quotes before committing.
For track days
Neither a fairing color nor a larger engine number makes a motorcycle track-ready. Ask the organizer about technical requirements, then assess tires, brakes, fluids, controls and rider equipment. If you plan repeated circuit use, think about the replacement cost of vulnerable parts and whether you want to store the original painted panels.
For a used purchase
Condition can outweigh the paper comparison. A carefully maintained R3 can be a stronger purchase than a neglected Ninja 400, and the reverse is equally true. Check service records, tires, chain and sprockets, controls, frame and steering alignment, leaks, warning lights and title history. Use a qualified mechanic when your own inspection cannot answer a mechanical question.
Fairings Change the Ownership Equation
Lightweight sportbikes often attract riders who want a visual project as well as a practical motorcycle. Bodywork can be repaired, refinished or replaced, but the right route depends on the damage and the intended result.
Start with an honest damage map. A scratched side panel is different from a cracked mounting tab, shifted headlight bracket or lower fairing that has been pushed toward the exhaust. Remove panels only when you have the service information, tools and permission to do so. Photograph the assembled gaps first, then record the inner surfaces, tabs, grommets, collars and fastener positions.
Use three questions:
- Is the problem cosmetic? Light scratches, decal damage or a local finish problem may support repair or refinishing.
- Is the panel structurally stressed? Cracks, whitening around holes, distorted tabs and forced seams require closer inspection.
- Did the mounting structure move? A new painted panel will not correct a bent bracket, displaced light, missing grommet or incorrect hardware stack.
For an R3 project, the Yamaha R3 fairing replacement record shows how photographs and a hardware map improve reassembly. For a Ninja 400, the lower fairing scrape inspection explains why belly-pan damage deserves more than a quick paint decision.

Editorial illustration: the two motorcycles use model-specific panels and hardware. Keep removed parts separated and verify fitment against the exact bike.
R3 and Ninja 400 Bodywork Is Not Interchangeable
These motorcycles share a category, not a bodywork system. Their cowls, tabs, vents, light openings, inner panels, brackets and fastener arrangements are model-specific. Do not use visual similarity or a marketplace keyword as proof that a panel fits.
When shopping, require the seller or supplier to identify the application in writing. Compare that listing with the VIN, model-year parts diagram and photographs of your motorcycle. If the bike has an aftermarket exhaust, signals, windscreen, mirrors or track hardware, disclose those changes before ordering. A product described as a “complete kit” still needs a written parts list; the phrase does not establish that every inner trim, heat shield, fastener or accessory is included.
If your R3 falls within the 2019–2024 generation, review the R3 fairing upgrade planning guide. A 2025 redesign should not be treated as the same bodywork because the badge still says R3. Ninja buyers should similarly start with the Ninja 400 2018–2023 fairing kit buyer's guide and confirm the actual motorcycle rather than extending that year range by assumption.
Decide Between One Panel, a Refinish and a Coordinated Kit
The cheapest-looking option on a product page is not always the lowest total project cost. Compare the entire job.
| Project route | Usually makes sense when | Evidence to collect before paying | Common hidden work |
|---|---|---|---|
| Replace one panel | Damage is isolated and the surrounding finish is acceptable | Exact part identity, mounting views, color and finish expectations | Decals, small trim, hardware and possible color variation |
| Repair and refinish | Original panel is repairable and a competent local painter can inspect it | Repair plan, paint scope and finish sample | Plastic repair, surface preparation and blending |
| Coordinated bodywork set | Several panels are damaged or a full visual change is the goal | Model-year application, written contents, finished views and exclusions | Transfer parts, heat management, hardware sorting and installation time |
Color deserves realistic expectations. Photographs change with lighting, camera processing and screens. If the fuel tank or other original parts will remain, send neutral-light photos and state whether you want a close match or an intentional contrast. A written color name alone cannot guarantee a physical match.
Likewise, ask how graphics and finish are produced for the specific product you are considering. Do not infer paint layers, decal construction, plastic composition or coating durability from a generic category description. Record the agreed design and retain the supplier's current specification.
A Better Ordering Checklist
Before ordering R3 or Ninja 400 fairings, prepare one evidence package:
- VIN and registration-market details;
- full left, right, front and rear photographs of the assembled motorcycle;
- close photographs of lights, windscreen, mirrors and exhaust changes;
- images of every damaged outer panel and its accessible inner face;
- photographs of mounting brackets, tabs, rubber grommets and hardware;
- a list of parts you expect, including inner trims and heat shielding;
- the desired color, finish and graphic layout;
- a note identifying every original painted part that will remain on the bike;
- written confirmation of application, inclusions, exclusions and approval steps.
Do not drill, enlarge holes or force a screw through a misaligned tab during the initial fit. Assemble the panels loosely, confirm that grommets, collars and brackets are present, and let the bodywork settle into position before staged tightening. If a panel needs sustained force to reach its mount, stop and find the cause. ABS held under static tension can crack later as heat and vibration cycle through the motorcycle.
The same principle applies to lower cowls. Confirm clearance from headers and exhaust components, and install the specified thermal protection for the actual kit and motorcycle. Heat management is an installation requirement, not a cosmetic extra.
Decision Matrix: Which Bike Better Fits Your Plan?
| Your priority | What to compare on the actual bikes |
|---|---|
| Everyday usability | Riding position, low-speed control, steering lock, fuel range and service access |
| Engine character | Test-ride response in the rpm and gears you use; do not decide from displacement alone |
| Suspension preference | Condition, setup and road behavior, alongside the R3's inverted and Ninja's conventional fork hardware |
| Used-bike value | Maintenance history, consumables, modifications, title status and quality of prior repairs |
| Cosmetic project | Availability for the exact year, damage scope, retained paint and total installed cost |
| Track use | Organizer rules, mechanical preparation, consumables and the cost of protecting or replacing original panels |
If both motorcycles fit you and both examples are healthy, the choice may legitimately come down to engine feel, controls, styling and the better individual deal. That is a stronger conclusion than declaring a universal winner from a spreadsheet.
Pre-Ride Check After Any Bodywork Work
Before the first ride, confirm:
- every fastener is present and tightened to the applicable service information;
- steering moves freely from lock to lock without pulling wires or touching bodywork;
- brake and clutch controls operate freely;
- lights, signals and other disconnected electrical items work;
- no panel touches a tire, fork, chain, radiator fan or moving control;
- lower panels have safe exhaust clearance and required heat protection;
- seats, access panels and quick fasteners are secure;
- tools, loose hardware and protective film have been removed.
Start with a short, low-speed check in a safe area. Stop immediately if you hear rubbing, rattling or contact. Reinspect the mounting points after the first heat cycle and again after the first proper ride.
The Practical Verdict
The Yamaha YZF-R3 and Kawasaki Ninja 400 both deserve to be evaluated as complete ownership propositions. The R3 offers a current-model reference point with a 321 cc twin and inverted fork in the cited US specification. The archived 2023 Ninja 400 brings a 399 cc twin and remains relevant on the used market. Those differences help organize a test ride; they do not replace one.
Buy the motorcycle that fits your body, roads, experience and budget in its actual condition. Then plan the fairings around the exact generation and the evidence on the bike. A disciplined inspection and written parts confirmation will protect your project far better than a universal price claim or a percentage fitment promise.
FAQ
Is the Ninja 400 automatically faster or better because it has more displacement?
Displacement is one specification, not a complete riding verdict. Compare the exact bikes' condition, response, ergonomics and suitability for your normal roads. Test riding and ownership costs matter alongside engine size.
Is the Yamaha R3 easier for a shorter rider?
The cited R3 seat height is 30.7 inches and the Ninja 400 ABS figure is 30.9 inches, but seat shape, inseam, boots and balance change how each feels. Sit on the exact bikes with appropriate assistance.
Can I order fairings using only the motorcycle's color and name?
No. Verify make, exact model, year, market and relevant modifications. Colors cross model years, while bodywork geometry can change even when the name stays familiar.
Should I replace the whole kit after a parking-lot drop?
Not automatically. Map the damage, inspect mounting structure and compare single-panel repair, refinishing and a coordinated set. The best route depends on structural condition, retained paint and the visual result you want.
Will aftermarket fairings bolt on without adjustment?
Do not rely on a universal fitment percentage. Verify the specific listing, inspect all mounting points and perform a loose test fit. Correct brackets, grommets, collars and assembly sequence are part of the result.



