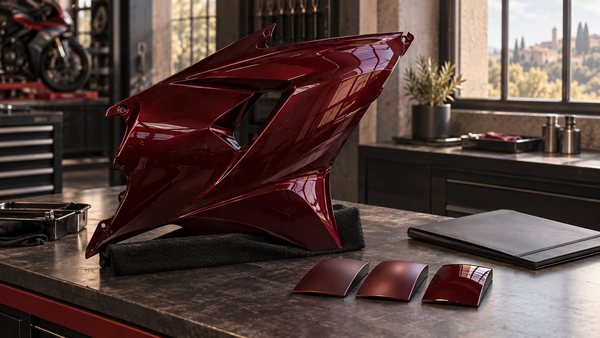
Your new fairings for the 2021-2026 Kawasaki ZX-10R have arrived. But your excitement fades when you think about cracking the pricey plastic or stripping the tiny screws. Most fairing damage comes from bad installation, which causes rattles, misalignment, and costly replacements.
The top five Kawasaki ZX-10R fairing installation mistakes are rushing the job, using wrong tools, skipping the bolt order, tightening too much, and ignoring the electrical parts. This guide shows you these common mistakes to avoid and the right way to get a factory-like fit on your Ninja.
Following these proven steps will save you time, money, and frustration. Your Kawasaki deserves better than guesswork.
Key Takeaways
Take your time. Rushing causes broken tabs, stripped screws, and expensive damage.
Use the correct tools. JIS screwdrivers and nylon trim tools keep your fairings safe.
Dry fit all panels before you put them on for good. This step shows fitment problems early on.
Follow the right order when you install. Put on the inner liners first, then the outer panels.
Be gentle when tightening bolts. Tightening them too much can cause cracks and stripped threads.
Be careful with electrical parts and paint. Gently unplug wires and use clean gloves to hold the panels.
Do a final check and recheck after your first ride. This makes sure everything is tight and won't rattle.

Kawasaki ZX-10R Fairing Installation Mistakes: The Cost of Rushing
Rushing is the main reason most installations go wrong. You might think saving thirty minutes is more important than doing careful work. That mindset leads straight to panels that don't line up, broken tabs, and stripped screws. Each error makes the next one worse, turning an easy job into a costly fix.
Why Patience is Critical for a Factory Fit
Your Kawasaki ZX-10R needs close attention. Factory panels fit perfectly because skilled workers install them with care. You can get the same result with patience and steady work. Rushing causes pressure points, uneven gaps, and fasteners that sit at odd angles.
The Domino Effect of a Single Mistake
One forced tab sets off a chain reaction. That broken tab moves the panel out of place. The shifted panel presses against its neighbor. The neighbor now sits crooked, leaving a visible gap. You then tighten a bolt to straighten the panel. That extra force cracks the plastic near the mounting hole. What began as one rushed move now needs a replacement panel. These kawasaki zx-10r fairing installation mistakes all share one cause: hurry.
Allocating Enough Time for the Job
Set aside a full afternoon for this task. Clear your schedule and remove distractions. Gather every tool before you start. Read your Kawasaki service manual sections about bodywork removal and installation. Organize your workspace with clean towels on a sturdy table. Good preparation stops the urge to rush through steps. The manual gives torque values and sequence details specific to your model year.
Skipping the Test Fit of Aftermarket Kits
Aftermarket fairings need more attention than factory parts. Makers produce these panels with small differences. You cannot expect perfect alignment straight from the box. Test fitting shows these differences before you start final assembly.
The Risk of Poor Alignment and Fitment Issues
Aftermarket kits sometimes need changes at mounting points. Holes may sit slightly off-center. Edges may overlap more than expected. Finding these issues during final assembly forces you to go back. You might strip a screw while forcing alignment. You might scratch fresh paint while wrestling a panel into place. A test fit stops these problems.
Dry Fitting Panels Before Final Assembly
Dry fitting means placing all panels without tightening anything. Start with the inner liners, then layer the outer pieces. Use a few hand-tightened bolts to hold everything in place. Check every gap and seam. Look for symmetry between left and right sides. Adjust each panel until the lines match. These fairings need careful handling during this phase. This process takes time but shows fitment issues early. The NiceFairings pre-fit checklist helps you verify all parts before installation begins.
Ignoring the Manufacturer's Bolt Sequence
Every fairing panel follows a specific tightening order. Engineers design this sequence to spread stress evenly across the plastic. Skipping this order creates uneven pressure that harms your new fairings.
Uneven Stress Leading to Cracks
Tightening one bolt fully before its neighbors pulls the panel one way. The plastic stretches near that mounting point. Other holes then misalign with their threaded inserts. You force those bolts, creating stress fractures. These cracks show up weeks later as hairline marks around the holes. By then, the damage is permanent.
Following the Correct Tightening Order
Always tighten fasteners slowly in a cross pattern. Snug each bolt lightly, then go back for a second pass. Add tension in small steps until everything sits flush. Never use power tools for final tightening. Hand tools give you the feel needed to avoid over-torquing. Your service manual lists the correct sequence for each panel section.
This guide stresses one truth: patience protects your money. Take your time, follow the sequence, and your Ninja will look factory-fresh.
Step-by-Step Removal Guide: Preparing for Installation
Before you touch any fastener, make a solid plan. This step-by-step removal guide protects your new investment. Good preparation prevents costly mistakes during the swap. Your stock panels must come off cleanly and safely. The process needs attention to detail from the very first screw.
Verifying Model Year and Fairing Compatibility
The 2021-2026 Kawasaki ZX-10R has specific bodywork needs. You cannot assume all Ninja fairings share the same mounting points. Each generation has unique shapes and attachment spots. Check your bike's exact specs before ordering or installing anything.
Checking Your VIN and Production Date
Your motorcycle's VIN holds critical information. Find the VIN on the steering head or frame rail. The tenth character shows the model year. For example, "M" means 2021, "N" stands for 2022, and "P" marks 2023. Match this letter against your production date. The manufacturer's sticker on the frame gives the build month and year. This data confirms which fairing kit fits your machine.
Cross-Referencing with Your New Kit's Specs
Compare your VIN details with the kit documentation. Every quality aftermarket set lists compatible model years. Look for the specific range printed on the packaging. Contact the seller if any doubt remains about fitment. A quick email saves you from getting mismatched panels. The right kit aligns perfectly with your bike's mounting brackets and bolt holes.
Avoiding Assumptions About Bolt Interchangeability
Fairing bolts differ between model years. The 2016-2020 ZX-10R uses different fastener lengths than the 2021-2026 version. Thread pitch and diameter may also vary. Never reuse bolts from an older bike without checking. A wrong bolt strips threads or damages plastic. Your service manual lists the correct hardware specs for your model year.
Laying Out Panels and Hardware Systematically
Organization prevents lost parts and confusion. A systematic approach keeps every screw and clip within reach. You will thank yourself during reassembly when each fastener has a clear home.
Creating a Clean, Soft Workspace
Choose a flat, well-lit area for this job. Lay down a thick moving blanket or foam mat. This soft surface protects your fairings from scratches. Clean the workspace thoroughly before bringing in any panels. Dust and grit scratch fresh paint easily. Keep pets and children away from your work area during the entire process.
The "Egg Carton" Method for Organizing Fasteners
Use a large egg carton or muffin tin for your hardware. Label each compartment with masking tape. Write the panel name and position on each label. Place each screw in its designated section as you remove it. This method keeps related fasteners together. You avoid the frustration of sorting through a mixed pile later. The pre-removal checklist on NiceFairings helps you track every part.
Documenting Wiring and Cable Routes
Modern sportbikes have complex electrical systems. Your ZX-10R has wires running through the bodywork. Blind removal can pinch or snap these delicate cables. Documentation gives you a reference for correct reinstallation.
Taking "Before" Photos for Reference
Use your phone camera before removing anything. Photograph every wiring connector and cable clip. Capture close-ups of each fastener location. Take wide shots showing the full routing path. These images serve as your visual guide during reassembly. You can compare your work against these photos at any time.
Identifying Clip and Tie Locations
Look for plastic clips and zip ties securing wires to the inner fairings. Note their exact positions during your photo session. Mark each tie location with a small piece of tape. This marking helps you replace everything in the original spot. Proper routing prevents pinched cables and chafing. Your throttle and clutch cables need free movement after installation.
This careful preparation makes the actual removal straightforward. Your kawasaki fairings will come off without damage. The new panels will install cleanly when you follow this guide.

Using the Wrong Tools and Fasteners
Your Kawasaki ZX-10R uses Japanese Industrial Standard (JIS) screws on its bodywork. These screws look almost the same as Phillips head screws, but they are different. Using the wrong driver strips the heads fast. This mistake is one of the most common fairing installation errors.
Stripping Screws with Incorrect Driver Types
JIS screws have a small dot stamped near the cross slot. This mark shows that the screw needs a JIS driver. A standard Phillips driver cams out under pressure. That slipping motion rounds the screw head. Once stripped, the screw is very hard to remove without drilling.
The Difference Between JIS and Phillips Heads
Phillips drivers have a tapered tip that pushes up when you turn it. JIS drivers sit flat in the screw head with no cam-out effect. The cross pattern on JIS screws has sharper corners and steeper walls. These differences matter when you remove your stock panels. Using the wrong tool damages both the screw and the plastic around it.
Investing in Quality JIS Screwdrivers
Good JIS screwdrivers cost less than replacing one damaged fairing panel. Buy a set with multiple tip sizes to fit different screw diameters. Vessel and KTC make reliable JIS drivers that fit well. Your local motorcycle shop may have these tools. Online stores sell complete sets at fair prices. This small investment protects your ninja from needless damage.
The Danger of Wrong Bolt Dimensions
Fairing bolts come in specific diameters, thread pitches, and lengths. Guessing these measurements leads to stripped threads and cracked mounting bosses. Each mounting point on your bike needs a certain fastener size.
Identifying Correct Diameter, Pitch, and Length
Diameter measures the bolt shaft width across its threads. Pitch describes the distance between thread peaks. Length tells how far the bolt goes into its receiver. A bolt that is too short cannot grip well. A bolt that is too long bottoms out and cracks the plastic. Your service manual lists exact specs for every fastener location.
Why Model-Year Specific Bolts Matter
The 2016-2020 ZX-10R uses different bolt lengths than the 2021-2026 version. Thread pitch may also differ between generations. Never assume they are the same without checking your manual. Aftermarket fairing kits include hardware matched to your model year. Check each bolt against the kit documentation before installing. This careful check prevents damage to your new kawasaki fairings.
Breaking Plastic Clips and Tabs
Plastic clips hold your fairings together at key points. These small parts break easily when you use the wrong removal method. A broken clip leaves your panel loose and rattling at speed.
Using the Right Trim Removal Tools
Metal screwdrivers damage plastic clips and scratch painted surfaces. Use nylon trim removal tools made for automotive work. These tools slide between panels without leaving marks. A basic set includes several shapes for different clip types. Keep these tools in your workspace during both removal and installation.
The Correct Technique for Depressing Clips
Most clips need you to press the center pin inward before pulling the outer ring. Insert your trim tool at the clip edge and apply steady pressure. Push the pin flush with the surface around it. Then gently pry the clip free from its mounting hole. Forcing a clip without depressing the pin breaks the retaining tabs. This removal technique works for both stock and aftermarket fairings.
Mistake |
Consequence |
Prevention |
|---|---|---|
Using Phillips driver on JIS screw |
Stripped screw head |
Use proper JIS screwdriver |
Wrong bolt length |
Cracked mounting boss |
Check service manual specs |
Metal tool on plastic clip |
Broken clip and rattles |
Use nylon trim removal tools |
Your service manual is still your best guide for tool selection and fastener specs. Take time to check each part before you apply force.
Skipping the Right Installation Order
The order you put on the panels matters more than most riders think. Each fairing piece needs the parts below it to line up correctly. Putting panels in the wrong order causes gaps, stress points, and rattles that are hard to fix later.
The Mistake of Putting Outer Panels First
Many riders start with the outer panels because they look best. This way creates problems right away. Outer panels have no base to attach to when inner liners are missing. You end up holding panels with one hand and looking for bolt holes with the other. The result is poor alignment and frustration.
Why Inner Liners Must Be the Base
Inner liners are the strong base for your whole fairing system. These panels bolt directly to the frame and give outer pieces places to attach. Without them, outer panels have nothing solid to grip. Inner liners also protect wires and electrical parts from road debris. Putting them on first creates a stable platform for everything else.
The Right Order: Inner to Outer
Start with the inner liners on both sides of your Kawasaki. Tighten them loosely at first, then move to the next layer. The middle panels go on next, then the outer pieces. This order matches how the factory does it. Your service manual shows the exact order for your model year. Follow that order every time you work on your Kawasaki.
Misaligning Panels by Not Dry Fitting
Dry fitting means placing every panel without tightening any bolt all the way. This step shows fitment issues before they become lasting problems. Skipping this step leads to crooked panels and uneven gaps that ruin the factory look. Your new fairings deserve this extra care.
Why Loose Alignment Comes First
Tighten each bolt only until it grabs the threads. Leave enough room for panels to move a little. This loose state lets you adjust each piece next to its neighbors. You can see where panels overlap and where gaps appear. Making changes now prevents forced fits later.
Adjusting Gaps for Evenness
Check the gap between your tank and the front fairing on both sides. Compare the left and right panel seams. Measure the spacing around your headlight opening. Small changes during dry fitting create perfect symmetry. Once you have even gaps, tighten all fasteners slowly in a cross pattern.
Forcing Tabs into Place
Plastic tabs lock panels together at key spots. These tabs break easily when you use too much force. A broken tab leaves your panel loose and buzzing at highway speeds. Knowing when a tab resists helps you avoid this damage.
Spotting Misalignment Early
A tab that will not go in usually means a problem elsewhere. Another panel may be slightly off. A bolt may hold a nearby piece too tight. Stop and look before you push harder. Check the panels around it for visible misalignment. See if any wiring blocks the tab's path.
The "Rock and Slide" Method
This way puts stubborn tabs in place without damage. Put the tab at the edge of its slot. Apply gentle pressure while rocking the panel side to side. Slide the tab into place using small, controlled moves. This method lets the plastic find its natural position. Never hit a tab with your palm or a tool. The "rock and slide" method works for both stock and aftermarket fairings.
Model-specific differences matter here. A ZX-6R installation order does not match your ZX-10R. Each Kawasaki generation has unique mounting points and panel arrangements. Always check your service manual before starting. This guide helps you avoid common mistakes, but your manual is the final word on your specific bike.
Taking off old panels follows the reverse order. Write down each step during removal to make installation easier. Your Ninja deserves careful attention throughout this process.

Over-Tightening Bolts and Mishandling Grommets
Over-tightening is one of the worst fairing mistakes you can make. You might think a harder twist means a safer panel. That idea harms your Kawasaki in hidden ways that show up later.
The Consequences of Over-Tightening
Every fairing bolt has a set torque range. Your service manual lists these numbers for each mounting point. A torque wrench gives you exact control. Without one, you depend on the "snug" feel. Snug means the bolt sits firmly without extra force. Many riders skip this step and regret it.
Stress Whitening and Cracks Around Bolt Holes
Plastic shows damage before it breaks. You will see a white, cloudy ring near a bolt hole when you tighten too much. This effect, called stress whitening, means the material is hurt. The plastic fibers have stretched past their safe limit. Ongoing vibration and heat make the damage worse. Tiny cracks appear weeks later. These cracks grow with every ride. A panel that looked fine after setup fails months down the road.
The High Cost of Repairing Stripped Frame Threads
Frame threads cost much more to fix than plastic panels. When you strip a threaded insert in your frame, you face pricey repairs. Helicoil kits can fix damaged threads, but the job needs drilling and tapping. A slip during this repair ruins the frame for good. Dealership labor rates make this repair expensive. Compare that cost to the price of a simple torque wrench. The math favors careful installation every time.
Crushing or Misplacing Rubber Grommets
Rubber grommets play a key role in your fairing system. These small rings sit between panels and mounting points. They soak up vibration and stop metal-to-plastic contact. Mishandling them creates rattles that annoy you on every ride.
The Role of Grommets in Vibration Isolation
Your ZX-10R engine makes constant vibration. Without grommets, that energy goes straight to your fairings. The plastic buzzes and hums at highway speeds. Grommets act as shock absorbers for your bodywork. They let panels flex a bit without passing stress to mounting points. This isolation makes your fairings last longer.
Ensuring Correct Placement to Prevent Rattles
Each grommet belongs in a certain spot. Check your service manual during removal to note their positions. Take photos before you start the removal process. When installing new fairings, place each grommet in its correct groove. A grommet that sits crooked cannot do its job. It leaves gaps that allow movement and noise. Press each grommet fully into its recess before inserting any bolt.
Forgetting Washers and Spacers
Washers and spacers look minor next to bolts. These small parts spread load and keep proper spacing. Skipping them creates stress points that crack your panels.
How Missing Washers Create Stress Points
A bolt head without a washer focuses force in one small area. The plastic around the hole takes all the pressure. This uneven load causes cracks over time. Washers spread that force across a wider surface. They protect your investment with a simple design. Spacers keep correct gaps between panels. Without them, panels sit too close and rub against each other.
Checking for Correct Hardware in the Kit
Quality aftermarket fairings include all needed hardware. Lay out every washer and spacer before you begin. Compare them against the kit documentation. Confirm each piece matches its planned spot. Contact the seller if any hardware seems missing or wrong. This check takes minutes and prevents hours of frustration later.
Your Kawasaki deserves hardware installed with care. Take the extra time to verify each part. Your fairings will stay quiet and secure for thousands of miles.
Neglecting Electrical, Cables, and Paint Protection
Your ZX-10R has sensitive electrical parts behind its bodywork. Turn signals, dashboard sensors, and control modules all sit close to the panels you are installing. Rushing past these parts creates problems that range from annoying to dangerous.
Forgetting to Disconnect Electrical Components
Many riders try to remove panels without unplugging the attached wiring. This strains connectors and puts tension on delicate wires. You might think you can work around them. That thinking leads to damage.
The Risk of Snapping Wires or Blowing Fuses
A connected wire limits how far you can move a panel. Pulling that panel too far stretches the wire beyond its limit. The inner copper strands break while the outer insulation stays intact. This hidden damage causes intermittent electrical failures that are hard to trace. A short circuit from damaged wiring can also blow fuses or harm your ECU. Replacing a wiring harness costs far more than taking a few extra minutes during removal.
Proper Connector Release Techniques
Each electrical connector has a locking tab that must be pressed before separation. Look closely at the connector to find this small clip. Press the tab firmly while pulling the connector straight apart. Never yank on the wires themselves. Use your fingers or a trim tool to reach tight spots. Take a photo before disconnecting anything so you remember which plug goes where. Your service manual shows the location of every connector on your model year.
Pinching Cables Behind New Fairings
Cable routing demands your full attention during installation. Throttle cables, clutch lines, and brake hoses all pass near your new panels. A pinched cable creates a serious safety hazard that you might not notice until you ride.
Checking Clearance at Steering Stops and Handlebars
Turn your handlebars fully to the left and right after installing each panel. Watch how the cables move through the full range. A cable that catches or binds at either stop needs immediate attention. Check the gap between your fairings and the handlebar assembly at full lock. You need visible clearance on both sides. This simple test takes one minute and prevents dangerous cable failure at speed.
Securing Wiring with Zip Ties
Use new zip ties to hold wiring in its original path. Place each tie at the same location you documented during removal. Leave enough slack for the handlebars to move freely. Do not pull ties so tight that they crush the wire insulation. Trim the excess tie material flush to avoid sharp edges that could cut other cables. Properly secured wiring stays away from hot engine parts and moving components.
Overlooking Paint Care and Preparation
Your new fairings carry a fresh paint finish that needs protection. Scratches and contamination during installation ruin the look before your first ride. Careful handling keeps that showroom appearance intact.
Handling Panels to Avoid Scratches
Always wear clean cotton gloves when touching painted surfaces. Hold panels by their edges or inner surfaces where scratches matter less. Set each piece on a soft microfiber cloth rather than a hard table. Keep fasteners and tools away from painted areas. A dropped screw can leave a permanent mark that no polish will fix.
Ensuring Clean Surfaces Before Installation
Wipe every mounting surface with a lint-free cloth before assembly. Remove dust, grease, or residue from the previous fairings. Check the back of each new panel for manufacturing debris. Clean both the panel and the bike's mounting points thoroughly. This preparation prevents trapped particles from rubbing against your paint during rides. The vibration of your kawasaki will slowly wear away paint when grit sits between surfaces.
Your kawasaki fairings deserve this level of care during installation. The extra minutes you spend protecting electrical parts and paint save you from expensive repairs later. Treat every wire and every panel as the precision component it is.

Skipping Final Inspection and First-Ride Recheck
You finish the last bolt and step back to admire your work. The new panels look great. But your job is not done yet. A full final check catches small errors before they turn into costly problems. Skipping this step leads to loose fasteners, melted plastic, and annoying rattles on your first ride.
Failing to Perform a Full Visual Inspection
Walk around your Kawasaki and look at every panel from different angles. Crouch down to check the lower parts. Step back to see the overall lines. Shine a bright work light on each mounting point. This careful review shows issues you missed while you were excited during assembly.
Verifying All Fastener Tensions
Touch every bolt and screw you put in during the job. Give each one a light turn with the right tool. If a fastener moves, fix it right away. Check the small screws that hold inner liners in place. Look for any fastener you may have forgotten. Compare your work with the photos you took during removal. Your service manual lists every mounting point for each panel section. Go through that list step by step to make sure nothing is loose or missing.
Checking Panel Gaps and Flushness
Run your fingers along each seam between panels. A smooth line means proper alignment. A step or ridge means a panel sits too high or too low. Measure the gap between your tank and the front fairing on both sides. These gaps should match closely. Look at the area around your headlight for even spacing. Check the tail section where panels meet the seat. Any unevenness now will only get worse with vibration and heat.
Not Checking Heat Clearance from Exhaust
Your exhaust system makes intense heat when running. New fairings sit close to this heat source. Without enough clearance, the plastic can melt or warp. This damage happens fast and ruins your investment.
Identifying Hot Zones Near the Mid-Pipe
Start your engine and let it warm up to normal temperature. Carefully hold your hand near the mid-pipe area without touching it. Feel for heat that seems too strong. Look at the gap between your fairing and the exhaust pipe. If the gap is smaller than your finger width, fix it. Check the lower belly pan area where heat builds up. Look at the rear section near the muffler mount. These spots need the most clearance to stay safe.
The Importance of Heat Shields
Good aftermarket fairings include heat shield material in key areas. Check that these shields are in place before your first ride. The shield reflects heat away from the plastic surface. Make sure the shield does not block any airflow vents. Confirm the shield stays secure at highway speeds. If your kit lacks heat shields, buy adhesive-backed heat barrier material. Put it on the inner surface of panels near the exhaust. This simple step stops costly melting damage.
The Critical First-Ride Recheck
Your first ride is the real test of your installation work. The road, engine vibration, and wind pressure show problems that a static check cannot find. Treat this ride as a check-up, not a fun trip.
Listening for New Rattles or Buzzing
Ride your Kawasaki on different road surfaces. Speed up through the gears and slow down smoothly. Listen for any new sounds from the bodywork. A rattle often means a loose fastener or a misaligned tab. A buzz at certain RPMs means a panel touches something it should not. Pull over safely when you hear an odd noise. Find the source before you keep riding. Fixing a small issue now stops a bigger problem later.
Re-Torquing Fasteners After Heat Cycle
Heat makes plastic and metal expand at different rates. Your fairings shift a little during the first ride. Fasteners that felt tight in your garage may now feel loose. Park your bike after the ride and let it cool fully. Check every bolt and screw again with your tools. Tighten any fastener that moved during the ride. Pay extra attention to mounting points near the engine and exhaust. This second pass keeps your fairings secure for thousands of miles.
Your careful check and recheck protect the money you put into quality fairings. Take these final steps seriously. Your Ninja will reward you with a perfect look and quiet ride every time.
Your good bodywork needs protection. Staying away from these kawasaki zx-10r fairing installation mistakes keeps your bike safe and looking good. Every mistake you avoid saves you money and stress.
Do |
Don't |
|---|---|
Use JIS screwdrivers |
Don't force tabs |
Dry fit all panels first |
Don't over-tighten bolts |
Follow the manual's sequence |
Don't skip the first-ride recheck |
This checklist helps you with your work. Being patient and using the right methods gives you a factory-like fit every time. Your kawasaki will thank you for your careful work.
Do you have questions about your installation? Tell us about your experience in the comments below. Good parts from NiceFairings start your project right. Look at custom fairings for a unique look that fits your skill.
FAQ
How long does a full fairing installation take?
Plan for four to six hours on your first attempt. This timeframe includes removal, dry fitting, and final assembly. Rushing this process causes the kawasaki zx-10r fairing installation mistakes covered earlier. Set aside a full afternoon without distractions. Your careful pace protects expensive panels from damage.
Do I need special tools for this job?
Yes. You need JIS screwdrivers, nylon trim tools, and a torque wrench. Standard Phillips drivers strip the JIS screws on your kawasaki. Quality tools cost less than replacing one damaged panel. Your service manual lists every tool and torque value you need.
Can I reuse my old bolts and clips?
Inspect each fastener before reusing it. Look for stripped threads, bent shafts, or worn clip tabs. Replace any damaged hardware with new parts from your kit. Old fasteners from a different model year may not fit correctly. When in doubt, buy fresh hardware.
What should I do if a panel does not line up?
Stop and check the surrounding panels first. A misaligned neighbor often causes the problem. Loosen nearby bolts and adjust the fit. Never force a tab or tighten a bolt to pull a panel into place. Forcing creates stress cracks that appear later.
How tight should fairing bolts feel?
Tighten each bolt until snug, then stop. Snug means the bolt sits firmly without extra effort. Your service manual gives exact torque values for each mounting point. Use a torque wrench for frame-mounted fasteners. Over-tightening causes stress whitening and cracks around bolt holes.
Why does my new fairing rattle at highway speeds?
A rattle usually means a loose fastener, a misplaced grommet, or a broken clip. Check every mounting point after your first ride. Confirm each rubber grommet sits fully in its recess. Replace any broken clips with new ones. Proper tension and placement stop most rattles.
Should I check anything after my first ride?
Yes. Let the bike cool completely, then recheck every fastener. Heat cycles loosen bolts that felt tight in your garage. Listen for new buzzes or rattles during the ride. Look for signs of heat damage near the exhaust. This recheck keeps your fairings secure.
Can I install fairings without reading the service manual?
You can, but you risk costly damage. The manual shows correct bolt sequences, torque values, and wiring routes for your model year. These details prevent the kawasaki zx-10r fairing installation mistakes that ruin panels. Spend thirty minutes reading before you start. That time saves you hours of repairs later.
See Also
Comparing Factory And Custom Fairings For 2024 Kawasaki ZX10R
Best Replacement Body Panels For Kawasaki ZX6R: A Review
Race Versus Street Fairings For Kawasaki ZX-6R: Which Wins?
Ultimate Guide To Choosing Custom Fairings For Ninja 400
How To Install Fairing Kits On Honda CBR500R: Step By Step
Related Fitment and Buying Resources
- Explore the related NiceFairings collection
- Plan a custom-painted fairing kit
- Use the motorcycle fairing pre-fit checklist
- Browse more Motorcycle Fairing Guides