
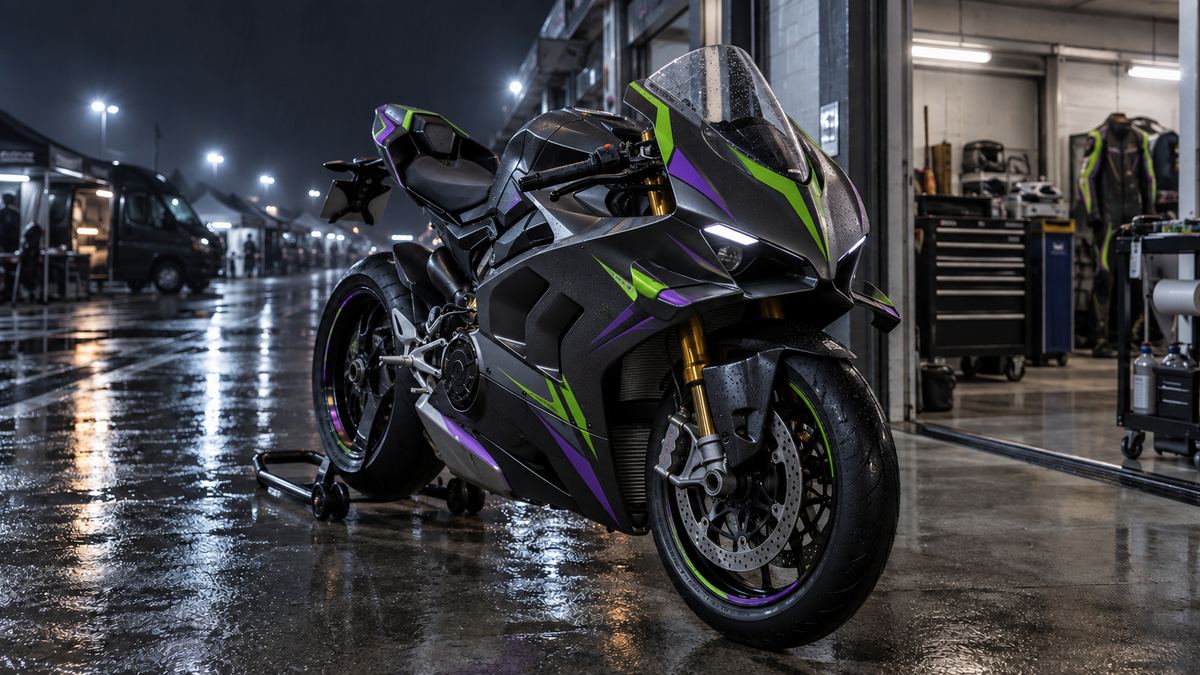
Cover disclosure: AI-generated editorial concept. It is not a NiceFairings product photograph, customer build, fitment reference, or proof of supplied parts.
An AI-generated superbike can be a strong starting point for a Ducati Panigale fairing project, but it is not a production file. The useful next step is to convert the mood, colors and visual rhythm of the render into a model-specific brief that a designer can review panel by panel. That means identifying the motorcycle first, deciding which visual elements matter most, and approving how every line behaves around real seams, openings and retained parts.
NiceFairings can review reference images for a custom enquiry, including AI concepts and sketches. A reference does not guarantee that every imagined vent, wing or illuminated detail can—or should—be reproduced. Start with the Ducati fairings collection, narrow the project to the correct model and year, and use the custom fairings enquiry to discuss the design and available scope.
Key takeaways
- Treat the AI image as inspiration, not as a dimensionally accurate view of the motorcycle.
- Confirm the exact model, model year, market and current bodywork before discussing paint.
- Separate paintable graphics from imagined changes to ducts, wings, lights or panel geometry.
- Approve the design from several views, because one dramatic render can hide the opposite side and lower panels.
- Confirm trademarks, character art and sponsor marks before requesting reproduction.
- Ask for the written product scope; an image is never a universal packing list.
What this guide adds beyond the existing AI overview
NiceFairings already has a general guide to creating custom motorcycle fairings with AI and a separate discussion of Panigale V4 bodywork versus OEM aerodynamic hardware. This article addresses the design handoff between those subjects: how to preserve a cyberpunk idea while removing visual assumptions that cannot be approved from a single render.
It does not claim that a generated motorcycle matches any particular V2 or V4 generation. It also does not treat a wing-like shape in an AI image as evidence that an aerodynamic component is included, compatible or functional.
Start with identity, not the prompt
Before refining colors, record the motorcycle's model, year and market. Photograph the bike from the front, rear and both sides, then add closer views of the nose, tank transition, belly area and tail. If the current fairings are not original, include photographs of the present panel arrangement and any supplier information you have.
This prevents an attractive prompt from becoming the wrong brief. “Panigale in graphite with violet light trails” describes a look. It does not specify which panel outlines, headlight opening, mirror interface, inner pieces or retained parts the project actually has. Browse the Panigale V2 collection or Panigale V4 collection only after identifying the platform; do not select by red paint or a similar nose shape.
Deconstruct the render into three layers
The fastest way to make a complex image reviewable is to separate it into a base, a graphic system and accents.
1. Base finish
Choose one dominant base and describe its intended sheen. “Dark gray” can mean a neutral graphite, a warm charcoal or a blue-biased gunmetal. “Matte” can also describe very different levels of sheen. Provide a physical color reference where possible and ask the supplier how color approval is handled. Screens, room light and camera processing can all change the apparent result.
2. Graphic system
Identify the lines that give the AI concept its character. For a cyberpunk scheme, that might be two violet planes crossing the upper side panel, a green edge line that continues toward the belly, and a restrained repeat on the tail. Redraw these as intentional paths rather than copying every AI-generated highlight. A highlight belongs to lighting; a graphic belongs to the paint plan.
3. Small accents
Use high-chroma colors selectively. If every edge is fluorescent, the bike can lose its form from a distance. Reserve the brightest color for a few junctions that remain visible from the front three-quarter and side views. Ask the designer to show where an accent ends before an opening or seam rather than letting it disappear unpredictably inside a recess.
Audit the image for impossible instructions
AI renders often blend paint, reflections and geometry. Before sending a reference, mark each feature as “color,” “graphic,” “surface finish,” “real component” or “unresolved.” A luminous line may be ordinary paint plus a reflected light source. A deep black shape may be a vent that does not exist. A sharp projection may be an invented aerodynamic part. A transparent panel or floating trim cannot be converted into paint simply because it looks convincing in one view.
Create a clean note such as: “Preserve the diagonal violet-to-green relationship; ignore the invented side opening; do not add lighting; keep the production panel shape.” This is more useful than asking for an exact copy of the render.
Map graphics across real seams
A two-dimensional concept shows surfaces from one camera position. Actual fairings are read from several angles and are separated by joins, fasteners and openings. The graphic plan should therefore include at least a left view, right view, front view and a view of the laid-out pieces if the supplier provides one.
Check every major line at four points:
- where it begins;
- where it crosses a seam;
- where it passes near an opening or edge;
- where it terminates.
A line that appears continuous from the side may jump when the panels are viewed from above. A tip placed too close to a hole can look accidental after assembly. The goal is not mathematical continuity from every possible angle; it is a deliberate hierarchy in the views that matter most to the owner.
For a broader approval method, use the seven-check livery design review and the guide to graphics across seams and viewing angles.
Keep paint and aero decisions separate
Cyberpunk concepts frequently exaggerate winglets and ducts. Do not turn those shapes into an implied parts promise. Ask which painted panels are in the quoted kit, which factory or aftermarket pieces remain on the motorcycle, and whether any visible aero item is outside the fairing scope. If the motorcycle has nonstandard wings, exhaust parts, lighting or protection hardware, identify them before ordering.
The designer can coordinate color around an existing component without claiming to reproduce its engineering function. A violet edge on a retained wing and a violet line on a painted side panel can form one visual system, but their attachment and compatibility remain separate technical questions.
Build a production-ready enquiry
| Stage | What the rider provides | What needs confirmation |
|---|---|---|
| 1. Concept upload | AI render, sketch or mood board; exact bike details | Whether the platform and requested scope are supported |
| 2. Design translation | Priority colors, required motifs, prohibited elements | How graphics map to the actual panel boundaries |
| 3. Proof review | Consolidated comments on each supplied view | Color direction, logo rights, left/right consistency and retained parts |
| 4. Production and QC | Approved proof and written order scope | Current production estimate, supplied pieces and finished-photo process |
| 5. Delivery planning | Shipping information and installation plan | Inspection procedure and who will perform installation |
Do not approve a proof with scattered messages such as “make it greener” and “use the first purple.” Consolidate feedback into one revision list. Assign every comment to a view or panel and state what should remain unchanged. This reduces the chance that solving one request accidentally changes another approved feature.
Review color without pretending a screen is a paint chip
AI tools and social platforms can alter saturation and contrast. Save the original reference, but also provide plain-language priorities: for example, “neutral graphite, not blue-black; violet should remain darker than the green; accents should occupy less than one quarter of the visible side area.” If a particular physical color matters, photograph a real reference under neutral light and discuss the supplier's approval options.
Ask whether requested finishes can be combined on the same project and how transitions are handled. Do not assume that a generated matte body with mirror-gloss graphics can be reproduced exactly. The supplier must confirm its available materials and process for the quoted order.
Plan the unboxing before ordering
The design brief should include practical acceptance checks. On arrival, inventory the pieces against the written scope, inspect finish and edges under diffuse light, and photograph any shipping concern before installation. Keep protective materials until the initial inspection is complete. Do not use fasteners to pull a panel into position; verify the motorcycle, retained parts and assembly sequence if an interface does not sit naturally.
NiceFairings' finished-photo checklist explains what buyers can look for in supplied images. The pre-fit checklist covers a separate stage after delivery.
A practical concept-reduction exercise
Imagine the reference shows a graphite bike with glowing green ducts, violet side planes, transparent wing edges and tiny symbols scattered across the belly. Do not send all of those features forward with equal priority. Make three columns: essential, adaptable and discard.
The essential column might contain the graphite-to-violet relationship and one green diagonal. The adaptable column might contain the symbols, because they can be replaced by original geometric marks and scaled for the actual panels. The discard column should contain transparent structures, invented lighting and any physical opening that does not exist on the documented bike.
Now create two acceptance tests. At five metres, the motorcycle should read as graphite first, violet second and green third. At arm's length, the panel transitions should look intentional and no small mark should collide with a hole or edge. Those tests give the designer a hierarchy without dictating an unverified production method.
This exercise also makes compromise easier. If one line must move to clear a seam, the rider knows whether that change preserves the core idea. Without a hierarchy, every pixel feels mandatory and the project stalls over details that were generated accidentally.
Record unknowns instead of hiding them
Create an “open questions” box beside the proof. Include the exact color-reference method, treatment of retained black parts, whether a requested accent can be applied inside a recess, and the status of any wing or trim item visible in the reference. Assign each question to the rider, supplier or installer.
An unresolved item should remain visibly unresolved until the responsible party answers it. Removing the note from a design proof does not solve the underlying scope question. This is especially important when a glamorous AI image creates the impression of a complete machine while the actual order concerns painted bodywork only.
FAQ
Can NiceFairings copy my AI Panigale image exactly?
Treat the image as a reference for review. Exact reproduction may be limited by real panel geometry, available processes, image quality, intellectual-property rights and the confirmed order scope. Ask for a model-specific proof rather than an unqualified one-to-one promise.
Can the design add vents or winglets shown by the generator?
Paint cannot create physical geometry. Any real component change requires separate identification, compatibility and safety review. Keep it out of the paint approval unless the supplied scope explicitly includes it.
Are neon-looking lines actually illuminated?
Not unless a separate lighting system is specified and appropriately assessed. In a fairing design they are normally color accents. The cover image for this draft is a concept, and its reflected lighting is not a product feature.
How many pieces are included?
There is no universal answer. Confirm the exact listing and written quotation. Do not infer contents from a render, a completed motorcycle or another model's product page.
What should I send first?
Send the exact motorcycle details, current-bike photographs, the unedited concept image, a short list of must-keep features, and notes about modifications. Then ask the NiceFairings custom team what additional evidence is needed.
Before you submit the brief
Put the exact motorcycle details, current-bike photographs, original concept, annotated priority list and modification notes in one folder. Name the final reference clearly so an earlier render cannot be mistaken for the approved direction. Keep unresolved hardware, aero and kit-content questions separate from the color comments.
Read the brief once without looking at the AI image. Another person should still be able to identify the base color, main graphic path, accent hierarchy, prohibited elements and required proof views. If the instructions depend on guessing what a dramatic reflection means, annotate them again. The useful outcome is a reviewable design direction—not a claim that every pixel, imagined part or lighting effect can be reproduced without qualification.



