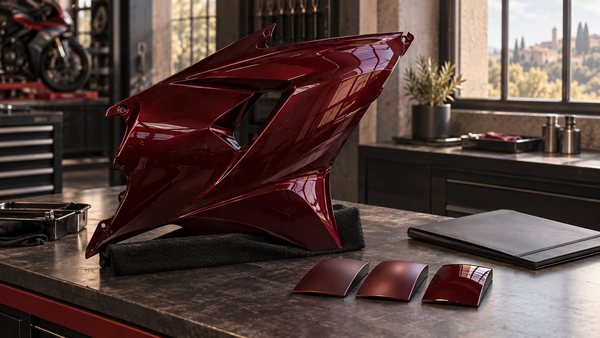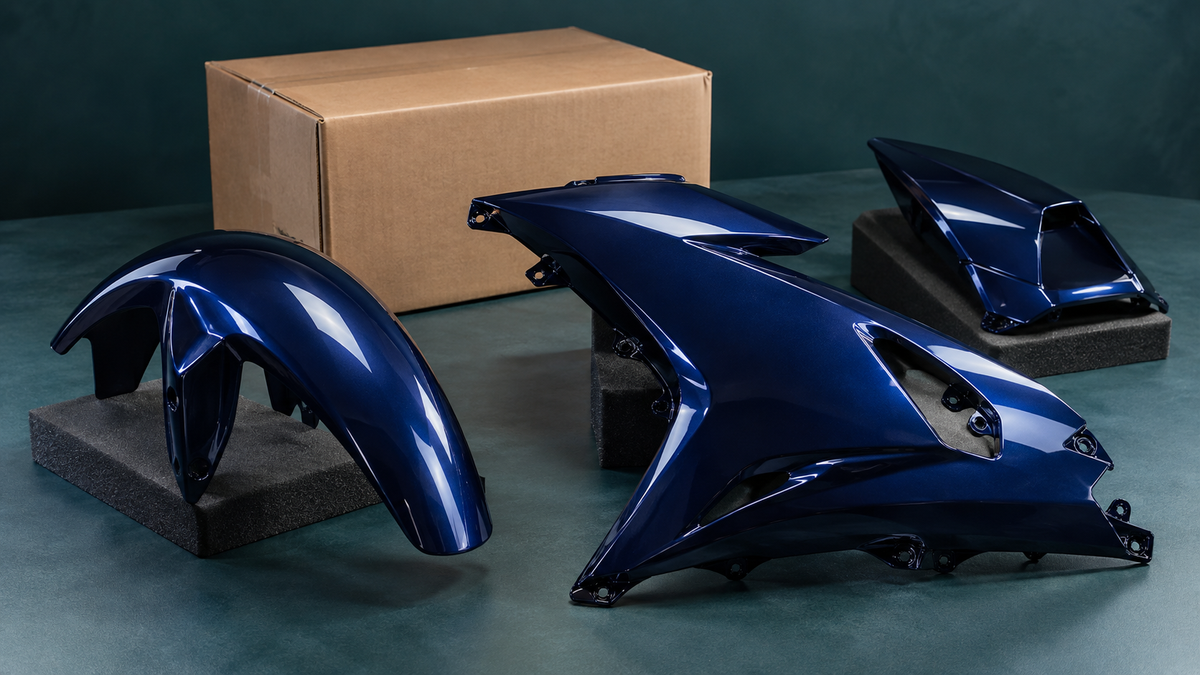
What comes in your motorcycle fairing kit depends on the exact listing you buy. Outer panels are bodywork. A windscreen, hardware, heat shields, and instructions are separate items to check, not promised inclusions. You are checking a specific order, not reading a general history.
Use this guide to check your motorcycle fairings before you pay. You get a panel-by-panel breakdown, a motorcycle fairing kit contents checklist, and a verification worksheet you can copy. Every rider should confirm each piece.
Check the box. Check the listing. Check the fit. Then install with confidence.
Key Takeaways
-
Look at your fairing kit listing for each item. Windscreens, bolts, and heat shields are not always included.
-
Use bright light and clean gloves to check every panel for cracks, warps, and missing tabs.
-
Make a worksheet checklist to write down the parts you expect and the parts you get before you install anything.
-
Ask the seller for details on tab counts, material, and the hardware that comes with it, and make sure you get their answers in writing.
-
Check the supplied parts against the order before installation and follow the actual seller procedures for reporting a discrepancy.
-
Check the left and right panel differences, since each side has special cutouts to fit properly.
-
If your package arrives damaged, document it and report it promptly using the seller and carrier procedures. Do not assume a universal reporting deadline.
-
Use the guide to check that the parts fit and fix any frame damage before you put on new panels.
Motorcycle Fairing Kit Contents Checklist: The Upfront Answer
A motorcycle fairing kit might come with a windscreen, a bolt or fastener kit, heat-shield material, and instructions for installing it. These items depend on the exact listing you buy. Do not assume they are included as standard. A complete fairing kit is not a one-size-fits-all package. You must check each piece against what the seller says.
This is a NiceFairings editorial guide. It is not a promise about every kit. Contents and names are different for each model and listing. Never trust a universal piece count. A high price does not mean more items are included. A low price does not mean fewer. Check the exact listing for your motorcycle.
What Counts As Fairing And What Does Not
Motorcycle fairings are exterior bodywork panels shaped around parts of the motorcycle. For this inventory, distinguish the painted outer panels from lights, ducts, inner trim, supports and hardware. Bodywork should not be described as crash protection or a guarantee of rider safety.
Outer panels are the main painted bodywork. Small inner trim pieces are sold on their own. They may or may not be in the kit. Fuel tank, tank cover, and seat cowl are each different items. A tank cover is not the fuel tank itself. A seat cowl is not the seat. Check each name with care.
Outer Panels Versus Small Inner Trim
Outer panels make up the shell you can see. They include the nose, side panels, and lower cowls. Small inner trim fills gaps and covers joints. These pieces are often sold on their own. Do not assume they are in the box.
Fuel Tank, Tank Cover, And Seat Cowl
A fuel tank holds fuel. A tank cover is a decorative shell that sits over it. A seat cowl takes the place of the passenger seat for a solo look. These are not the same as the tank or seat. Check which ones the listing includes.

Why "Complete" Varies By Seller And Model
Kit contents are not the same for everyone. They differ by seller and by motorcycle model. One seller may include a windscreen. Another may not. One model may need a different set of panels. You must open the product page for your exact bike. Compare the fitment range and kit contents across brands. Do not trust general "best" claims.
Listing Photos Versus Actual Box
Listing photos show one example. The actual box may be different. A photo may show a windscreen that is not included. It may show hardware that is sold on its own. Treat photos as a guide, not a promise. Read the text description with care.
OEM Alignment On A Damaged Motorcycle
Even a correctly specified replacement panel may not align when its supporting parts are damaged or modified. Have suspected frame or bracket damage assessed by a qualified technician; ordering fresh cosmetic bodywork is not a diagnosis or repair of that damage.
Why You Must Verify Every Piece Yourself
You are the last inspector. The seller may ship a kit that is not complete. The box may arrive with items missing. You must check every piece before you install anything.
Common Omissions In Shipped Kits
Bolts, grommets, heat shielding, windscreens and instructions are items to check explicitly. An item excluded by the listing is different from an included item missing from delivery. Record which situation applies rather than treating every accessory as a promised inclusion.
Risks Of Installing Before Checking
Checking first helps identify missing items or visible damage before further handling makes the situation harder to document. Follow the actual return and reporting terms; this guide does not determine your legal rights or create a universal claim deadline.
|
Component |
Details |
|---|---|
|
Body panels |
Main painted panels for the specific model |
|
Windscreen |
May be included; confirm tint and fit |
|
Bolt kit |
Fasteners for mounting |
|
Heat shield |
Heat protection material |
|
Installation instructions |
Guidance for assembly |
Panel-By-Panel Breakdown Of A Motorcycle Fairing Kit
Every panel has a specific place in the bodywork assembly. The following names help you identify what is being offered, but they do not create a universal parts list. Confirm material and manufacturing details in the particular listing rather than assuming every aftermarket panel is made the same way.

Nose And Upper Fairing Panel
The nose or upper fairing is the front bodywork section. On a road-going sportbike it commonly surrounds the lighting area and meets the windscreen, but the exact assembly depends on the model and kit. Identify whether lights, inner trim and supports are included or retained.
What It Covers And Mounts To
For an example of separate panels and hardware, see the Kawasaki cowling-lowers diagram for the 2016 ZX-10R ABS. It is not a universal kit contents list. Use the correct parts diagram to identify the upper-cowl supports and attachments for your motorcycle. Compare the supplied panel with that application, including its inner mounting areas. A raw tab count alone does not prove fitment, and the required support arrangement must not be generalized from another model.
Cracks, Warps, And Mounting Tabs
Inspect every edge and mounting tab under bright light. Look for hairline cracks as thin dark lines. Support each tab with one hand while you examine the junction between tab and panel body. Do not bend or force any part. Keep your inspection visual only. Photograph any suspicious lines and contact the seller before you proceed.
Support the panel on clean padding and view its contours from several angles. Compare suspected distortion with the correct product reference. Do not press the panel flat. A curved panel is not expected to lie flat. Note that left and right fairings may intentionally differ. Compare with side-specific references.
Side Panels And Mid Cowls
Side panels and mid cowls form the visible bodywork along the sides of the motorcycle. They may include vents or meet separate inner trim. Identify each piece by its position and the seller’s name rather than treating every painted side piece as the same component.
Left And Right Fitment Differences
Left and right panels are not interchangeable. Each side has unique cutouts for the kickstand, exhaust routing, and frame geometry. Check the fitment notes in your listing for side-specific part numbers. A left panel will not mount on the right side. Verify each side separately before you install anything.
Tab Count And Edge Alignment
Record the mounting features on each side panel and compare them with the correct product references. Check for damaged holes or tabs and note how adjacent panels are intended to meet. An uneven seam does not by itself prove a warped panel or bent frame; investigate the application, hardware and assembly with the supplier or technician.
Lower Fairing, Belly Pan, And Tail Section
The lower fairing or belly-pan assembly sits below the main side bodywork on relevant models. It is cosmetic bodywork, not a substitute for impact protection. The tail bodywork covers parts of the rear assembly and meets the seat or seat-cowl area. Check the listing’s names and scope for each.
Belly Pan Clearance And Exhaust Routing
The lower panel must have the clearances and heat protection required by the correct model and product instructions. Do not place it against the exhaust, omit specified insulation or fabricate brackets to address an unexplained fit issue. Have any uncertain clearance or modified exhaust configuration checked by a qualified technician.
Inspect accessible lower-panel attachment areas for damage and record concerns. Do not infer a service life or the cause of a crack solely from its position.
Tail Panel Seams And Seat Interface
The tail section must meet the seat, fuel-tank area, undertray, and adjacent side panels cleanly. Do not assume that a tail section will fit because its length looks similar in a marketplace photo. Confirm the exact year group and compare the underside tabs and bolt locations.
Follow these steps when you check the tail:
-
While handling the tail section, protect the tank and seat area from scratches or damage.
-
Before closing the tail assembly, inspect the routing of the tail lamp wiring and connectors.
-
After installation, verify that the seat, latch, and nearby moving parts function normally and do not scrape against the newly finished tail panel.
-
When aligning the tail pieces, gently engage locating tabs and watch the seam where the tail meets the seat and tank area.
-
If the tail sits unevenly, recheck the rubber mounts and inner trim position rather than forcing fasteners, as painted ABS can crack around stressed holes.
A complete panel-by-panel inventory protects your investment. Check every piece before you bolt anything down.
Windscreen, Hardware, And Instructions In The Box
Your motorcycle fairing kit may or may not include a windscreen, bolt kit, heat shield, and instructions. Each item depends on the exact listing you buy. Treat every accessory as a separate task to verify. Do not assume any piece is included until you confirm it against the seller's description.
Windscreen Inspection
A windscreen may come with your kit or be a separate order. Confirm the listing, tint and stated application. Inspect the delivered screen promptly when practical, following the actual seller and carrier procedure rather than assuming a full unboxing is possible before delivery acceptance.
Scratches, Crazing, And Correct Shape
Inspect the supported windscreen under suitable light for scratches, cracking or other damage. Photograph concerns and ask the supplier to assess them. Compare the intended application and mounting arrangement; a similarly curved screen is not proof of compatibility, and not every surface mark has the same consequence.
Mounting Hole Alignment
Line up the mounting holes with the upper fairing. Every hole must align without force. If the holes sit off-center, the windscreen will not seat properly. Do not drill or enlarge any hole to make it fit. Contact the seller instead.

Bolt Kit And Mounting Hardware
A bolt kit may come in the box, or you may need to find hardware on your own. Check the listing for details. If hardware is included, verify it before installation.
Grade, Quantity, And Thread Match
Take a full inventory of the hardware set. Sort every fastener into groups: reuse OEM, included in kit, separately needed. Record quantities by fairing location, such as left upper panel, front nose, or tail section. Do not assume a single total covers every mounting point. Hardware types vary by model and location. Ask the supplier for a specification sheet with dimensions, materials, quantities, and intended locations. Match part numbers against the manufacturer's installation guide or service manual.
Confirm grade-related attributes: material, property class, coating, and dimensions. Check receptacle and clip compatibility as part of the complete assembly. For more detail on fastener selection, see the NiceFairings guide on motorcycle fairing fasteners.
Stainless Versus Coated Hardware
Do not choose replacement hardware by shine, color or a generic stainless-versus-coated preference. Match the specified dimensions, material, grade, coating and complete assembly for the mounting location. Ask the supplier when the specification is unclear; neither a finish description nor a low price establishes suitability.
Heat Shield, Trim, And Instructions
Heat shield material, edge trim, and instructions may or may not ship with your kit. Verify each item against the listing.
Fitment Around Exhaust And Engine
Ask which heat-protection pieces are supplied and which original items must be retained. Use the specified type, placement and clearances for the actual motorcycle and panels. Do not guess coverage from a photograph or assume any supplied sheet can be placed anywhere near the exhaust.
Grommets, Clips, And Edge Trim
Count the grommets, clips, and edge trim pieces. These small parts protect your motorcycle fairings from vibration and wear. Missing pieces cause rattles and stress cracks over time. Keep any installation documentation for future maintenance reference.
Fairing Kit Contents Checklist And Verification Worksheet
A worksheet makes the purchasing scope explicit. Before payment, use it to distinguish what is included, what you intend to reuse after checking its condition, what must be bought separately and what remains unknown. After delivery, reconcile the received items with that same record; the separate delivery-inspection guide covers detailed arrival checks.

How To Use The Checklist
A checklist works only when you use it at the right moments. You need two passes: one before purchase and one on arrival. Each pass has a different job.
Print Or Copy Before You Buy
Copy the table below and identify each component needed for your particular motorcycle. Record the exact listing description, quantity and proposed source. If a detail cannot be established, write “Unknown—ask seller” rather than assuming a standard piece count.
Before you buy, open the product listing on your screen. Read every line of the description. Note each item the seller claims to include. Write those claims in the expected quantity column. This step creates your pre-purchase checklist. You now have a written record of what the seller promises.
Mark Included, Reuse, Separate Purchase, Or Unknown
For the pre-purchase pass, mark the proposed source of each item: included, reuse pending condition check, buy separately, or unknown. A reused item is not approved merely because it is still on the motorcycle; confirm its application and condition.
For the arrival pass, record what was received and document discrepancies separately. A later supported trial fit is a different check and must follow the appropriate instructions. Do not mark a part suitable for service solely because it was present in the box.
Inventory Table With Prompt Columns
Use these prompts as a working document. Replace each prompt with a confirmed answer or an explicit unresolved question. The table is not a claim that every listed item is supplied in every kit.
|
Component |
Quantity |
Proposed source |
Question to resolve |
|---|---|---|---|
|
Upper cowl |
Check exact listing |
Included / reuse / separate / unknown |
Lights and supports included or retained? |
|
Left and right side panels |
Check exact listing |
Included / reuse / separate / unknown |
Exact names and quantities for each side? |
|
Lower panels / belly pan |
Check exact listing |
Included / reuse / separate / unknown |
Correct exhaust configuration and required protection? |
|
Tail bodywork / seat cowl |
Check exact listing |
Included / reuse / separate / unknown |
Seat, undertray and brackets supplied or retained? |
|
Front fender / tank cover |
Check exact listing |
Included / reuse / separate / unknown |
Included in this particular order? |
|
Windscreen |
Check exact listing |
Included / reuse / separate / unknown |
Correct application and mounting hardware? |
|
Fasteners, grommets and clips |
Check exact listing |
Included / reuse / separate / unknown |
Specification and quantity by location? |
|
Heat protection / trim |
Check exact listing |
Included / reuse / separate / unknown |
Correct type, placement and source? |
|
Instructions |
Check exact listing |
Included / reuse / separate / unknown |
Product and motorcycle reference available? |
Component Name And Expected Quantity
Write the exact name from the listing. Use the seller's words. If the listing says "left mid cowl," write that. Do not shorten it to "left panel." The expected quantity comes from the listing. If the listing does not state a quantity, write "Unknown" and ask the seller.
Condition Notes And Missing Item Flag
Use the notes column to identify missing information before purchase and any observed delivery discrepancy later. Record the exact component and issue. Keep part references and photographs together so the seller can understand the question without guessing.
Reconciling The Worksheet With The Listing
Your worksheet is only useful when you compare it to the source. The listing, the photos, and the seller's answers must agree. When they do not, you have a discrepancy to resolve.
Compare Photos, Description, And Seller Answers
Open your order confirmation or the product listing. Compare the part numbers and descriptions against the parts you received. Verify that the fairings match your motorcycle's year and model as stated in the listing. Check the received labels against the ordered variant.
Count every major piece against the listing. Count main fairings, inner panels, windscreen, and vent components. Label left and right panels from the rider's perspective. Place labels on the protective wrapping, not the finish.
Check the hardware. Confirm whether bolts, clips, and grommets should be included per your order details. Lay them out and count each type against the parts list. Set aside and photograph any non-standard or extra hardware that does not match the expected components.
Document Discrepancies Before Payment
Before payment, document conflicts between the listing, photos and supplier replies. After delivery, record discrepancies between that confirmed order and the parts received. Keep photographs and packaging information as appropriate, following the actual seller and carrier instructions.
Use a simple structure for each problem: "I found [Issue] on the [Part Name]. See attached photo." Include your order number in the subject line. State your name and delivery date. Keep your tone polite and factual. Ask specific questions about replacement parts and estimated replacement time. Keep all messages in one email thread.
Keep the listing, confirmation, correspondence and your worksheet together. They provide a useful order record. This guide does not determine which documents are legally binding or promise a particular claim outcome.
This guide gives you a repeatable process. Use the motorcycle fairing kit contents checklist before you buy. Use it again on arrival. Ask direct questions about tabs, cracks, and included hardware. Check the box, check the listing, check the fit. Then install with confidence.
What To Ask The Seller Before You Buy
You have the power before you pay. Ask clear questions about panel completeness, material, and fitment. A seller who answers clearly earns your trust. A seller who avoids details gives you a reason to wait. Use this guide to build your question list.
Questions About Panel Completeness
Start with the basics. Ask what motorcycle type this fairing kit is for. Confirm the intended riding purpose. These answers shape what you expect from the kit.
Tab Count And Crack Disclosure
Ask the seller to count the mounting tabs on each panel. Request close-up photos of every tab. Ask directly: "Are there any cracks, stress marks, or repaired areas?" A vague answer signals risk. A clear answer with photos builds confidence.
Hardware And Heat Shields Included
Never assume the box contains a windscreen, bolt kit, or heat shield material. Ask: "Does this kit include mounting hardware, a windscreen, and heat shield material?" Get the answer in writing. Check the listing text against the reply. For more help, see the NiceFairings FAQ and the exact product listing.
Questions About Fitment And Material
Material choice affects weight, durability, and repair options. Ask what the panels are made from. Request the molding method.
ABS Plastic Versus Fiberglass
|
Question |
ABS panel |
Fiberglass-composite panel |
|---|---|---|
|
What is it? |
A thermoplastic panel; confirm the actual material specification. |
A fiber-and-resin composite; confirm the actual construction. |
|
What should you verify? |
Application, mounting details, finish and included pieces. |
Application, mounting details, finish and included pieces. |
|
Can appearance prove quality? |
No; ask for product-specific information. |
No; ask for product-specific information. |
ABS plastic and fiberglass composites have different material characteristics, but weight, flexibility and durability depend on the actual construction. Do not use a universal lighter-or-stronger ranking. Confirm the material, intended application and any repair guidance for the exact panel.
Model Year And Trim Compatibility
Ask: "Does this kit match my exact make, model, and year?" Even a one-year difference can change fairing compatibility. Confirm the kit fits your specific motorcycle. Note that OEM parts do not guarantee alignment on a damaged motorcycle. Check your frame and mounting points first.
Questions About Returns And Shipping Damage
Ask about the claim window before you buy. Know the deadline for reporting damage.
Document Arrival Under The Actual Delivery Procedure
Inspect the box when it arrives. Look for crushed corners or punctured cardboard. Note any visible damage.
Photo Evidence And Claim Window
Report shipping damage as soon as possible after delivery. Provide your order number and photo or video evidence. The seller can then work with the carrier to resolve the issue. Ask about this window before purchase.
A useful fairing-kit order is one whose scope is understood before purchase. Identify the body panels, confirm accessories individually, and separate included items from reused or separately sourced parts. Save the listing and supplier answers, then reconcile the delivery with that record. A “complete” label is not a substitute for a model-specific list or a correctly performed fitment check.
FAQ
What does a fairing kit include?
What you get in the kit depends on the exact listing you buy. Outer panels are the bodywork. A windscreen, hardware, or heat shields are not always included. Check your listing before you pay.
How do I check the kit on arrival?
Inspect the delivered panels under suitable light, compare the contents with the order and photograph visible concerns promptly. Follow the actual carrier and seller procedures; do not assume every delivery can be fully unpacked before signing.
Can I install the kit on a damaged frame?
Do not use new fairings to work around suspected frame or supporting-part damage. Have a qualified technician assess the motorcycle first and resolve the underlying issue before cosmetic installation.
What material are aftermarket fairings?
Check the material stated in the exact listing. Do not infer it from price, appearance or a general description of aftermarket fairings. Material alone does not establish fitment or construction quality.
What if a panel does not fit?
Stop right away. Do not force, heat, or drill the panel. Check your motorcycle alignment again. Contact the seller with photos and your order number.
How do I verify the kit matches the listing?
Match part numbers, panel counts, and colors to what the listing says. Look at the photos closely. Write down any differences before you pay.