
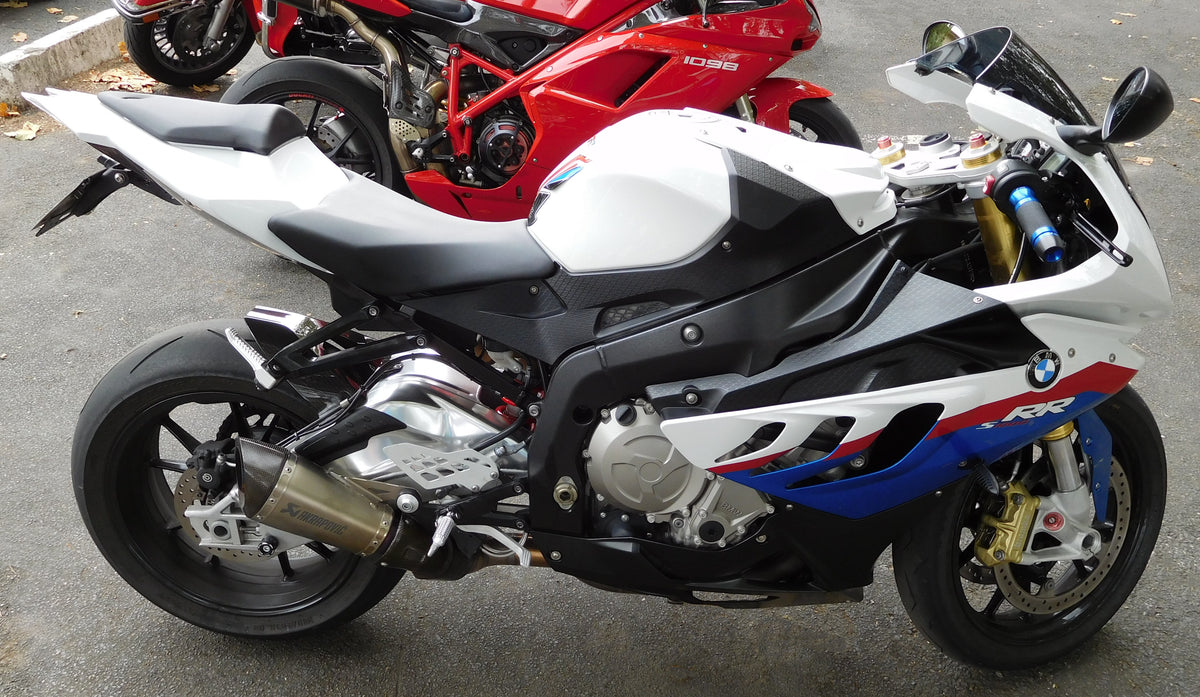
A 2015–2018 BMW S1000RR can look familiar enough that a buyer orders from a color photograph and discovers later that the motorcycle, replacement set and parts retained on the bike were not described in the same way. The solution is not an alleged universal fit percentage. It is a small, explicit order packet: exact model year and market; genuine left and right photographs; a list of panels to replace and pieces to retain; a record of modifications and damage behind the skin; and written confirmation of the selected listing's contents. Do that before choosing a livery or paying for a kit.
BMW's official 2015 launch material identifies the split face with asymmetric headlights, gill-type air outlets on the right, and a redesigned cooling-air outlet on the left. That gives us a trustworthy visual starting point, not proof that all 2015–2018 panels interchange or that any particular aftermarket kit fits an altered motorcycle. The existing 2017–2018 left/right identification guide teaches how to name loose pieces. This guide has a different purpose: assembling the evidence a seller needs before an order, including uncertain retained hardware and variant details. If you already have loose parts on the floor, use both guides rather than treating a photograph as a parts catalog.
First identify the motorcycle, not the paint scheme
Record the VIN privately, the documented model year, the registration market, and any known variant or bodywork conversion. Do not send a full VIN in a public comment; give it to the seller or an authorized dealer through an appropriate private channel if needed. Registration year is not necessarily model year, and a previous owner may have repainted the bike or installed panels from another source. A visual “2018-looking” fairing does not settle the bike's underlying application.
Make one front photograph with the steering centered, a genuine full left view and full right view, and a rear three-quarter photograph. Stand far enough back to include the entire motorcycle; add close-ups later. Use even outdoor light where possible. If one side is damaged, show the damaged region and the corresponding intact surrounding structure. The camera should not crop the point at which one panel meets the next. Save original image files so the supplier can zoom into openings and fasteners. Add a note stating whether each photo shows the bike before or after a repair.
Then mark every image using vehicle left and vehicle right from the seated rider's viewpoint. A front-facing image reverses those sides on the screen. A mirrored photo is especially harmful here: it changes the apparent headlight shape and gill orientation. Never mirror a product shot to represent the other side. If a listing only shows one profile, ask for the actual opposite-side photograph.
Treat the asymmetry as an identification feature
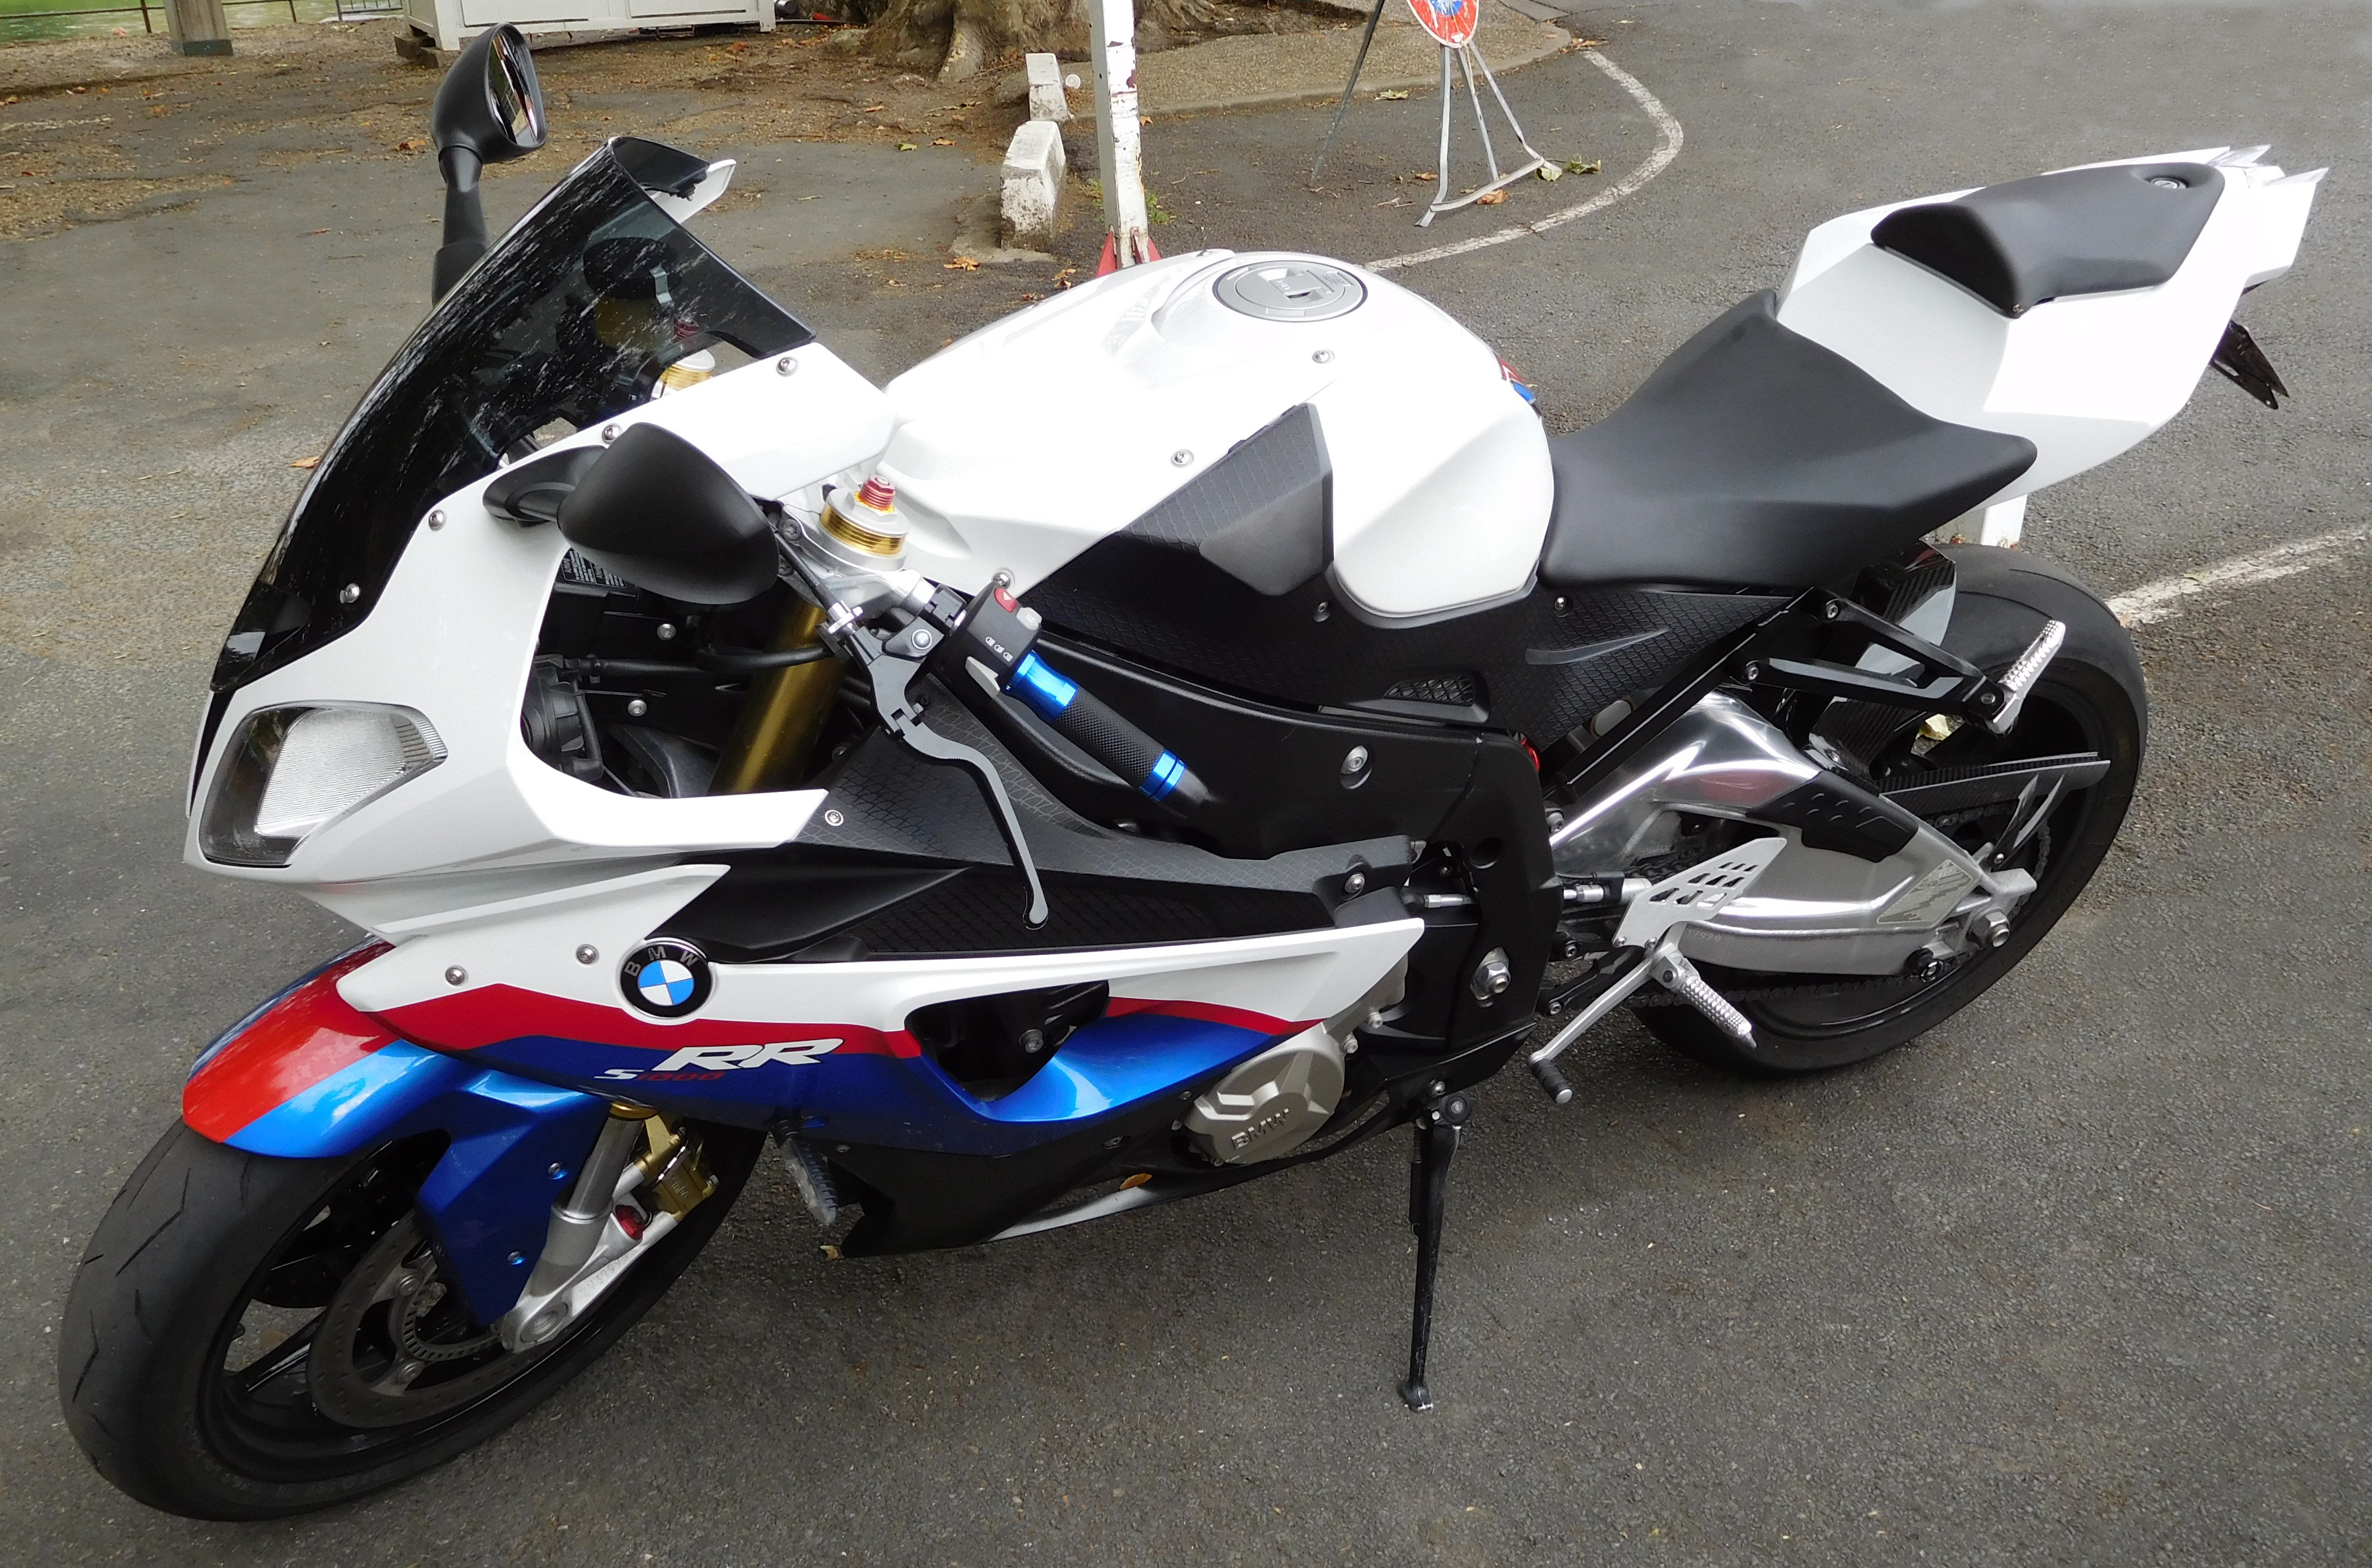
The 2015 BMW press description is unusually useful because it names both sides: right-side gills and a left-side cooling-air outlet, with asymmetric headlights at the front. The cover photograph shows the vehicle-right side of one real S1000RR photographed in 2016; the photograph immediately above shows the vehicle-left side of the same motorcycle. These are documentary visual references, not NiceFairings products, installation tests or proof that parts interchange between 2015 and 2018. Those are diagnostic shapes. They are not a license to assume equal duct dimensions, a particular count of loose pieces or shared fit across every later year. Compare the motorcycle's actual openings with the listing's actual left, right and nose photographs.
The nose deserves its own record. Photograph each headlight opening square-on and at an angle, including the surrounding cowl, screen edge, mirror base and turn-signal arrangement. If the front end has been repaired, an uneven gap may come from a displaced stay, not from the painted nose panel. Our mirror and upper-cowl alignment guide explains why bracket diagnosis comes before declaring the replacement plastic defective. Do not rely on a low-resolution image that hides the contact line between lamp and cowl.
For each side, identify the outer painted piece, black inner or duct trim, any mesh or insert, and the lower adjoining piece as separate questions. The right gill area can be visually prominent while its actual component boundaries remain hidden in a hero photo. The left outlet can be partially covered by a livery stripe. Ask for uninstalled photos that show the inner surface, tabs and attachment ears as well as the painted face. The seller should say which items ship and which factory parts must be transferred. “Complete kit” is not an itemized list.
Build a panel-status map, not a wish list
On a one-page contact sheet, place an actual motorcycle image next to each candidate product view. Use four status labels: replace, retain, inspect, and unknown. It is tempting to classify everything scratched as replace and everything hidden as retain. That misses the pieces that most often cause uncertainty: inner trims, windscreen mounting hardware, lamp-adjacent pieces, tank-edge covers and lower shields. The status map lets the supplier answer a precise question rather than an open-ended “will it fit?”
| Region | Photograph to supply | Question for the seller | Stop condition |
|---|---|---|---|
| Asymmetric nose | Centered front plus separate lamp-edge close-ups | Which cowl pieces and screen interface are supplied? | Only a mirrored or cropped product view exists |
| Vehicle-right gill area | Full side and inner surface of retained pieces | Are gill-adjacent inserts or ducts included or transferred? | Opening differs from the proposed part |
| Vehicle-left outlet | Full side, outlet edge and adjoining lower seam | What pieces form the outlet in this particular listing? | Seller cannot identify the actual left part |
| Lower fairing | Both sides, underside and exhaust-side gap | Are inner shields or nearby fittings reused? | Heat/contact issue or altered exhaust is unresolved |
| Tank and tail transition | Top, side and rear three-quarter views | Which visible trims are in the itemized set? | “Full kit” is the only contents description |
| Hidden supports | Bracket, stay and fastener close-ups | What must be sound and retained on the bike? | Bent, missing or unknown support remains |
This table is deliberately about evidence, not guaranteed installation order. A camera cannot measure every mounting point, and a seller photograph cannot establish tolerance. If a tab or boss on the current bike is broken, mark that fact before evaluating a new panel. A correctly specified replacement cannot repair a damaged stay by itself. The general pre-fit checklist is useful after delivery, but it cannot replace an accurate pre-order packet.
Separate the visible shell from the mounting system
Photograph the original outer and inner sides while the bodywork is still on the motorcycle, then again during any authorized removal. Label each fastener bag by location rather than putting all hardware into one cup. Photograph rubber mounts and spacers in place before they disappear under a workbench. Do not pry a reluctant tab merely because another panel seems to move freely; verify its attachment in the service information for the exact bike.
Look beyond painted plastic after a low-speed drop or track incident. Is the lamp or mirror support straight? Are a stay and mounting ear still present? Does a fastener spin without clamping? Is a lower panel touching the exhaust, a hose, or a moving part? A close-up of the scratch alone cannot answer those questions. If the motorcycle is modified or impact damage is structural, obtain competent inspection before treating a bodywork order as the repair plan.
This is also why “bolt-on” cannot be translated into a percentage. Different motorcycles have different prior repairs, retained mounts and accessory configurations. The seller can confirm the application and supplied pieces, while the owner or installer must check the actual motorcycle. If a listing claims a numerical alignment rate without explaining the test population and method, do not repeat it as a fact. The standard of evidence here is more modest and more useful: documented model identity, correct side-specific pieces and an agreed list of retained parts.
Document every modification that can change the answer
An aftermarket exhaust, frame sliders, radiator guard, custom signals, changed screen, different mirrors or a converted track front end may affect access, clearance or what the photos appear to show. Put those changes in the first message to the seller. Include a wide photo that locates each modification and a close-up where it meets the fairing. Our S1000RR exhaust-order checks go deeper on the heat/clearance question. This article does not prescribe a gap or heat barrier from afar; that depends on the specific hardware and instructions.
If the motorcycle is wearing race bodywork, ask whether you are ordering road-cut fairings, track shells or parts intended to work with the existing arrangement. A race photograph is not proof that a street lamp, mirror, plate holder or side stand can be retained. Likewise, a livery shown on a complete motorcycle may conceal which decals, painted panels or small parts actually arrive in the package. Save the exact listing title, model-year statement, option code, finish image and itemized set description in the order packet.
Decide the replacement scope with two separate questions
First ask what is physically damaged or absent. Second ask what finish you want. Combining these into “I want the full race look” can cause unnecessary replacement—or leave an unseen broken support unresolved. If one painted side is scratched and the rest is sound, a single-panel repair or replacement may be sensible, subject to availability and color match. If multiple panels are damaged, a coordinated set can simplify the visual result. Neither option is universally cheaper; request itemized quotes rather than assuming a dealer panel is always costlier than a complete aftermarket order. Our after-drop replacement-scope guide helps separate those decisions.
If the goal is to store original panels for track use, record their condition and packing location. Keeping the OEM set may provide a useful original reference later, but its resale effect cannot be promised. It also creates a storage and hardware-management job. A bag of mixed screws and an unlabelled left side can make a later return to road trim unexpectedly difficult. Treat the saved bodywork as an inventory, not merely a pile of spares.
Send a useful enquiry to NiceFairings
Start at the BMW S1000RR collection, then inspect the year-group listing, including the 2017–2018 collection if that is your documented application. Collection navigation helps find candidate products; it does not certify any individual bike, especially one with modified mounts or prior repairs. If the exact 2015–2016 offering or a single panel is unclear, ask through the contact page instead of selecting the nearest-looking year group.
An effective message can be concise: “My motorcycle is a [documented year and market] S1000RR. I have attached front, vehicle-left, vehicle-right and mounting-area photographs. These parts are damaged: [list]. These parts are modified or missing: [list]. I am considering [exact product URL and option]. Please confirm the intended year/market application, provide the actual left/right and inner-side images, itemize the pieces and state what original hardware and trims must be retained. Please identify any aspect you cannot confirm from these photos.”
That last sentence matters. It gives the seller permission to say “not established” rather than guessing. For a custom color scheme, use the custom-fairings enquiry only after the bodywork application and scope are clear. Ask whether the proposed graphic crosses a vent, removable insert or asymmetrical seam. A paint proof should include both real side views, not a duplicated and flipped profile. If you want a BMW-inspired or racing-inspired graphic, confirm artwork rights and the exact marks permitted; do not assume a product photograph grants a license to reproduce every logo.
Check the delivered parts without forcing an answer
When a parcel arrives, photograph the package, each item and any damage before discarding protection. Compare the delivered pieces to the written itemized list. Put left and right pieces in separate padded areas and confirm the nose openings against your contact sheet. Do not drill, cut or paint an uncertain piece merely to make it resemble the old one. Keep the seller's return and support terms in view before irreversible work.
Only after the list matches should the installer perform a careful dry fit according to the product guidance and the bike's service information. A fairing that will not sit naturally may indicate the wrong application, a missing spacer, a bent support or a mounting sequence issue. It is not automatically a defect in one panel. Photograph the mismatch with adjacent pieces and the support visible, then ask for help before adding stress to tabs or enlarging holes. Finally, check lamp operation and aim, steering movement, wiring, fasteners and clearances before riding. The headlight-aim guide covers a separate safety check that visual paint approval cannot replace.
The best order packet is small enough to send, specific enough to answer, and honest about what remains unknown. On an asymmetric S1000RR, that discipline is more valuable than another dramatic image of one side of the bike.
Source and scope note
- BMW Motorrad USA's 2015 S1000RR introduction supports the asymmetric headlight, right-gill and left-outlet design description. It is not a replacement-part compatibility catalog.
- NiceFairings links above are shopping and further-reading routes, not dimensional or installation test results.
Photograph credits and limits
The cover (vehicle-right) and in-article photograph (vehicle-left) are unaltered real photographs of the same motorcycle by Cjp24, licensed CC BY-SA 4.0. Both were taken in 2016. They illustrate orientation and visible form only; neither is evidence of a supplied kit, fitment or condition on a reader's motorcycle.





