
A 2018–2023 Kawasaki Ninja 400 can leave a track session with relatively little visible road-bike bodywork if it was running race panels. Returning it to the street is still not a matter of fastening painted shells until the gaps look even. The road configuration needs the correct lighting, mirrors, mounting supports, inner pieces and secure hardware for that specific motorcycle and jurisdiction. If the bike has crashed, first resolve mechanical or structural damage with a qualified professional. A fairing purchase cannot certify the machine is safe or road legal.
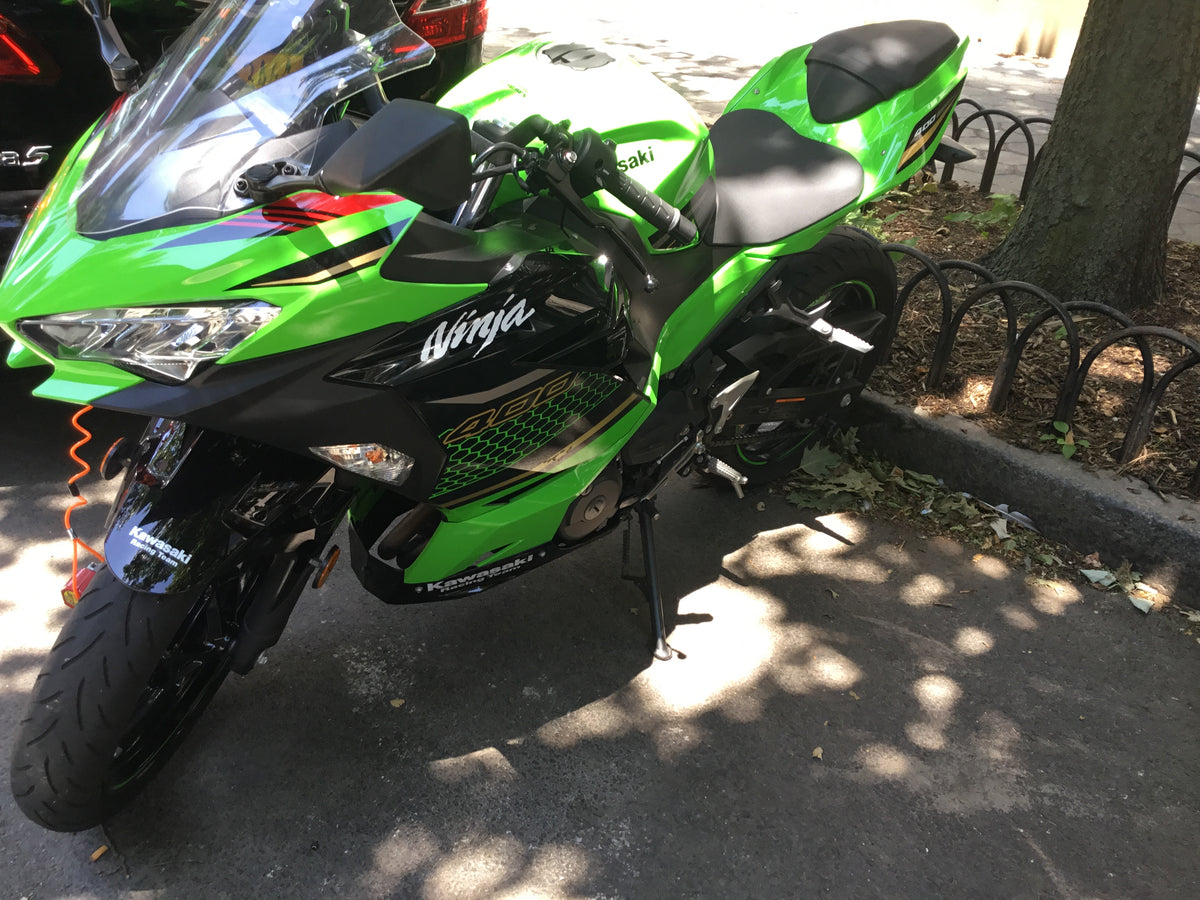
The cover is a real, undamaged Ninja 400 in street trim, used as a visual reference for road equipment; it is not a photograph of a crash, repair, or NiceFairings product.
This is a road-return inventory and decision guide for owners who are moving between track and street configurations or rebuilding after a lowside. It is deliberately distinct from our general Ninja 400 fairing buyer's guide, which compares kit selection and finishes, and our lower-fairing scrape inspection, which follows abrasion around the belly pan. Here the main question is: what must be present and verified before this particular machine goes back on public roads?
The year range is a scope for the discussion, not a universal kit-fit promise. Kawasaki's owner center distinguishes a 2023 Ninja 400 ABS and its relevant manual; its parts diagrams are model-specific. A track bike may have changed more than its external paint: a race stay, removed street electrical equipment, a modified tail or a non-stock exhaust can alter the restoration plan. Identify the exact year, market and variant before comparing parts.
Draw a boundary between the crash repair and the bodywork conversion
Start with the crash itself. Do not infer from “it was only a lowside” that the fork, wheel, brakes, frame, engine covers, controls or subframe are unaffected. A leak, unusual steering feel, damaged control, changed wheel position or loose support requires assessment before riding. A panel may hide a leak or rub point. If insurance, event reporting or a shop inspection is involved, preserve the photographs and findings before discarding broken parts.
Next separate three lists. Mechanical recovery covers the machine's working and structural systems and belongs with the relevant service professional. Street-equipment recovery covers the lights, indicators, mirrors, registration/plate equipment and other items required by the laws where the motorcycle will be used. Painted bodywork recovery covers the outer appearance and safe retention of the panels. These lists overlap at a mounting stay or wiring route, but solving one does not close the others. For instance, a new nose cowl cannot restore a missing signal harness; a working headlight does not prove its support or front fairing is secure.
Look up the road-equipment rules for your own location instead of treating a track-day handout or another region's advice as law. Track organizers likewise set their own entry and preparation requirements. This article states no universal tape, mirror-removal or fluid-containment rule. If you are preparing to return to the circuit after a street period, use the current event's requirements; our track-day light tape and mirror-removal article addresses that separate workflow.
Inventory what the track setup displaced
Before ordering a shell, lay out what was removed when the Ninja 400 became a track bike. A race front stay may not carry the original headlight, mirrors or indicator arrangement. A race upper may have no road-light opening. An aftermarket tail may omit plate support, rear lighting provisions or a street seat arrangement. Inner trim, ducts, pads, brackets, grommets, collars, fasteners and heat shields can sit in a separate box—or may have been sold with the old road bodywork. The absence of any one item can turn a promising painted-kit quote into a stalled project.
Make a simple four-column record: component; installed on the motorcycle; stored original; missing or damaged. Put left/right and upper/lower designations on each bag. Do not use “full street kit” as a substitute for this inventory. A supplier can confirm what a product includes, but cannot know what is currently missing from your garage. A product image may show the finished motorcycle yet exclude lights, screens, mirrors, supports, inner panels or fasteners. Ask for a written supplied-parts list that you can mark against your record.
The front group needs particular care because the cowling and equipment share a limited space. Kawasaki's 2023 Ninja 400 cowling diagram shows multiple cowling pieces and separate associated hardware. It is an example for its stated model code and year, not a parts list for every 2018–2023 bike or every aftermarket kit. Consult the correct diagram for your motorcycle when translating a callout into an actual part number. A bracket that appears small in an exploded view can determine where the headlight, cowl or mirror sits in reality.
| Decision area | What to establish on your bike | Evidence to keep before ordering |
|---|---|---|
| Crash and support condition | Has a professional ruled out damage where the bodywork or lights mount? | Inspection findings; straight-on and side photos of stays and attachment points. |
| Road equipment | Which lights, indicators, mirrors and plate equipment are required and currently present? | Local requirements; photos of equipment, connectors and mounting provisions. |
| Outer vs inner pieces | Which cowls, inner trims, ducts, shields, rubber parts and supports are usable? | Labeled inventory and the correct Kawasaki catalog references. |
| Street or race shell | Does the proposed shell have openings and supported interfaces for the intended equipment? | Written seller application and itemized contents, not a finish photo alone. |
| Hardware and finish | Can correct hardware be reused, and which painted surfaces will remain? | Fastener map, old-panel photos and color/graphic reference in daylight. |
The table is intentionally a gate rather than a shopping ranking. If the crash and support row is unresolved, the paint choice is premature.
Work from the front cowl outward
Once the motorcycle's condition is established, inspect the front stay and every piece that relies on it. Was the original stay stored, or did a race conversion replace it? Are the light, screen and mirror interfaces present and undamaged? Did an impact load the right or left mirror mount? Photograph the support without trying to make a new cowl “prove” it is straight. Compare the equipment to the correct parts information and the approved road configuration for your market. This is not an instruction to rewire a damaged harness; electrical work should follow the applicable service documentation.
Then map the outer panels to their adjoining inners. Trace each visible seam to the hardware and support behind it. A track shell may use different fasteners or edge relationships from the road set. A missing inner piece can leave a gap or expose an electrical connection even when the new painted side looks fine from a distance. The lower join is similarly more than a cosmetic line: note mounts, shielding, exhaust configuration and clearance. If an aftermarket exhaust changes the hot-part arrangement, photograph it and ask the supplier or installer how the proposed bodywork is intended to clear the actual exhaust. Do not infer heat resistance or fit from “ABS” in a product title.
The tail group needs its own check for the rear lamp, turn signals, plate mounting and wire routing. Avoid assuming that a race tail and a road tail share all support pieces simply because they resemble each other. Put the retained street equipment beside its original mounting hardware before starting a purchase enquiry. If a prior owner handed you several boxes, do not guess which collar, clip or screw belongs where based on appearance alone; verify through the relevant parts and service information. Unidentified hardware is a reason to slow down, not to fit the closest available fastener.
Write the supplier enquiry around the missing interfaces
Before using the NiceFairings Kawasaki fairings collection, check whether a current individual listing actually names your exact Ninja 400 application. The collection is a browsing route, not a fitment promise. If no suitable listing exists, do not order another Kawasaki model's panels as a substitute; seek the correct parts elsewhere or ask NiceFairings contact whether your specific project is possible. For any enquiry, give the exact model year and market, standard or ABS variant as applicable, and clear current photographs of the motorcycle from both sides and the front. Explain whether it presently has race bodywork, stock road panels or a mixture. List the parts you possess and the missing road interfaces. If it has a race stay, aftermarket tail or non-stock exhaust, state that explicitly. Ask whether the specific proposed listing is designed for the original road configuration and what must be transferred from OEM parts. A written confirmation for a specific listing matters more than a collection name.
Request the actual itemized panel list, photos of the inner faces or attachment areas where available, finish details, and written fitment for your model. Do not infer that a set includes a headlight, inner radiator trim, front stay, hardware or heat shield unless its listing says so. If your KRT-style or other graphic goal matters, provide both sides and the retained fuel-tank appearance through NiceFairings' custom design process. A green paint name alone will not specify the exact shade, graphic boundary or how it meets a tank that has spent years in sunlight. Brand marks shown on a reference photograph are not permission to reproduce someone else's artwork; confirm any custom logo rights separately.
Use NiceFairings contact for unresolved fitment and contents questions. Review current production and shipping information and FAQ before committing; do not infer price, stock, turnaround or replacement policy from an older blog post. The written response should leave you able to answer: “What is supplied, what do I provide, what equipment must be restored independently, and what remains unknown until a dry fit?”
Treat the dry fit as a discovery step, not a battle
After the mechanical inspection and after parts arrive, compare the shipped pieces with the promised list before modifying them. Photograph finish damage or missing hardware immediately. Check that each panel corresponds to the planned street equipment, then perform a supported dry fit using the service procedure for the exact motorcycle. Keep nearby connections adjustable long enough to observe the natural seams, but do not use bolt tension to drag a mislocated panel onto an unknown bracket. This is not a universal tightening sequence or torque recommendation. If an edge, opening or mounting hole seems wrong, stop and diagnose the bracket, rubber part, hidden trim and application before cutting a painted shell.
Check the steering throughout its movement in a controlled stationary setting, including the relationship between nose, screen, fork, bars, brake lines and any added accessories. Verify that all required lights and indicators function, their wiring is protected, and the mirror assemblies are secure. Confirm that panels are retained at intended points; no lower section approaches a moving part or hot exhaust; and any transferred protection is correctly located. Have a competent installer or inspector resolve uncertainty. A short careful test ride should happen only after the bike is mechanically sound and lawful to use, followed by a stop-and-check for fresh witness marks or loosening. No blog can certify roadworthiness from photographs.
When a new fairing set is the wrong purchase
If the motorcycle still carries race-only brackets and you intend to put it on the road, source and verify the road equipment first. If the support is damaged, get a repair decision before trying to align a new shell around it. If only one road panel was scratched and the rest of the original equipment is intact, a correctly identified replacement or a professional refinish may be narrower than a full set. If the motorcycle will remain track-only, street-light openings and road-equipment planning may not be priorities at all; use the actual event's requirements and a bodywork product intended for that use. “Track” styling in a paint listing is not race technical approval.
If you alternate regularly between the two configurations, consider how you will store the original road parts: padded, labeled by side, with fasteners and supports recorded separately. This is a preservation method, not a promise that every swap will be quick. Repeated conversion involves time, wear risk at clips and electrical connections, and repeated pre-ride checks. Decide whether the two-set workflow is realistic for your garage rather than assuming a new set makes conversion effortless. Our OEM-bodywork track-day plan examines that broader choice.
Frequently asked questions
Will a street fairing kit bring a track-prepared Ninja 400 back to road specification?
Not by itself. The kit may only contain painted exterior panels. Confirm the actual listing contents, correct supports, lighting, mirrors, wiring, inner pieces and local road requirements. A qualified inspection of crash damage is a separate obligation.
Can I reuse the race stay if the headlight seems to line up?
Do not assume so. Identify the stay, its intended equipment and condition against the appropriate Kawasaki information and the intended bodywork. A temporary visual alignment is not evidence that it safely carries road lights and mirrors.
Do 2018–2023 Ninja 400s share every fairing component?
The year label alone does not establish part-by-part interchangeability. Use your exact model code, market, OEM diagrams and the supplier's specific application statement. Modified track machines need an even more explicit review.
Do the original plastic fasteners come in a complete kit?
Only an itemized listing can answer that. Treat every clip, grommet, collar and screw as a separate inventory line. Replace damaged or unidentified pieces with appropriate parts rather than relying on a generic box of bolts.
Is a green or KRT-style set the easiest way to hide a lowside?
The finish does not settle the mechanical or street-equipment work. First diagnose the crash, identify all missing road interfaces and decide the repair scope. Then specify the color or graphics alongside photographs of retained painted surfaces.
The road-return standard
The convincing result is not a Ninja 400 that looks complete in a paddock photograph. It is a motorcycle whose crash damage has been assessed, whose road equipment is appropriate to its jurisdiction, whose supports and inners are accounted for, and whose fairings fit without hiding a fault. A precise parts inventory is the bridge between the track version you have and the street version you intend to ride. Only then does choosing a new livery become the enjoyable part of the project.
Cover photo credit
Real Kawasaki Ninja 400 photographed by Kidfly182 on Wikimedia Commons, CC BY-SA 4.0. Original photograph, not digitally altered for this article. The motorcycle pictured is not an example of crash damage or a supplied fairing kit.




