A blistered decal, browned inner surface or softened belly pan does not prove one universal cause. Heat can arrive by radiation from a nearby exhaust component, conduction through direct contact, hot airflow, a displaced shield, an incorrectly positioned bracket or a combination of factors. Replacing the visible lower panel before documenting the source may allow the same mark to appear again.
Keep the motorcycle off and fully cool before inspection. Exhaust systems and catalysts can remain dangerously hot after riding. Use the applicable service information and a qualified technician for removal, clearance, exhaust, shielding and roadworthiness decisions. This guide is a documentation workflow, not a temperature limit or installation specification.
Key takeaways
- Record the exact motorcycle, exhaust configuration and recent changes before blaming the plastic.
- Distinguish radiant heat, direct contact, trapped hot air and fluid contamination.
- Preserve factory shields, spacers, brackets and air paths unless correct documentation supports a change.
- Do not use or copy a universal millimetre clearance or temperature threshold.
- A material label alone cannot prove that a finished panel is safe for an unresolved hot zone.
- Inspect the first damage mark and its matching nearby component before ordering replacement bodywork.
Where this guide fits
The motorcycle fairing heat-damage guide provides a broad hot-zone framework. The belly-pan clearance guide after an exhaust change focuses on altered exhaust geometry, while the Yamaha R1/R6 exhaust-change inspection is platform-specific.
This guide adds an evidence chain for the lower panel: configuration record, mark classification, corresponding source, shield inventory and replacement decision. It avoids attributing every event to Euro 5 or Euro 5+ because emissions designation alone does not identify the exact temperature, layout or cause on a particular motorcycle.
Freeze the configuration before cleaning
Do not wipe away soot, polished contact marks, adhesive residue or discoloration until they are photographed. Take an overall view of the motorcycle and close views of the lower panel from outside and inside. Record which side is affected and where the mark sits relative to fasteners, seams and openings.
Write down the model, model year, market, exhaust header, collector, catalyst, muffler and any change from the documented configuration. Include belly-pan brackets, aftermarket bodywork, missing trim and previous repairs. If the history is unknown, say “unknown” rather than assuming the visible exhaust is original.
Photograph the cold motorcycle at normal ride height or as required by the correct procedure. A panel hanging loose on a stand may show a different relationship from the assembled condition. Do not position yourself under an unsupported motorcycle.
Classify the first visible evidence
Look for the earliest and most localized clue:
- a polished spot suggesting repeated physical contact;
- a sharp line that follows the edge of a shield or bracket;
- a broad dull or browned region facing a hot component;
- bubbling in paint or graphics without obvious plastic deformation;
- softened or warped plastic;
- adhesive failure around an existing barrier;
- residue from oil, coolant, fuel or cleaning chemicals;
- a crack that may have moved the panel toward the exhaust.
These observations do not diagnose the cause by themselves. They determine what to compare next. A broad mark and a matching hot surface suggest a different investigation from one bright rub point beside a loose bracket.

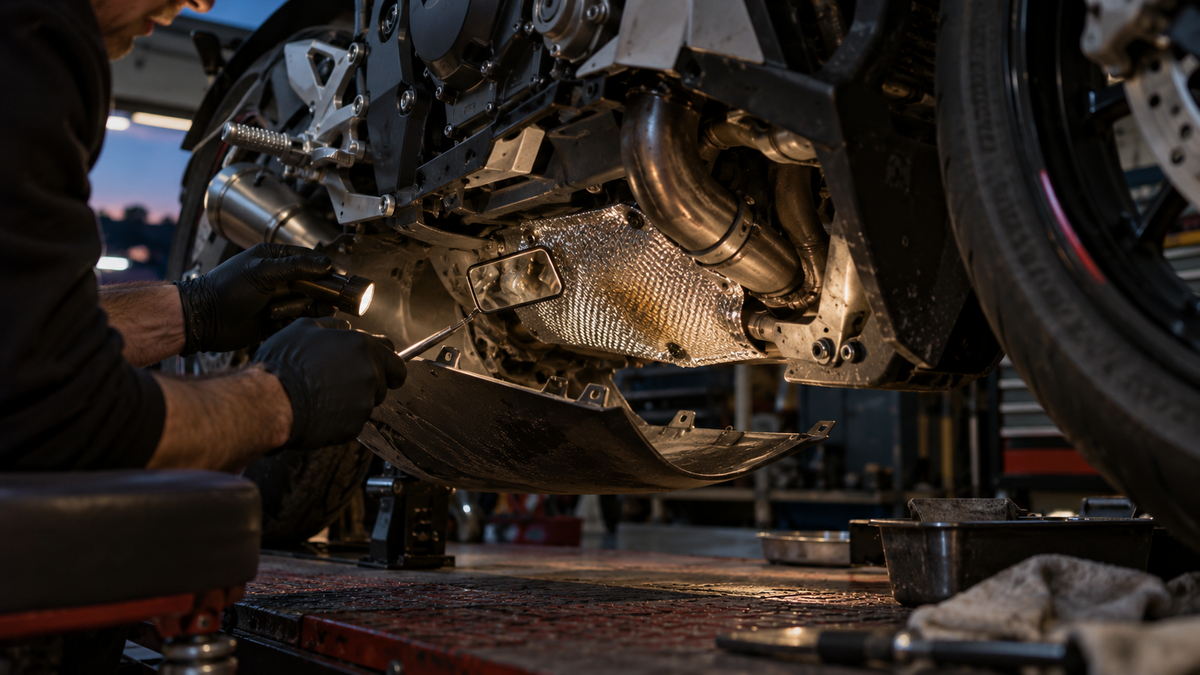
Editorial concept: documenting a removed lower panel before cleaning or replacement. It is not a customer motorcycle, thermal test, clearance measurement or model-specific construction reference.
Separate four transfer paths
Radiant heat
A nearby hot component can heat a panel without touching it. The effect depends on the source, distance, view, shielding, airflow and operating condition. A photograph cannot provide a safe universal threshold.
Conductive contact
Direct contact transfers heat and may leave a polished or sharply localized witness mark. Determine why the parts touched: incorrect assembly, displaced bracket, wrong panel, damaged support, altered exhaust or another cause. Do not merely add insulation between parts that should not contact.
Hot airflow
Air leaving a radiator, header area or duct can concentrate at an opening or dead zone. Do not block a path in an attempt to protect one surface without understanding the model's intended cooling arrangement.
Non-thermal surface damage
Chemical exposure, adhesive incompatibility or abrasion can resemble heat damage. Record odor, residue, direction and service history, but avoid speculative conclusions. Seek appropriate assessment when fluids or fire risk are involved.
Inventory the thermal system
The “shield” is not always one sheet. The thermal system may include formed metal, reflective material, air gaps, stand-offs, brackets, ducts and the location of the panel itself. Record every visible item and compare it with appropriate parts and service information.
Ask:
- Is the shield present and attached at all intended points?
- Is it torn, oil-soaked, crushed, delaminated or contacting the exhaust?
- Are spacers, collars and rubber receivers present?
- Has a bracket moved the panel inward?
- Does the exhaust match the configuration assumed by the panel and shield?
- Is an opening blocked by debris or an added accessory?
Do not copy a barrier layout from a different model or year. A shiny inner surface in a product photo is not a technical drawing.
Avoid false precision in clearance claims
Online discussions sometimes repeat a universal 15–20 mm gap or fixed exhaust temperatures. Those numbers are not suitable without model-specific documentation and defined measurement conditions. The relevant clearance may change with location, shields, movement, brackets, manufacturing tolerances and the complete exhaust system.
Use the correct service or product information and measure only with an appropriate safe method. Record where and how the measurement was taken. A single ruler photograph may miss the closest point, panel movement or hidden contact.
If the required specification cannot be established, leave the question open and obtain qualified guidance. Do not treat “it looks far enough away” as evidence.
Compare protection methods by evidence, not marketing numbers
| Protection state | What can be observed | What must be confirmed | Common failure clue |
|---|---|---|---|
| Bare panel with no documented barrier | Panel surface and nearby source | Whether the model is intended to use a shield there | Broad discoloration, softening or repeated hot spot |
| Thin reflective adhesive layer | Visible coverage and edge condition | Product rating, substrate suitability and approved location | Lifted edge, blister, tear or adhesive residue |
| Formed or reinforced thermal barrier | Shape, fasteners and surface condition | Exact part, orientation, stand-off and temperature specification | Loose mount, crushed air gap or localized contact |
| Factory shield and bracket system | Documented components if identified correctly | Completeness for model/year/market and current exhaust | Missing spacer, displaced bracket or damaged shield |
Do not insert universal “radiant heat rejection percentages,” maximum temperatures or longevity claims unless product-specific evidence defines the method and conditions. A thicker-looking material is not automatically the correct material.
Do not rely on a resin label
ABS is a family of materials, and a finished panel's behavior depends on formulation, thickness, geometry, finish, manufacturing and installed environment. “Virgin ABS,” “injection molded” or “OEM” does not establish a universal heat limit. Direct exhaust contact can damage many materials.
NiceFairings offers painted bodywork across collections such as Ducati fairings, BMW fairings and Yamaha fairings. Those collection pages help identify bodywork options; they do not replace the motorcycle's thermal system, exhaust-specific assessment or required shields.
When discussing a replacement, send photographs of both sides of the damaged panel, the exact exhaust configuration, shield inventory and any displaced bracket. Ask what is included with the specific product and what must be transferred.
Decide whether the panel is the cause or the victim
Use a cause-and-consequence worksheet:
| Finding | Possible relationship | Next evidence |
|---|---|---|
| Panel sits inward near one fastener | Incorrect hardware, bracket or distorted attachment may reduce clearance | Compare documented fastener stack and support position |
| Exhaust was recently changed | New geometry or missing transferred shield may affect hot zone | Identify exact system and installation documentation |
| Shield edge lifted | Adhesive or mechanical retention may have failed | Identify barrier product and inspect substrate safely |
| Contact mark matches pipe location | Panel and exhaust may be touching under some condition | Qualified inspection of assembly and movement |
| Heat mark returns after panel replacement | Source was not resolved | Stop replacing cosmetics and reassess complete system |
A replacement lower fairing may be appropriate after the source is understood. A repaired bracket or restored shield may also be needed. The visible plastic should not be asked to compensate for an unresolved mechanical relationship.
Build a post-ride evidence routine
Only after the motorcycle has been returned to a supported, safe configuration by a qualified person should operating checks be considered. Follow the motorcycle and exhaust instructions. Never touch the exhaust or lower panel to estimate temperature.
After the bike is shut down and fully cooled, compare the same photographed areas. Look for new odor, discoloration, lifted graphics, barrier movement, polished contact or a change in panel gap. Record riding and ambient conditions without claiming that one short ride proves long-term safety.
If smoke, burning odor, leaking fluid, severe deformation or contact is observed, stop using the motorcycle and arrange appropriate inspection.
Treat finish changes as evidence, not a thermometer
Paint haze, yellowing, lifted graphics and gloss change may be important, but they do not reveal an exact temperature. Finish condition also depends on preparation, material, age, contamination and previous repair. Do not convert a photograph into a temperature estimate or claim that one coating would have survived.
Photograph the affected area beside an unaffected area under the same neutral light. Include the panel edge and a known location so the mark can be found again. Avoid aggressive polishing or solvents before assessment; they may alter the evidence and introduce new damage. The fairing finish evidence guide explains why appearance at one moment is not a long-term test.
If the color changed near a seam, inspect both panels and the space behind them. One panel may have moved closer to the source, or a neighboring piece may redirect hot air. Continue tracing the system rather than stopping at the most visible blemish.
Recheck hardware before adding material
A missing collar, incorrect fastener or damaged rubber receiver can pull the lower fairing inward. Compare the installed stack with appropriate parts information and inspect for elongated holes or compressed edges. The fairing-fastener guide helps organize that record without prescribing universal hardware.
Do not use extra washers, improvised spacers or a thicker barrier to push the panel away unless the documented assembly supports that solution. Changing one point can load another tab or close an intended opening. Restore the correct relationship rather than creating clearance by force.
For the replacement order, use the fairing kit contents checklist to separate painted panels from shielding and retained hardware.
Order replacement bodywork with a heat packet
Include the exact model and year, both sides of the bike, the damaged panel outside and inside, current exhaust information, existing shielding, brackets and close views of all marks. Use the NiceFairings contact page to ask which panels can be supplied and the custom fairings page if the project also changes color.
Confirm the written kit contents. Do not assume a painted lower panel includes thermal barriers, brackets, ducts, fasteners or exhaust parts. Keep the supplier's bodywork scope separate from the technician's thermal and mechanical corrections.
FAQ
Did Euro 5 or Euro 5+ cause my belly pan to melt?
An emissions label alone cannot diagnose the event. Identify the exact motorcycle, exhaust, shielding, panel position and first damage mark.
Is there a universal safe exhaust-to-plastic distance?
No universal number should be used across motorcycles. Follow model- and product-specific information and qualified guidance.
Is injection-molded ABS heatproof?
No plastic panel should be described as heatproof. Material, construction and installation matter, and direct contact or excessive exposure can cause damage.
Can I add adhesive foil over the damaged area?
Do not cover evidence or use an unverified product. First identify the cause, then use only a suitable barrier and installation method for the documented application.
Should I replace the belly pan immediately?
Remove the motorcycle from use if safety is in doubt. A qualified person should assess the heat source, shielding and damage before a cosmetic replacement decision.
Final decision record
Close the audit with four statements: identified configuration, observed damage, confirmed corrective work and unresolved questions. Attach before-and-after photographs and the written panel scope. This prevents a new lower fairing from becoming a disposable indicator for a heat problem that was never actually diagnosed.
Image notes
- Featured image: AI-generated editorial concept showing a cooled motorcycle being inspected in a workshop. It is not a thermal test, customer repair, product photograph or model-specific clearance reference.
- In-article image: AI-generated editorial concept showing an evidence photograph being made before the lower panel is cleaned or replaced. It does not establish the material, shielding layout or mounting design of any NiceFairings kit.