
On a 2007–2008 Honda CBR600RR, the tail is not simply a painted cap behind the rider. The motorcycle's compact center-up muffler sits in the rear-bodywork area. Honda's 2007 model announcement describes a slimmer rear-seat cowl and a more compact silencer; its European model announcement identifies the redesigned 2007 motorcycle. This makes the rear shell an especially poor place to order by color alone. If the exhaust, its supports or the original tail hardware has changed, first establish what is on the bike and what the proposed kit expects to retain.
The practical answer is to document the entire rear assembly while the bike is cold, compare the installed muffler and supports with the correct motorcycle and exhaust instructions, then request a written panel-and-hardware scope for the exact fairing offer. A photo of a beautiful blue tail does not certify exhaust clearance. Nor does a dark patch on old paint, by itself, prove heat damage. This guide concentrates on the rear of this CBR600RR, not the lower belly-pan heat question covered elsewhere.
Why the rear deserves its own inspection
The underseat position changes what a buyer needs to see. A tail fairing may visually meet the rider's seat, passenger-seat or seat-cowl area, rear light, number-plate support, undertail trim and exhaust outlet. Some of those pieces may be painted shells; others may be original black trim, supports or electrical components that an aftermarket kit does not supply. The exact arrangement depends on the motorcycle, market and prior modifications. It cannot be read reliably from a single gallery thumbnail.
Honda's 2007 release is useful design context, not a kit-contents list. It says the new silencer and rear cowl were made compact; it does not specify the backside of a NiceFairings panel, the shield inside a used motorcycle or a safe universal air gap. Do not convert a model-history paragraph into a mechanical fitment guarantee. If an installer needs exact routing, clearances, fastener order or torque, use the service information for the documented motorcycle and the instructions for the actual exhaust system.
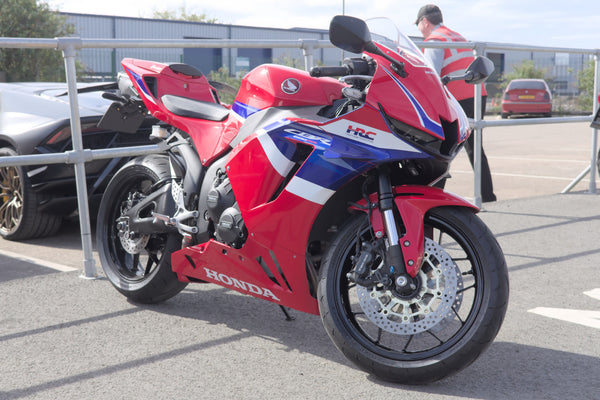
The real CBR600RR in the cover photograph shows the full silhouette and tail position. Its outdoor setting and markings make it a useful visual reference, but it is not a photograph of the kit sold below. The added canvas at the edges is AI-generated to keep both wheels visible on the blog card; no part of that image is offered as a dimensional reference. For an order, the useful photographs are of your motorcycle, especially what is hidden below the tail.
Separate the four problems that can look like “bad tail plastic”
A dull area or an awkward seam can have more than one cause. First is surface wear: luggage straps, boots, cleaning or repeated seat removal may leave rub marks on the outside. Second is mounting stress: a missing collar, damaged tab or displaced bracket can pull a panel into a strained position. Third is exhaust-related exposure: a hot component, changed outlet path or disturbed protection may affect an inner surface. Fourth is wrong application or incomplete assembly: a shell is asked to meet a seat, lamp, undertail or support it was not made to meet.
These are investigative categories, not diagnoses that can be made from one photo. A white stress line at a mounting hole is different evidence from a broad faded area near the outlet. A soot trace deserves assessment of the exhaust, not an immediate order for fresh paint. A shiny contact point inside a shell can indicate rubbing without proving the cause. Photograph the pattern and the corresponding component before removing or replacing anything. If an exhaust joint appears loose, a mounting support is missing, or fumes are suspected, do not ride until a qualified technician checks the motorcycle.
The existing belly-pan heat guide focuses on the lower fairing and pipe route. Its broad principle—resolve the source of damage before replacing plastic—also applies here. The rear CBR600RR question is more specific: which tail components surround the center-up muffler, and which of those will remain after a painted-kit change?
Make a six-view record before removing the tail
Work on a fully cooled, stable motorcycle. Take a genuine full left view and full right view that include both wheels. Add a straight-on rear view, a rear three-quarter view from each side and an underside view looking toward the muffler outlet without touching hot parts. These six views allow the seller or technician to understand the whole assembly before close-ups remove context.
After that, document the seat edge, tail-to-undertail seam, lamp mounting area, outlet opening, any visible heat barrier, exhaust hanger and all existing fastener locations. If a part has already been removed, photograph both faces on a clean surface, with one wider shot showing its orientation. Note any previous repair, aftermarket exhaust, license-plate or indicator modification. Include the exact make and part number of an aftermarket silencer or link pipe if known; “looks stock” is not a specification.
Make a short note beside the images: documented model and model year; country or market; whether the current tail is original or unknown; whether the seat or solo cowl is changed; what damage you want to solve; what parts you intend to keep. A registration date is not necessarily model year. If the bike's identity is uncertain, obtain a private VIN-based check from an appropriate Honda parts source. Do not publish the complete VIN in a review, forum post or public image.
Read a product gallery as design evidence, not a packing slip
NiceFairings currently has a 2007–2008 CBR600RR fairing collection and, for example, an active custom-painted kit with design NF-CBR600RR-0708-P001. The listing identifies an intended model-year group and shows the selected finish. It does not prove that every original underside piece, shield, bracket, light or fastener is in the box, nor that an altered exhaust clears its painted panels. Confirm the current option and written contents at the time of purchase.

One way to make the gallery useful is to name the pieces it raises questions about. Which pictured piece is the rear-seat cowl area? Are the black undertail and inner trim included, or are they reused from the motorcycle? Is the passenger seat, solo cowl, seat latch, rear light, plate support or indicator hardware pictured only as context? What protection must remain near the silencer? Do not assume a product title, even “full kit,” answers each question. The kit-contents checklist explains how to turn photographs into a line-item response.
If the bike has an aftermarket exhaust, send its exact installation instructions along with the photographs. The fairing seller can identify the bodywork application it offers, but should not be expected to certify an undocumented exhaust conversion from a cropped photograph. If the exhaust maker specifies a bracket, spacing, protection or verification procedure, those written instructions matter. A generic “no problem” response does not resolve a visible conflict.
Order the repair you need, not just the color you like
Consider a 2007 bike whose outer rear shell is scratched but whose muffler, underside parts and mounts are undisturbed. Identify the exact damaged piece and ask whether a single matching rear piece is available. An older factory finish may have aged; a new painted panel may look different beside it even if the design name is the same. If the goal is a matched appearance across the whole motorcycle, a complete painted set may be a better aesthetic project—but only after its contents are clear. Appearance and mechanical scope are separate decisions.
Now consider a bike with new soot, deformation or a strong hot odor near the tail after an exhaust change. Do not treat a painted kit as a heat repair. A qualified technician should first identify exhaust position, secure support, any leakage and the original protection arrangement using the correct instructions. Replacing the shell without resolving the exposure risks repeating the damage. Avoid inventing a temperature threshold or copying another rider's clearance measurement; materials, exhaust systems and installation details differ.
Finally, consider a purchased motorcycle with a neat exterior but missing or improvised underside pieces. It may be possible to buy the correct painted shells, but the order packet should explicitly list which original parts are absent or altered. The seller may need to say that a proposed kit assumes unmodified original supports. That is an honest boundary, not poor customer service. If the bike cannot be identified or the exhaust is not securely installed, pause the bodywork purchase.
A useful message to send before checkout
Use the NiceFairings contact page with the exact product link and selected design. A concise message might say: “My motorcycle is a documented [model year] Honda CBR600RR in [market]. Its current exhaust is [factory / maker and exact part number]. Here are full left, right, rear, underside and close-up photos. I am considering [exact URL and option]. Please identify every supplied rear painted and inner piece; confirm which original undertail, lamp, seat-area, bracket, fastener and heat-protection components your kit expects me to retain. The following items have been altered or damaged: [list]. Please flag anything you cannot verify from these images.”
Keep the reply with your chosen design and order confirmation. If the seller asks for more angles, provide them before production approval. If the reply describes only the color, repeat the unanswered parts question. If it says “fits 2007–2008” but your motorcycle has a modified muffler or repaired stay, ask whether that application statement assumes the original arrangement. Do not force a yes-or-no answer where an inspection is genuinely needed.
The production and shipping guidance describes finished-photo review before dispatch. Those photographs are valuable for evaluating design, graphics and visible finish. They cannot certify hidden exhaust clearance on your bike. Review the visible tail shape and the kit's written parts scope before you approve the appearance; then complete the actual dry fit after delivery.
Dry-fit the rear as an assembly, not an isolated shell
When the set arrives, photograph the box and laid-out pieces before alteration. Compare the shipment with the written line-item answer. Use the service procedure for the exact motorcycle to remove and refit rear bodywork; keep original clips, collars and fasteners labeled by position. Check whether the tail sits naturally alongside the seat, rear light and undertail. A screw should retain an aligned panel, not draw it across a gap or push it toward the muffler.
With the motorcycle cold, inspect the complete region around the muffler using the applicable Honda and exhaust instructions. Confirm that retained protective pieces are present and secure, and that wiring, hoses and trim are routed as required. Do not cut away an unexplained interference or substitute decorative foil for a specified protective part. The pre-fit checklist helps organize the bodywork side of this check; it is not a substitute for exhaust service information.
If a hole does not align, a tail panel touches the outlet, a shield is missing or the seat latch behaves differently, stop and photograph the whole relationship plus the close-up. Contact the seller before drilling, grinding or heating a painted shell. A workshop can inspect the exhaust and rear supports independently. Photograph the corrected arrangement as well: it gives the installer and seller a common reference if the panel must come off for later servicing. Before road use, the motorcycle needs secure bodywork, proper seat retention, functioning lamps and indicators, unobstructed wheel travel and an exhaust installation that meets its instructions. A stationary fit photograph alone cannot prove those conditions.
The decision worth making before paint approval
The 2007–2008 CBR600RR's tail is a visible style feature wrapped around a real exhaust and support system. Honda's model release supports that design context; the current NiceFairings listing supports what is offered in its photographed design. Neither source proves every hidden part on a used or modified motorcycle. Build a short record of the bike, the installed muffler, the rear components you will retain and the exact kit contents. Then choose the finish with confidence about what the paint is actually going onto.
Sources and image notes. Honda's 2007 CBR600RR release describes the compact rear cowl and silencer; the Honda European announcement confirms the redesigned 2007 model. These are model-history sources, not aftermarket clearance instructions. Cover: adapted from 2007 Honda CBR 600 RR by Heselnut, CC BY-SA 4.0; the photograph was widened with AI-generated background for a 16:9 card. The adaptation is offered under the same CC BY-SA 4.0 license and is not a product or fitment image. Inline flat lay: NiceFairings product listing photograph, design NF-CBR600RR-0708-P001.