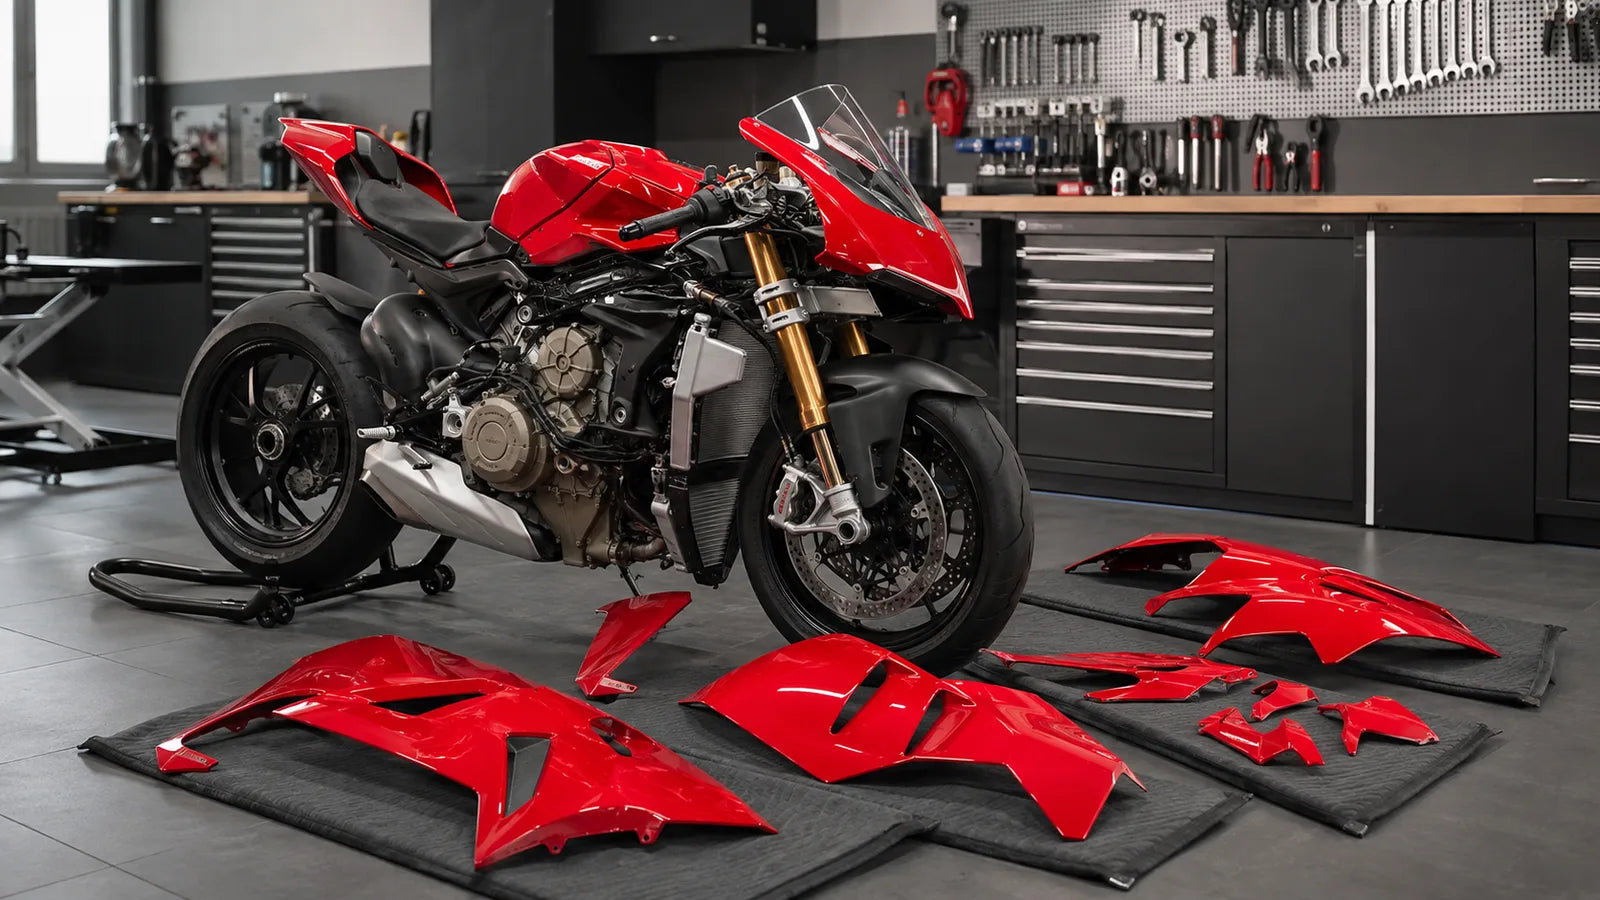
You want your Panigale V4 to look its best. A Ducati Panigale V4 fairing replacement can completely transform its appearance, but you must plan carefully. This project tests your skills in three areas: dealing with intense engine heat, lining up panels precisely, and getting a flawless paint finish. Prices vary a lot. You might spend between $699.98 and $1,289.98 for a good kit. The table below shows typical pricing.
Price Type |
Amount (USD) |
|---|---|
MSRP |
$1,289.98 |
Sale Price |
$699.98 |
Making the right choice during your Ducati Panigale V4 fairing replacement prevents melted wiring, rattling panels, and peeling paint. This guide gives you a clear plan to succeed.
Key Takeaways
Pick a full fairing kit if the damage covers several panels or you want a fresh color.
Check your bike's exact year and model before you order fairings, so they fit correctly.
Carbon fiber fairings manage heat better and are lighter than ABS plastic.
Put heat shielding and reflective tape on wires and panels to keep them safe from engine heat.
Always test-fit every panel before you paint or put it together for good, so you can check that everything lines up right.
Use original factory screws and swap out old clips to stop shaking and harm.
Sand and prime the panels correctly so the paint sticks well and lasts a long time.
Apply several coats of urethane clear coat for the best protection and shine.

Planning Your Ducati Panigale V4 Fairing Replacement
Before you spend money, you need a clear plan. A Ducati Panigale V4 fairing replacement demands careful thought about damage, bike model, and part quality. Each decision affects your final result. Let's walk through the process step by step.
Repair vs. Full Replacement
You have two paths when your fairings suffer damage. You can repair the existing panels, or you can replace them entirely. The right choice depends on the damage level and your budget.
Evaluating Damage and Cost
Start by inspecting every panel closely. Look for cracks, deep scratches, and broken mounting tabs. Small cracks and minor scuffs often respond well to plastic welding and repainting. A professional shop can repair a single panel for roughly $50 to $150. This option works best when damage affects only one or two areas.
However, you must consider the paint match. Ducati's red finishes fade over time. A freshly painted panel may not match your bike's existing color perfectly. If your fairings show widespread damage or sun fading, repair costs add up quickly.
When to Choose a Full Kit
A full replacement kit makes sense when damage spans multiple panels. It also suits riders who want a complete color change or track-focused aesthetic. Full aftermarket kits for the Panigale V4 typically cost between $1,200 and $2,500. This price includes all body panels with fresh paint and clear coat.
Option |
Cost Range |
|---|---|
Repair single panel (plastic weld, shop labor) |
$50 - $150 |
Full aftermarket replacement kit (Ducati Panigale V4) |
$1,200 - $2,500 |
Choose a full kit when you want consistency across every panel. You also avoid the hassle of matching faded factory paint.
Verifying Your Bike's Year and Model
Fairings are not universal across all Panigale V4 model years. You must verify your exact bike before ordering anything.
The Importance of Exact Fitment
The Panigale V4 underwent significant bodywork changes between generations. Panels from a 2018 model should not be assumed to fit a 2024 model without modification. Each mounting point, vent position, and fastener location differs. Ordering the wrong kit wastes time and money.
Check your motorcycle's VIN number and production date. Write down the exact year and model designation. This information ensures you select the correct fairing set.
Checking for Mid-Cycle Updates
Ducati sometimes updates bodywork during a model's production run. For example, the 2022 and 2023 models share similar shapes, but subtle changes exist. Conversion kits do exist for cross-year fitment. These kits allow you to mount newer-style fairings on older bikes. However, they require careful verification of all mounting points before purchase.
Contact the seller with your bike's details. Ask whether their kit matches your specific year and model. A reputable supplier will confirm compatibility before you order.
OEM vs. Aftermarket Kits
You have two main sources for replacement fairings: original equipment manufacturer (OEM) parts or aftermarket kits. Each option offers distinct advantages and drawbacks.
Pros and Cons of OEM Panels
OEM panels come directly from Ducati's supply chain. They guarantee perfect fitment and factory-quality paint. You receive panels that match your bike's original specifications exactly. The downside is cost. OEM panels cost significantly more than aftermarket alternatives. You also face limited color options and long wait times for special orders.
Benefits of High-Quality Aftermarket Kits
Aftermarket manufacturers offer compelling advantages. They provide complete kits at lower prices. Many aftermarket suppliers offer custom colors and graphic designs unavailable from Ducati. High-quality aftermarket kits use durable ABS plastic and automotive-grade paint. The best suppliers test their products for fitment across multiple model years.
Comparing Costs and Features
The table below compares OEM and aftermarket options across key factors.
Factor |
OEM Panels |
Aftermarket Kits |
|---|---|---|
Cost |
Highest |
Moderate to high |
Fitment |
Perfect |
Good to excellent |
Material |
Factory ABS |
ABS or carbon fiber |
Paint/Finish |
Factory match |
Custom options available |
Availability |
Limited |
Wide selection |
Best For |
Purists, warranty concerns |
Customizers, track riders |
For a wide selection of aftermarket options, browse the Ducati Panigale V4 fairings collection. You will find kits for various years and custom finishes.
Managing Heat for Durability and Performance
The Panigale V4 puts out a lot of heat from its rear cylinder and exhaust pipes. This heat can damage any Ducati Panigale V4 fairing replacement. You must handle heat control before putting on new panels. If you skip this, you may face melted wires, bent plastic, and paint that fails early.
Picking the Right Fairing Material
Your material choice decides how well your fairings handle heat. You have two main options: ABS plastic and carbon fiber. Each one deals with heat in its own way.
How ABS Plastic Handles Heat
ABS plastic does fine with moderate heat. It keeps its shape below its softening point. Most aftermarket kits use automotive-grade ABS. This material handles normal engine heat well. But too much heat for too long can cause warping. Keep ABS panels away from exhaust parts unless you add extra shielding.
Why Carbon Fiber Is Light and Heat-Friendly
Carbon fiber resists heat better than ABS. It can take much higher temperatures without losing strength. It also cuts down weight. A full carbon fiber set for the Panigale V4 weighs about 1.5 to 2.5 kilograms less than an ABS kit. Each carbon fiber panel weighs 1,200 to 1,800 grams. ABS panels weigh 1,800 to 2,500 grams per piece. That means you save 600 to 700 grams per panel. Lighter fairings lower the bike's total weight and make handling sharper.
Carbon fiber also spreads heat out better. Its heat-moving ability shifts warmth away from tight spots. This cuts down hot areas that can harm nearby parts. For track riders who push hard, carbon fiber offers extra confidence.
Improving Ventilation and Airflow
Good airflow keeps your fairings cool. The Panigale V4 sends air through set paths. You must keep and improve these paths when you replace fairings.
Finding the Hottest Spots on the V4
The rear cylinder makes the most heat. Its exhaust headers sit close to the bodywork. The area under the tail also traps heat. The radiator pushes hot air up and back. These spots need extra care during setup.
Picking Kits with Working Vents
Many aftermarket kits come with working vents. These openings let hot air escape from closed areas. When you choose a kit, check where the vents sit. Look for vents near the rear cylinder and exhaust path. Working vents stop heat from building up and harming panels or wires.
Changing Vents for Better Airflow
You can improve airflow through current vents. Carefully make vent holes bigger with a rotary tool. Smooth the edges to stop cracks from stress. You can also add small vents in smart spots. Always keep the panel strong. Big changes weaken the fairing and hurt how it fits.
Adding Heat Shielding and Insulation
Heat shielding gives you another layer of safety. Put shielding in key spots during your fairing setup.
Keeping Wires and Connectors Safe
The Panigale V4 has many electrical connectors near heat sources. These parts need protection from high heat. Heat shield sleeves work well for this. The Thermaflect Tube gives a shiny heat barrier. It handles steady heat up to 1200°F (649°C) and short bursts up to 1500°F (816°C). Its wrap-around design goes on without removing connectors. The material fights oil and chemicals, so it suits motorcycle use.
The Battery Cable Shield is another choice. It blocks up to 60 percent of radiant heat. This shield takes steady heat of 1100°F (593°C) and short spikes to 2000°F (1093°C). Its flexible weave stretches over terminals, stopping wire failure in hot areas.
Using Reflective Heat Tape on the Bottom
Reflective heat tape is a simple, strong barrier. Put this tape on the underside of panels near exhaust parts. The shiny surface bounces heat away from the plastic. Clean the panel well before you apply it. Press the tape down firmly so it sticks fully. Replace the tape if it starts to peel or wear out.
Putting Heat Shields on Panels Near Exhaust
Some panels sit very close to exhaust parts. These panels need their own heat shields. You can buy pre-shaped shields made for certain panels. Or you can make custom shields from heat-safe materials. Fix the shield between the exhaust and the fairing panel. This barrier stops direct heat from reaching the plastic surface.
For custom material options and venting designs, visit the custom fairings page. You will find solutions made for your exact needs.

Achieving a careful panel alignment and Finish
A successful Ducati Panigale V4 fairing replacement depends on careful installation. You cannot rush this phase. Patience and preparation separate a professional result from a frustrating one. The physical mounting process requires methodical attention to every tab, slot, and fastener. Let's walk through the proper sequence.
Pre-Fitting and Dry Assembly
Professional mechanics never paint or bolt panels directly onto a bike without testing first. You should follow the same discipline. A dry assembly reveals problems before you commit to final installation.
The Importance of a Test Fit
A test fit means mounting every panel loosely without tightening anything. This step shows you which tabs align and which ones fight you. You want to discover misalignments now, not after you have scratched fresh paint. During the test fit, use only hand-tightened bolts. This approach allows positional adjustments. You can shift panels slightly to match factory specifications without forcing anything.
Checking Alignment of All Mounting Points
Follow this sequence when you check alignment:
Dry-fit all panels with bolts hand-tightened first. This method allows positional adjustments, ensuring tabs line up with factory specs and panels sit flush without forcing.
Check alignment points such as gaps where panels meet the tank, around the headlight, and at the tail. A gap wider than approximately 3 mm indicates a tab or bracket problem that you must fix before final tightening.
Verify bracket alignment by loosely attaching brackets to frame locations. Adjust them to match the groove and slot patterns on the new fairing shells.
Use a torque wrench set to manufacturer specifications (approximately 6-9 Nm for M5 bolts) to tighten fasteners evenly. Avoid over-tightening that can crack ABS plastic or strip threads.
Perform a final inspection after tightening. Confirm mounting brackets remain firmly attached to the frame. Check that no hoses or cables are pinched, which could impair bike operation.
Using a Pre-Fit Checklist
You need a systematic way to track your progress. The NiceFairings pre-fit checklist provides a structured approach. You can find it on their custom fairings page. This resource guides you through every mounting point. It ensures you do not skip critical alignment checks before final assembly.
A good shop does more than just bolt on some panels. They'll dry-fit every piece first to check alignment, make sure tabs line up with factory specs, route any wiring harnesses neatly behind the inner panels, and tighten everything to the correct tightness. That's typically around 6 or approximately 9 Nm for the M5 bolts on sportbike bodywork. Skipping the dry-fit means you might find out your headlight bucket is crooked after you've already wasted 45 minutes.
Aligning Panels and Mounting Points
Once your dry fit passes inspection, you can begin proper assembly. The order of installation matters more than you might think.
Starting with the Core Structure
Begin with the largest structural pieces. The front fairing stay and the tail section form the backbone of your bodywork. Mount these pieces first. They provide reference points for everything else. If these sit crooked, every subsequent panel inherits that error.
Working from the Inside Out
Install inner panels before outer ones. This sequence gives you access to hidden fasteners. You also avoid removing outer panels just to reach inner mounting points. Work methodically from the center of the bike outward. Each layer you add should nest cleanly against the previous one.
Adjusting Rubber Grommets and Dzus Fasteners
Rubber grommets compress over time. New fairings may need fresh grommets to hold panels securely. Check each grommet for cracks or hardening. Replace any that show wear. Dzus fasteners require proper alignment too. These quarter-turn fasteners should engage smoothly. If a Dzus fastener fights you, check the receiver position before forcing it.
Using OEM Fasteners and Hardware
Your new fairings deserve quality hardware. The fasteners you choose affect both appearance and structural integrity.
Why Quality Fasteners Matter
OEM fasteners match the exact specifications Ducati designed for your bike. They resist corrosion and maintain proper clamping force. Cheap aftermarket bolts may strip easily or corrode quickly. They also may not match the factory head size, which affects how tools engage with them. Quality fasteners prevent vibration-induced loosening. A loose panel at speed creates noise and can damage paint through constant movement.
Replacing Worn Clips and Screws
Inspect every clip and screw during your installation. Plastic clips become brittle with age and heat exposure. Replace any clip that shows cracks or loses its grip. Screws with damaged threads will not hold proper torque. You risk stripping the mounting insert if you force a damaged screw. Spend the small amount on fresh hardware. This investment protects your larger investment in the fairing kit itself.
The Ducati Panigale V4 fairings collection offers complete kits with quality materials. Pair your new panels with proper hardware for the best result.
Selecting and Applying a Durable Finish
Your new panels need a finish that can handle heat, road debris, and weather. The paint you pick and how you put it on decide how your Ducati Panigale V4 fairing replacement looks for years. Hurrying this step causes peeling paint and faded colors. Let's look at the right way to do it.
Choosing Your Color and Graphic Scheme
Your color choice sets the mood for the whole bike. You can match the factory look or make something all your own. Both paths need careful thought.
Matching Factory Paint Codes
Ducati uses special paint codes for each model year. Look for these codes on the steering head or in your owner's manual. A paint shop can mix an exact match using those codes. This works well if you want a stock look. Your bike keeps its original style and resale value.
Exploring Custom Colors and Designs
Custom colors let you show your personality. Many riders pick pearl whites, metallic grays, or matte finishes. Graphic designs range from simple racing stripes to bold geometric patterns. Shops like NiceFairings offer custom color and graphic choices. You can match your fairings to your helmet or leathers for a unified style.
Considering Street vs. Track Aesthetics
Street riders often like factory-inspired designs that fit in with traffic. Track riders may pick bright colors for visibility or sponsor-style graphics. Think about your main use before you choose. A glossy red set works well for weekend rides. A matte black with neon accents fits track days better.
Preparing Panels for Paint
Surface prep controls how well paint sticks. You cannot skip this stage. Good prep stops peeling and bubbling later on.
The Critical Step of Sanding
Sanding makes a rough texture called a "key" that helps paint grip. Start with 120 grit to flatten the surface and remove tool marks. Move to 180 grit to erase scratches from the last step. Go to 220 grit for more smoothing. End with 320 grit as the final step before primer. This grit works best for scuffing ABS plastic. Use wet sanding to cut down dust and keep the surface smooth.
Applying Primer for Adhesion
Primer bonds the paint to the plastic surface. Pick a primer made for plastic or fiberglass. Put on thin, even coats. Let each coat dry before adding the next. Tape off areas that should stay paint-free before you begin.
Cleaning and Degreasing the Surface
Wash the fairings with warm water and mild soap using a soft sponge. Rinse and dry fully. Use a paint-safe degreaser to remove oils and dirt. Stay away from harsh solvents that can harm plastic. Wipe with a clean microfiber towel. This step makes sure nothing blocks paint adhesion.
Applying Paint and Clear Coat
The application process needs patience and steady hands. You want a smooth, shiny finish that guards the panels underneath.
Spray Technique for a Smooth Finish
Hold the spray gun or can about 6 to 8 inches from the surface. Move in smooth, overlapping passes. Put on the base coat evenly, covering well without heavy buildup. Let each coat flash before adding the next.
The Importance of Multiple Clear Coats
Clear coat shields the color from UV rays and road debris. High-performance urethane clear coats give great impact resistance and flexibility. They handle temperature swings without cracking. Add several clear coats for the best protection. Each layer adds depth and shine to the final look.
Curing Time and Handling
Paint needs time to cure fully. Follow the maker's suggested curing time before touching panels. Skipping this step can leave fingerprints or cause soft spots. Once cured, your panels will resist chips and keep their shine.
For a visual demo of the sanding and surface prep steps above, check the video guide at paintformotorcycles.com. This resource gives step-by-step visual help to go with the written process.
The table below compares paint types for fairings.
Paint Type |
Impact Resistance |
Flexibility & Heat Tolerance |
Overall Durability |
|---|---|---|---|
High-Performance Urethane |
Excellent - stands up to stones and debris |
High - tolerates flexing panels and temperature swings without cracking |
Best choice for longevity and showroom gloss |
Epoxy-Based |
Good but prone to micro-cracking under stress |
Low - does not bend readily, cracks in hot sun |
Less ideal for whole fairings due to stress cracking risk |
Choose urethane-based products for your Ducati Panigale V4 fairing replacement. They give you the toughness you need for both street and track use.
A successful Ducati Panigale V4 fairing replacement follows a clear sequence. First, assess damage and choose your kit. Second, prepare for heat with proper materials and shielding. Third, test-fit every panel before tightening anything. Finally, apply a durable finish with careful prep work.
Common mistakes derail this process. Tightening panels too early creates uneven gaps. Over-tightening cracks mounting holes. Skipping heat shields risks long-term damage. Reusing worn fasteners causes rattles. Avoid these errors by working methodically.
Visit NiceFairings for quality kits and their pre-fit checklist to guide your installation. Proper planning saves time, money, and frustration.

FAQ
What material handles engine heat best for new fairings?
Carbon fiber handles heat better than ABS plastic. It can take higher temperatures without bending or warping. Carbon fiber also spreads heat more evenly across its surface. This lowers the chance of hot spots that harm nearby parts. Each carbon panel weighs 600-700 grams less than an ABS panel of the same size.
Do aftermarket fairings need extra heat protection?
Yes, you should add extra shielding. Put reflective tape on the underside of panels near exhaust parts. Use heat sleeves on electrical connectors close to the rear cylinder. These steps stop warping and wire damage over time. Check the custom fairings page for material options.
Can I install a full fairing kit by myself?
Yes, if you have patience and prepare well. Start with a dry fit to check every mounting point. Work from the inside out when adding panels. Use OEM fasteners for the best results. Give yourself enough time for careful alignment. Rushing leads to crooked panels and annoying rattles.
How much does a complete fairing replacement cost?
Aftermarket kits for the Panigale V4 range from $699.98 to $1,289.98. OEM panels cost much more than that. Custom paint and carbon fiber options raise the price further. Browse the Ducati Panigale V4 fairings collection for current pricing.
Will fairings from a different year fit my bike?
Fairings do not fit across all model years. A 2018 kit should not be assumed to fit a 2024 model. Check your VIN and production date before ordering. Conversion kits exist for cross-year fitment. Confirm compatibility with the seller before you buy.
How long should painted panels cure before handling?
Follow the paint maker's recommended curing time. Rushing this step can leave fingerprints or cause soft spots. Proper curing helps the finish resist chips and keep its shine. Urethane clear coats usually need several days to reach full hardness.
What is the most common mistake during installation?
Skipping the dry fit is the biggest error. Tightening panels too early creates uneven gaps. Over-tightening cracks mounting holes. Reusing worn fasteners causes rattles. Use the pre-fit checklist to avoid these mistakes. Test-fit every piece loosely before final assembly.

See Also
Evaluating Custom Ducati Panigale V4 Fairings Benefits And Drawbacks
Simple Steps To Swap 2019 BMW S1000RR Fairings Successfully
Comprehensive Guide To Understanding Motorcycle Fairings Basics
Nicefairings Offers Tailored Motorcycle Fairings For Your Bike
How Sportbike Fairings Evolved From Honda CBR To Ducati Panigale
Related Fitment and Buying Resources
- Explore the related NiceFairings collection
- Plan a custom-painted fairing kit
- Use the motorcycle fairing pre-fit checklist
- Browse more Motorcycle Fairing Guides