
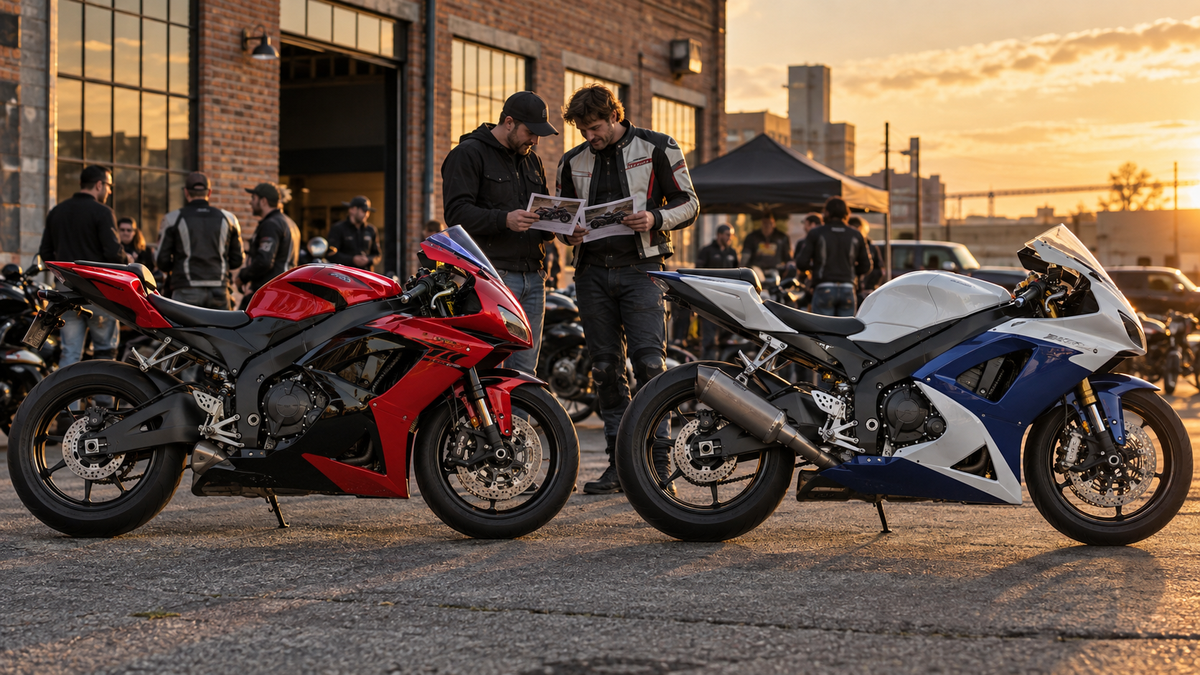
Choose the CBR600RR or GSX-R750 project by comparing what is present, what is damaged and what remains uncertain. A complete motorcycle with scuffed paint may be a more predictable restoration than a cheaper bike missing its inner plastics, brackets and model-specific hardware. The badge alone does not determine the fairing budget.
This guide compares the two motorcycles from a bodywork buyer's point of view. It helps street riders, garage builders and occasional track-day riders audit a used bike before ordering replacement panels. It does not claim that one model is universally easier, cheaper or better to ride.
First separate motorcycle choice from bodywork choice
Mechanical condition, legal status and riding suitability come first and require their own inspection. Within that larger decision, the fairing project has four questions:
- Is the exact motorcycle application verified?
- Is the motorcycle-side mounting structure complete and serviceable?
- Which visible and hidden pieces are missing or damaged?
- Does the planned finish coordinate with the parts that will remain?
Answer those questions for each candidate on separate worksheets. A social-media photo can inspire the comparison, but it cannot replace evidence from the actual motorcycles.
Verify the generation before comparing kits
Both model names span substantial changes. Record the VIN, exact model year, market version and current equipment. Photograph the front, both sides, tail and cockpit. If loose parts come with the sale, photograph their undersides, labels and mounting features rather than accepting a pile described as “all the plastics.”
Do not use color as the primary identifier. Paint, decals, race-replica designs and replacement panels can make one generation resemble another at a glance. Supplier catalog names can also differ, so send the same application record with every quote request.
For CBR600RR research, the year-by-year CBR600RR fairing guide helps organize the question, but the exact supplier application still needs confirmation. For a 2007–2012 bike, the CBR600RR installation and alignment guide provides a more focused preparation reference.
Audit the real damage boundary
A seller may describe a low-side as “only plastics.” Check what that phrase includes. Remove or inspect panels only with permission and safe support. Look for:
- broken outer-panel tabs and worn interlocking edges;
- missing inner trim, ducts or splash pieces;
- headlight, windscreen and mirror interfaces;
- displaced front or rear stays and sub-brackets;
- flattened grommets, absent collars and mixed fasteners;
- exhaust, frame-slider or rearset changes that affect bodywork;
- wiring repairs or connectors pinched near panel edges;
- heat marks, odor or deformation around lower panels;
- old repairs hidden on the underside.
A cosmetic scratch belongs in a refinishing discussion. A damaged mount or uncertain clearance belongs in a structural and safety inspection. Keep those scopes separate.

Editorial concept: use separate carts and inventories to compare project completeness; the image is not a product photo or fitment record.
CBR600RR project: what usually deserves attention
On a CBR600RR candidate, document the nose, lamp, windscreen and side-panel interfaces as one connected system. A clean outer surface does not confirm that the stay, inner supports and rubber-mounted locations are correct. Inspect the tail configuration and retained seat-related parts as well.
If the motorcycle has been converted for track use, identify what was removed for that conversion and whether the street equipment is included. A box of lamps and brackets should be mapped to the actual motorcycle before its value is assumed.
When comparing quotations, confirm the precise year range and every included panel. Do not extend instructions written for one CBR600RR generation to another simply because the motorcycle name is unchanged.
GSX-R750 project: treat shared-family claims carefully
The GSX-R750 is often discussed alongside the GSX-R600. That relationship can be useful when researching a verified shared generation, but it should not become a blanket interchangeability claim. Model year, market and actual part interfaces still control the order.
For K11-era preparation, use the GSX-R600/750 K11 dry-fit and alignment guide to organize the areas you need to inspect. Confirm the exact kit instructions and motorcycle service information, and do not treat a general article as authority for forcing, filing or altering a bracket.
Inspect the nose, side/lower junctions and tail group as systems. Record aftermarket exhaust routing and heat shielding because a lower panel project may depend on those non-stock parts. Do not accept an unexplained near-contact as normal.
Compare three restoration paths
Each motorcycle may support more than one sensible scope:
| Path | Best fit | Evidence needed | Main risk to control |
|---|---|---|---|
| Repair retained panels | Localized cosmetic damage and complete mounts | Underside inspection, repair feasibility and finish plan | Repair spreading beyond the quoted area |
| Replace selected panels | Exact damaged pieces identified and adjacent finish manageable | Part identity, side/orientation, finish reference and landed quote | Color or graphic mismatch beside retained parts |
| Install a coordinated kit | Multiple visible panels damaged or a full visual reset desired | Exact application, inclusion list, retained-parts map and design approval | Assuming the kit replaces hidden or motorcycle-side parts |
Do not default to a full kit because it looks simpler, and do not default to one panel because its item price is lower. Compare the complete project.
Build a total-project worksheet
Use the same rows for both motorcycles:
- purchase price and independent mechanical inspection;
- outer panels to repair or replace;
- inner trim, ducts, screens, lights and brackets;
- model-specific fasteners, collars, rubber mounts and clips;
- paint, graphics and adjacent-panel coordination;
- heat shielding or retained thermal protection;
- shipping, taxes, duties and damage-claim terms;
- professional inspection or repair of motorcycle-side mounts;
- installation time and realistic downtime;
- storage or preservation of original pieces.
Ask for a written landed quotation. Avoid fixed online estimates that ignore destination, box size, finish complexity and missing motorcycle parts.
Originality, resale and the value of retained panels
If original bodywork is present and repairable, include its future value in the decision. Some owners prefer to preserve an original set and use replacement bodywork for regular riding or track days. Others prioritize a coordinated street restoration. Neither choice is automatically correct.
Photograph original panels before removal, including defects. Store them clean, dry and supported so tabs are not carrying the weight. Keep original hardware organized by location. If a buyer later evaluates the motorcycle, documented retained parts are more useful than an unlabeled box.
Replacement paint should not be described as factory-original unless it is. An OEM-inspired or race-replica design can still be attractive when represented accurately.
Compare paint and graphics in the real assembly
Judge a design across the entire silhouette. A graphic that works on one broad side panel may cross different seams on the other motorcycle. Request a design reference that shows both sides, nose and tail. Confirm which logos or marks are permitted and which details will be customized.
If some original pieces remain, photograph them next to a neutral reference in daylight. Existing paint can change with age, repair history and viewing conditions. A code or screen image is a starting point rather than proof of a perfect visual match.
Ask how the finish and graphics are described for the exact order and request care guidance. Do not invent a universal number of clear-coat layers or guarantee resistance to fuel, sunlight or track debris.
A fair comparison at the viewing
Give each candidate the same 20-minute bodywork audit:
- Photograph the complete motorcycle from repeatable angles.
- Verify VIN, year and market information.
- List installed and loose outer panels.
- List hidden trim, ducts, stays, lights and hardware.
- Record all non-stock parts and previous repairs disclosed.
- Check panel behavior with fasteners in their existing condition; do not force anything.
- Note uncertain mounts, steering interference and hot-part clearance as stop items.
- Price repair, selected-panel and coordinated-kit paths using the same worksheet.
The used sportbike fairing inspection guide explains what replacement bodywork can and cannot reveal about a motorcycle's past. A clean replacement fairing is not evidence that the underlying machine has never fallen.
Pre-ride and post-installation boundaries
Before riding either motorcycle, verify that bodywork and retained equipment are securely installed according to model-specific service information. Confirm steering movement, control clearance, wiring retention, lights, tire clearance and distance from hot or moving components. Do not ride with an uncertain bracket, loose panel or unverified exhaust contact.
After a bodywork installation, recheck required fasteners at the interval specified for the motorcycle or kit. New noises, shifting seams, heat odor, discoloration or contact marks justify stopping and inspecting rather than tightening randomly.
Verdict: the smarter project is the one with fewer unpriced unknowns
Choose the CBR600RR when the example in front of you has the stronger application record, complete interfaces and a restoration scope you can price. Choose the GSX-R750 when its evidence is better. If one bike has attractive paint but an undocumented mix of brackets and loose parts, its lower asking price may not represent the lower project cost.
The most useful comparison is not red versus blue or one fan base versus another. It is documented completeness versus uncertainty.
Frequently asked questions
Can CBR600RR and GSX-R750 fairings interchange?
No. They are different motorcycle families and their bodywork systems are not interchangeable. Order only for the verified model, year and market application.
Is a scratched complete bike preferable to a clean bike with missing panels?
It may be a more predictable fairing project, but only a full mechanical and structural inspection can support the overall purchase decision. Completeness makes bodywork pricing easier; it does not prove the motorcycle is sound.
Should I buy one replacement panel or a full kit?
Compare the real damage boundary, adjacent finish, hidden pieces, freight and labor. A single panel can be rational for isolated damage; a coordinated kit can make sense when several visible panels need replacement. Neither is universally cheaper.
Do clean aftermarket fairings prove the bike has not crashed?
No. Replacement bodywork can reflect customization, preservation or previous damage. Inspect motorcycle-side mounts and request history rather than drawing a conclusion from paint alone.



