
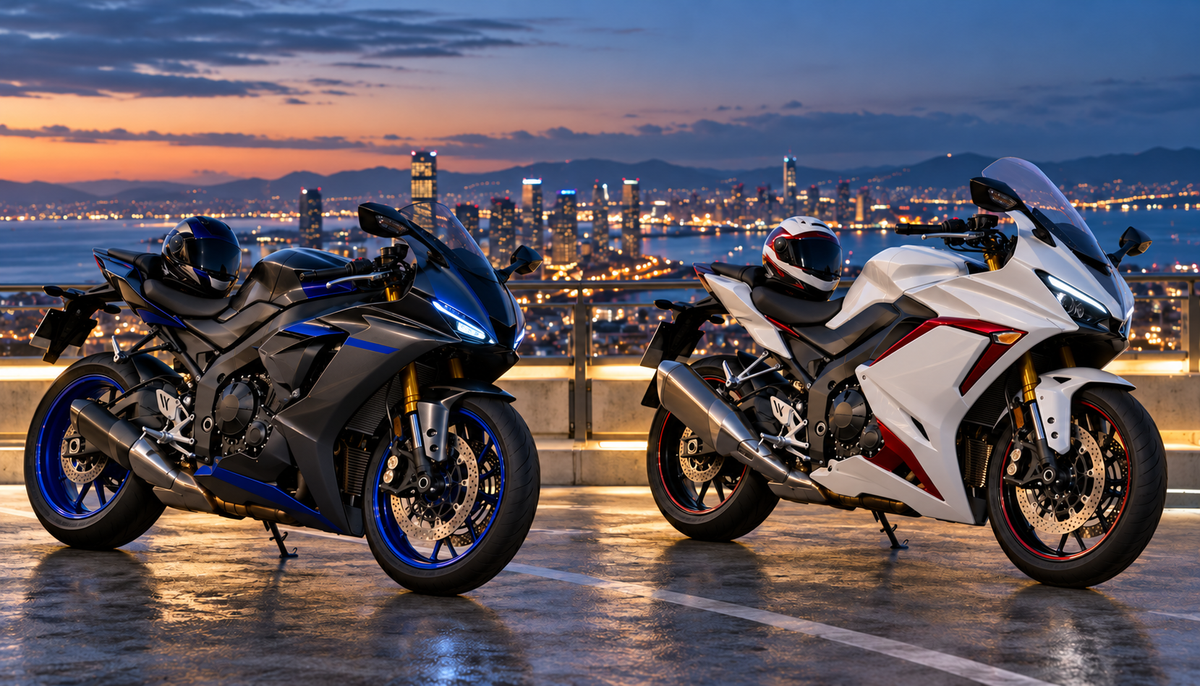
The Yamaha YZF-R7 and Honda CBR650R can both become striking custom-fairing builds, but they reward different design decisions. The R7 suits a compact, visually focused project in which a few bold surfaces carry most of the identity. The CBR650R gives a designer a broader, more layered street-sport canvas, so color balance and continuity across more visible surfaces matter more. Neither is automatically the better motorcycle or the easier kit. The better project is the one whose exact year, market specification, retained parts, damage condition and intended use match the design you want to approve.
That distinction matters because a fairing order is not a vote for a brand. It is a parts-and-brief decision. A dramatic rendering can look convincing while hiding a wrong headlight opening, a different tail arrangement or an accessory that will not remain on the finished bike. Before comparing paint schemes, confirm the identity of the motorcycle and define what the project must include.
The useful comparison is bodywork scope, not a spec-sheet winner
Most R7-versus-CBR650R discussions drift toward engine layout, horsepower or lap times. Those may matter when choosing a motorcycle, but they do not tell you whether a replacement bodywork project will be coherent. For a fairing build, five questions are more useful:
- Which model year and sales market is the motorcycle?
- Which painted panels are being replaced, and which original parts will remain?
- Are the headlight, inner trims, tank area, tail and lower cowl still straight and complete?
- Will the bike be used primarily for commuting, weekend rides, display or occasional track days?
- Does the quote describe the same panel set shown in the design proof?
If you are still shopping for the motorcycle itself, start with a careful used sportbike fairing inspection. Fresh paint can improve a bike’s appearance, but it cannot confirm that the stays, brackets, lights and underlying mounting points are undamaged.
Where the R7 creates design impact
The R7’s visual appeal comes from a narrow, tense silhouette and a relatively concentrated graphic area. That makes it well suited to a simple high-contrast concept: deep blue against charcoal, a clean two-color split, or a restrained race-inspired layout with one dominant accent. The design does not need to be crowded to read clearly from the curb.
This compactness also makes small decisions conspicuous. A stripe that changes direction at a panel seam, a color block that stops before the tail, or an unmatched retained tank area can interrupt the whole design. When reviewing an R7 proof, ask for at least four views: both sides, the front and the rear three-quarter angle. A side-only mockup can hide the transition around the nose and the relationship between the tank area and tail.
For additional color directions, the existing Yamaha R7 custom fairing guide is a useful starting point. Treat it as inspiration rather than a substitute for confirming your exact motorcycle and kit.
Where the CBR650R rewards a broader plan
The CBR650R presents a fuller street-sport profile. A successful scheme usually needs a clear hierarchy: one main body color, one supporting color and a limited accent that guides the eye rather than dividing every surface. Because the visible mass is spread through the nose, side and lower areas, an isolated color choice can feel disconnected if the rest of the bike remains stock.
That does not mean the CBR650R needs complicated graphics. Pearl white with a deep red lower accent, a dark neutral body with one metallic highlight, or a controlled factory-inspired arrangement can look more resolved than a dense collection of stripes. The goal is to make the motorcycle read as one object under normal street lighting.
Be especially careful when using photographs of a CBR600RR as CBR650R inspiration. They are different motorcycles, and visual similarity does not establish panel compatibility. Our CBR600RR versus CBR650R bodywork checklist explains why model identification must come before ordering.
A side-by-side project decision
| Project question | Yamaha YZF-R7 | Honda CBR650R |
|---|---|---|
| Best visual starting point | Compact scheme with one strong contrast | Broader color hierarchy across nose, side and lower areas |
| Proofing priority | Seam direction and front-to-tail continuity | Balance between larger visible surfaces and retained parts |
| Common brief risk | Adding too many small graphics to a clean silhouette | Treating each panel as a separate color block |
| Daily-use consideration | Make high-contact and leading edges easy to maintain | Keep light colors and lower areas practical for road grime |
| Before ordering | Confirm exact year, market and complete panel list | Confirm exact year, market, trim pieces and retained bodywork |
The table is a design-planning comparison, not a fitment guarantee. Actual kit contents and mounting details depend on the exact product and motorcycle. Ask the supplier to name the included pieces and identify any original hardware, inner plastics, heat shielding, lamps or trim that must be transferred.
Build the quote from the motorcycle outward
A reliable quote begins with evidence. Send clear photographs of the actual motorcycle rather than a screenshot of the color scheme you like. Include a full left side, full right side, front, tail, VIN/model-year label where appropriate, and close views of damage or accessories that may affect the bodywork. Remove luggage or a cover if it hides a panel edge.
Then write a short retained-parts list. Examples include the original fuel tank, front fender, wheels, passenger-seat setup, mirrors, exhaust and any carbon-look trims. This list tells the designer which existing colors and textures the new paint must meet. It also prevents a concept image from quietly replacing a part that is not in the quoted kit.
Finally, ask for a written panel list. “Full fairing kit” is not precise enough by itself because sellers can package different pieces. The useful question is: which named panels, inner pieces and small trims are included for this exact year and market version? Keep that answer with the final proof and invoice.

Editorial concept: this workshop image illustrates two different design-brief approaches. It is not a product photograph, fitment test or evidence that the pictured panels belong to either model.
Approve the paint as a system
Whether you choose the R7 or CBR650R, approve the scheme in layers. Start with the main color and finish, then place the secondary color, and only then decide whether a small graphic or logo area is necessary. This order makes it easier to see whether the design still works without decorative clutter.
Review these points before approving the proof:
- Color references: Use a paint name, physical sample or clearly described reference. Phone displays and social-media images can shift color.
- Finish map: State which panels are gloss, satin or matte. “Mostly matte” is too vague when adjacent panels meet.
- Seam continuity: Check where stripes or color boundaries cross from one panel to another.
- Front and rear views: Confirm that the design does not collapse when seen head-on or from behind.
- Retained parts: Compare the proof with the tank, fender, wheels, seat and trim that will stay on the motorcycle.
- Branding permissions: Decide whether the scheme should remain clean or use supplied, authorized marks. Do not assume every reference graphic can be copied.
For a more detailed approval process, use our seven-check livery design review. It helps turn “make it look like this photo” into instructions a painter can actually follow.
Inspect the underlying motorcycle before blaming the new panels
A replacement kit cannot correct a bent bracket, displaced headlight stay or missing rubber mount. If the motorcycle has been dropped, map the damage before ordering. Photograph panel gaps, broken tabs, lamp position, mirror mounts and any point where the old bodywork is under tension. A gap on the damaged bodywork may be a symptom of the support behind it.
During installation, loosely stage the panels and verify that each interface is understood before final tightening. Never pull a misaligned hole into position with a screw. That can leave the plastic under constant stress and make a tab failure more likely as the motorcycle vibrates and heat cycles. If the first panel gap appears, stop and find the earliest conflict rather than forcing the last fastener. Our guide to diagnosing aftermarket fairing panel gaps gives a practical sequence.
Also preserve the motorcycle’s original small parts during teardown. Label fasteners and rubber pieces by location, take photographs before unplugging lamps or signals, and keep left and right groups separate. Use the motorcycle’s service information and the kit supplier’s instructions for model-specific procedures and fastener requirements.
Design for the way the bike will actually be used
A city commuter, a weekend canyon bike and an occasional track-day motorcycle live different lives. The right fairing design should acknowledge that.
For frequent road use, consider how the leading edges and lower panels will show insects, stone marks and grime. A very pale lower section can look exceptional when clean but will demand more attention. Matte finishes can create a strong contrast, yet touch-up and cleaning expectations should be discussed before approval. Gloss finishes make reflections and surface preparation more visible.
If the motorcycle will occasionally visit the track, plan how numbers, tape or temporary protection will interact with the paint. Do not base the purchase on the assumption that street bodywork replaces dedicated competition preparation. Follow the track organizer’s current requirements and inspect clearances, fasteners and controls before riding.
For display-oriented builds, the finish can take priority, but the motorcycle still has to remain serviceable. Ask whether commonly removed panels can be accessed without damaging a graphic boundary, and whether heat protection and retained hardware have been included in the installation plan.
Which project should you choose?
Choose the R7 project if your ideal result is visually compact, sharply defined and built around one strong color relationship. It rewards restraint and careful seam control. Choose the CBR650R project if you want a fuller street-sport canvas and are prepared to coordinate the main body color with a wider set of visible surfaces and retained pieces.
If one motorcycle is already in your garage, that fact should outweigh an abstract winner. Document its exact identity and condition, define the parts you will keep, and design around the real machine. If you are deciding between two used motorcycles, compare the bodywork condition and completeness of each candidate alongside the purchase price. A cheaper bike with missing inner trims, damaged stays or an unclear model history may create the more complicated project.
The smartest fairing build begins with a specific motorcycle, a complete photo record and a written scope. Once those three are clear, the choice between R7 and CBR650R becomes less about internet consensus and more about which silhouette, paint strategy and daily-use compromise fits you.
Pre-order checklist
- Confirm model, exact year and sales market.
- Photograph both sides, front, tail and all damaged areas.
- List every part that will remain on the motorcycle.
- Request the kit’s named panel and trim list in writing.
- Approve color references, finish map and multiple proof angles.
- Confirm how lights, mirrors, accessories and original hardware are handled.
- Inspect brackets, stays, grommets and mounting points before installation.
- Keep every fastener loose during the first alignment pass; never force a misaligned hole.
- Verify steering movement, tire clearance, heat clearance, lighting and secure fasteners before the first ride.



