A paddock stand looks simple until a hook, pad or front pin reaches the wrong part of a fully faired motorcycle. The mistake may not show up as a dramatic fall. It can begin as a scratched swingarm, a compressed brake hose, a bent tab or a lower panel that suddenly carries weight it was never designed to support.
The safe question is not “Will this universal stand fit a sportbike?” It is “Does this stand, with these adapters, fit this exact motorcycle and year at the support points named by the motorcycle and stand manufacturers?” That difference matters before routine cleaning, chain work, wheel removal or a fairing test-fit.
The short answer
Do not lift a fully faired sportbike from its painted panels, belly pan, exhaust or another convenient-looking surface. First identify the motorcycle’s approved support points in its owner or service information. Then confirm the stand type, adapters, spool provision and year range with the stand manufacturer. Dry-check clearance around the fairings, exhaust, brake lines, ABS wiring and sensors while the motorcycle is still stable.
If any contact point is hidden, improvised or ambiguous, stop. A helper or qualified workshop is cheaper than a dropped motorcycle. This guide is a selection and inspection framework, not a universal lifting sequence.
One word, several different stand systems
“Paddock stand” can describe tools that support a motorcycle in very different ways:
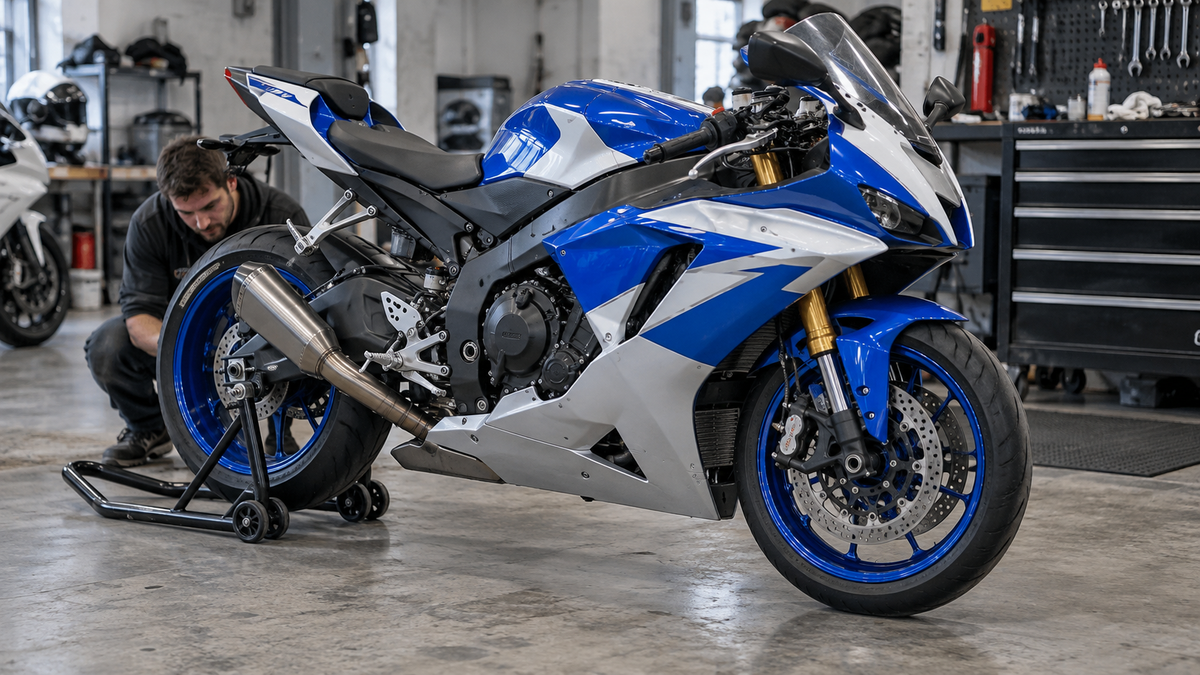
- a rear spool stand whose hooks engage dedicated swingarm spools;
- a rear stand with rubber-covered pads under suitable swingarm surfaces;
- a front fork-lift stand that supports specified areas near the fork bottoms;
- a head-lift stand using a model-specific pin under the steering stem;
- a single-sided swingarm stand with a model-specific hub pin.
Those systems are not interchangeable just because their frames look alike in a product photo. A rear stand does not automatically make every front-lift method safe, and a pin that fits one model year may be wrong for the next. Before shopping, write down the exact model, year and market specification—just as you would before ordering a model-specific fairing kit.
Start with the motorcycle, not the stand listing
The motorcycle manufacturer decides where the machine may be supported. The owner’s manual may only cover basic maintenance and may refer more involved work to a dealer or service manual. That is still valuable: it tells you when the maker expects the bike to be securely supported and whether a centerstand is absent.
For example, Yamaha’s owner information for one YZF-R6 generation says the motorcycle must be stable and level for checks and describes using a motorcycle stand for wheel service. That is evidence to consult the correct procedure—not permission to copy the same setup onto every R6, R1 or other sportbike. Read the manual for the VIN-matched motorcycle you actually own.
Year ranges are engineering information
Fit charts from established stand manufacturers show why “it’s a Yamaha” or “it’s a Ninja” is not enough. Pit Bull’s fitting charts list different front pins and support notes across R6 and R1 year ranges, while its Kawasaki charts vary spool sizes and front arrangements across model years. Some applications also carry clearance or ABS-related notes.
Treat a year break as meaningful until verified. A steering-stem bore, fork-bottom shape, brake routing, sensor position or bodywork opening can change while the model name remains familiar. This is the same discipline used when checking older Honda CBR tabs, hardware and heat zones: familiar bodywork is not proof of identical geometry.
Spool bosses are not universal
Some swingarms have threaded bosses intended for spools. Some do not. Thread diameter, pitch, shoulder shape and available depth can vary. Never force a bolt because a spool kit was advertised with a broad model label, and never drill or tap a swingarm to solve a fit problem casually.
Confirm the motorcycle’s provision and the spool maker’s exact application. The spool should seat as designed without bottoming incorrectly, cross-threading or trapping a cable guide. If the boss is damaged, corroded or partly obstructed, repair guidance belongs with a qualified technician—not a longer wrench.
Spool hooks and swingarm pads solve different problems
A spool stand locates on dedicated spools. A standard rear stand may use rubber-covered supports beneath suitable portions of the swingarm. Pit Bull’s standard rear stand description distinguishes the two and recommends a spool stand when the bike accommodates spools.
Neither approach is automatically correct for every motorcycle. With pad-style supports, inspect the underside for seams, welds, adjuster hardware, brake components, chain guides and asymmetric surfaces. A pad that begins square can slide as load transfers if its contact surface is angled or obstructed. Do not let a support drift toward a painted hugger or fairing edge.
A fairing mounting point is not a lifting point
Fairing tabs and inserts are designed to locate bodywork and accept specified fasteners. They are not structural jacking pads. The distinction is easy to lose when the lower bodywork hides the engine and chassis.

This NiceFairings process photo shows an unpainted side-panel-shaped part with mounting features and preparation marks. Those tabs help position the panel; they do not make the panel a load-bearing motorcycle support. If a stand, jack or adapter would press the painted shell, stop and reassess the approved support path.
Lower fairings can hide the first bad contact
The belly-pan area may sit close to exhaust headers, link pipes, brackets and stand hardware. A support can appear clear from one viewing angle while touching a lower panel farther inboard. Use a light and inspect both sides before load is transferred.
This becomes more important after an exhaust or bodywork change. Our belly-pan clearance guide after an exhaust change explains how heat and bracket position can alter the installed gap. Ducati owners should also review the separate Panigale V2 lower-fairing and exhaust audit. Neither article turns a belly pan into a support point.
Front lifting needs its own fit audit
Front stands deserve separate verification. A fork-lift adapter and a steering-stem pin contact different structures and leave different service access. The correct stem pin can be highly model- and year-specific. The wrong diameter, insertion depth or shoulder can create unstable engagement or unwanted contact with bodywork, hoses or wiring.
Before using a front system, check the stand maker’s application chart and the motorcycle service procedure. Look for brake hose tension, ABS wire routing, fender clearance, radiator or nose-fairing interference and any steering-lock limitation. Do not reshape a body panel to make a questionable pin appear compatible.
The rear usually establishes the stable base
Many service procedures that lift the front assume the motorcycle is already held by an appropriate rear support, but the exact sequence and equipment are manufacturer-specific. Follow the instructions supplied with both motorcycle and stands. Do not infer a sequence from a short social video.
If you cannot hold the bike upright, align both contacts and operate the stand while maintaining control, use a trained helper or workshop. A first attempt should not be combined with wheel removal, bodywork disassembly or another task that eliminates your ability to correct a bad setup.
Inspect the floor and the stand before the bike
Use a level, hard surface with room for the stand handle to travel. Small casters do not tolerate gravel, soft asphalt, drain channels or floor debris well. This is a different risk from parking on soft ground; for that situation, see our side-stand and fairing-damage prevention guide.
Check the stand for bent tubing, loose wheels, cracked welds, missing retaining hardware and adapters that no longer stay aligned. Confirm its rated application and usable width. “It held another bike” is not a fit specification.
Make a no-load contact map
With the motorcycle stable and unloaded, use a flashlight to trace the intended support path:
- identify the exact left and right support points;
- verify the adapters face the direction shown by the stand maker;
- check equal engagement and stand width;
- look behind the visible contact for hoses, wires and brackets;
- confirm the handle and frame will clear the exhaust and license-plate hardware;
- check that no painted panel can become trapped as the stand rotates.
This is an observation checklist, not an instruction to lift. If the geometry cannot be seen clearly, remove uncertainty before applying load.
Stop at the first sign of bodywork load
Warning signs include a panel moving before the suspension unloads, a new creak from a tab, a widening seam, a fastener head shifting in its recess or a stand adapter migrating sideways. Lower the motorcycle according to the stand maker’s safe procedure and inspect the cause.
Do not “see if it settles.” A fairing can flex and spring back while a tab or insert has already been damaged. Our guide to new fairings rubbing the fuel tank or seat uses the same principle: changing gaps are evidence, not something to hide by tightening harder.
Recheck after custom fairings or exhaust work
A stand that cleared the original motorcycle may not clear a replacement belly pan, race bodywork, extended tail or relocated exhaust. The new part can be correctly made yet occupy a different envelope. Perform the contact map again before the first lift.
Record close-up photos of the spool area, stand adapter and lowest clearances. If a problem appears later, those images help separate pre-existing marks from fresh contact. The same evidence discipline is explained in our fairing-damage claim packet guide.
Do not solve interference by deleting hardware
If a panel fastener blocks a stand component, that is a compatibility issue—not an invitation to leave the fastener out. Missing hardware can let the panel move toward a tire, chain, exhaust or stand. Review our fairing-rattle inspection guide and the mid-ride missing-fastener decision guide before treating a mounting point as optional.
Likewise, do not grind a stand, thin an adapter or stack improvised spacers unless the equipment manufacturer explicitly supports that configuration. Clearance gained by weakening or misaligning a support is not a repair.
Inspect again after lowering
Once the motorcycle is safely back on its normal support, inspect the spool bosses, swingarm surfaces, lower fairing edges and exhaust. Look for fresh scuffs, witness marks, displaced rubber pads, loose spools or a changed panel gap. Check that brake hoses and ABS wiring returned to their natural routes.
If the lower bodywork has a new scrape, use the method in our Ninja 400 lower-fairing scrape inspection: establish where the mark begins, whether adjacent hardware moved and whether the damage is cosmetic or evidence of deeper contact.
Keep parking, service and track rules separate
Three nearby topics are often mixed together. A side stand supports a parked motorcycle. A paddock or service stand supports specified chassis or suspension points for maintenance. A track belly pan may be designed around fluid-containment rules. The MotoAmerica belly-pan guide explains the last category; it does not approve that bodywork as a lifting surface.
The same separation applies to a tank cover. A fairing-kit tank cover is not the fuel tank, and a painted cover is not a structural support just because it follows the shape of a structural component.
A ten-minute stand-fit worksheet
Before the next maintenance session, record:
- exact motorcycle model, year and market;
- owner/service manual support guidance;
- stand brand, model and load/application information;
- adapter type and stand-maker fit-chart entry;
- spool brand, thread specification and verified motorcycle provision;
- left/right contact photos with the motorcycle unloaded;
- minimum visible clearance to fairing, exhaust, brake and ABS components;
- floor condition and available handle travel;
- name of the helper or workshop if one is required;
- post-lowering inspection result.
Keep the sheet with the motorcycle’s maintenance notes. It turns “this setup seemed fine last time” into a repeatable compatibility record.
Where NiceFairings fits into the decision
NiceFairings can help identify how a replacement panel or kit is intended to fit, but the motorcycle and stand manufacturers remain the authorities for structural support and lifting procedures. When asking us about clearance, send the exact model and year, photos of the installed lower panels, both stand contact areas and the stand or adapter model. Start at the NiceFairings collection index or contact NiceFairings before ordering bodywork around an uncertain setup.
The goal is not to make every stand work. It is to select a verified system whose load path never depends on the fairing. When the support point, adapter and clearance all agree, routine maintenance begins with evidence rather than hope.
Sources and image notes
- Yamaha Motor, YZF-R6 owner’s manual: stability and motorcycle-stand references for model-specific maintenance.
- Pit Bull motorcycle fitting charts, including its Yamaha R6, Yamaha R1, Kawasaki ZX-6R and Ninja 650 pages: examples of year-specific pins, spools and clearance notes.
- Pit Bull, Standard Rear Motorcycle Stand: distinction between swingarm-pad support and spool-equipped applications.
- Header image: AI-generated editorial illustration reviewed for the support-point concept; it is not a stand-installation instruction.
- Inline image: NiceFairings production-process photo of an unpainted side-panel-shaped part; used to distinguish mounting features from structural lifting points.